Introduction

For some reason that may be hard to explain in rational terms, you think it is time to build a boat. It’s an excellent decision, of course, but if it is your first boat, you’ll be wondering where to start.

Selecting a building method that is appropriate to your skill level, expectations, and situation should be one of your first decisions. The first edition of Getting Started in Boats covered the construction of a skiff built with time-honored procedures and materials: it employed solid-wood planks fastened with screws. The next installment detailed how to make a canoe of readily available plywood. Now we turn to strip-epoxy construction, a method that economizes on the use of solid lumber—there’s very little wasted wood—and combines it with the strength and resilience of epoxy and fiberglass. It yields a beautiful and lightweight hull with maintenance concerns similar to those of a fiberglass hull. A variety of boats can be built using the basic techniques outlined in this booklet.

This edition of Getting Started explains the major operations involved in building a strip-planked boat, in hopes that you’ll discover just how straightforward the process is. Numerous books cover the nuances and details of strip-planking; likewise, several companies offer kits and plans for this technique.

What is Strip-Planking?

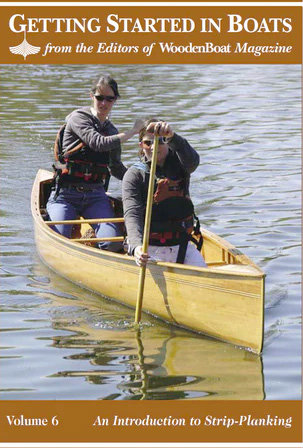
Strip-planking is simply joining the edges of narrow, uniform-width planks to form the shape of a boat hull. Many boat shapes—from canoes to kayaks to heavy cruisers—can be built with strip planks and fiberglass, as the accompanying photographs suggest.

In general, strip-planking requires fewer tools and skills than traditional building. The hulls have a high strength-to-weight ratio and, because the wood is sealed with epoxy, its moisture content does not change. The boats therefore remain light, and maintenance is minimal. Wood-strip-epoxy boats have a core of softwood planks sandwiched between layers of fiberglass cloth set in epoxy resin. One big advantage of this construction is the large number of full-sized plans and precut kits for strip-planked boats available to the home builder. This eliminates a number of complicated steps and the need for stationary power tools for the milling of strips.

Choose a good design that is right for you. Do some research; a poorly designed boat that does not meet your needs will consume the same materials and time as the perfect boat.

Getting Started in Boats (ISNN 1932-1511) is published bimonthly, in Brooklin, Maine, by WoodenBoat Publications, Inc. Jonathan A. Wilson, Chairman. Copyright 2007 by WoodenBoat Publications, Inc. All rights reserved. No part of this publication may be reprinted or reproduced without written permission from the publisher.

What Can I Build With Strip-Planking?

A kayak built to plans from Bear Mountain Boat Shop.

The edge of practicality and the edge of speed: A racing canoe, or “high kneeler”.

RIFF, a 12’3″ daysailer designed by Paul Gartside.

NIKI (see cover story, WB No. 198), a lobsterboat-inspired yacht built by Thomas Townsend.

A canoe built to plans from Bear Mountain Boat Shop, with detailed accent strip running along the topsides.

Basic Steps of Strip-Epoxy Construction

The building jig for a canoe consists of a series of forms, or molds, carefully aligned and fastened to a strongback.

Making Molds

Strip-planked boats are built on a construction jig. A jig is a series of perfectly aligned station molds set up on a strongback. Each mold represents the shape of a slice through the boat at a given interval. When planks are edge-glued to each other over these molds, the shape of the boat is revealed. The molds can be made by drawing their shapes full-size from a set of dimensions—the so-called table of offsets—or they can be traced from full-sized drawings. Full-sized plans and precut molds may be purchased from a variety of suppliers (see list, page 8).

The first of many steps that will lead to your boat is to accurately transfer the plans to the mold material. Molds are generally made from 1⁄2″ or 3⁄4″ particle board or low-grade plywood. Keep in mind that small errors have a tendency to accumulate and become complications later. The shortest route to the best results will be to do each step as preparation for the next step. Take whatever time you need to draw, cut out, and set up the station molds to the best of your ability. If you do this, and assuming you began with accurate plans, no reshaping of the station molds will be necessary before planking.

Strongback

A strongback is the foundation upon which the station molds sit. It is important that it be straight from end to end, level from side to side, and reasonably level from end to end. It should be sturdy enough to remain level while the boat is being planked, sanded, and fiberglassed. It can be cobbled up using such things as an extension ladder with a plywood top, but it could be simpler to start from scratch. A plywood box beam and legs will take two sheets of 3⁄4″ plywood and less than a day to build and set up.

Setting Up Station Molds

The top of the strongback is prepared with a full-length centerline and perpendicular lines representing the positions of the station molds. Blocks are attached on the station lines for mounting the station molds. For a canoe or a kayak, the end station molds and stem molds are set up first. They become anchor points for stretching a string line directly over the centerline, creating an upper centerline. From there on it is a simple matter of lining up each mold between the strongback’s centerline and the elevated string line, and screwing the mold to the block.

Stems

The stem is the piece of wood that ties the sides of a boat together at the bow—and at the stern, in the case of a double-ended boat such as a canoe or kayak. Strip-planked boats typically have stems comprising an “inner” and an “outer” stem, the inner one doing the structural work, and the outer one protecting the plank ends—and providing eye-pleasing trim. It is possible to build a strip-planked boat without a stem, but molding something from thickened epoxy to take its place will be messy and frustrating, and it will surely identify you as an amateur.

Stems are generally laminated from 1⁄4″-thick pieces that have been steamed for about 15 minutes. Steam-bending these pieces is very low-tech and rather fun. The only equipment needed is a kettle from the kitchen and a cardboard mailing tube with a rag in the top. The thermostat on an electric kettle will have to be bypassed to keep a continuous boil; watch the water level, as boiling it dry will destroy the heating element. Inside and outside stems are bent at the same time over the stem mold. They are initially bent without glue. Once they’ve cooled and dried, they are disassembled and glued together permanently. Outside stems are usually made of hardwood for maximum durability, while softwood inside stems will do the job and are easier to shape than a hardwood.

A mold is developed by drawing the sectional shape of the boat on plywood or similar material, and carefully cutting this out and attaching it to an extension. The extension, in turn, is fastened to a cleat on the strongback’s top.

Planking Stock

The boat’s (in this case a kayak) stems are laminated from thin strips of wood. This one will eventually be beveled to accept the planking.

The light weight and high strength of a strip-planked epoxy hull comes from a combination of the high tensile strength of the two layers of fiberglass and the space that is maintained between them by the strip-planked core. A structural I beam is a good example of how the space in the middle contributes to the stiffness of the beam. The reinforcing layers carry most of the load in tension or compression while the function of the core is to maintain this space without caving in. What this means for us is that there are few limits on what the core is made of, within a few parameters. Planking is generally made from softwood; it keeps the weight down, is easy to work, and absorbs enough epoxy to make a good bond with the fiberglass. Look for a species such as cedar or pine that weighs about 25 to 30 lbs per cubic foot. Because the wood core is sealed both sides with epoxy, choosing a rot-resistant wood is not necessary. Western red cedar is the first choice for most builders. It has the advantage of being available in long lengths, and the colors range between light-colored sapwood and chocolate-brown heartwood.

Long lengths of clear Western red cedar are becoming scarce, so expect to pay a premium price. Raw lumber will cost between $6.50 and $9.00 per board foot, but considering how long it took the tree to grow, we should appreciate it at any price. It will take about 50 to 60 board feet of rough lumber to build a 16′ canoe or kayak. If the price of premium lumber is not in your budget or you can’t find it, look for an available lightweight species and give some thought to making it work for you.

Some builders bevel the edges of each individual strip in order to attain a tight fit. This, however, requires a high level of skill, and can be daunting to the first-time builder. There is, however, another way to achieve tight fits between planks: It is standard practice to cut a bead profile on one edge of each plank, and a cove on the other. The bead nests in the cove, and the joint can articulate, to some degree, around the curved surface of a mold while still remaining tight.

To make up the full length with short planks, cut the ends square and butt-glue them together on the mold as the boat is being planked. If bead-and-cove planking is being used, the planks above and below will keep the joint aligned, allowing it to land between station molds.

When a hull is planked with random colors of short planking, it will look busy, similar to a parquet floor. If more control over the color is important to you, begin by keeping the planks in order as they are being ripped— or sort them, as best you can, according to color if you’ve ordered already-milled stock. To make the plank full length, take two planks in order and turn one around so that the ends that grew side by side are now butted together. The color, tone, and texture will match and not draw attention to the joint.

Accurately machined planking is a joy to use, but planks that don’t fit together or with broken edges take unproductive time to deal with. Missing edges must be filled and sanded. A step between planks requires shaping one plank down to meet the other. When this is done on both sides, there is a danger of thinning the planking to a point where the boat would make a better lamp-shade. Whether you are machining your own planking or buying it, pay attention to the quality of the machining. Good planking will be a consistent width and thickness. Width is important especially if short planks are being joined end to end. For bead-and-cove planking, the thickness is critical if a clean cove and centered bead are expected. To check the fit, put two planks together and run your fingers over the joint on both sides. If the shaped profile is off, you will feel the step.

Planking edges are milled with corresponding bead and cove profiles; these allow the planks to be laid over curved sectional shapes without surface gaps.

Basic Steps, Continued

The first strip is often laid along the hull’s top edge, or sheerline. Subsequent planks become shorter and shorter.

Planking The Hull

Planking your boat is the reward for the careful preparation of the building jig. The biggest danger with this step is that as the skeleton quickly becomes a boat, builders naturally pick up the pace of adding more planks faster. It’s fun, but getting ahead of yourself could mean missing details or leaving out steps.

The position of the first plank is extremely important; take as much time as you need to get this one right. Using parallel-width planks simplifies planking the hull, but it also means that the plank line established with the first plank will be repeated on every plank.

One of the details that will identify an amateur-built boat is the amount of filler between the planks. The filler is evidence of damaged or poorly machined planking or by loose joints between the planks. Loose joints are most often a problem around the turn of the bilge and around the stem as it makes the transition from vertical into the bottom. It is hard to check visually as the joint will overlap enough to look tight on the surface, but it will open up when wood is sanded away as the hull is shaped.

To make sure that the joint is tight, there are several things you can do. While there are good reasons for planking with the cove side up, it is hard to squeeze the planks together without damaging the fragile cove edges. Planking with the bead edge up will allow you to apply more pressure without damaging the edge.

Take the time to check each plank before moving to the next. You will look like a professional and save a lot of time sanding unhealthy filler. After the plank has been fastened to the mold, take the time to check it over. You’ll be using carpenter’s glue, which is quite thick, and the bead that has been applied with a syringe needs some time to spread out. As you work down the plank wiping up the glue, get into the habit of giving the plank another squeeze. Put pressure on the plank, hold it, and watch for something to happen. If nothing happens or there is no movement in the excess glue, the joint is tight. No glue squeezing out could indicate the perfect amount of glue applied; it could also mean no glue. If you see movement in the glue as more is squeezed out, hold it until it stops moving, then watch as the pressure is released. With the staple and the sticky vacuum of the glue, it should stay in place. If it opens up, use something such as plastic shipping tape to hold it until the glue grabs.

Shaping and Sanding

Shaping and sanding are rewarding tasks if approached methodically.

When the hull planking has been completed, the next step is to shape the flat surface of each plank into a fluid boat shape. A common way to do this is to attack the boat with an orbital sander and coarse-grit sandpaper followed by several more passes with finer grits to clean up the scratches. This will remove the ridges where the plank edges join, and it will smooth the surface, but the sander will provide very little control over the shape. In short, you’ll make a lot of dust and noise for a second-rate job. Consider using a sharp block plane and spokeshave to shape the planks and using the sander to smooth out the plane marks. The ridged base of the plane does a very good job of finding the high spots first and creating a fair surface without removing more wood than necessary. About 80% of this step can be done with the plane, leaving one pass with 120-grit sandpaper to prepare the surface for the fiberglass. A big pile of clean shavings will make you feel more like a boatbuilder than a thick layer of dust everywhere will.

Shaping inside is not quite as easy because the plane won’t fit the inside curve of the hull. A paint scraper sharpened to fit the inside profile will remove a lot of wood fast and leave very little to be cleaned up with the sander. The skill is not hard to learn, and the speed and control are impressive.

Sanding seldom becomes the new builder’s favorite job, but if you don’t try to use the sander as a shaping tool, use good sandpaper, and know when to stop, it can be a positive experience. If most of the shaping is done with a cutting tool, sanding should not begin with any grit coarser than 80. Choose a sandpaper grit that strikes a balance between leaving the smallest scratch and achieving a reasonable sanding speed. High-quality sandpaper is a good investment; the cut is aggressive, and it continues to cut longer than cheap paper. In most cases, you can begin with a finer grit than you would using a cheap paper. This means getting to the desired surface with no scratches and the least amount of sanding.

Fiberglassing the Hull

Sanding is followed by fiberglassing, which adds great stiffness and strength to the otherwise delicate hull.

The last step before removing the hull from the mold is to cover it with fiberglass cloth saturated with epoxy resin. Your first thought when working with epoxy resins and solvents should be safety. Exposure by contact or breathing fumes from these chemicals is known to be bad for your health. Protective gloves and good cross-ventilation are enough to keep most people healthy, but there is a small percent of the population that has a natural sensitivity to some of the chemicals in epoxy resin and hardener. If you have allergies, it would be wise to learn more about overexposure to epoxy and solvents.

How you apply the epoxy resin can mean the difference between a quick sand to prepare the epoxied surface for varnish and a discouraging and unhealthy fight with the sander to remove excess resin. The trick is to control the amount of resin that is applied with each coat.

The function of the first coat is to saturate the surface of the wood and the fiberglass cloth. Runs on the first coat are almost impossible to sand off without damaging the fiberglass reinforcement. If the run becomes buried under the next two coats of resin, it could leave cloudy patches in the finish. Controlling the amount of resin is complicated by the fact that each softwood plank will absorb a different amount of resin. Applying what appears to be the optimum amount of resin to the cloth will look good initially, but as the wood continues to absorb resin, it will steal it from the cloth, leaving it starved. The only way to control the amount of resin on the first coat is to apply enough resin to saturate the cloth and feed all the planks. After about 30 minutes the wood will have accepted all it can handle, and the excess can then be removed with a squeegee.

The function of the second coat is to fill the weave of the cloth. Use a squeegee to force the resin in and the air out of the coarse surface. Scrape off the excess, as buildup on this coat is hard to control and it could compromise the finish.

The third coat will bury the fiberglass with enough resin to allow sanding without hitting the glass. The trick here is to apply the resin generously with a brush using horizontal strokes. To work the resin into an even film, draw the brush along working both diagonals. When you feel even resistance through the brush, complete by working in a horizontal direction. Take care to blend each section you work into the previous one.

You can move on to the next building step when the surface feels hard, but for safety reasons wait until it has reached a full cure before sanding. During the curing stage, up to 12 days, the epoxy dust will be a chemical as well as a dust hazard. Begin sanding by leveling any runs in the epoxy with a cabinet scraper. Trying to level the surface with the sander will cut the surface around the run almost as fast as it does the run; there is a good chance that the sander will cut down to the ’glass before the run is sanded out. Remember that the ’glass is what holds your boat together. With the surface level, begin sand- ing with 120-grit until the gloss disappears, then stop sanding. If you are fussy, finish with a quick pass using 180-grit paper.

Basic Steps, Final

The final step in the building process is varnishing, which makes the hull both beautiful and enduring.

Varnishing

This is one step that will often leave the builder less than satisfied. Remember that the closer you get to the perfect finish, the more elusive it will be. All you can do is clean the workspace, sand the boat, clean and tack the boat, organize all the materials you will need, and do your best to work the varnish into an even film. There will be details that may bother you in the shop, but they have a way of disappearing after the boat has been launched. Wooden boats look better after they have been revarnished. So use your boat. You know how to fix the scratches.

Ted Moores is proprietor of Bear Mountain Boatshop <www.bearmountainboats.com>, a purveyor of kits, plans, and finished strip-planked boats. Widely acknowledged as one of the leading builders of strip-planked small craft in North America, he also teaches at WoodenBoat School. He is author of two books on strip planked construction: CanoeCraft (Firefly Press, 2000), and KayakCraft (WoodenBoat Books, 1999). These books include fine details not covered in this short article, and comprehensive lists of materials suppliers.

You can also consult the following businesses for materials, plans, and kits for strip-planked small craft:
• THE NEWFOUND WOODWORKS
, <www.newfound.com>
•REDFISH KAYAKS
, <www.redfishkayak.com>
• CANADIAN CANOES
, <www.canadiancanoes.com>
•GUILLEMOT KAYAKS
, <www.guillemot-kayaks.com>
• CHESAPEAKE LIGHT CRAFT
, <www.clcboats.com>