Tips on How to Store Your Boat Properly
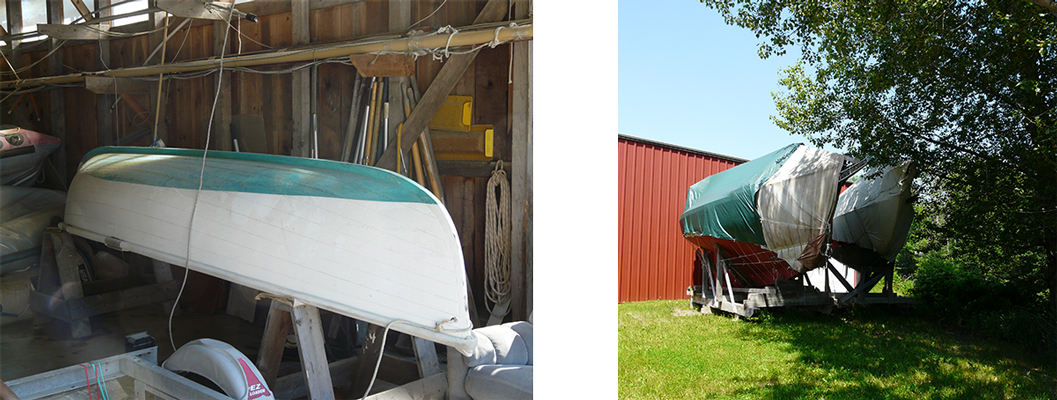
Left—Small, open boats can be stored upside down for the winter as long as you block up the boat clear of the ground and shade her from the direct sunlight and give her some shelter from the wind. Store spars horizontally (and on-edge if they’re rectangular), and make sure to support them along their length. Right-Throughout the off-season you’ll want to check your cover regularly to make sure it stays in place during storms and high winds.
Depending on the length of your boating season and where your home waters are, you may want to layup your boat for the months when boating takes a back seat to other activities. Here in New England and in other cold winter climates, the majority of pleasure boats are hauled out in the fall and stored on land.
In this article we’ll discuss the best practices for decommissioning and storing a wooden boat. We’ll focus on the hull, as this is what usually raises the most questions. Because engines are so varied and individualized, we’ll give only a cursory look at their lay-up, expecting that you’ll rely on your owner’s manual to provide guidance.
A local boatyard manager remarked that when he pulls a boat out for layup he thinks of it as the first step in preparing for the next season. Every boat owner needs to pay extra attention to a wooden hull at lay up time to avoid problems later; neglect can have devastating results. So let’s take a look at the work that’s generally done to keep a wooden boat in good condition while she’s high and dry.
Before Hauling Out
Start thinking of a layup strategy well in advance of getting hauled out. Don’t wait until the last minute to decide how and where you’re going to store your boat. Create a checklist and divide it into “do-it myself” and “boatyard-will-handle-it” categories. Work out a budget, as this will determine whether you’ll be doing a majority of the work yourself or hiring out some or all of it. If you’ll be working with a boatyard, give them plenty of notice of when you’d like to have your boat hauled.
Choose your storage area carefully so it provides shelter and avoids drying out the wood. The ideal inside environment is an unheated building with a damp dirt floor. Avoid storing your boat in a place that is continuously heated without some source of maintaining humidity. Whether your boat is under a roof or a cover, make sure all deck scuppers and seacocks are open and that the bilge can stay drained; pockets where fresh water can collect will quickly cause discoloration and rot.
For boats that must be stored outside, shade is better than sun, and a good lee (such as alongside a building) is better than being subjected to the open wind. Light-colored canvas stretched over a simple, wooden frame works best, because air can penetrate it but water won’t. Just about any method of producing artificial shade will help, but think twice before using a shrink-wrap cover because that type tends to fit too tightly and does not breathe.
If canvas isn’t available, use your imagination. Old roofing materials, boards, evergreen boughs, aluminum siding—anything to keep the sun and wind away will work.
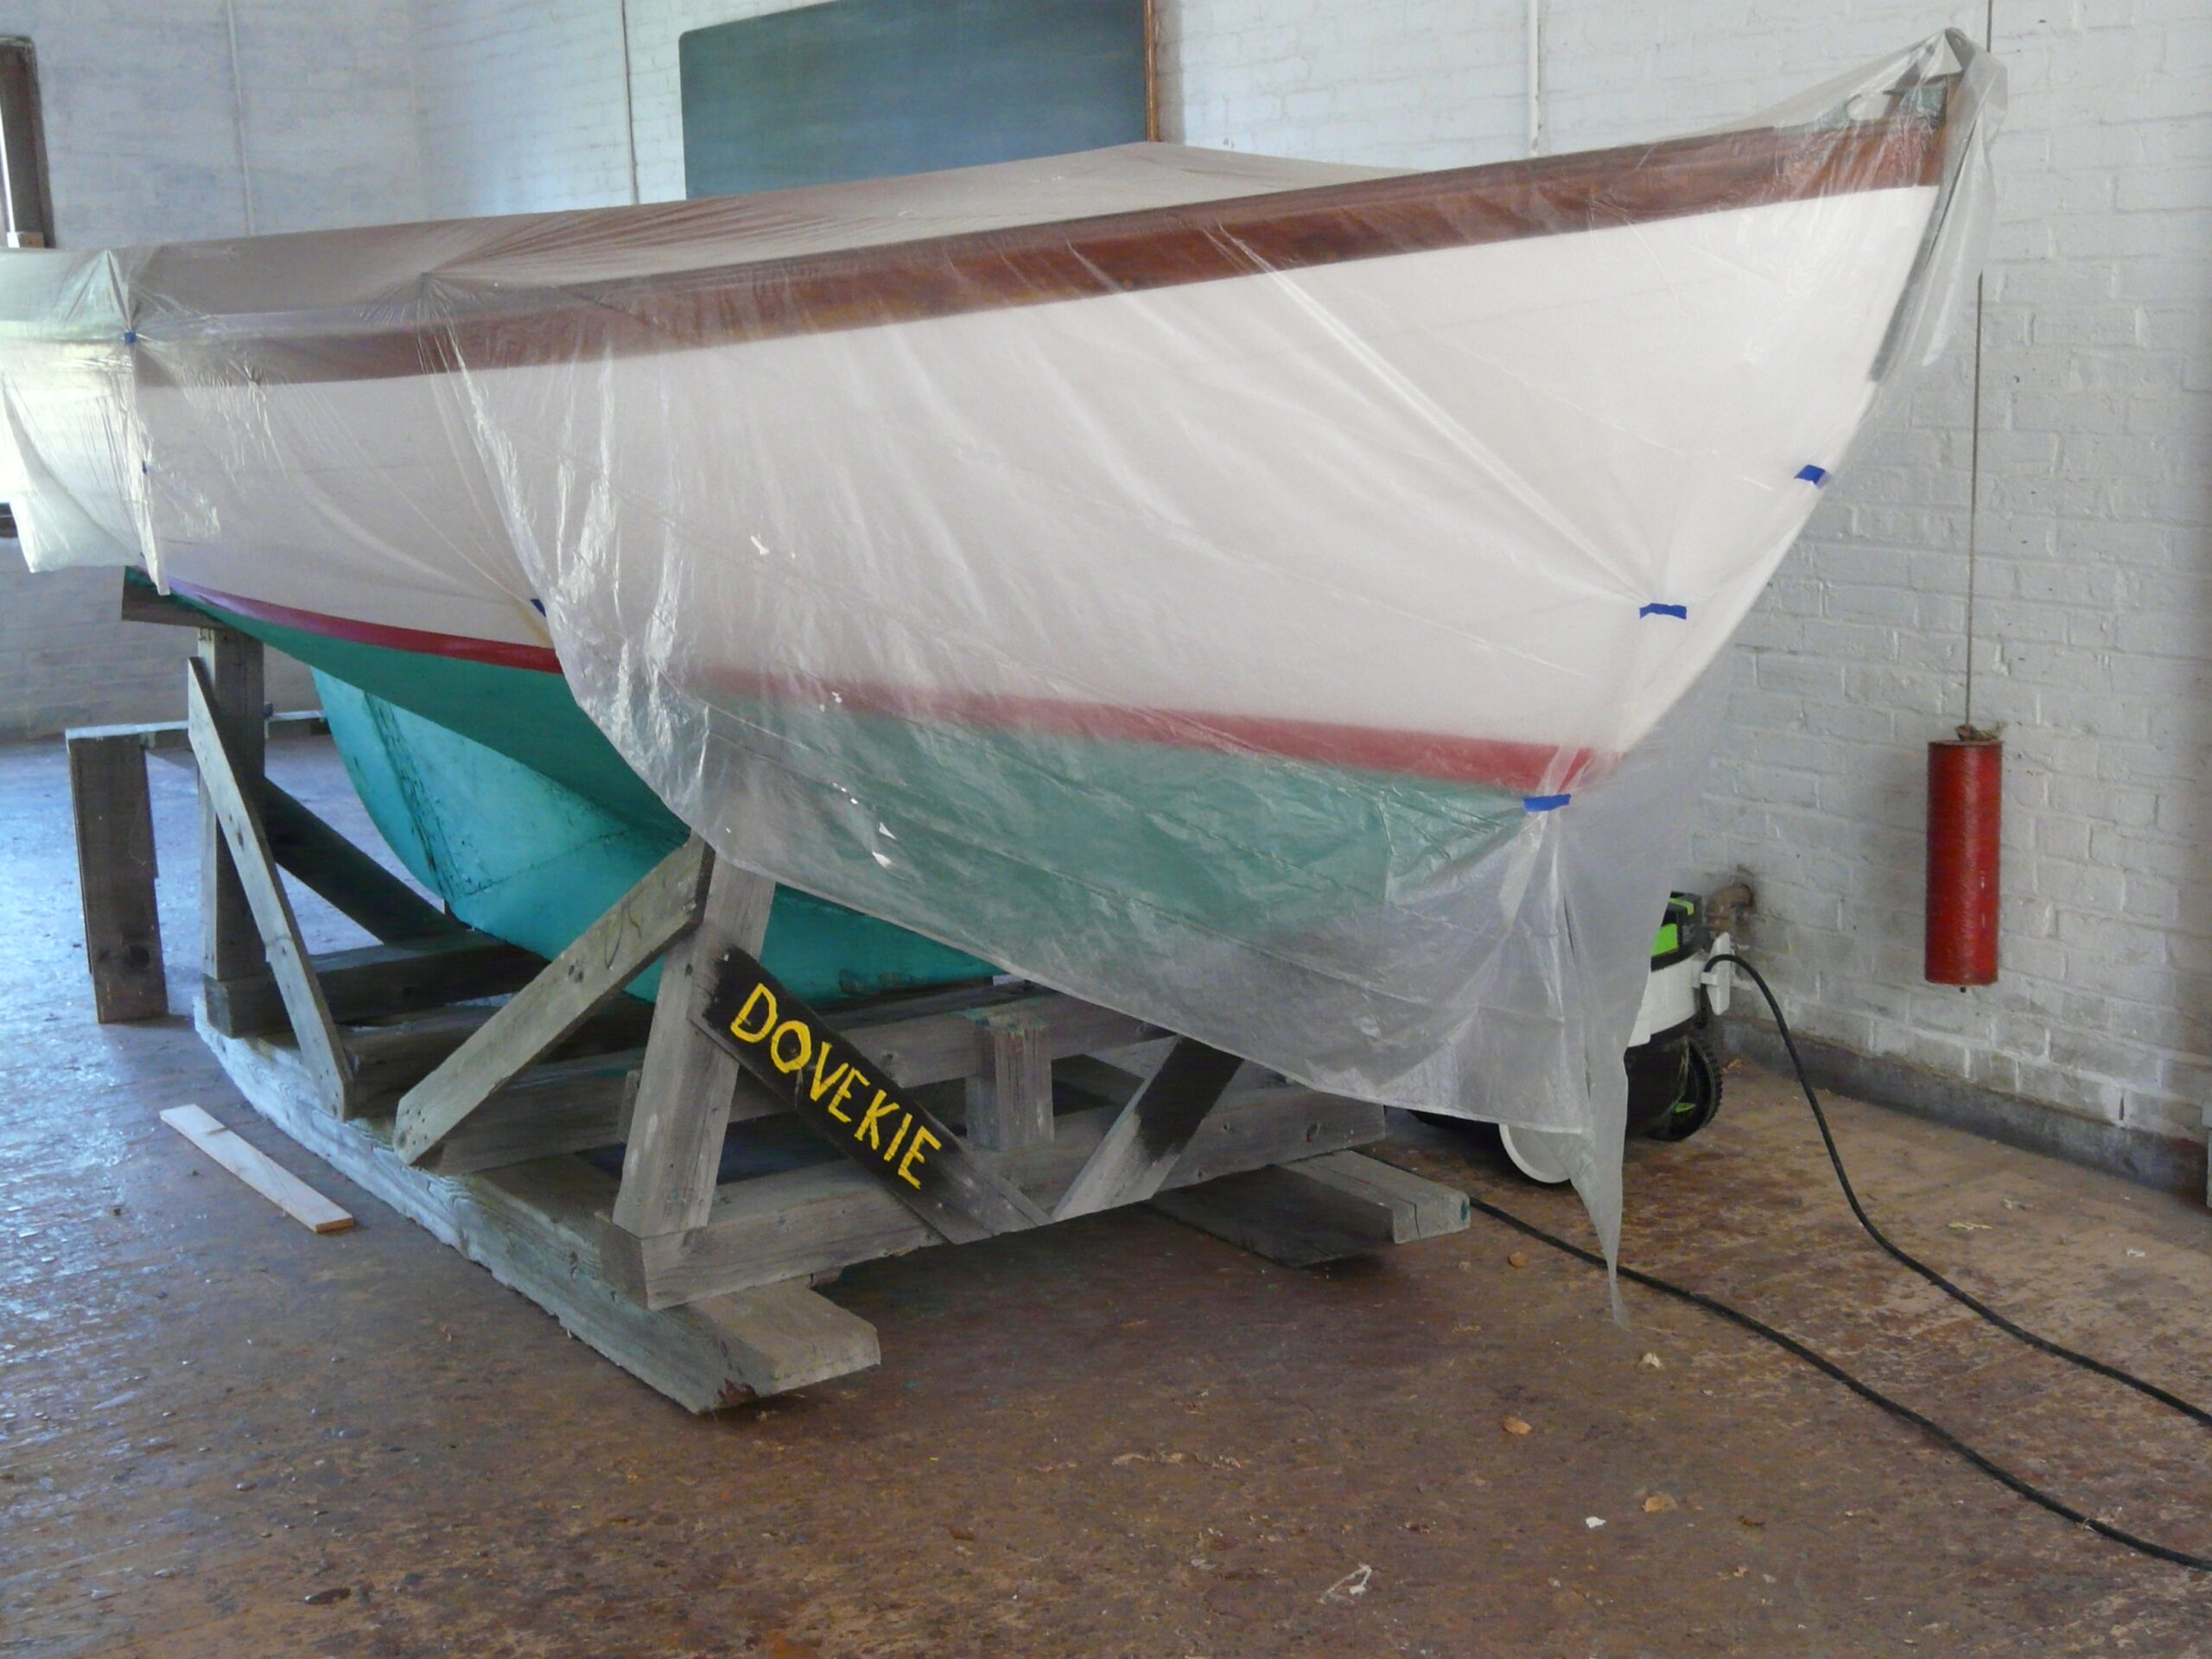
Above-If you have inside storage, be certain the roof doesn’t leak and that water won’t collect on deck or in the cockpit. If the roof is questionable, think about hanging a tarp over the boat to protect it from drips.
Once you’ve decided on a date for coming out of the water, leave plenty of time beforehand for removing any portable equipment and loose gear: sails, ground tackle, cushions, life jackets, clothing, food, etc. Also remove anything that can be damaged during storage, such as electronics, fire extinguishers, and cooking fuel tanks.
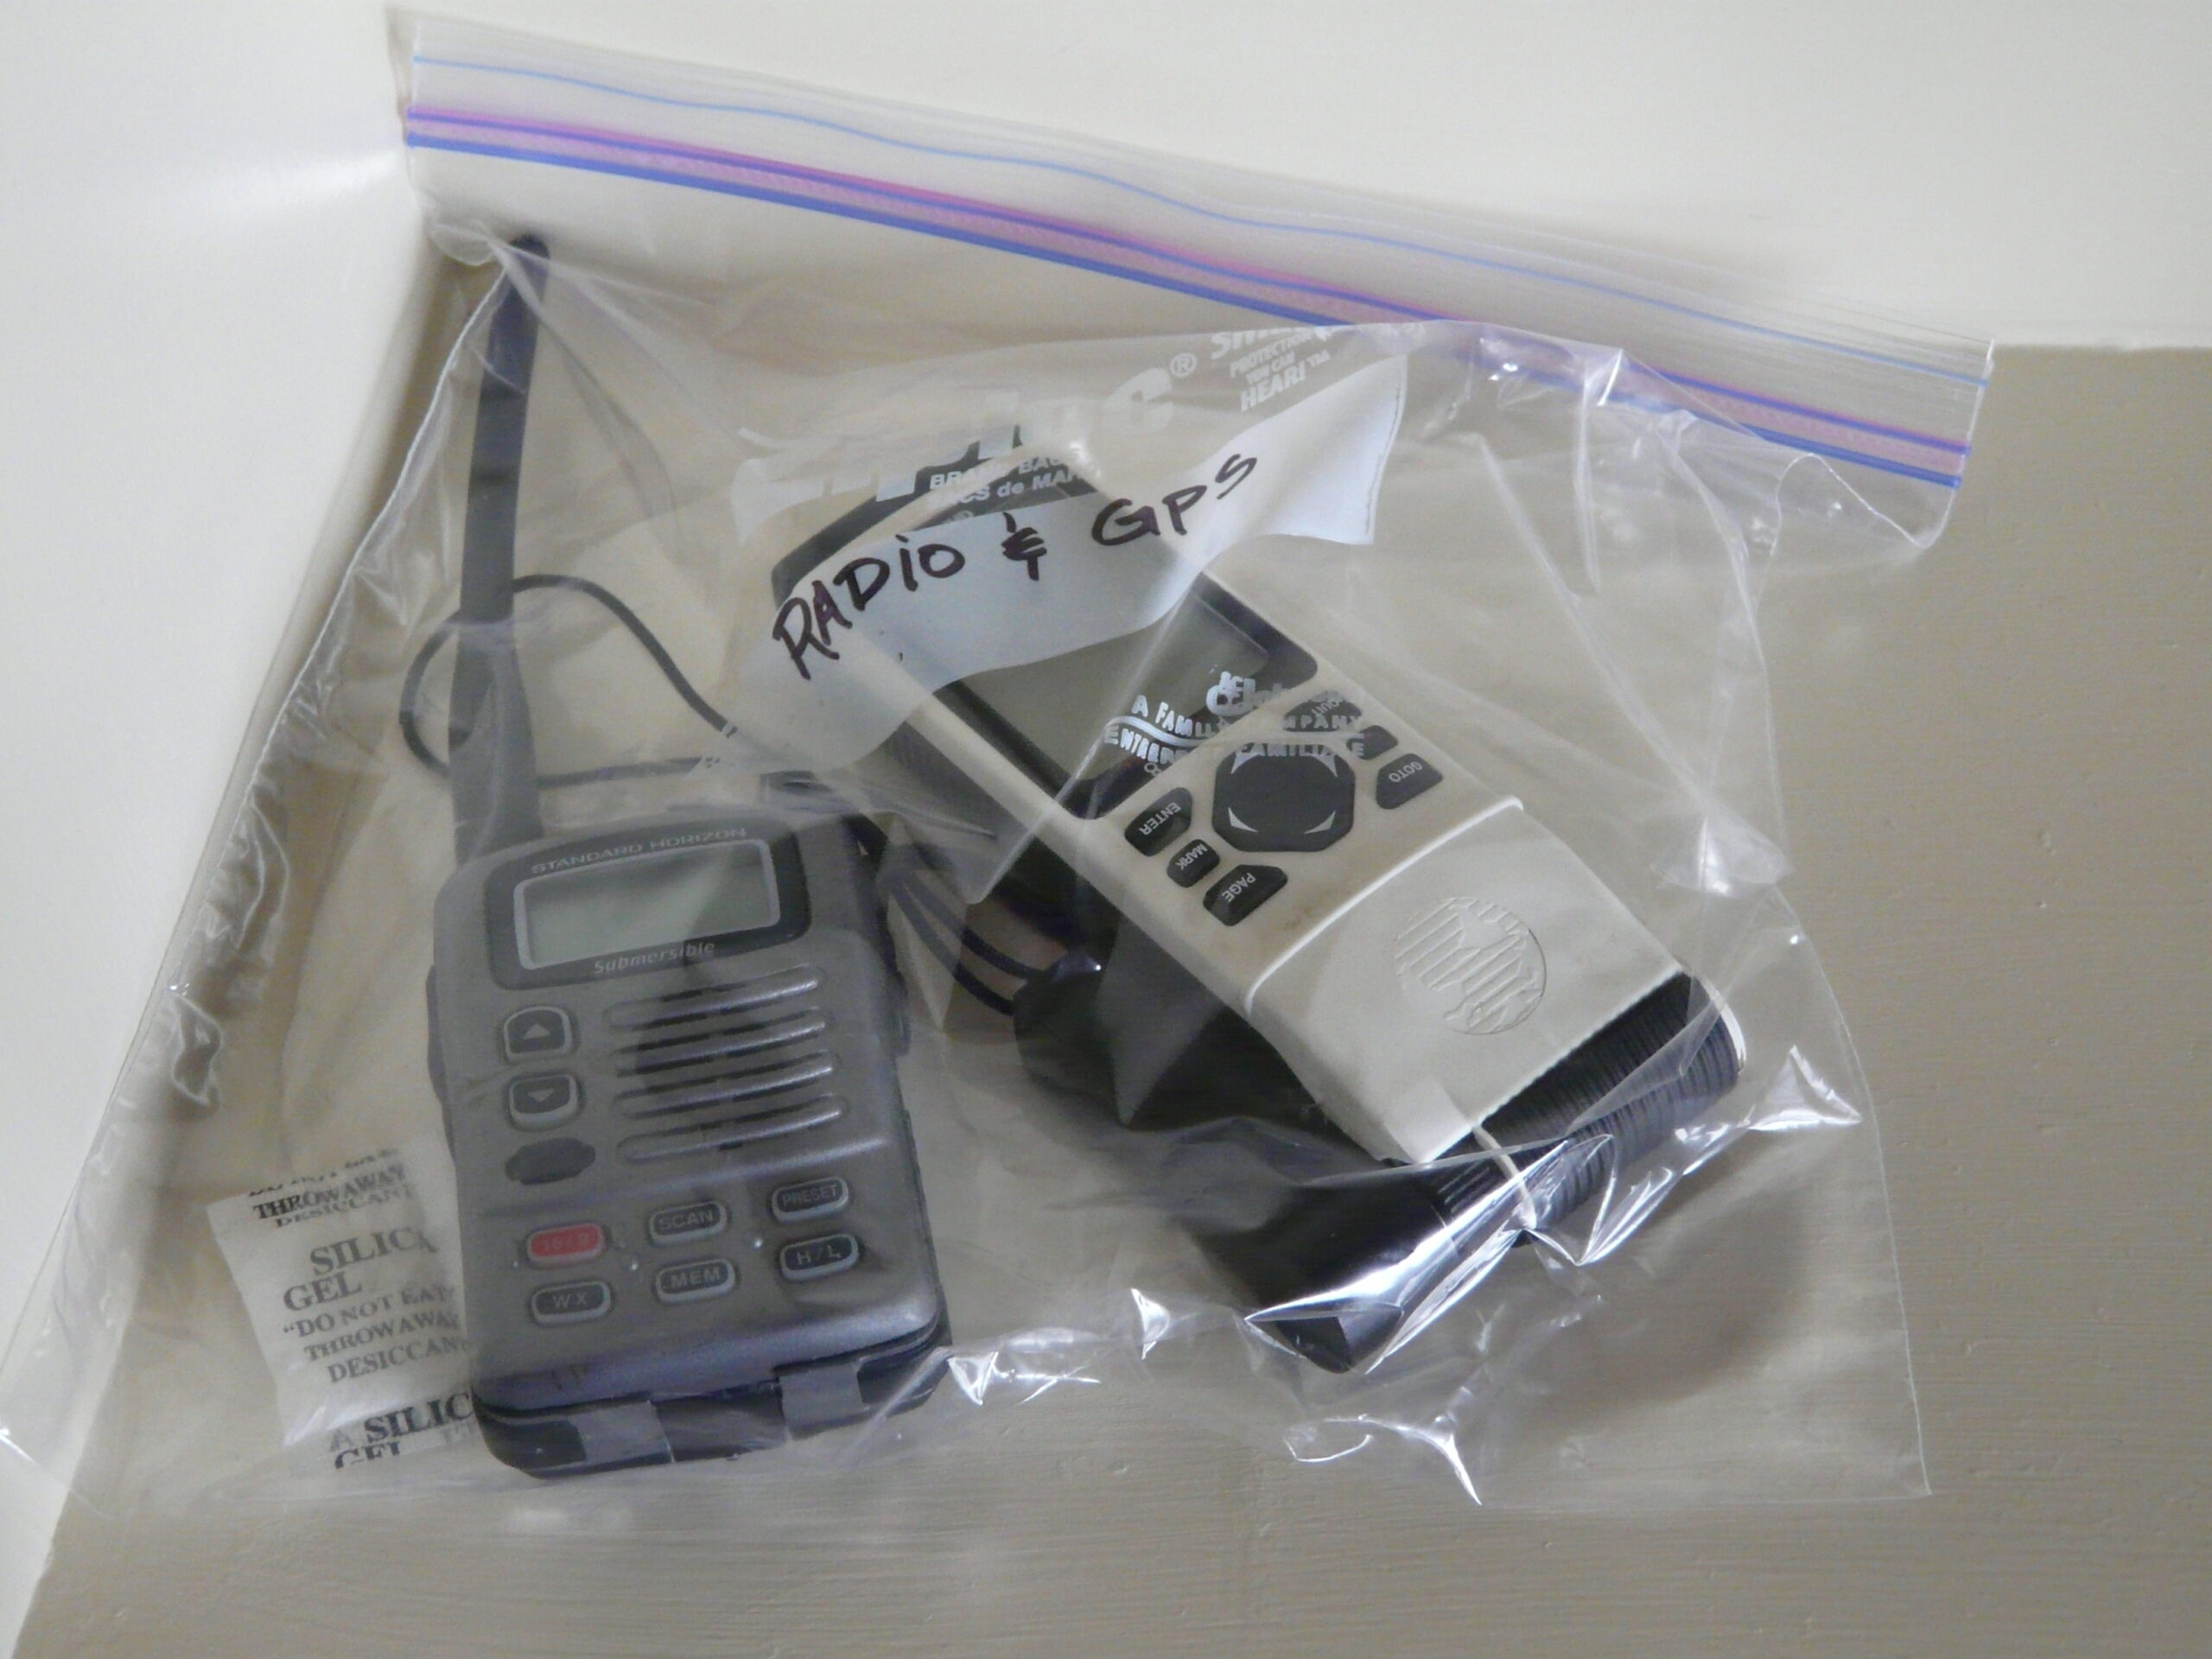
Above-Protect electronics by placing them in an airtight bag. Include a desiccant packet and then store indoors.
Store electrical equipment in a dry place at home. If you can achieve an airtight seal, wrapping these items in a plastic bag containing silica gel desiccators is a good solution. Remember to include switch panels as well as the more obvious things such as the starter, generator, magnetos and distributor. Having these ashore in the off-season will give you an opportunity to check their condition and make any necessary repairs. For items removed, it pays to label their disconnected wires and leads—a small fold of marked-up masking tape works well.
Also keep in mind that taking home any wooden items that can be oiled, varnished, or painted (locker doors, hatch covers, tillers, etc.) over the winter will save valuable hours and make spring commissioning easier.
Having service manuals for the equipment left aboard makes life easier for whomever is winterizing this gear. An ever-useful notebook kept up-to-date is a great way for the boat owner to keep track of what tasks need to be done, where things will be stored, what needs to be repaired, and which improvements might make sense come next sailing season. A permanent notebook is less likely to be mislaid than numerous scraps of paper.
Cradles, Blocking, and Boat Stands
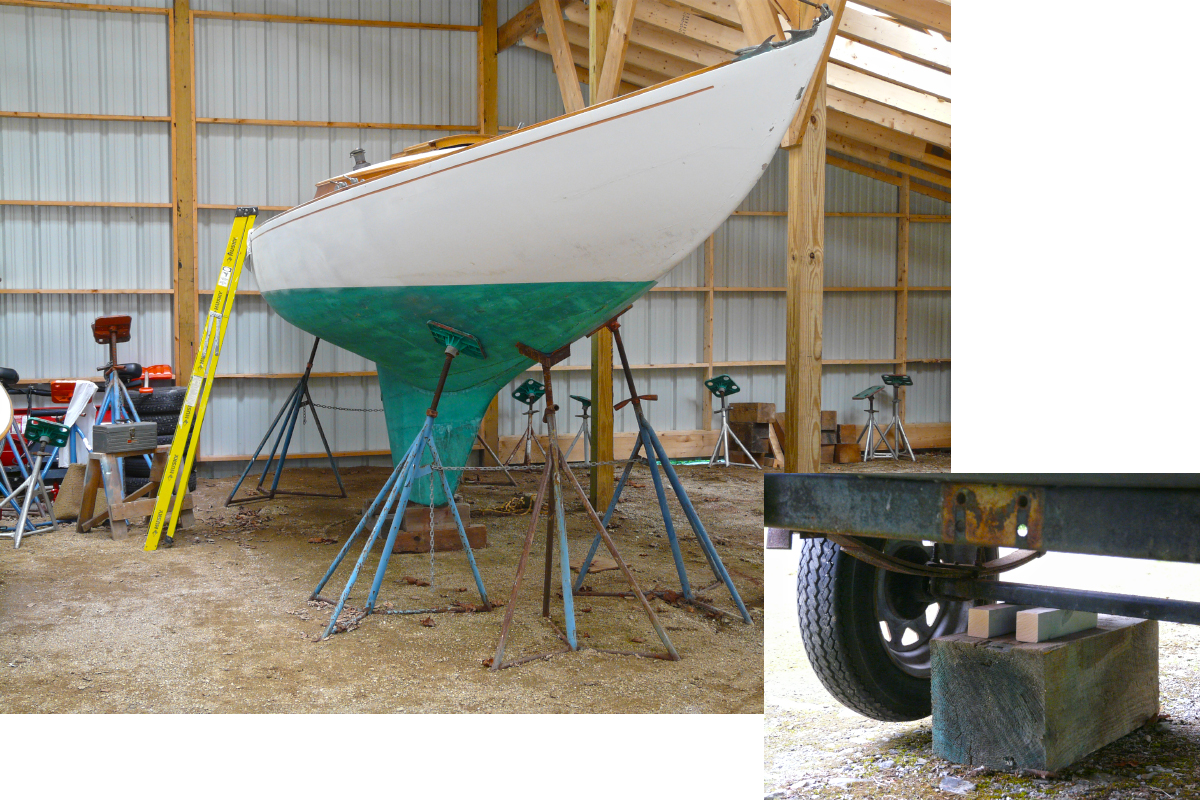
Above—Most of the boat’s weight should be borne by keel blocks, with jack stands holding the boat upright. When the ground freezes, jackstands often rise and push too hard, so it’s a good plan to give them an occasional pressure check over the course of the winter. Inset—Some small boats can live on trailers during the off-season. If you go this route, take the weight off the tires by jacking up the trailer frame so the wheels clear the ground. Place blocks or heavy timbers under the axles and use sleepers on the ground so the supports don’t settle.
More damage can happen to a hull from a badly built cradle or improper blocking than from many seasons of hard sailing. Unless one takes care in properly supporting the hull, it can have a profound effect on the structure of the boat.
For any boat, a cradle of stout wooden timbers shaped to fit the underbody will give sufficient support. Check your cradle each year for any weaknesses due to broken fastenings, cracked framing, or old age. If a cradle is not practical, keel blocking and jack stands or shores under the bilges is the best alternative. Make sure to block the boat so that its waterline is level.
Most of the weight should be on the keel blocks, and these should be placed evenly to support the whole structure. For boats with outside ballast keels, blocking should be concentrated there and not on the adjacent wood. Jack stands support the bilges, and these work hand-in-hand with the keel blocks. They should rest on solid ground or timbers to prevent their settling (although, with frost, movement is sometimes inevitable); and to help spread the load over the planking, wooden pads are fastened to the tops of these stands.
Jack stands should be braced securely or chained together side-to-side so they can’t kick out. Take the time to get everything right. If your boat is being stored outside, remember to check the jack stands and keel blocking every so often to make sure frost heaves haven’t affected your support system. Adjust if necessary.
Inspection and Scrub Down

Above—Just as one’s home sweet home needs a good spring-cleaning, boats deserve a thorough wash-down at the end of each season. While there are a number of adequate household cleaning products available on store shelves, a mixture of good old bleach and warm water does wonders in eliminating grime, mildew, dirt, and stains. Always wear gloves, eye protection, and be sure to have plenty of ventilation when using any of these cleaning products. Inset– Threaded drain plugs need to be well maintained to keep working properly. Though a part of routine maintenance, be sure to remove sand and dirt from the threads of both the plug and the hole, wash thoroughly, and then lubricate them before putting the boat away for the season.
Soon after your boat is hauled out of the water, take a close look at the entire hull for wear and tear and leakage from sprung planks, loose caulking or fastenings, or rot. If the boat has been leaking, check seams and joints for dampness and actual dripping before draining the bilge. Be sure to mark these areas (chalk works well) for further inspection later on.
Remove the bilge drain plug so any water can begin draining. Take a close look at all limber holes in the bilge and make sure they are open and free of any debris. Never allow any bilgewater to remain since it can freeze and, through expansion, push off a plank—or it can lead to rot in the keel, garboard planking (planking adjacent to the keel), and floor timbers.
Remove any marine growth that may have fouled the bottom, or have the boatyard give it a pressure wash-down in their catch basin. It’ll be a lot easier to do it now with a stiff scrub brush, rubber gloves, and a freshwater rinse rather than waiting until the spring.
After the bottom surface has dried for a week or two, take the following simple steps to help keep your hull from drying out and your plank seams tight over the long offseason:
- Mix up a pot of layup compound consisting of raw linseed oil (70%) and turpentine or old varnish (30%) and warm it slightly (well below the boiling point).
- Using a brush and paint roller, apply this solution liberally to the bottom of the boat (right over the bottom paint) to assure good coverage and penetration.
- Don’t forget to saturate the stem, sternpost, keel, and rudder.
In the spring, this finish can be lightly sanded followed by a fresh coat of bottom paint.
A boat’s topsides can take a beating during the season not only from the sun and salt but from chafing on docks, scrapes from dinghies, and other mishaps. After a thorough wash-down with freshwater, take a close look for loose fastenings or caulking, sprung planks, and symptoms of rot. Check all brightwork for failure (i.e., exposed wood) and, if needed, give it a light sanding and a touchup coat of varnish. Unless these areas are coated, moisture will raise the grain and darken the wood during storage.
Systems and Engine Layup
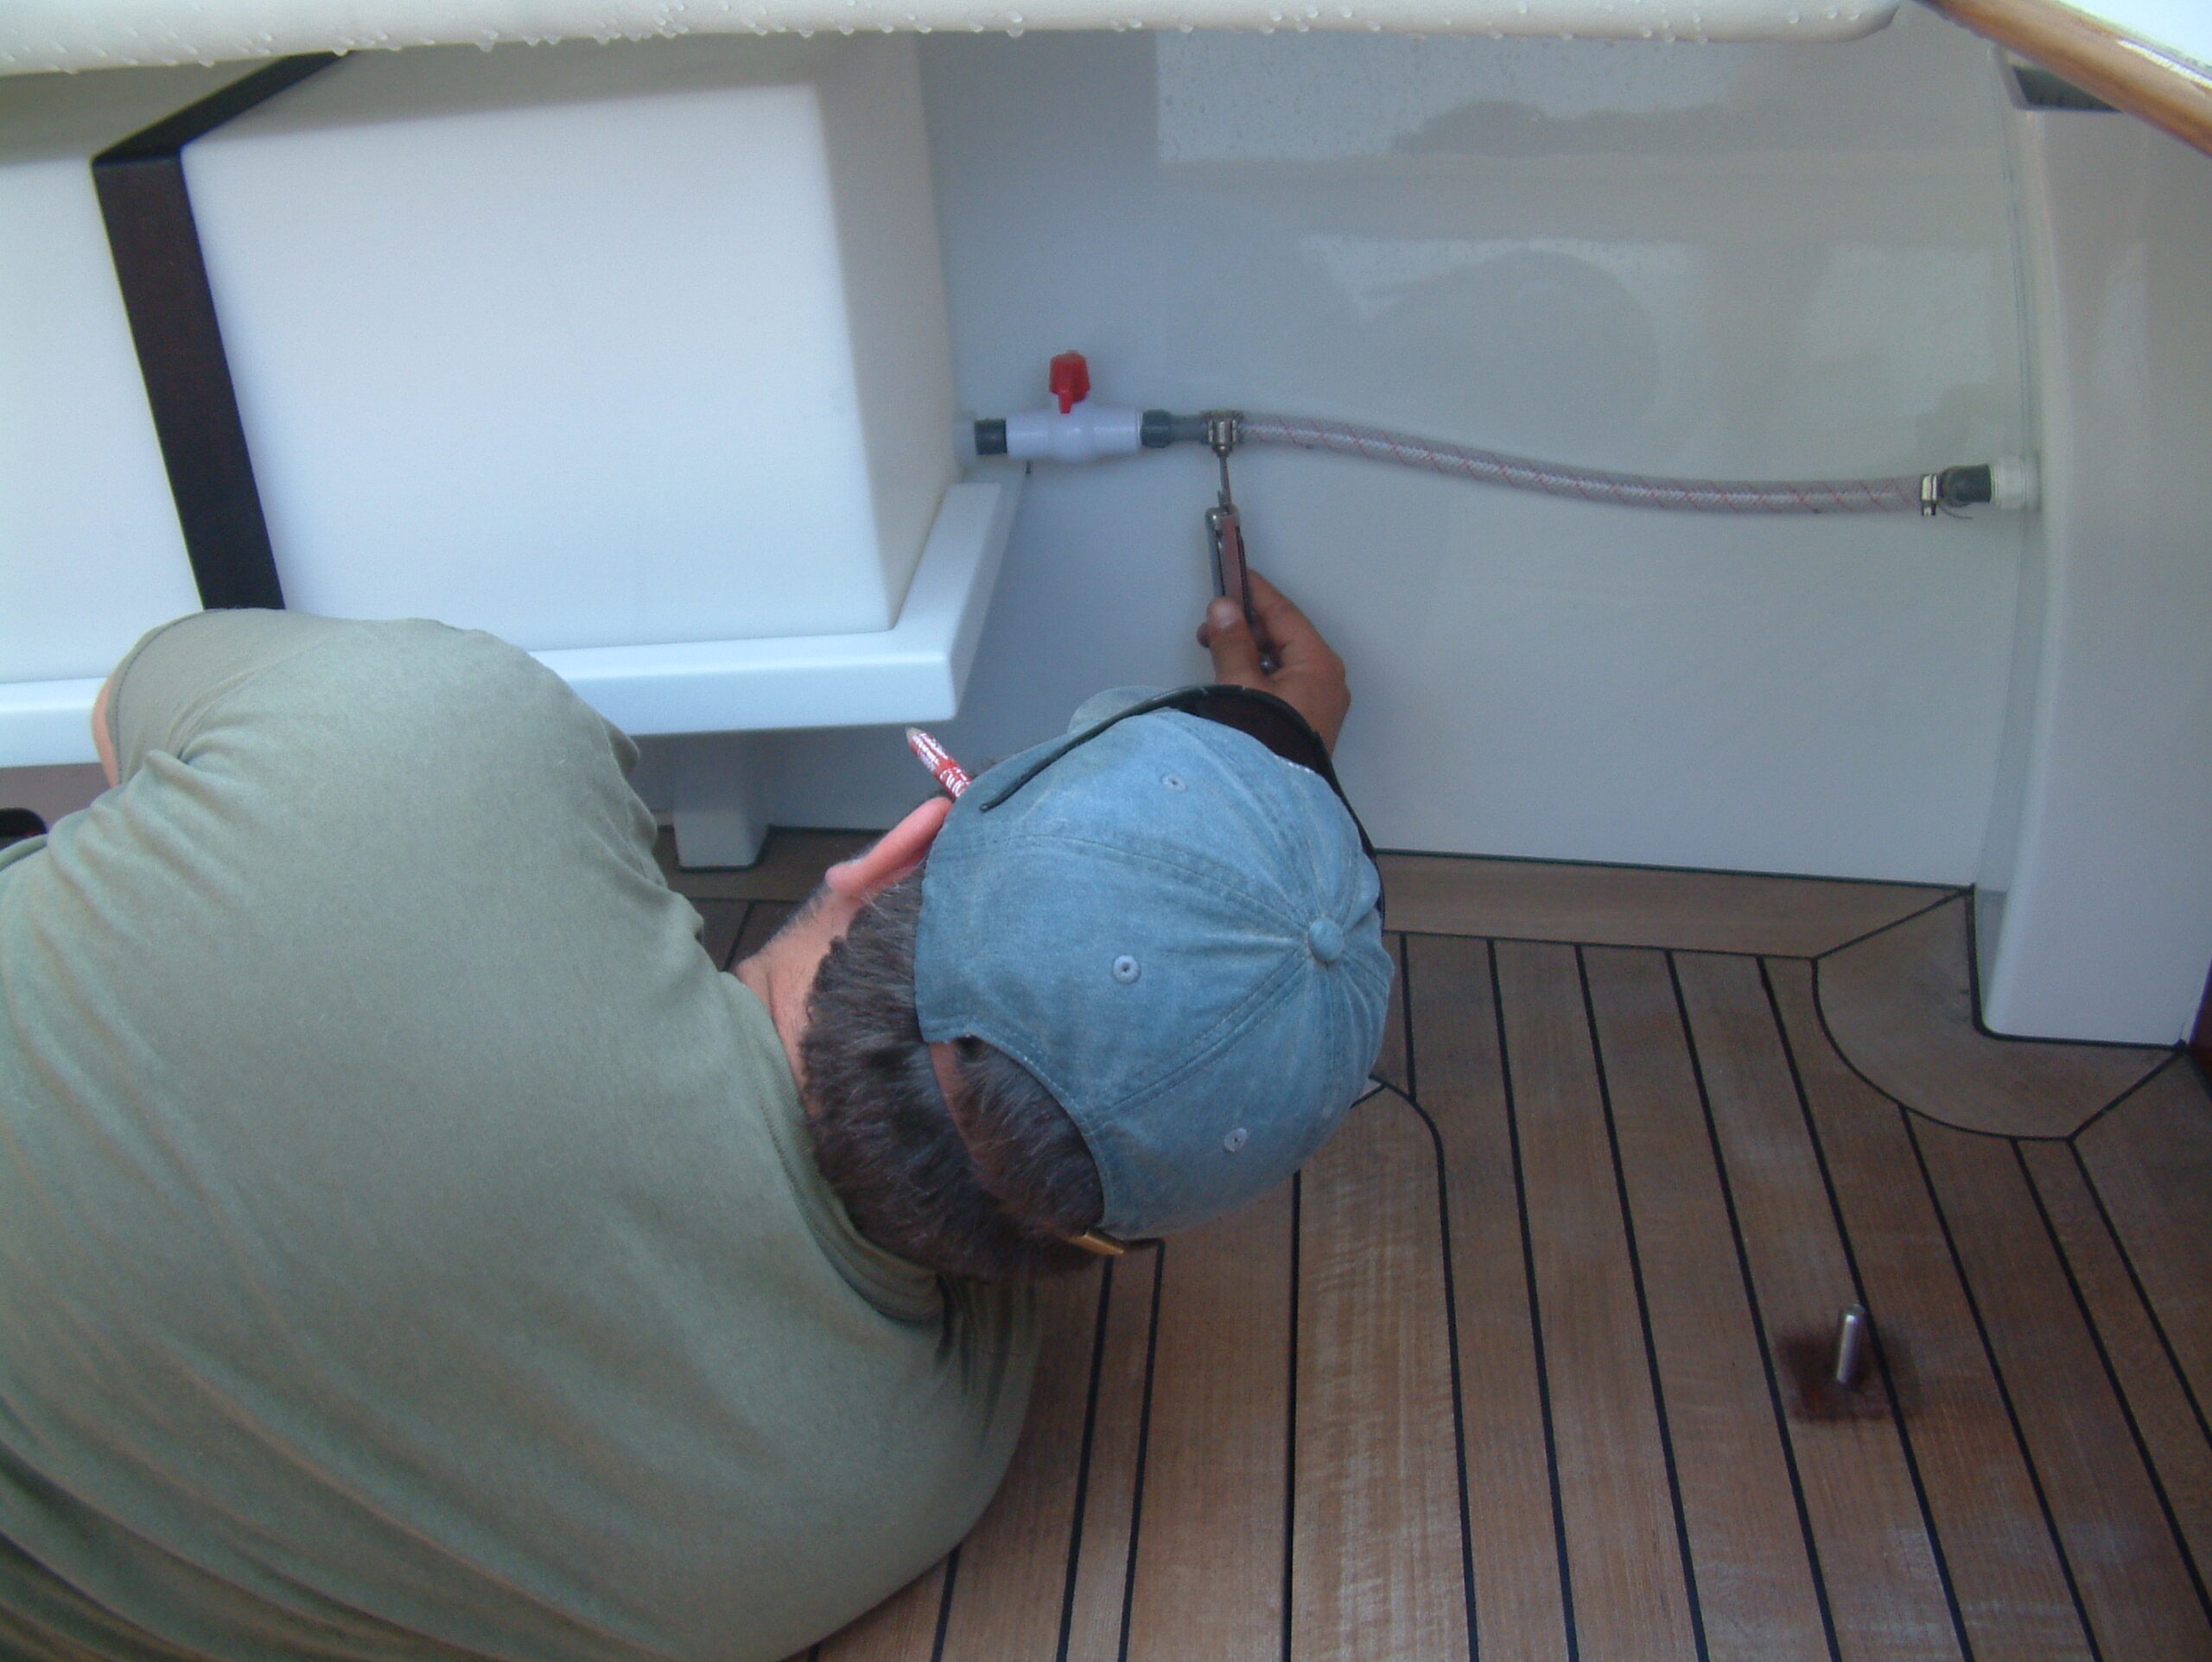
Above-Drain all the water tanks. There’s no need to use a bucket in this self-bailing cockpit—just open the valve and let nature and the scuppers take care of it.
Drain the water tanks first. Then fill diesel fuel tanks with fuel and a fuel stabilizer to prevent condensation while the boat is in storage. Make sure the cap is secured tightly. For gasoline systems, there seem to be two strategies: The first is to stabilize the fuel that’s remaining in the tank. The second is to top off with gasoline and stabilizer. Pump out the head’s holding tank at an approved facility; look to your local boatyard for guidance on finding one. Add antifreeze to the toilet. Check the water level in the batteries and then remove them. Clean their posts with a wire brush, and put them on trickle charge.
While instruction manuals give plenty of details of the laying-up procedure for engines, it is easy to forgo some steps and get into trouble. It is critical to flush the entire routing (path) of the raw water side of the cooling system and to make sure that liquid from the flushing process is, in fact, flushed out so that it doesn’t wind up being backed into the exhaust manifold, past the valves, and into the cylinders. Not only can this lead to serious corrosion, it can even cause the engine to seize.
Make sure that the antifreeze solution you use for flushing your engine is propylene glycol-based because this type is non-poisonous and does not pose the environmental hazards of ethylene glycol. Reserve ethylene glycol antifreeze for use in your heat exchanger, where it’s completely contained and controllable.
There is too much information on this subject to cover adequately here, and each engine make and model has different requirements. If engine layup is within your abilities, you’ll find the best layup procedure for your engine well described in your owner’s manual. Follow your manual’s directions, and call the manufacturer with questions.
Earlier in this article we discussed the “do-it-myself” vs. the “boatyard-will-handle-it” list. Unless you are comfortable with mechanics, it’s probably a good idea to leave engine layup to an experienced professional.
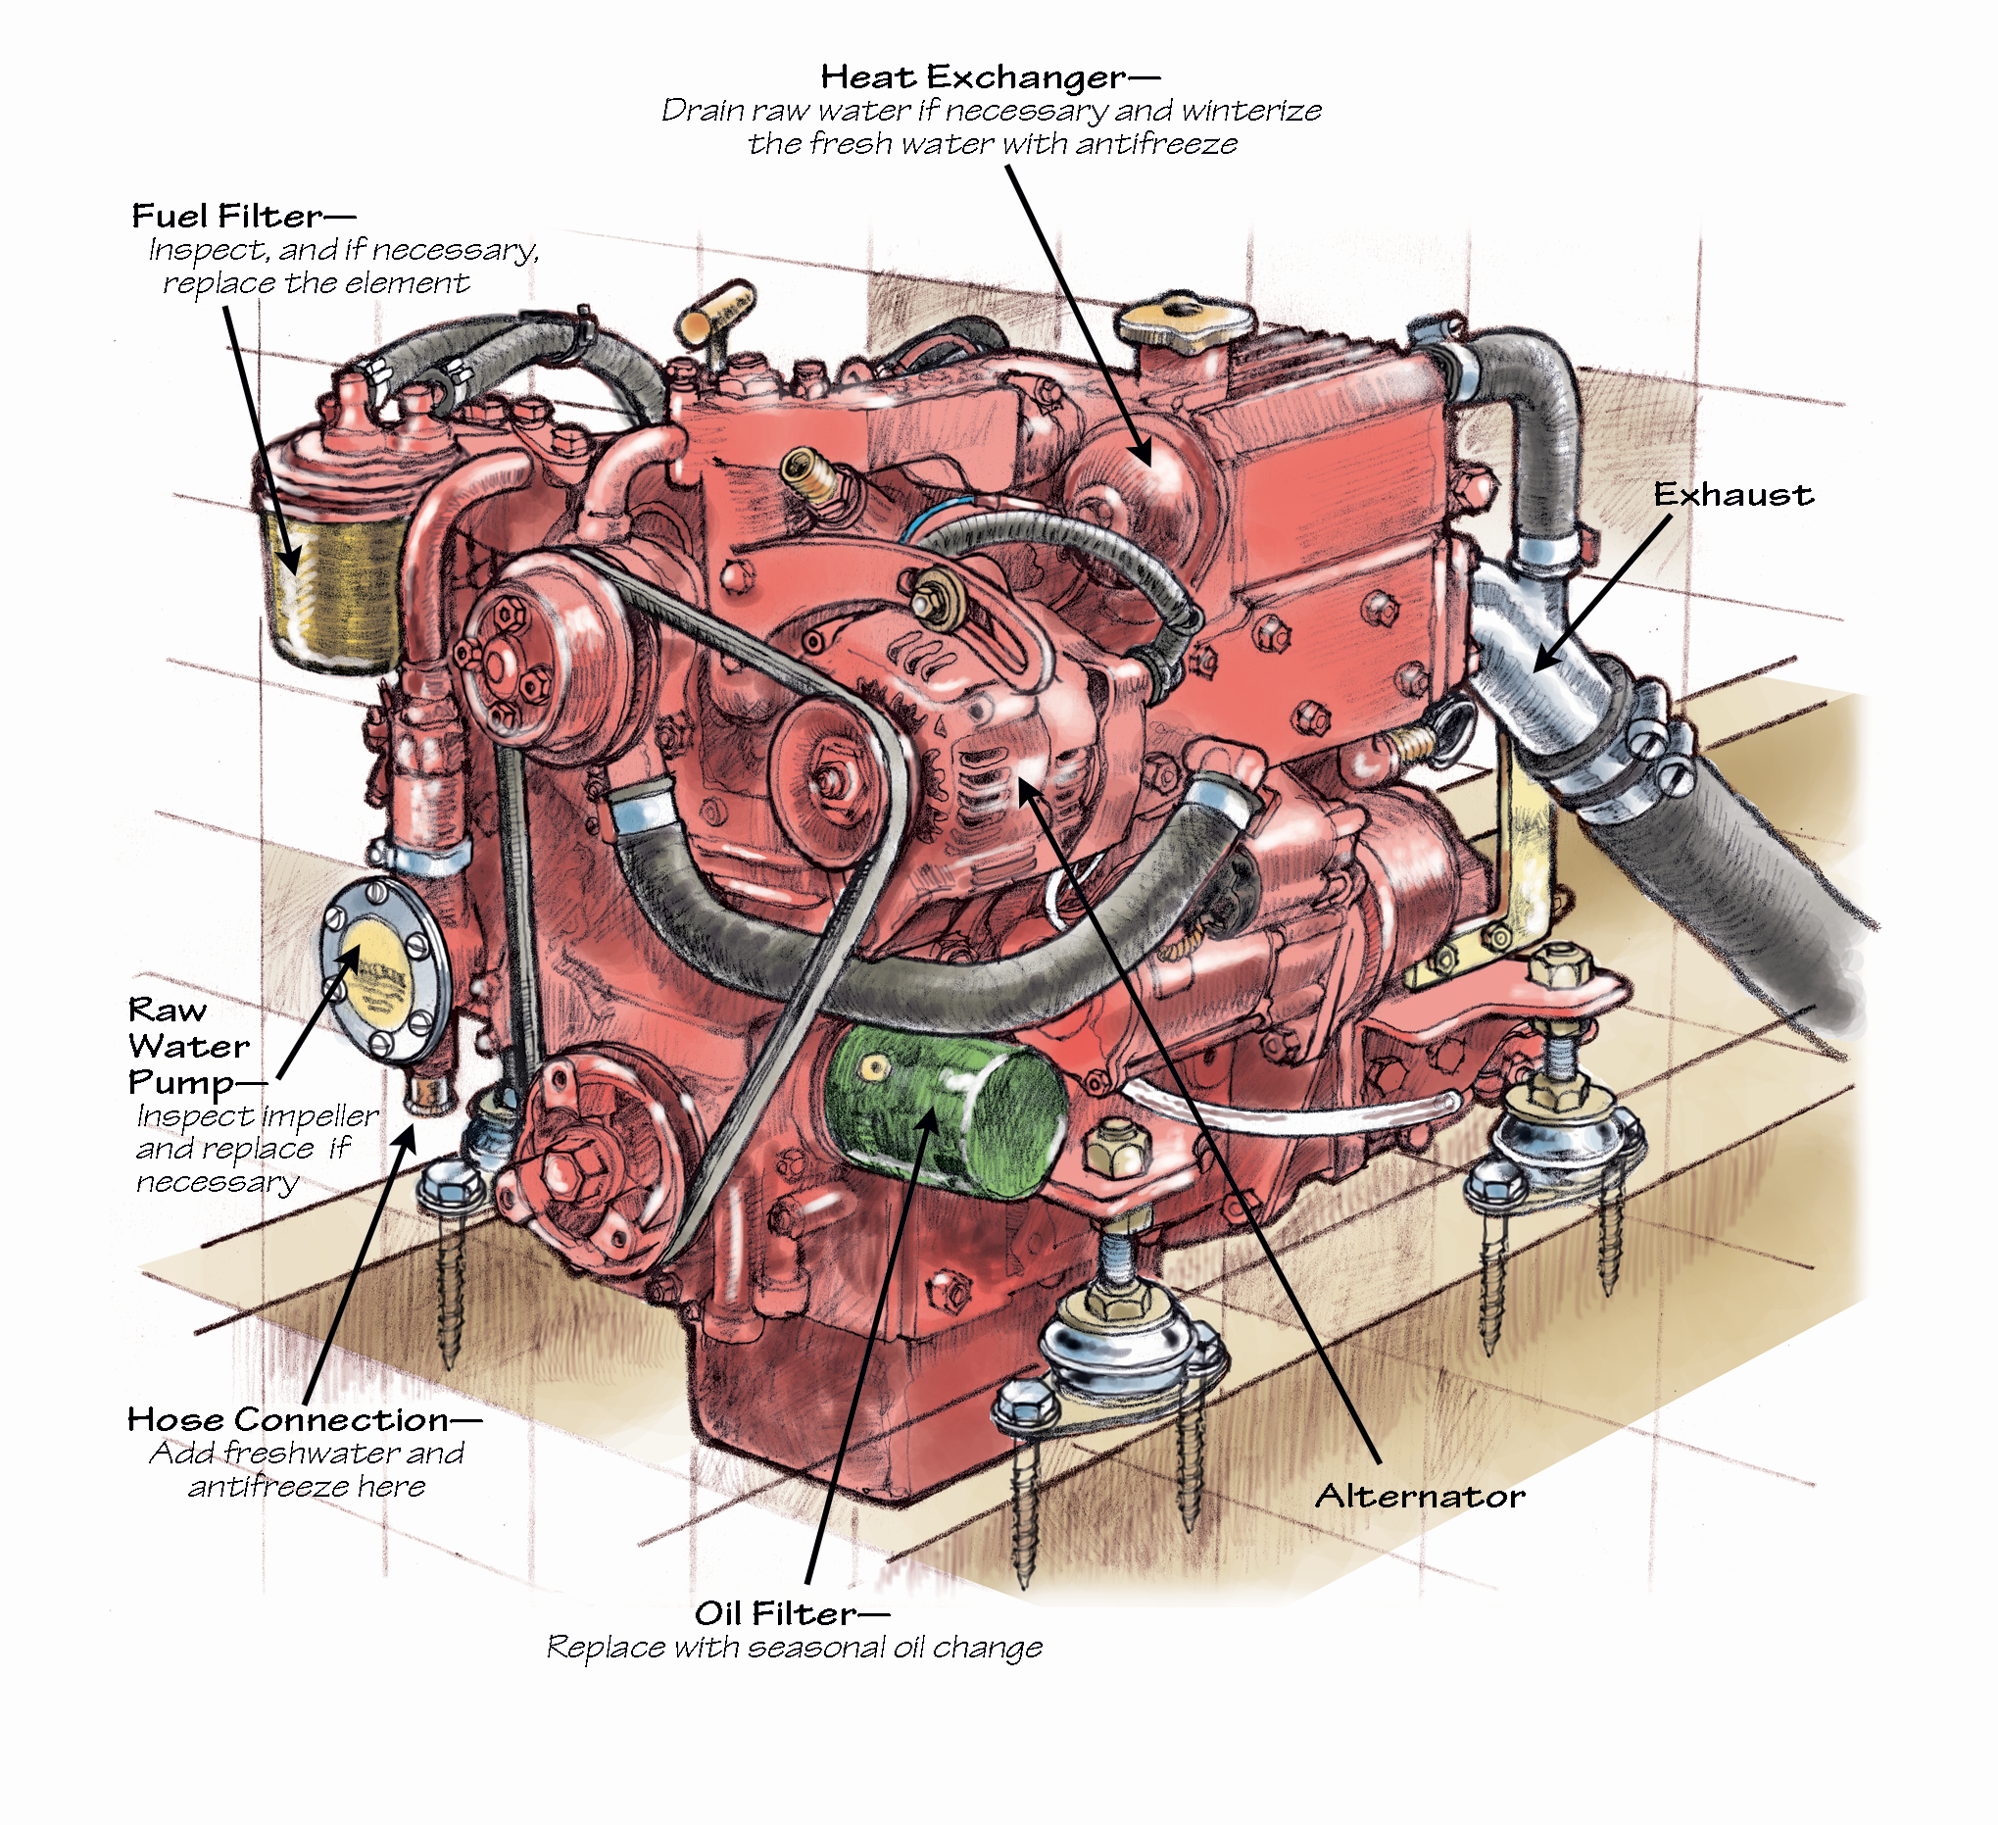
Above-This Beta 20 from Beta Marine Inc., like many of today’s engines, is freshwater-cooled, allowing it to be made of lighter materials than the massive-block, seawater-cooled engines that used to be more prevalent. At the end of the season, the raw-water loop of a freshwater-cooled engine should have a good flushing with a mixture of propylene glycol antifreeze and fresh water. Some people layup the engine while the boat is still afloat, but a better idea is to wait until after haulout. The engine is often situated in the boat below sea level, making the flushing process more vulnerable to backup and failure. On-land layup makes any runoff easier to control, too.
Ventilation

Above-Once under cover, open hatches and leave drawers and doors ajar to keep the air moving through the cabin. Proper ventilation will help prevent mildew and condensation from forming, which could lead to rot over time.
Once the boat is adequately sheltered and/or covered, all hatches, portholes, and companionway should be opened. Also remember to leave all lockers, doors, and drawers ajar for fresh air to circulate.
For boats stored outside, remember that as winter winds down, the days lengthen, and the temperatures begin to rise, you’ll want to open your cover up enough to allow the heated air underneath to escape. Never leave unventilated covers on too long in the spring, as they can contribute to creating a damp and steamy environment, which surely leads to rot.
These are the basics of off-season lay-up. If you’d like to delve more deeply into the layup process for a single boat type, read, “Boat Care the Beetle Way” on page 33 of WoodenBoat No. 216. Establishing good boat-keeping habits during your end-of-season layup will add to your boat’s longevity and make boating even more fun.


