
 Alison Langley
The instructions presented here can be adapted to make a traveler for a variety of boats, including the Haven 12 1/2.
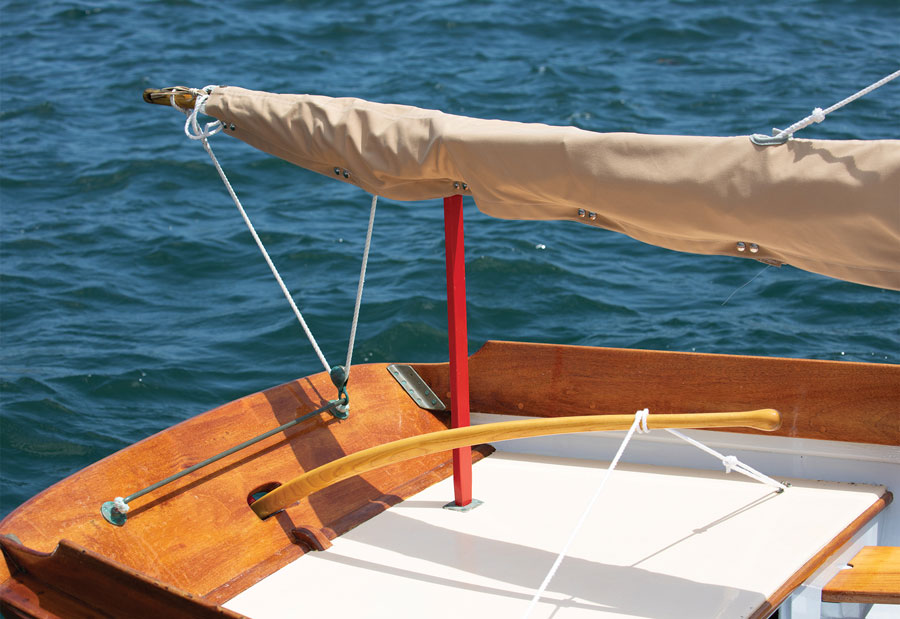
The John Alden–designed North Haven Dinghy is a classic Victorian-era sailboat. It first raced in 1885 at the island summer colony of North Haven, Maine, and is the oldest one-design class in the United States; the dinghies are still raced there today. These distinctive boats are 14′ 5″ long with plumb stems, wineglass sterns, gaff rigs, 350 lbs of inside ballast, and flotation tanks. From stem to stern, they carry a lot of period hardware—some quite specific to the boat, which can be a challenge when building an accurate replica.
One such item is the elegant brass mainsheet traveler that runs from transom knee to transom knee. While it’s an item that would be at home on many traditional daysailers, its size is specific to the span between the knees. Back in the 20th century, it would have been a simple matter for the builder to consult the venerable Rostand Manufacturing Company Catalog of Custom Grade Marine Hardware. The book was a compendium of hard-to-get items such as bow plates, portlights, gooseneck slides, centerboard blocks, and, yes, even the desired traveler.
That catalog is long gone, but its crisp graphics offer details from which one can make full-sized templates for building duplicate hardware. Like lofting the lines of a hull, such full-sized drawings are the way to go for accuracy in making hardware.
What You’ll Need to Make a Brass Traveler
Tools
• Welder’s gloves
• Safety glasses
• Fire extinguisher
• Cutting oil
• SAE 3/8-16 NC thread-cutting die and die holder wrench
• Metalworking vise
• Bandsaw
• Bench grinder
• Power drill with a 3/8″ twist drill and a 1″ spade bit
• Sliding bar clamp
• Hardware store-quality handheld torch and bottle of Bernzomatic Map-Pro gas
Materials
• Appropriate length of 3/8″ brass or bronze rod
• Two 3/8″ bronze acorn nuts
• Two 3/8″ bronze hex nuts
• Four 3/8″ flat washers
Getting Started
An old-time builder once told me, “If you can draw it, you can probably build it,” and technology has made it easier than ever to duplicate and scale a drawing. I scanned the drawing of the traveler, enlarged it digitally so the scaled-down 3/8″-diameter rod in the catalog was expanded to an actual 3/8″, and printed it.
The next job was to measure the distance between the fastening points on the boat, which I determined to be 20″. I then created my full-sized drawing on a piece of corrugated cardboard. I began with a simple line representing the traveler’s span. I then taped the full-sized drawing of the lefthand portion of the traveler in its appropriate position on the cardboard.
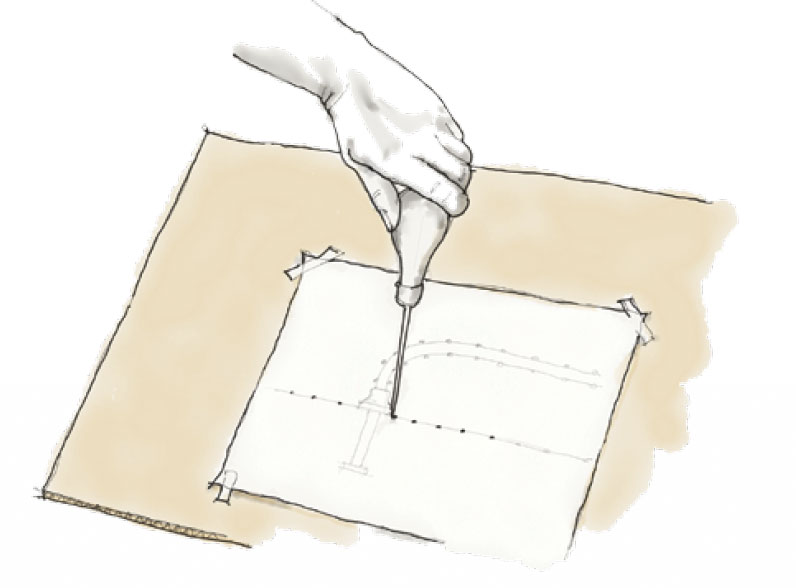
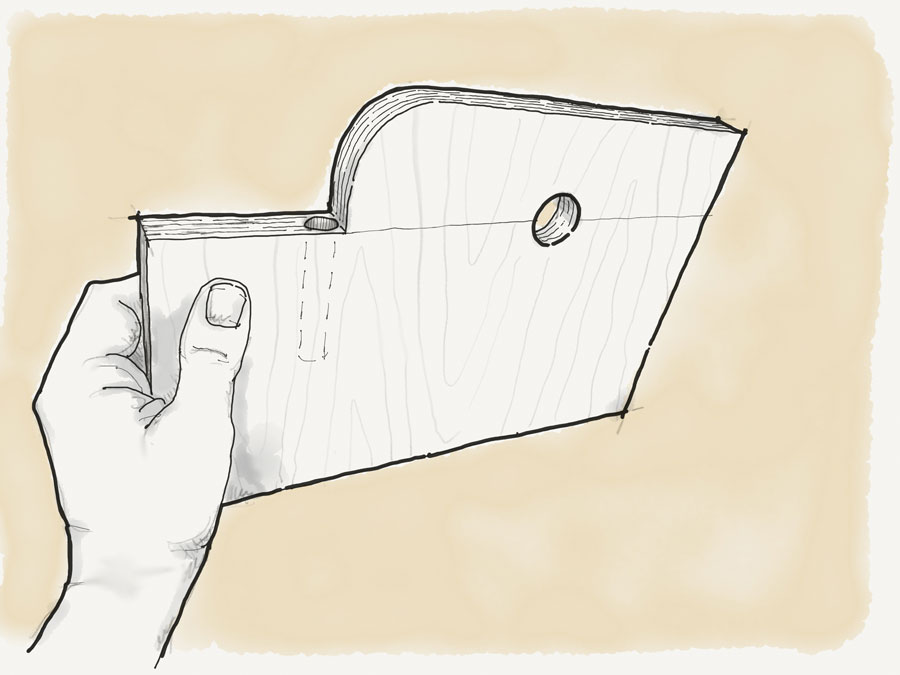
To transfer the curved shape of this portion (including the threaded portion that goes through the knee) to the cardboard, I punched through the drawing (see illustration above) with an ice pick to create a series of holes to be connected by a fair line using a batten and drafting curves.
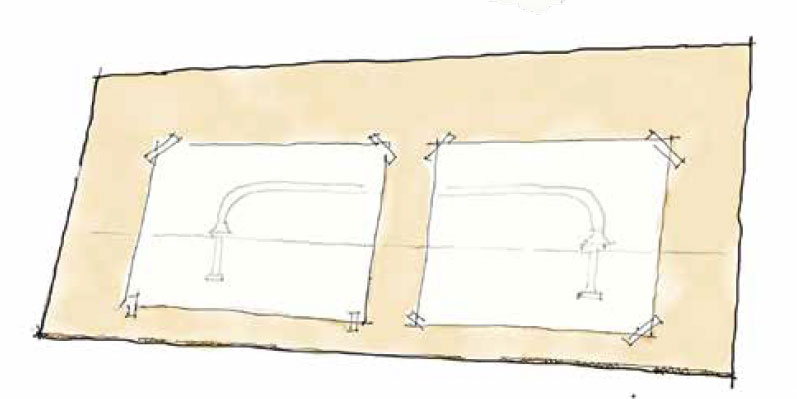
I repeated the preceding operation on the other end of the traveler by simply flipping over the print (see illustration above), punching through the already-established holes, and then connecting the two ends with a drawn-in 3/8″-diameter rod. A batten wrapped around the outside face of the drawn rod yielded its actual length of roughly 29″; I then purchased two 36″ lengths of brass rod—one extra, in case of an error.
Bronze rod would work as well and would be stronger but more expensive. It’s interesting to note that the original Rostand offering was in brass. I also procured two brass hex nuts, two brass acorn nuts, and four 3/8″ washers.
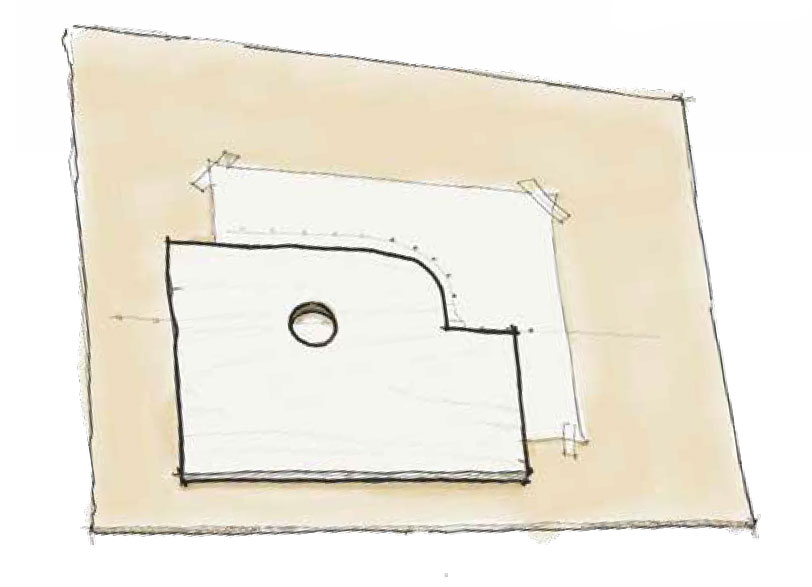
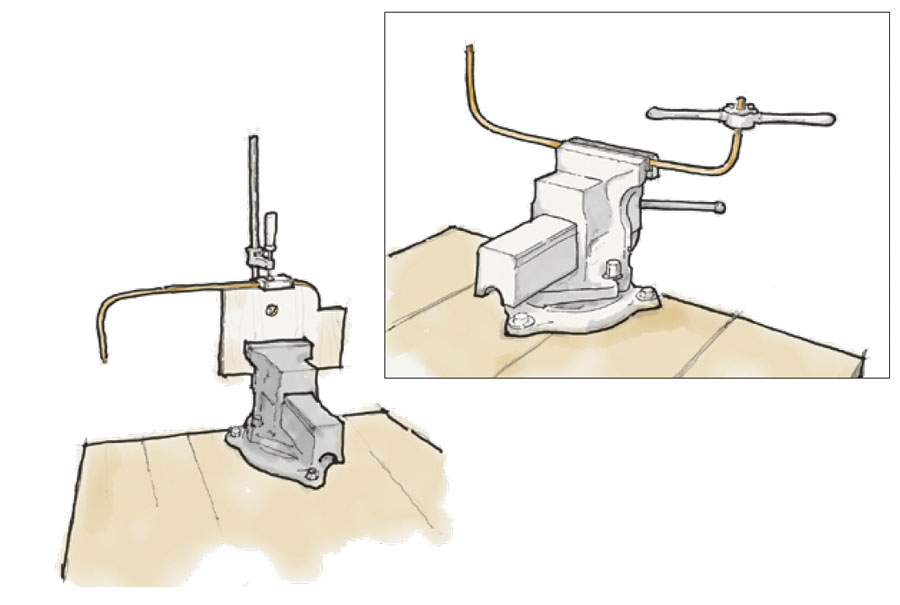
Using the same ice-pick technique I’d employed to make the full-sized drawing on cardboard, I transferred the shape of the traveler’s curved ends to a piece of 3/4″ plywood (see illustration above) that was large enough to be securely clamped in a vise. The radius of the curve just happened to be the same as the bottom of a can of WD-40, so I used that can to guide my drawing—and incorporated a bit of an over-bend to compensate for the springback of the brass rod. I cut the curve into the plywood on a bandsaw, and then bored a 3/8″ hole the depth of the threaded portion of the rod.
A hole bored through the face of the plywood jig allowed a clamping purchase point for a sliding bar clamp to hold the bend until the rod, which has to be heated in order to bend it, has cooled. I clamped the completed bending jig firmly into the vise and made sure the rod slid easily into the 3/8″ hole until it bottomed out. I planned to cut the threads after bending to avoid creating a weak spot during bending.
Safety Tip: Before proceeding to the next step, be sure that your work area has adequate fire protection, that there is a fire extinguisher handy, and that you are wearing welder’s gloves and eye protection.
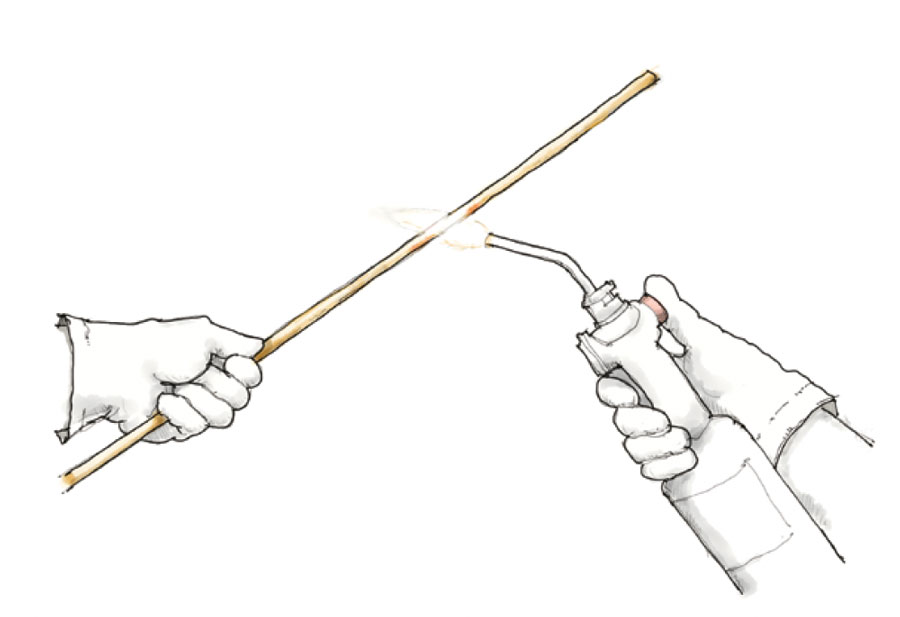
Map-Pro gas burns hotter than propane (3,730 degrees compared to propane’s 3,600 degrees). I used it to heat the rod until the rod slightly changed color. I then inserted the rod into the hole in the jig until it bottomed out, bent the rod over the jig, and clamped it in place.
After the rod had cooled, I bent the other end of the traveler in the same manner as the first one, checking by eye to be sure that both curved ends were in the same plane.
I cut the threads with a common SAE 3/8-16 NC thread-cutting die. (Use a high-quality new one, and not one from the 40-piece tap-and-die set you purchased online for $10.) Brass and bronze are “sticky” metals to cut threads into; I use plenty of cutting oil and cut only a half turn at a time, then back off to break away the curl of cut metal.
After cutting the threads, it was time to add the nuts and washers. While common nuts top and bottom are expedient, a touch of class can be achieved by using brass cap nuts on the upper, visible side of the traveler.
 Isaac Robbins, (inset) shipmodel.com
..
Although there is no hole in the top of the nut, it’s easier than you may think to create one by threading the nut onto a bolt clamped into the vise and tightening the nut until it pops through the thin metal on the “crown” of the nut.
I spun the acorn nuts, crown up, onto the threaded portions of the traveler, then added the two washers and followed with the common nuts. With a bit of polish, the traveler was ready for action. The inset photograph of a model from American Marine Gallery shows such a traveler in position.
Watch the Video to See How It’s Done
More of a visual learner? Watch Greg Rössel and Rich Hilsinger demonstrate the brass traveler-making process in this video.
Greg Rössel is a longtime contributor to WoodenBoat and an instructor at WoodenBoat School.