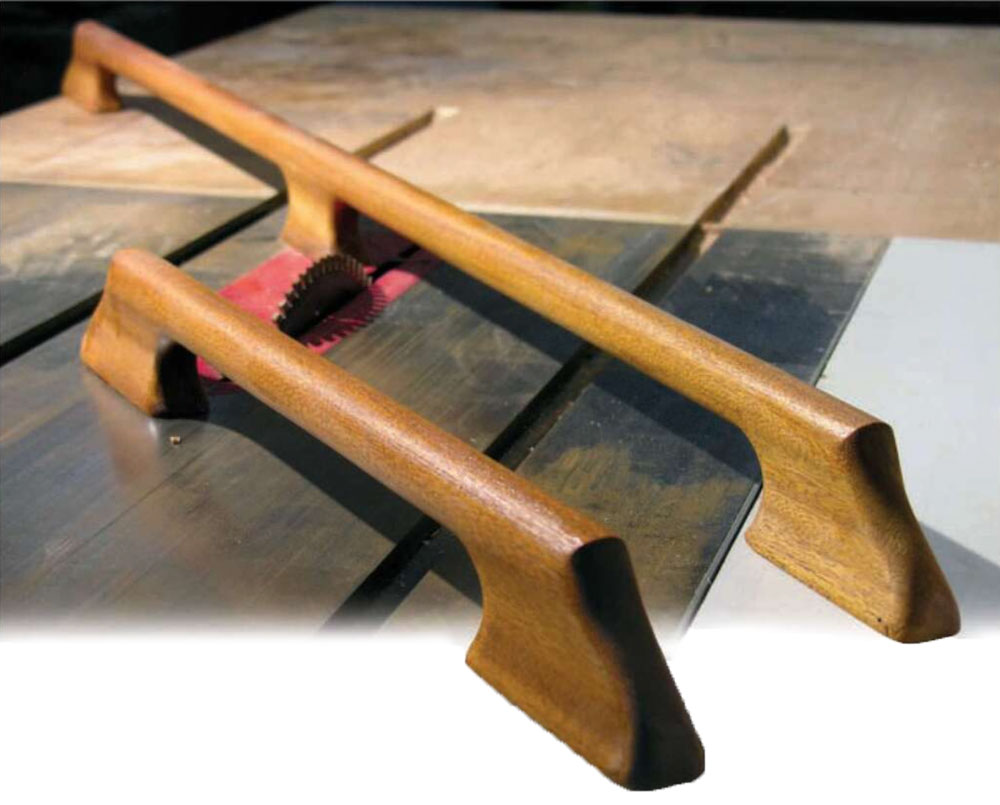
Shortly after I was asked to write an article detailing how to make handrails, I found myself swinging from one handrail to the another on a rough offshore passage late in November 2010, crossing the Gulf Stream in conditions that gave me a renewed appreciation of how vitally important these items can be. These humble pieces of joinery may very well be among the most important pieces on any yacht: They may save your life.
It was the very handrail design shown here that graced the deck of SONNY, the 70′ sloop I was delivering. Not only are these handrails used above deck, they are found throughout the yacht’s interior as well, and in a subtle way they visually join the exterior to the interior. The handrails described here are not your run-of-the-mill, CNC-routed, off-the-shelf version. They are complex as handrails go, but they are also functional, beautiful, and easy to maintain. They are fastened from below, allowing them to be completely prefinished before installation, and they’ll be easy to remove without having to pop out bungs and ruin brightwork.
The light plays off the concave sectional shape and shouldered base, creating a striking bit of detail. These particular handrails will give you a way to dress up what is often a typically ordinary piece of joinery. Alternatively, you may omit the hollowed, tumblehome sections and detailed end profiles if you’d like a more common design.
Making the handrails as described below may take a little more time than the common version, and there will be more hand shaping and sanding involved. But I promise you that they’ll be handsome, and that if they’re well fastened you’ll be able to depend on them just as I did aboard SONNY. So find yourself a nice piece of hardwood, then get after it. When finished you’ll have something to hang on to, and something to look at when they’re not being used.
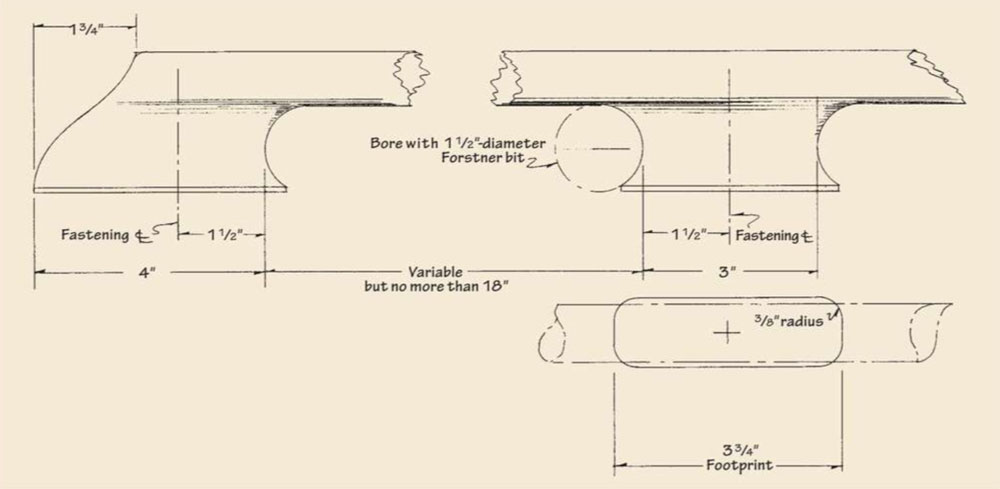
As chief designer for Brooklin Boat Yard, Bob Stephens drew up the signature-style handrails seen here. The making of the rails is detailed on the following pages.
Making Handrails for a Yacht in 12 Steps
1. Begin by milling blanks from clear, straight grained, and durable hardwood such as teak, black locust, or mahogany. Saw them out straight with square corners, 2 7⁄16″ high × 1 1⁄8″ wide, and a bit longer than the desired length. At the same time, mill out any shorter rails you may want for the interior, as well. A few short pieces of stock of the same dimensions as your workpieces are nice to have for testing, so as to not ruin real pieces when determining saw settings.
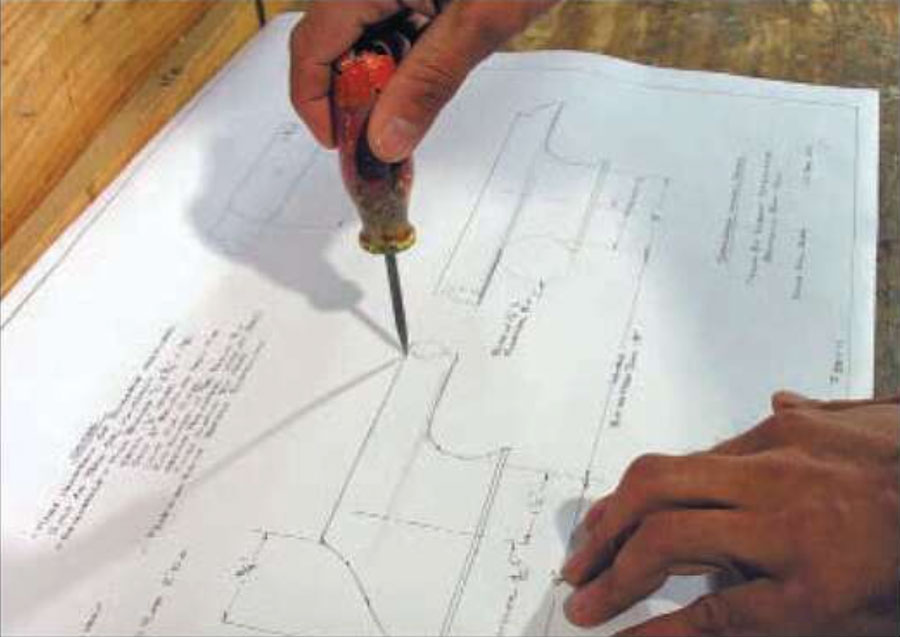
Instead of making separate layouts for the end profiles of each individual rail, make a single layout on a template; this will ensure that the ends are all the same throughout the boat. Here I am using the full-sized drawing to prick through onto a piece of pattern stock to get the proper shape. Connect the resulting dots, cut out the template, and set it aside for the next step.
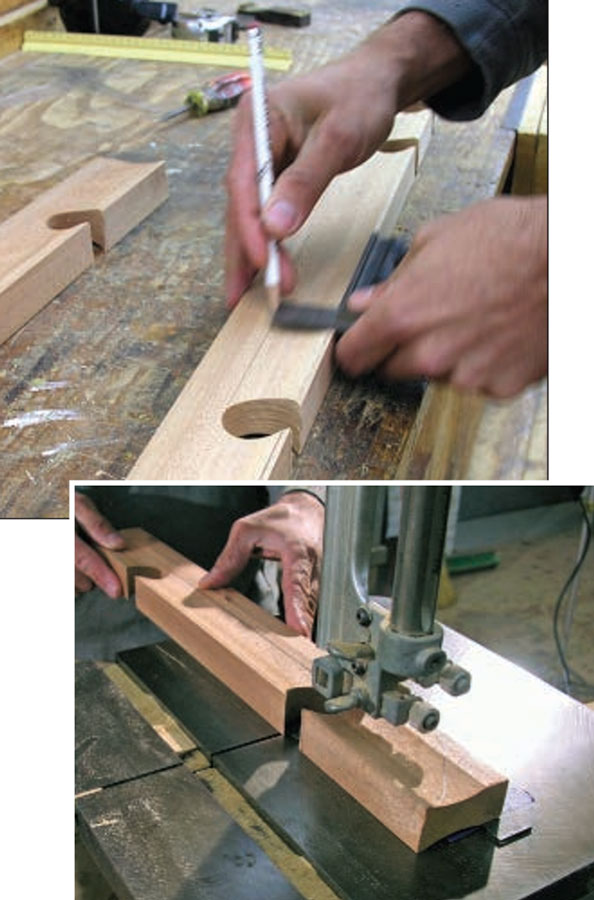
2. Now determine the rail’s finished length and mark its ends with lines squared across the face of your blank. Using the template described in the previous step, trace the end profiles onto each end of each blank. Then lay out the distances between the feet and, referring to the drawing, use a combination square to line out the openings, to locate the centers of the circles whose arcs form the ends of the openings, and to establish the 1⁄8″-high shoulder line at the bottoms of the feet.
Being accurate during this stage of layout is important so your handrails and their openings will be symmetrical. The span between feet shouldn’t exceed 18″.
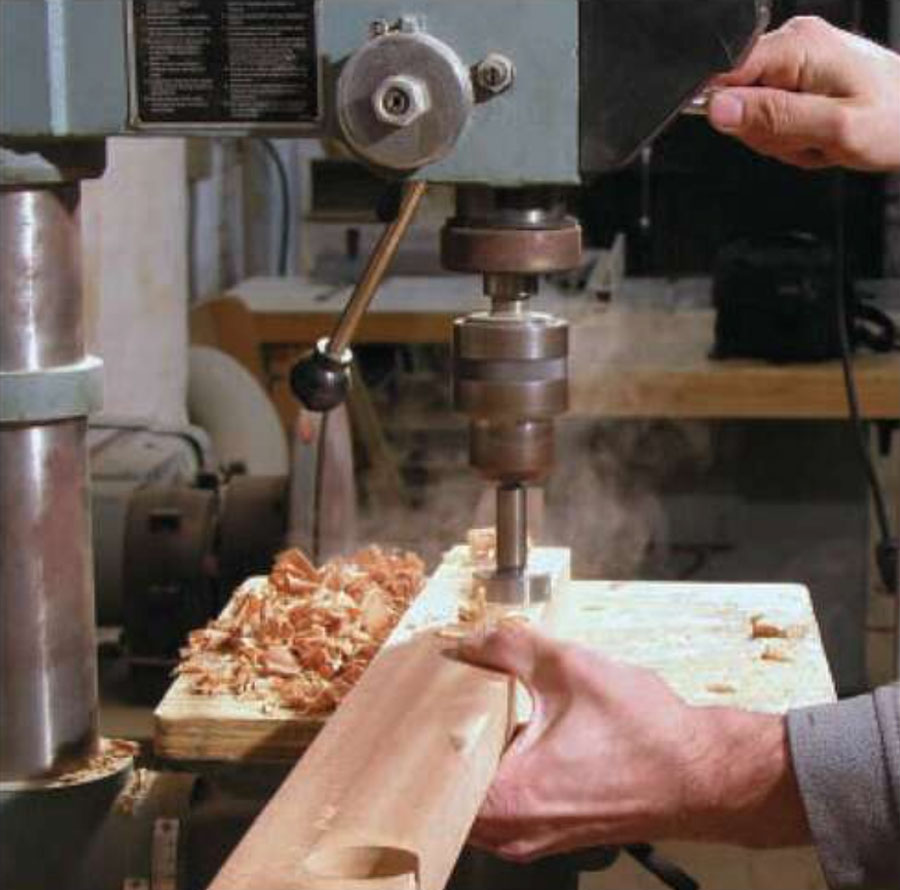
3. The first milling operation is to bore the 11⁄2″ holes that form the ends of the handrail openings. Do this while the rails are still square, and use a drill press for this, if possible, to maintain nice, square cuts. A Forstner bit works well because it makes a controlled, clean cut. Go slowly, keep clearing away the shavings, and bore into a good backing pad, as these precautions will help prevent tearing out the back side of the cut.
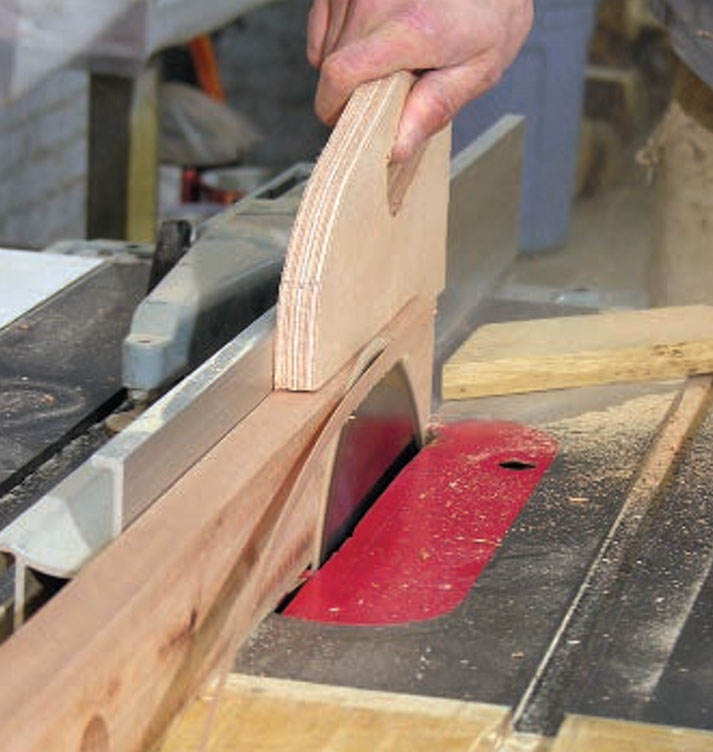
4. Now it’s time to begin cutting the rail’s sectional shape. Set the tablesaw to rip each face to a 3-degree bevel. When working with the blade tilted towards the fence, be sure to stand out of the path of possible kickback. Hold the rail firmly against the table on the second pass; the already-beveled face must not bear against the fence, though the small unbeveled shoulder at the base should be tight to it. The resulting subtle taper (or “tumblehome”) gives the rail a refined look and is the first step toward producing a real hand-made piece.
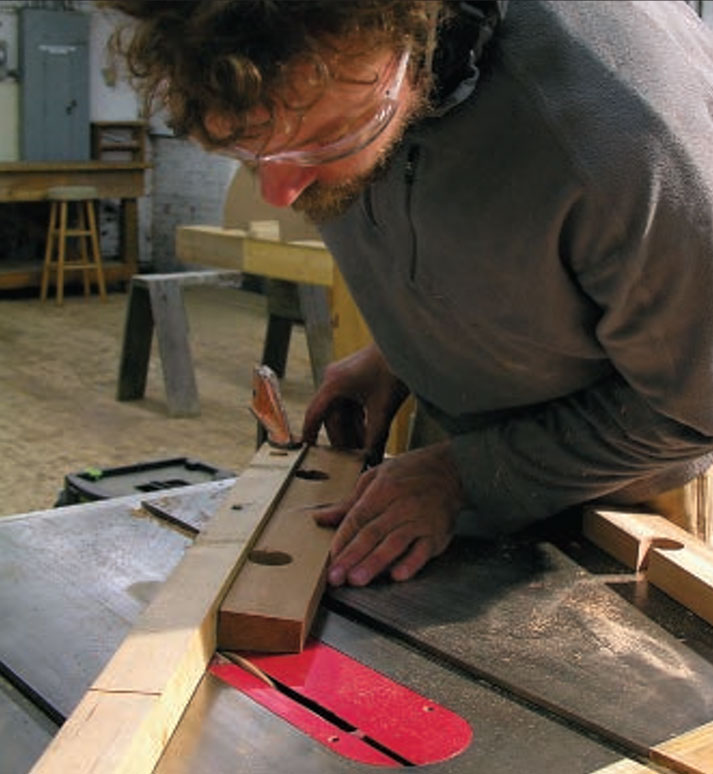
5. The broad shallow cove, or hollow, that gives the handrail its elegant sectional shape is made by passing each face diagonally across a tablesaw blade that’s set very shallow. Getting the fence (a wooden straightedge clamped to the table) at the correct angle will take a few tries, so use a test piece of the same cross section as your blank to get the correct setup. I could give you the exact angle I used here, but you’ll find that the proper setup is best achieved by studying the photograph and making a few test passes.
With the blade not tilted at all and set only 1⁄8″ above the table, set your angled fence at a distance from the blade that will have the bottom of the cove terminate just where the drawing shows, leaving a 1⁄8″ uncut shoulder at the bases of the feet. “Sneak up on it,” I like to say. The proper setting here saves a lot of handwork later.
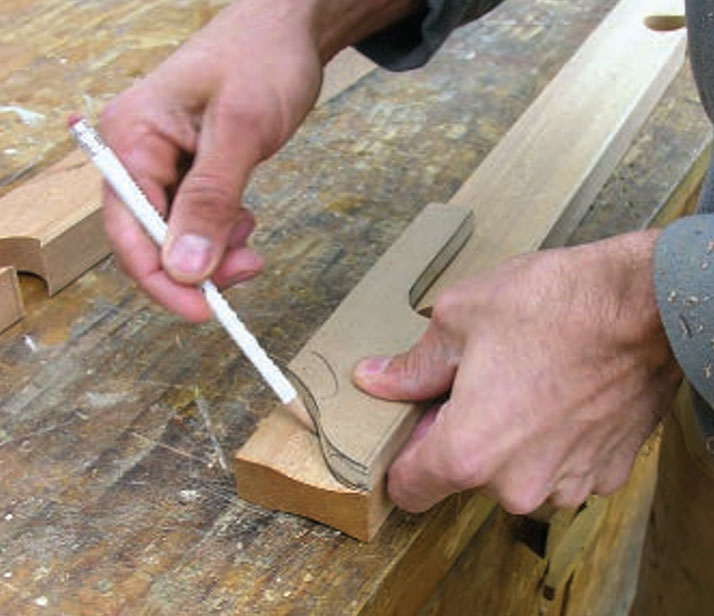
6. The previous steps eliminated some important layout lines, and these must be redrawn. So dig out the template you made in step one, carefully align it with the remnants of the end profile layout, and rescribe this curve.
7. Once the cove is cut on each face of each handrail, the next step is to cut out the openings and end profiles. I lay out the cut lines for the openings on both faces, using a combination square to connect the tops of each pair of 1½” holes that we bored in step 3.
Whether you use a jigsaw or a bandsaw to cut these out, you will be off-square by 3 degrees unless you compensate for the bevel you cut in step No. 4. As you can see, I taped the rule of a combination square to the table to create a shim, as this handily compensated for the bevel. You could also tilt the table 3 degrees.
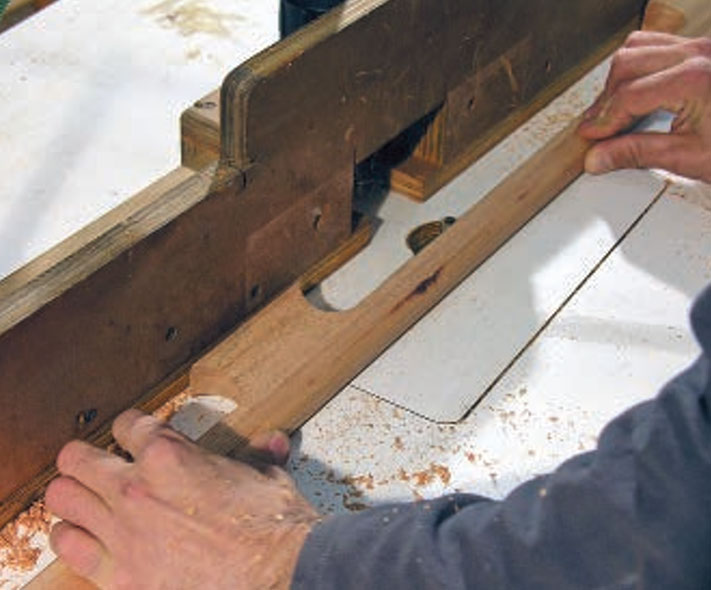
8. A 3⁄8″ round-over bit with a guide bearing is set up on a router table to run around each opening. (Holding the router freehand is impossible on such a delicate piece with tight radii; you really need to use a router table.) The fence shown here is kept far enough from the piece to not interfere with shaping, but close enough for its built-in vacuum hose to remove dust and chips.
The router won’t completely cut a radius across the hollow sections at each foot; those areas will require hand-shaping.
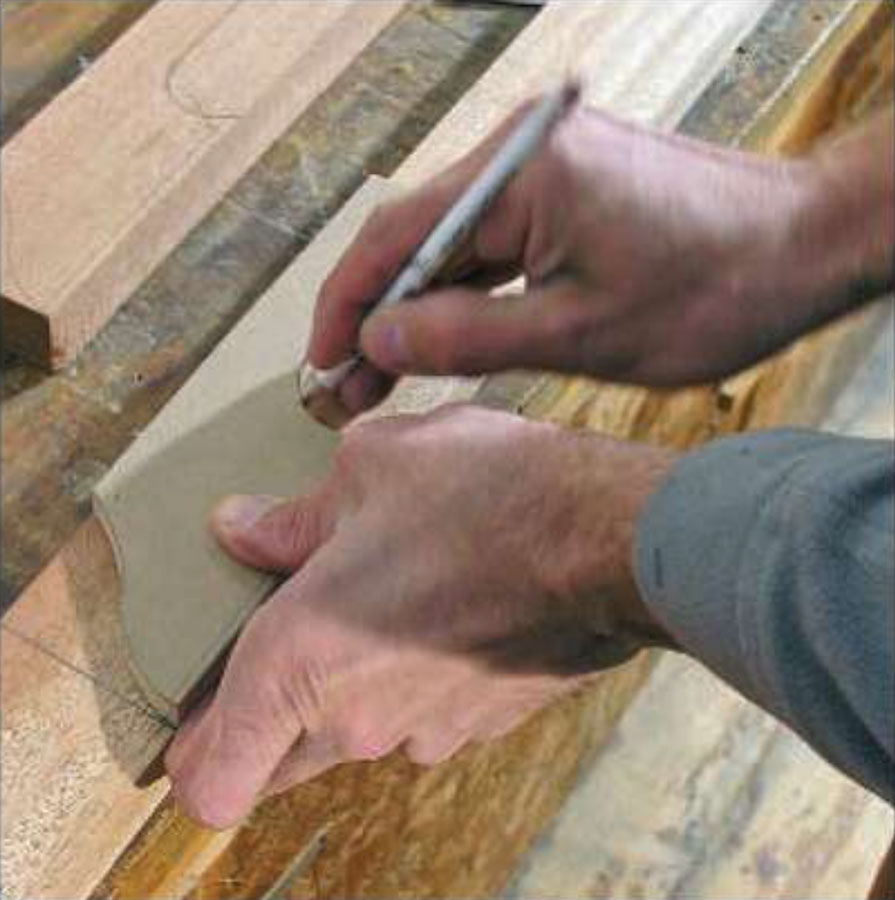
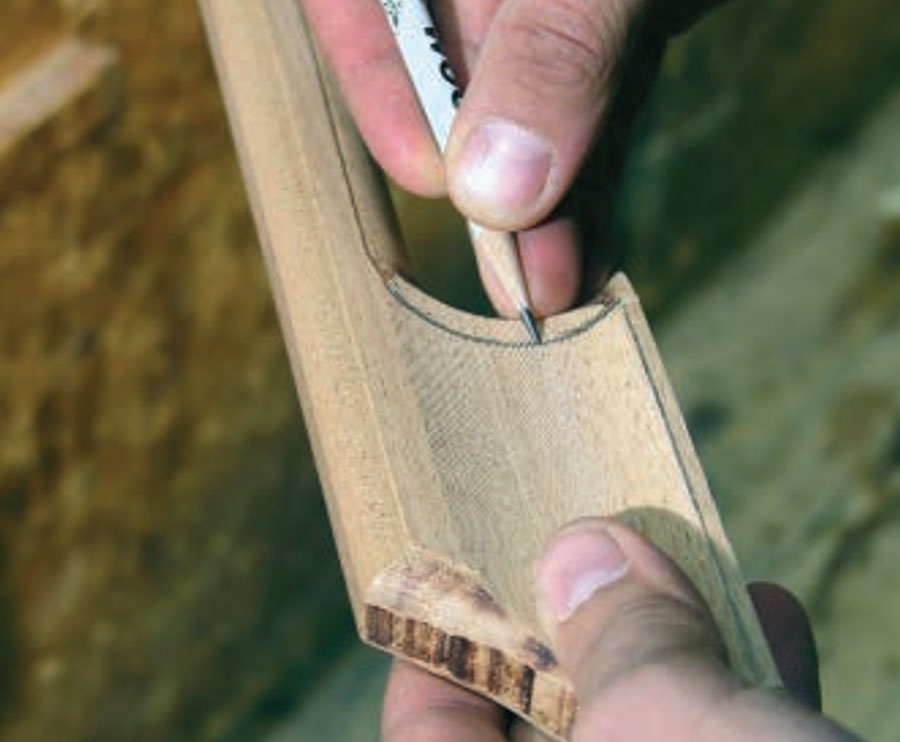
9. To complete the rounding-over by hand, I draw layout lines in each hollow by simply using my finger to guide the pencil and connecting the resulting arc to the already-profiled area. Quick layout lines such as these are key to keeping a constant round-over, giving you fair, sweet lines to rasp and shape to.
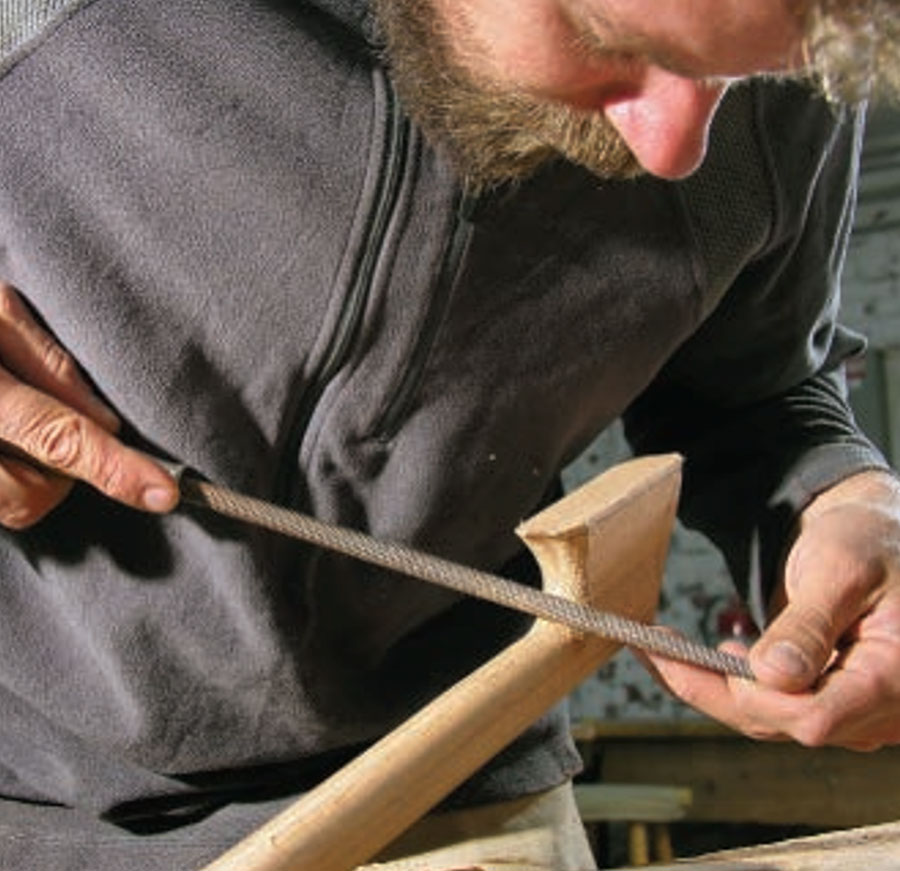
10. Rough-shaping starts with a round rasp. Clamping the piece in a padded vise is helpful; you can also clamp the rail across the corner of a bench. I usually start by completing the radius in the hollowed areas. Again, it is important here to take your time and to “sneak up on it.” One or two passes with too much pressure can drastically change the shape of the cove at these tight radii.
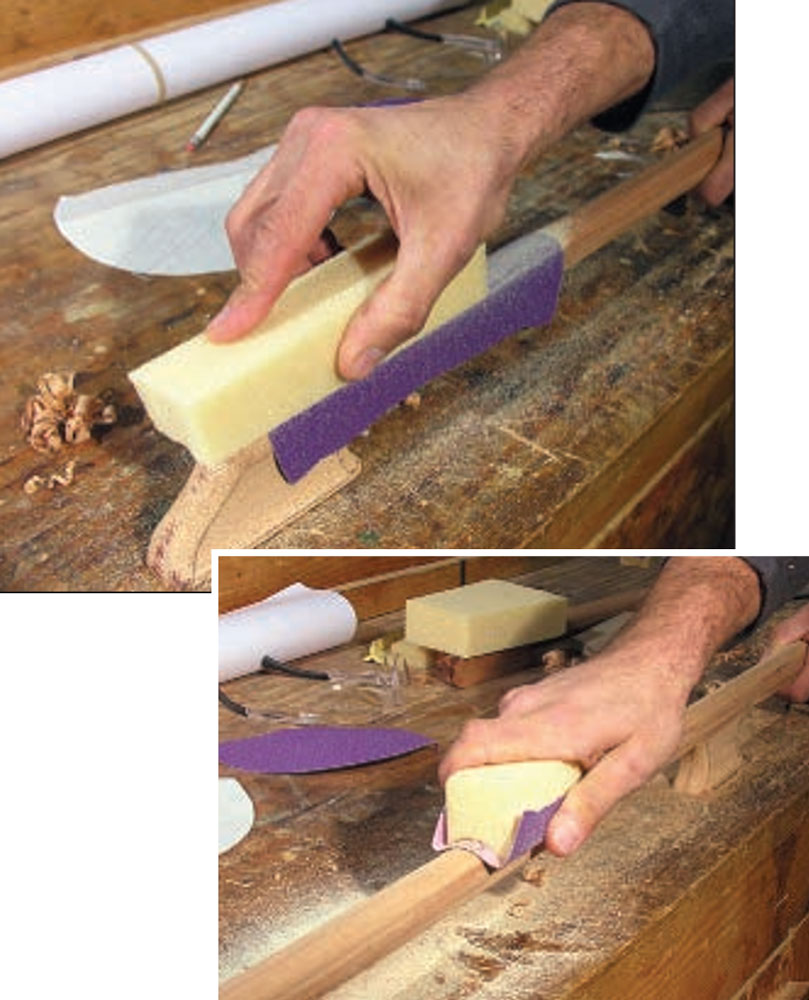
11. After using a block plane to take off any hard edges left by the router and to trim the grip as close to round as I can, I finish shaping the rails with sandpaper wrapped in a custom foam sanding block. These blocks are easy to create and are key to keeping the shape of long, radiused pieces of joinery consistently fair as you sand them.
Once a short section of the grip feels fair after trimming with the plane, I use it to shape a foam sanding block. Wrap a piece of sticky-backed sandpaper around this section and rub a foam block back and forth across it. This gives a perfect foam-block negative of the desired radius to which I can then stick sandpaper. With 60-grit sandpaper, I use this foam block to shape the rest of this rail as well as the remaining ones.
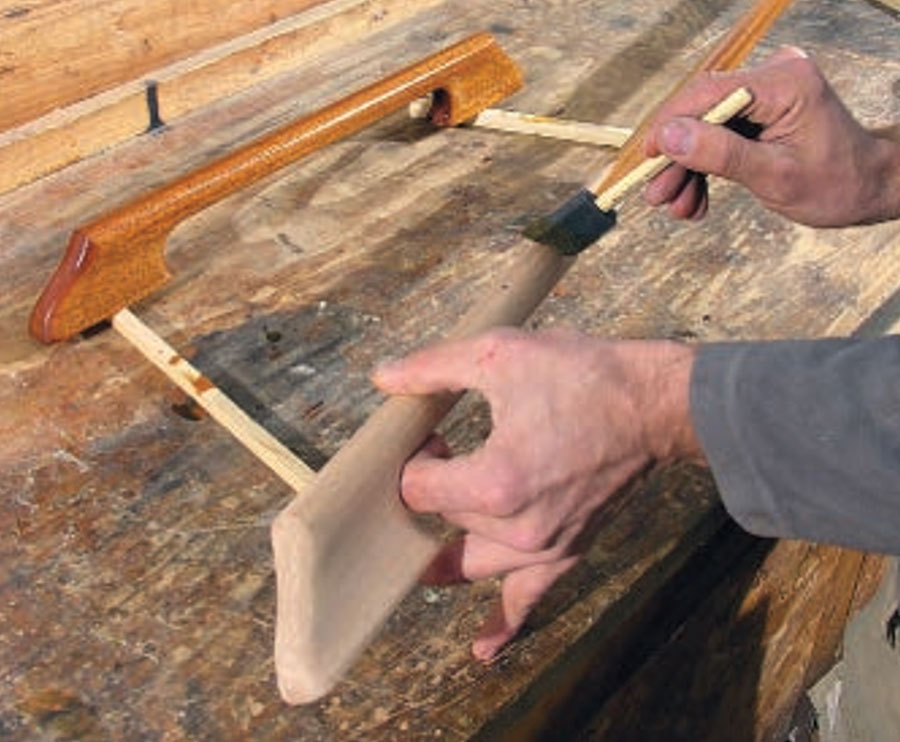
12. Once the overall shaping is complete, you can begin working through the finer grits, finishing with 120 before sealing. The shadows from bright lights played across the rails will help you to see unfair spots or crossgrain scratches. When you feel you are ready, get out the varnish brush and seal them completely, feet and all. When that coat dries, inspect the rails and sand out any flaws before building up your varnish coats. Chances are, if you’ve taken your time, the rails are going to look incredible and you’ll be eager to get them finished and mounted.
Installing Yacht Handrails
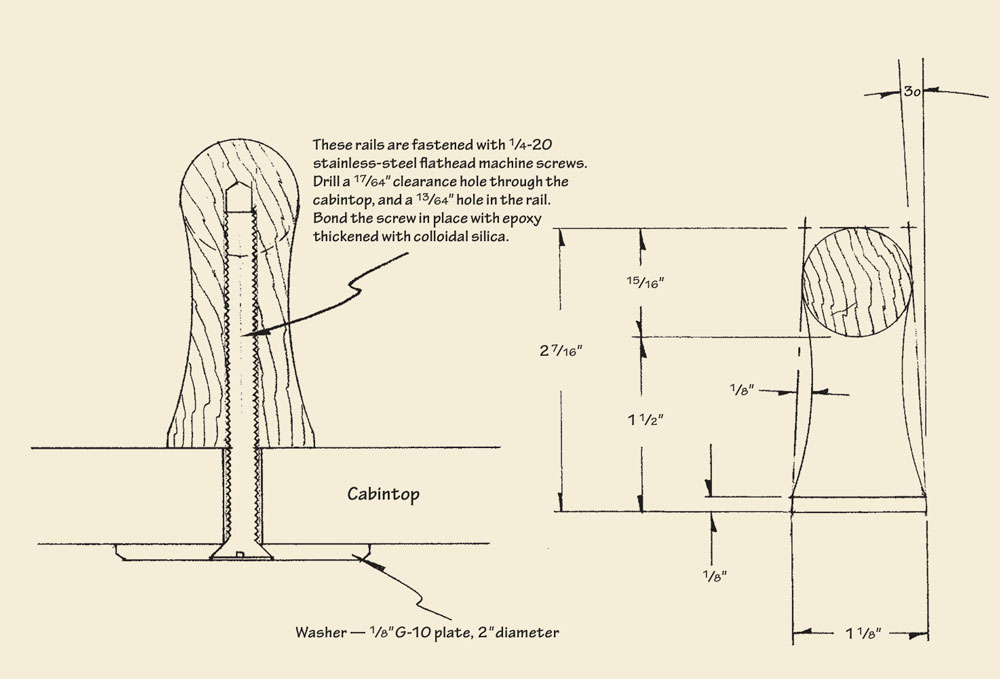
These handrails can be fastened in one of two different ways. The “feet” of a yacht’s handrails traditionally have been fastened from above, through the cabintop and into the underlying deck beams with large wood screws. Many modern boats have a cabintop that is laminated of solid plywood or constructed of a cored panel with no beams, and solid blocking where the handrails are located. In these cases, handrails can be fastened from below with machine screws set in epoxy. This is a very common way that not only allows the builder to prefinish the rails before installing them, but also to remove them without picking out a bung from the varnished rails and ruining their finish.
Eric Blake is a boatbuilder at Brooklin Boat Yard and an instructor at WoodenBoat School. This article was originally published in WoodenBoat #220.
