 JOSEPH ANTINUCCI
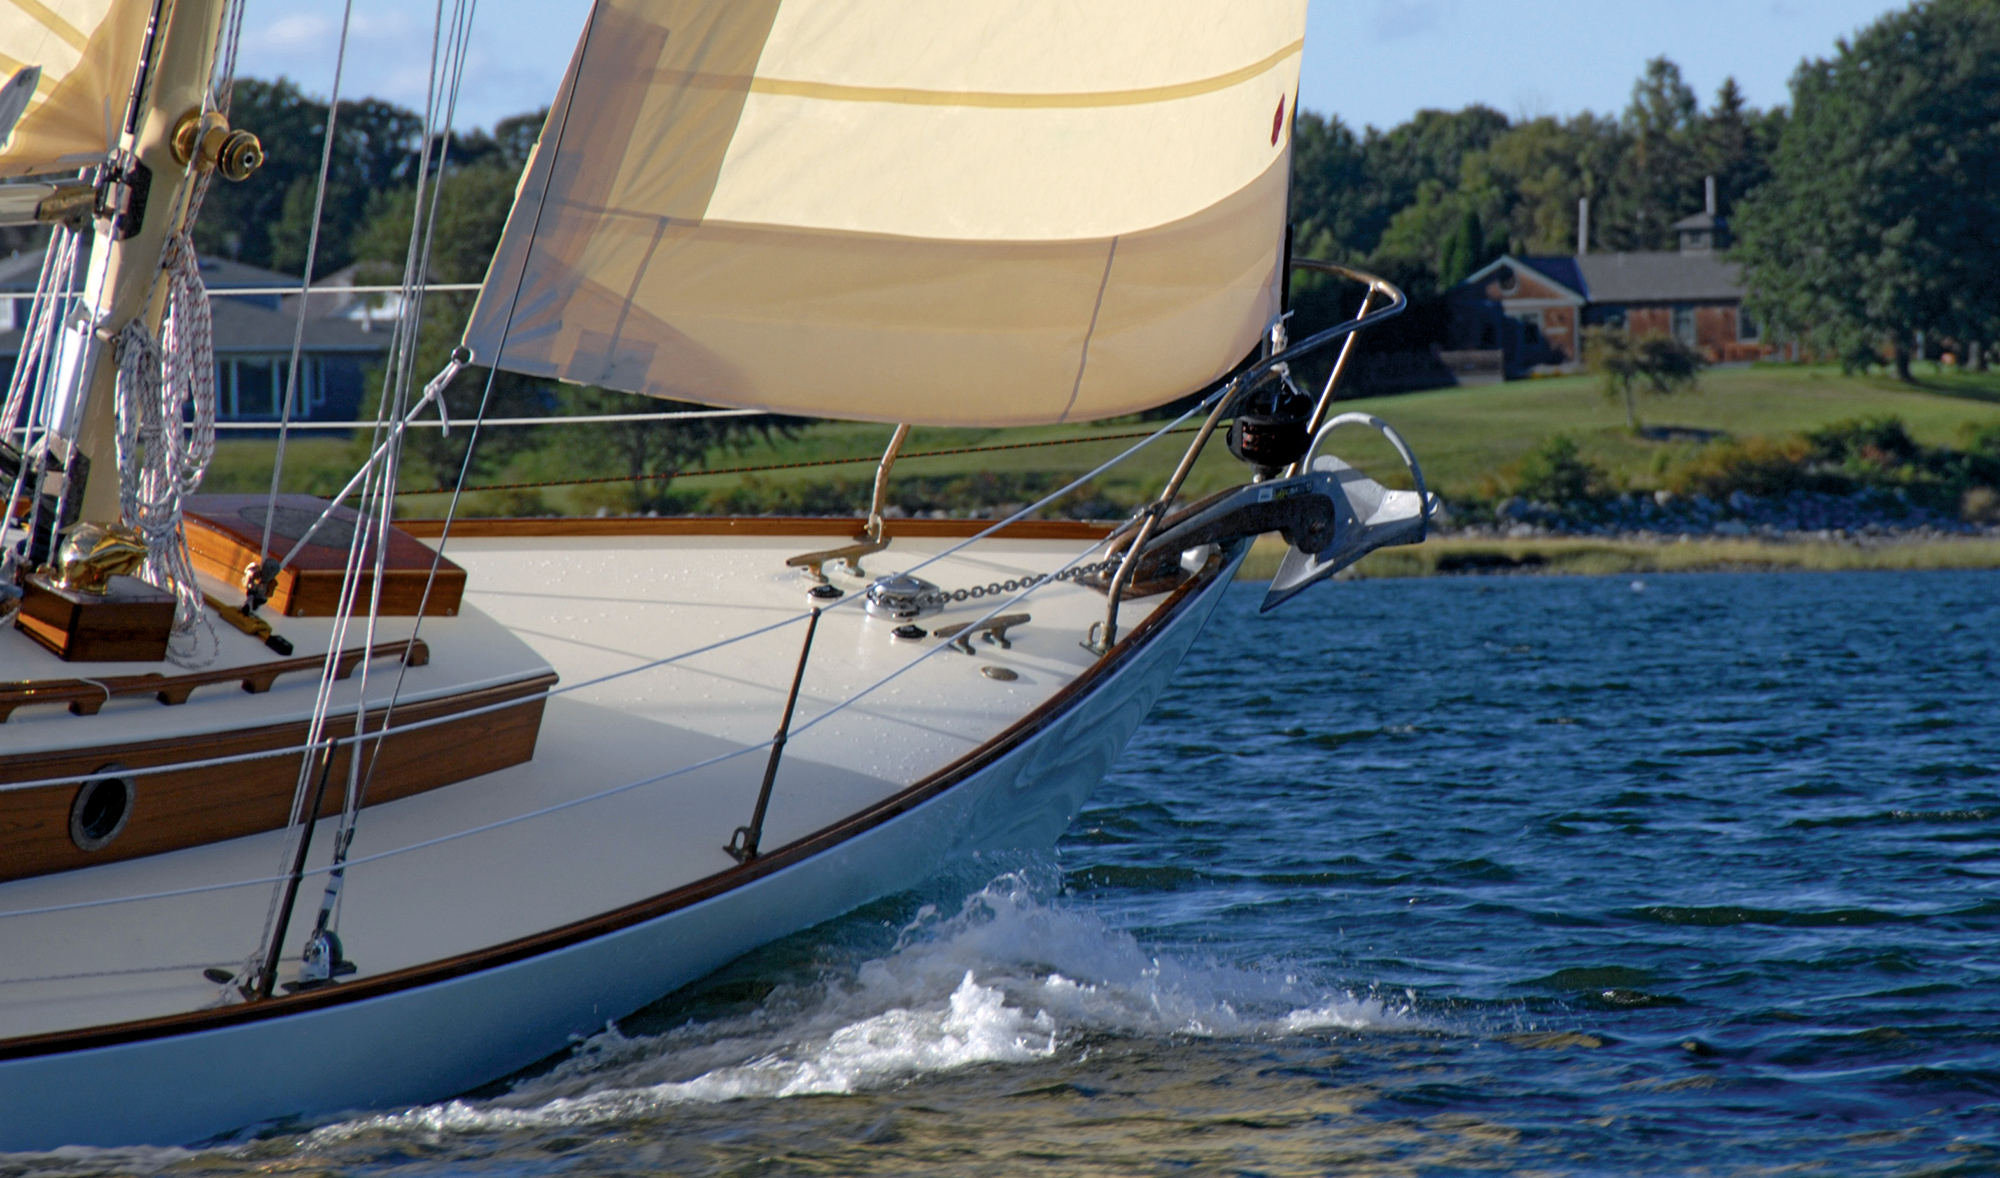
The crisp, clean look of a well-finished deck is as much about function as it is about aesthetics. Like the Alerion 26 described in this article, this Nathanael Greene Herreshoff–designed Newport 29, built by the author, has a plywood deck sheathed in fiberglass cloth set in epoxy, providing a durable, stable surface, with nonskid compound added for sure footing.
How boat decks should be built is the subject of ongoing debates. What are the forces driving the decisions regarding methods and materials? If a boat’s hull is traditionally built, should it have a traditional laid deck? If so, is it to be laid teak, or quarter-sawn pine covered with canvas and painted? If the hull is cold-molded, should the boat have a “modern” deck built of plywood ’glassed over? Should it have a teak overlay?
We could all sit around drinking beers and discussing which method is best. There is no debate, though, that once the decision has been made to use plywood, the deck must be sheathed in some way. These days, even those doing traditional boat restorations often choose plywood decks for a number of reasons, among them the prevention of freshwater leaks into the deck structure and the structural stiffness that a plywood deck can add to a hull.
Here, we’re showing the process that I’ve come to prefer over the years and the one we use most often in my shop. For this Nathanael G. Herreshoff–designed Alerion 26, redesigned by Halsey Herreshoff as a fullkeel boat instead of a centerboarder, the deck is built of two layers of plywood, the first 3⁄8″ and the second 1⁄4″ epoxy-glued over the first. After the preparation work is completed, the deck is covered with 8-oz fiberglass cloth set in epoxy.
Preparation
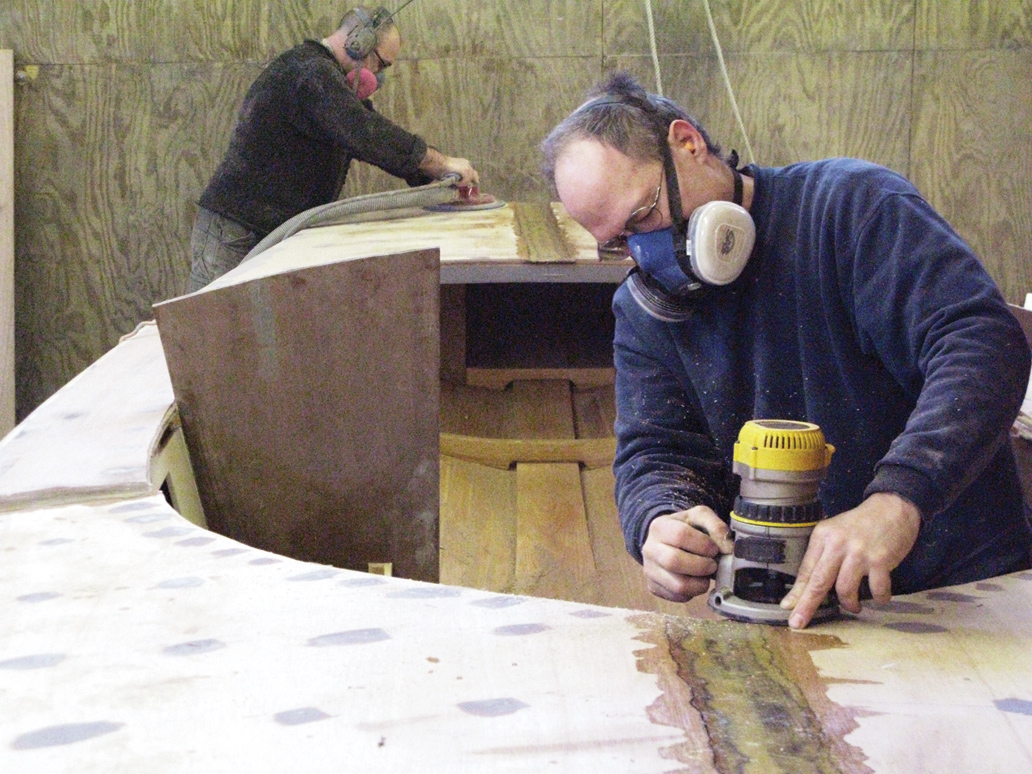
Step 1: Installing the plywood is straightforward, using epoxy between the layers and silicon-bronze screws to fasten the panels to the deckbeams, carlins, and the sheer clamp. After the deck is installed, the screw heads are filled over with epoxy putty, and butt joints are filled with epoxy, Ted Gaebler (left) sands and fairs the deck with a large disc sander. In the foreground, Bill Longley is using a router with a flush-trimming bit to cut the edge of the plywood flush to the cabin carlin.
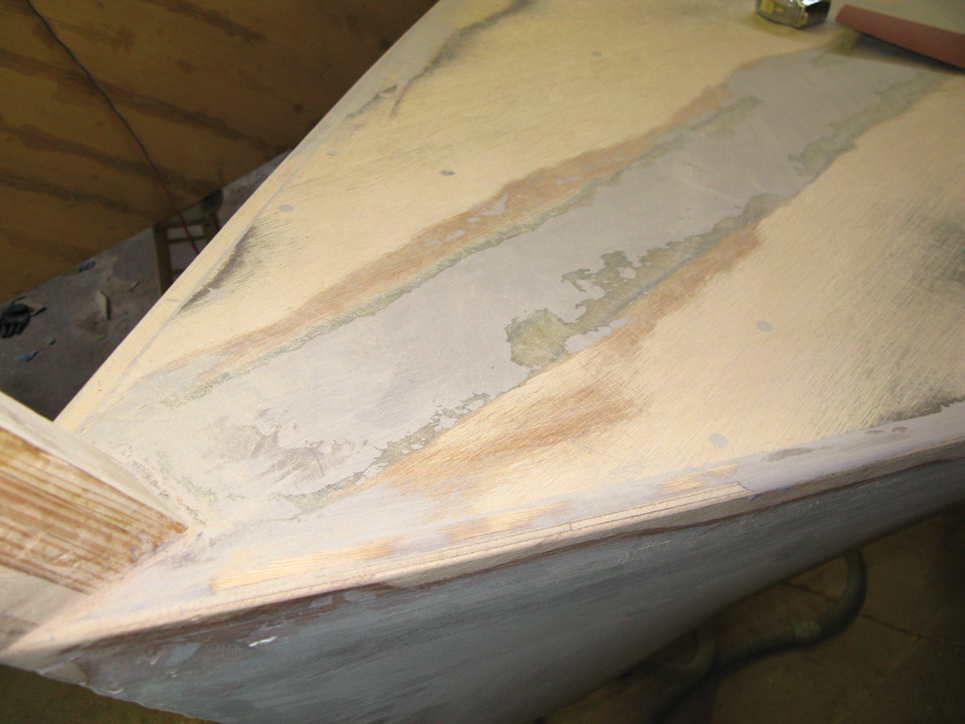
Step 2: The butt joint on the centerline of the foredeck is one of several plywood joints to be filled with epoxy fairing compound and then sanded, making the deck ready to dry-fit with fiberglass cloth.
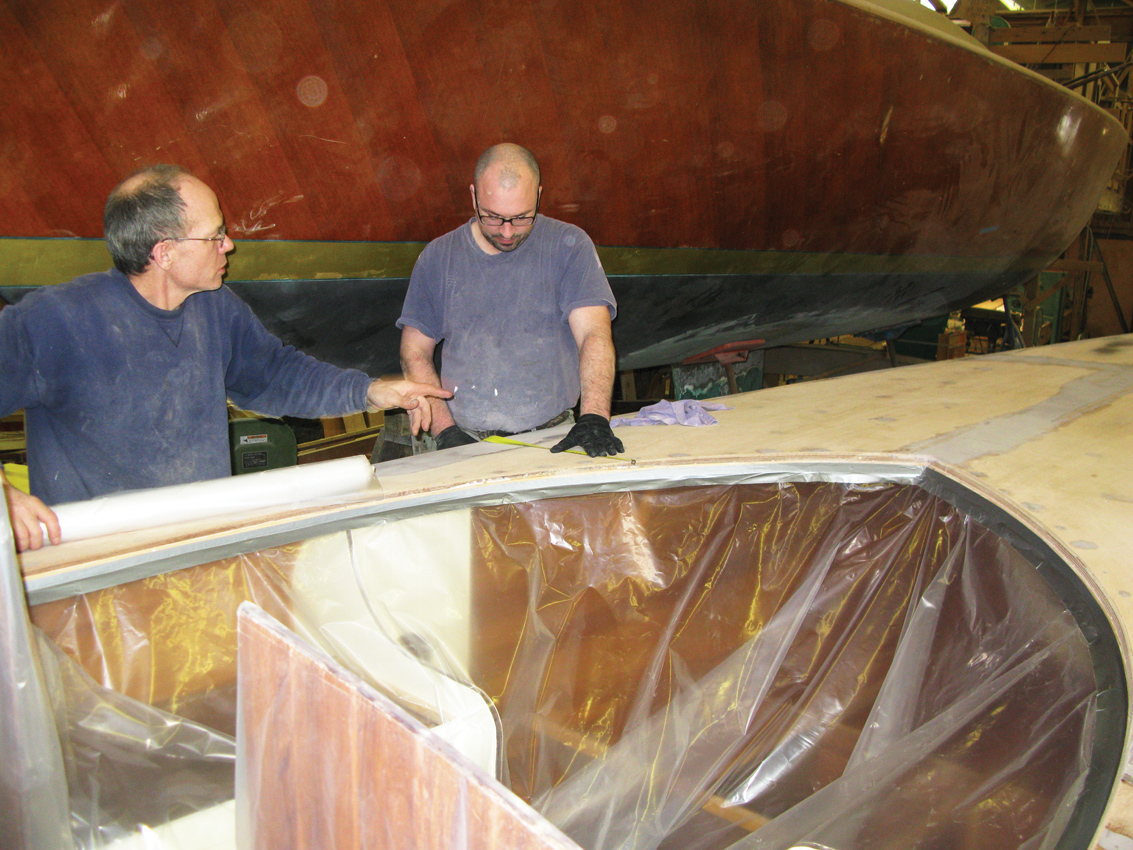
Step 3: Ted and Bill puzzle out the fits of 4′-wide lengths of 8-oz fiberglass cloth. Plastic sheeting taped inside the carlins keeps epoxy resin from dripping on the largely finished interior. The hull also has been covered so no resin drips mar the topsides.
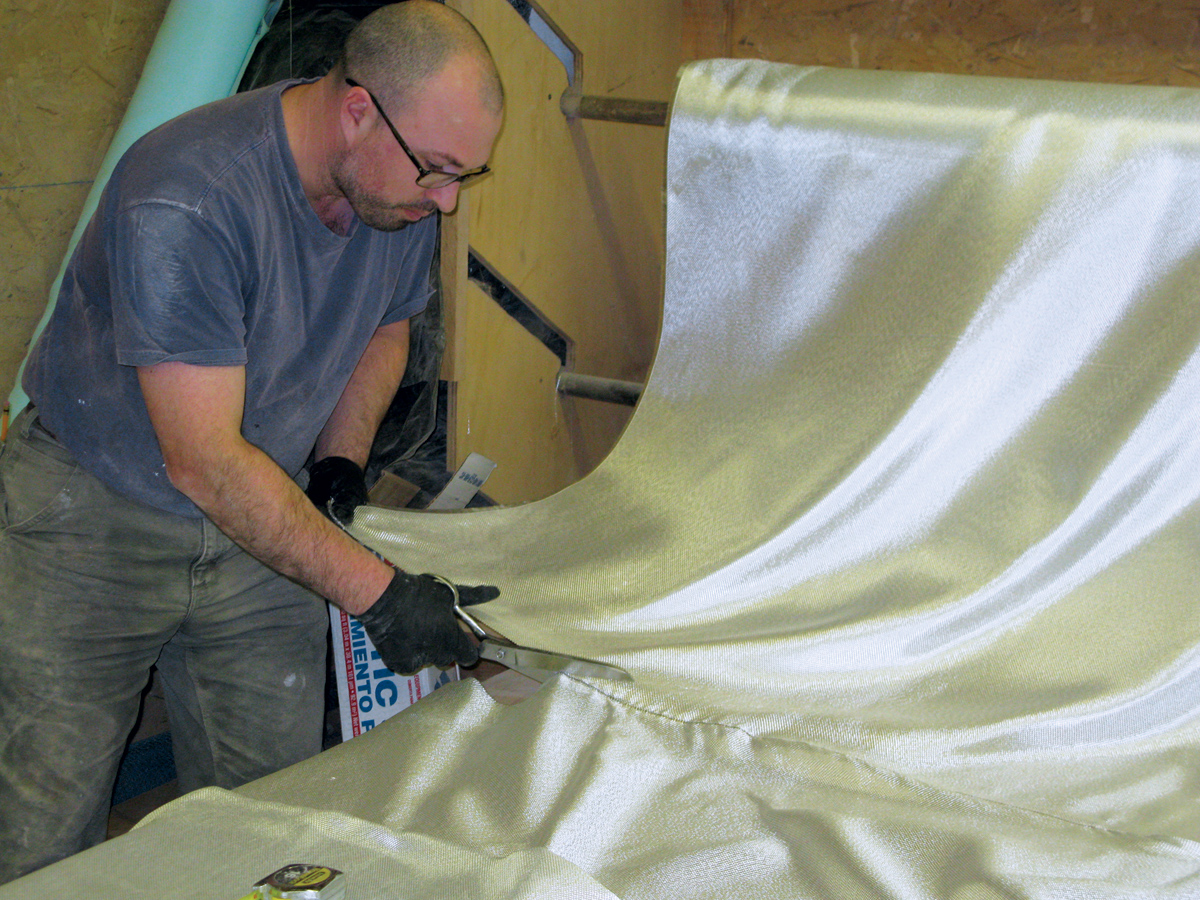
Step 4: Ted has pulled a string out of the fiberglass cloth to provide a line for a straight and square cut.
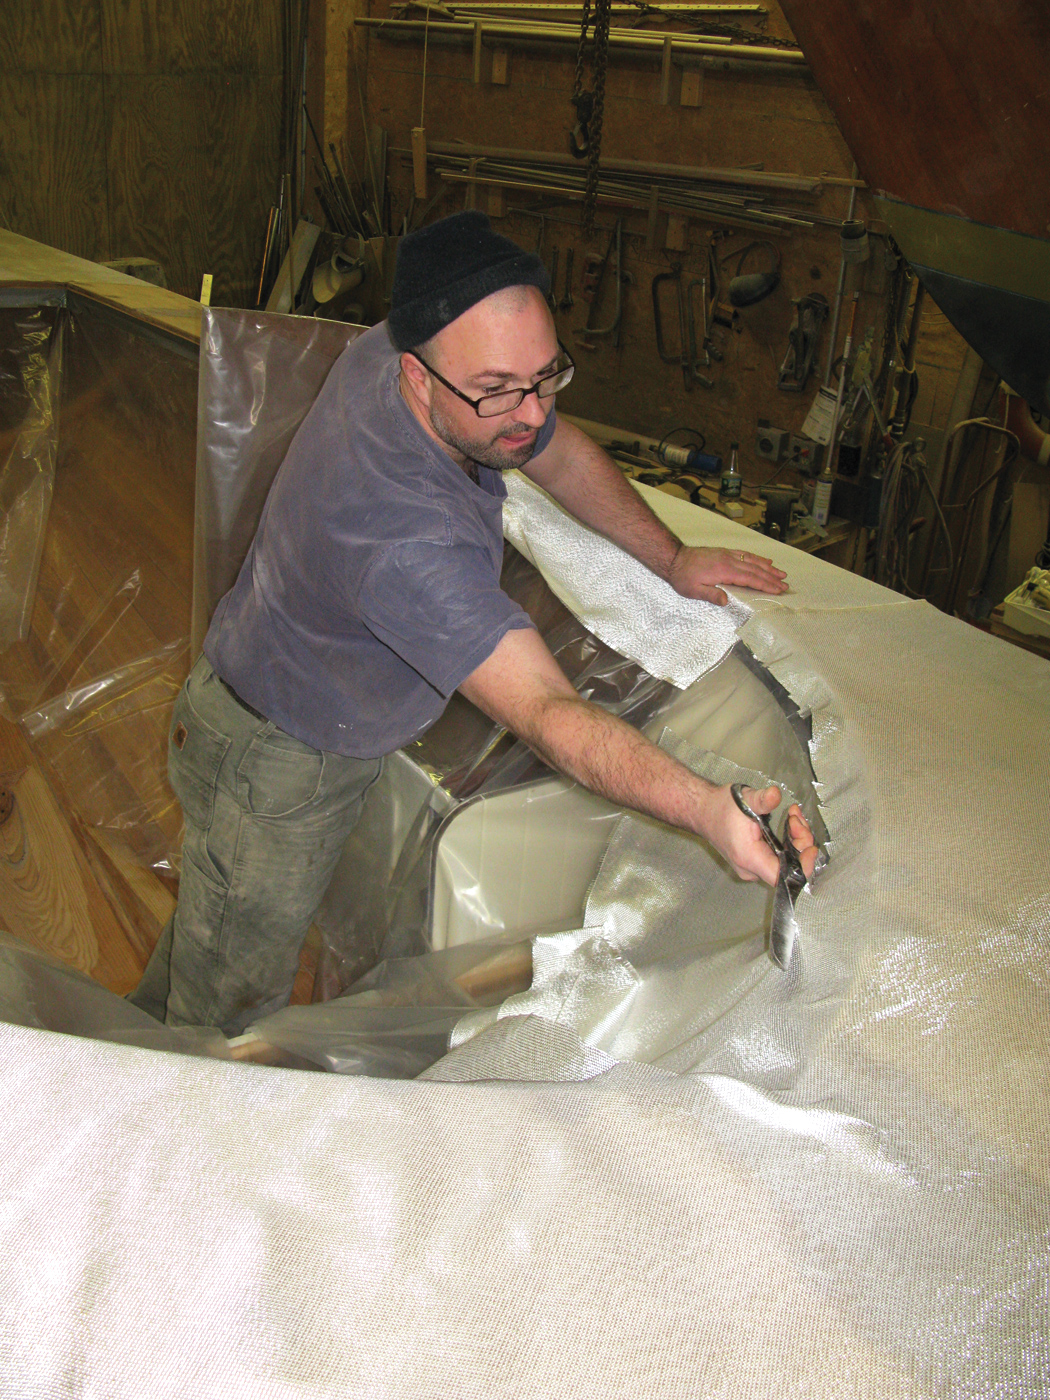
Step 5: Ted trims the fiberglass cloth to fit the perimeter openings of the cabin. The triangular piece resulting from the cut is used to make up the last piece needed on the foredeck, near the stem. All excess fiberglass cloth is rough-cut at this point, but the final, careful trim comes after the wet-out has been completed yet before the epoxy has fully cured.
Applying Epoxy
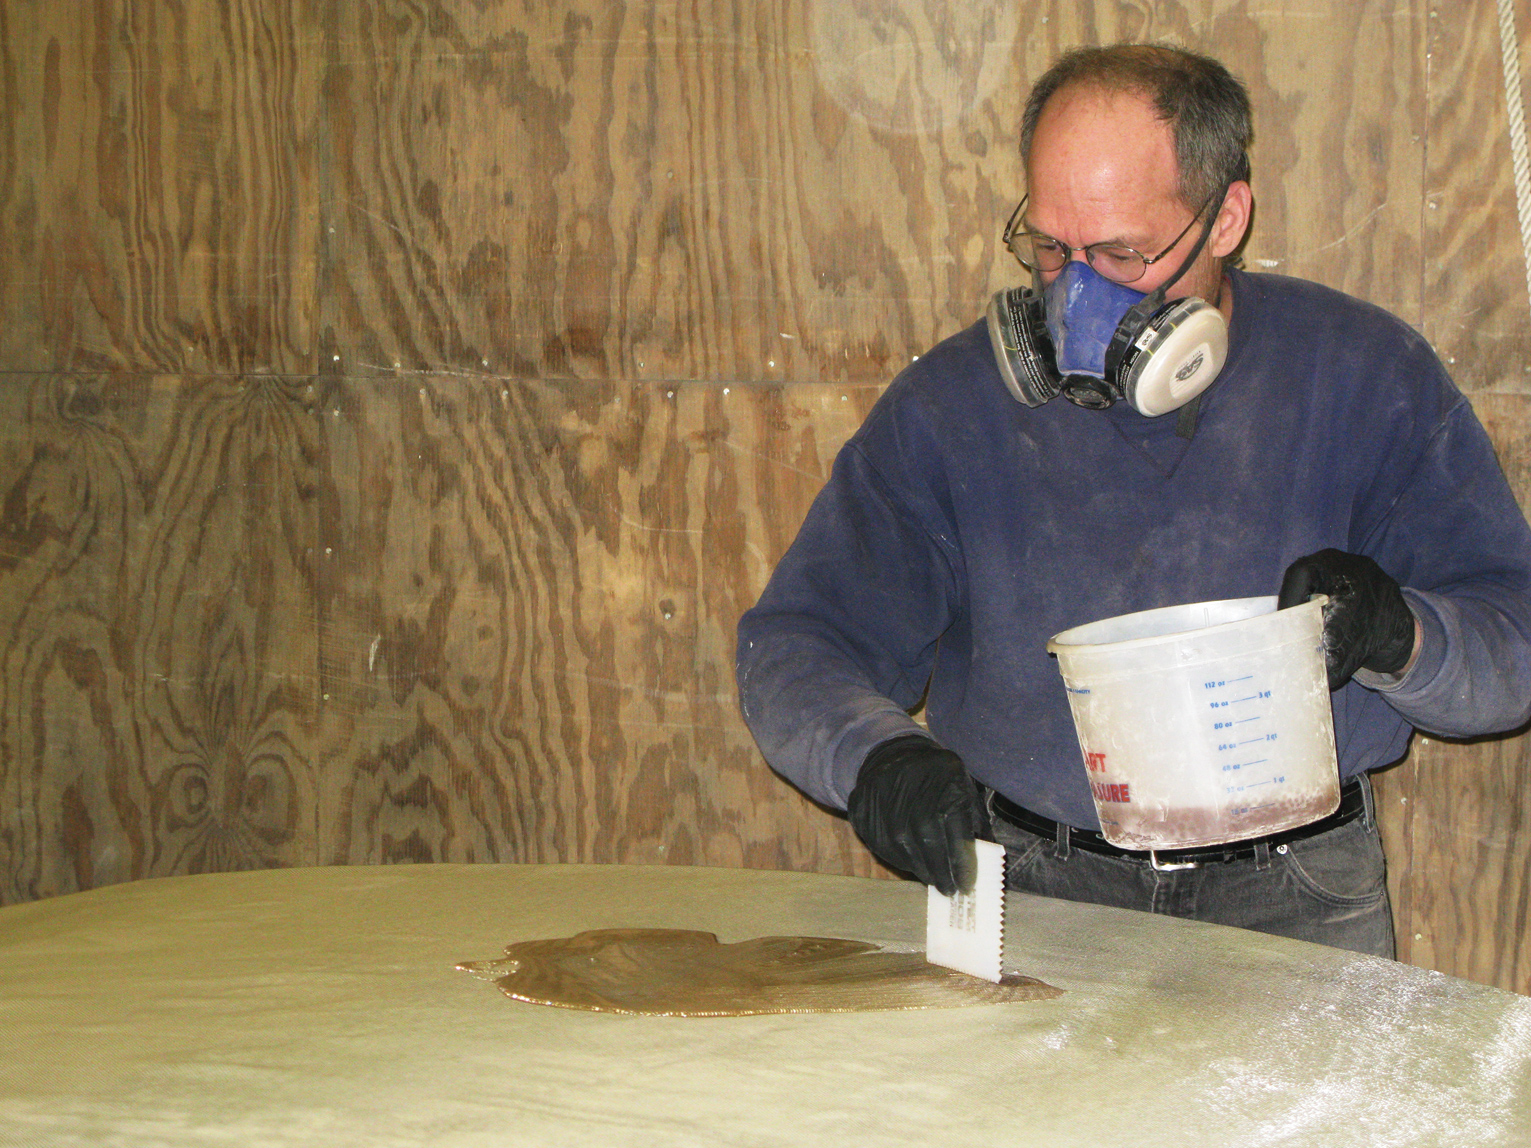
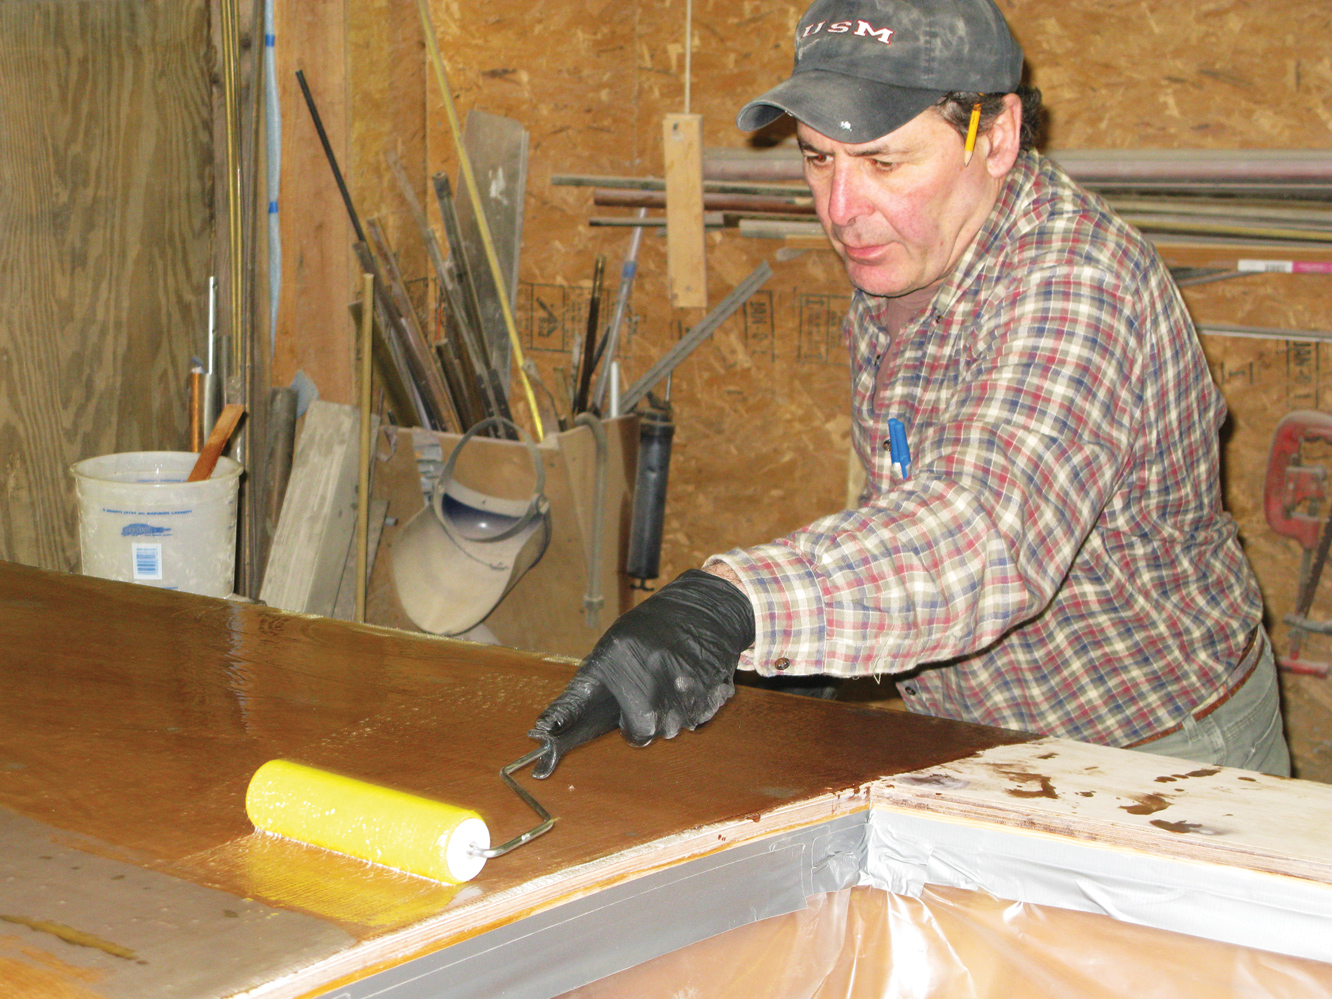
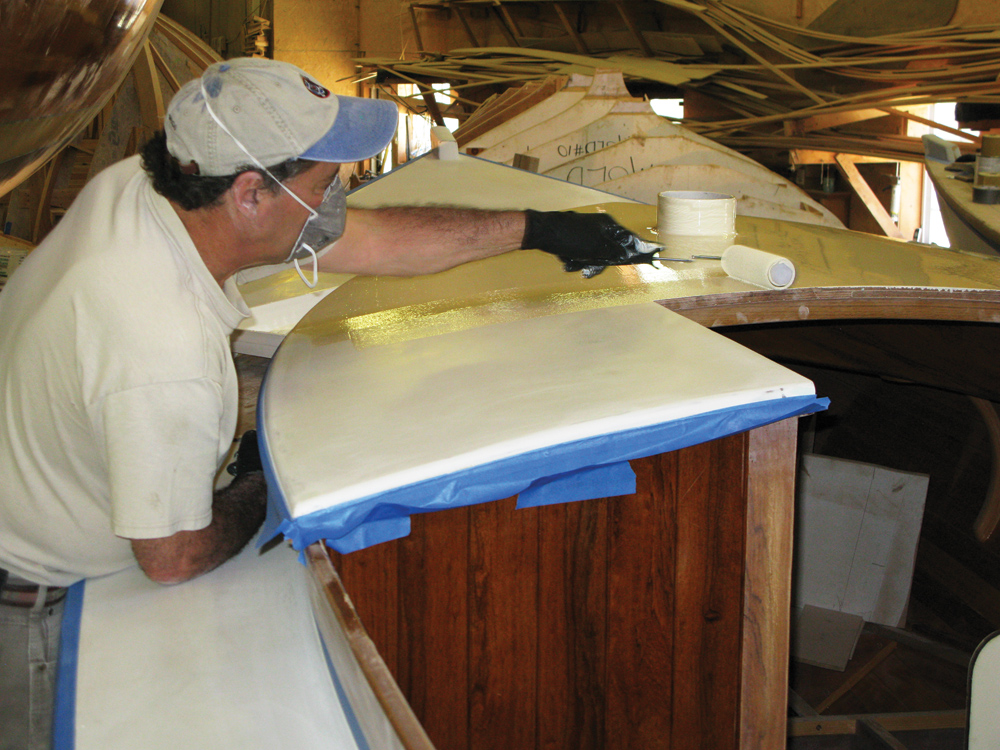
Step 6: After all the fiberglass cloth has been cut to fit, Bill starts to wet-out the cloth, filling its weave with epoxy resin. It’s best to start pouring at the center of a given area and work out toward its edges. Using slow-cure epoxy, a mix of about a pint provides enough resin to make good progress without being unwieldy.
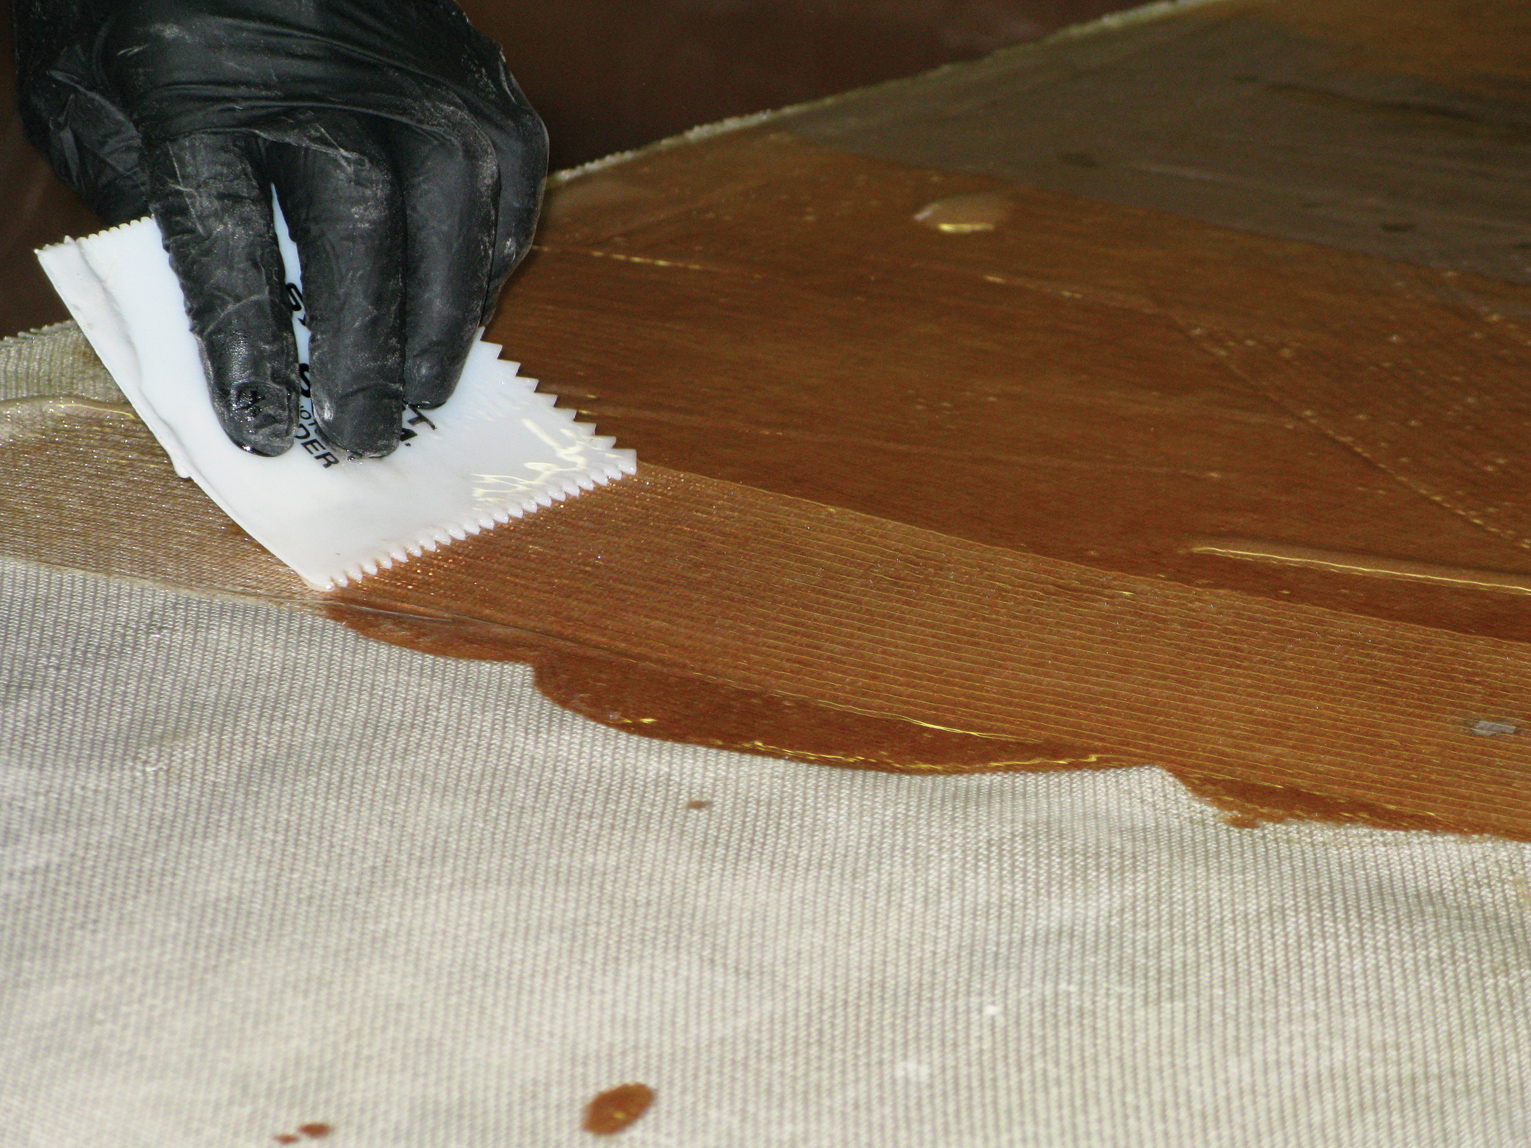
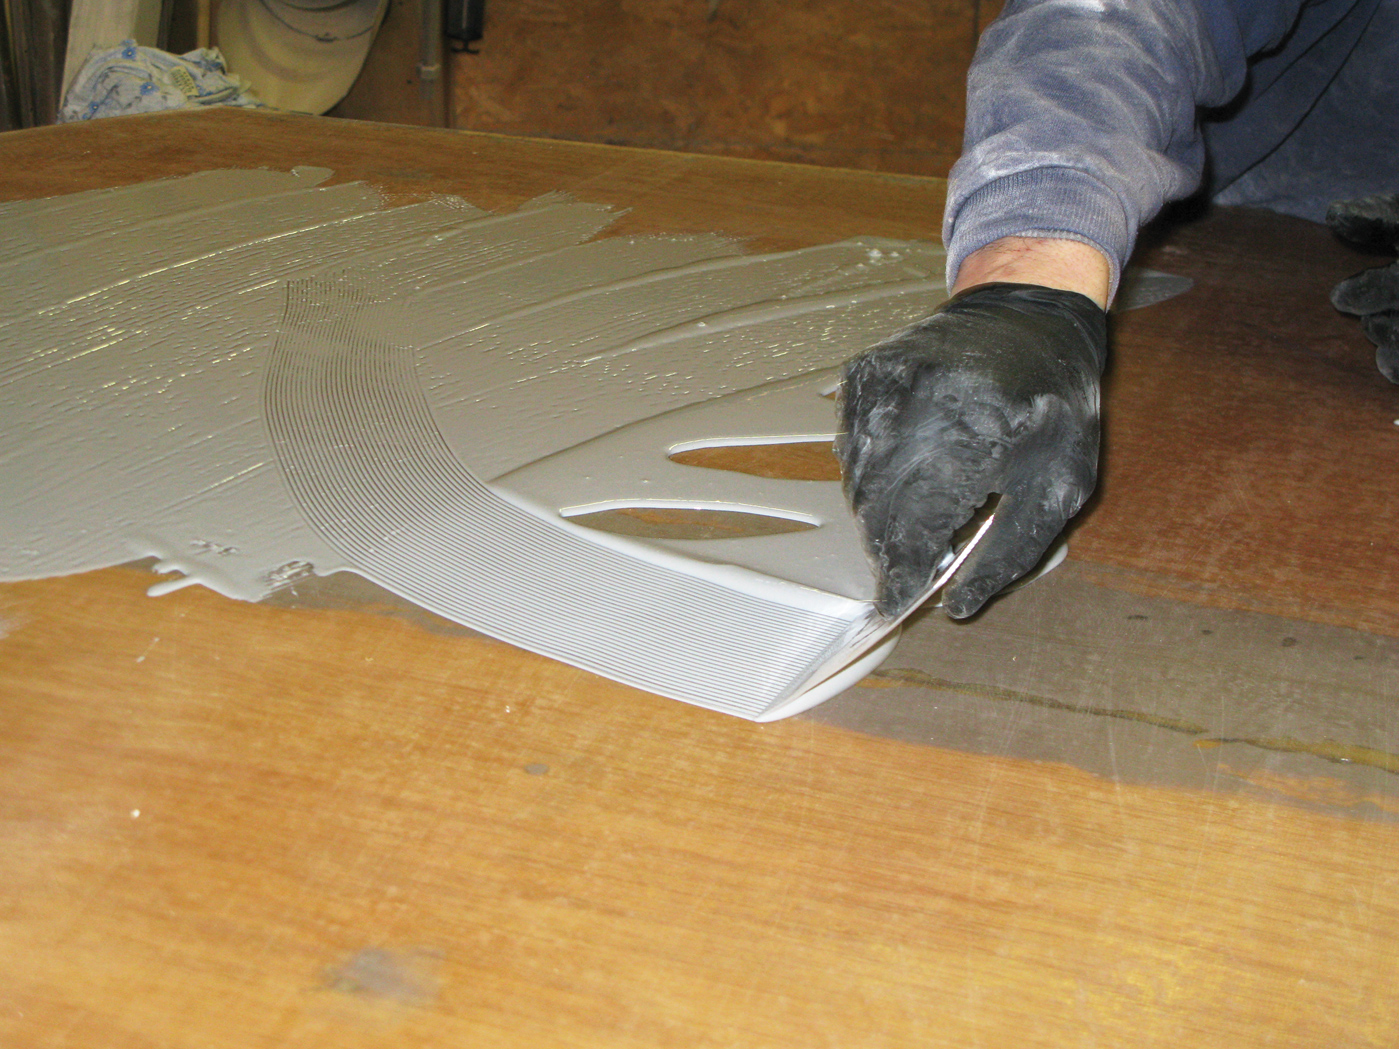
Step 7: Over the years, I’ve found it easier and faster to pour small amounts of resin on the cloth and use a notched trowel—1⁄16” notches seem to work best—to spread an even film of resin over and through the cloth. Be careful not to drag too much to the edges, and if you do, you can use a brush to absorb extra resin and redirect it back to your bucket.
Step 8: When a large area has been wetted-out and the resin has been given some time to soak into the cloth and plywood—which is easy to see because the fiberglass becomes transparent and the plywood shows through I go back over the area with a roller to even out the resin, chase out air bubbles, and to help fill the weave of the cloth. This method should leave a little resin on top of the cloth so you can sand it without cutting into the cloth itself.
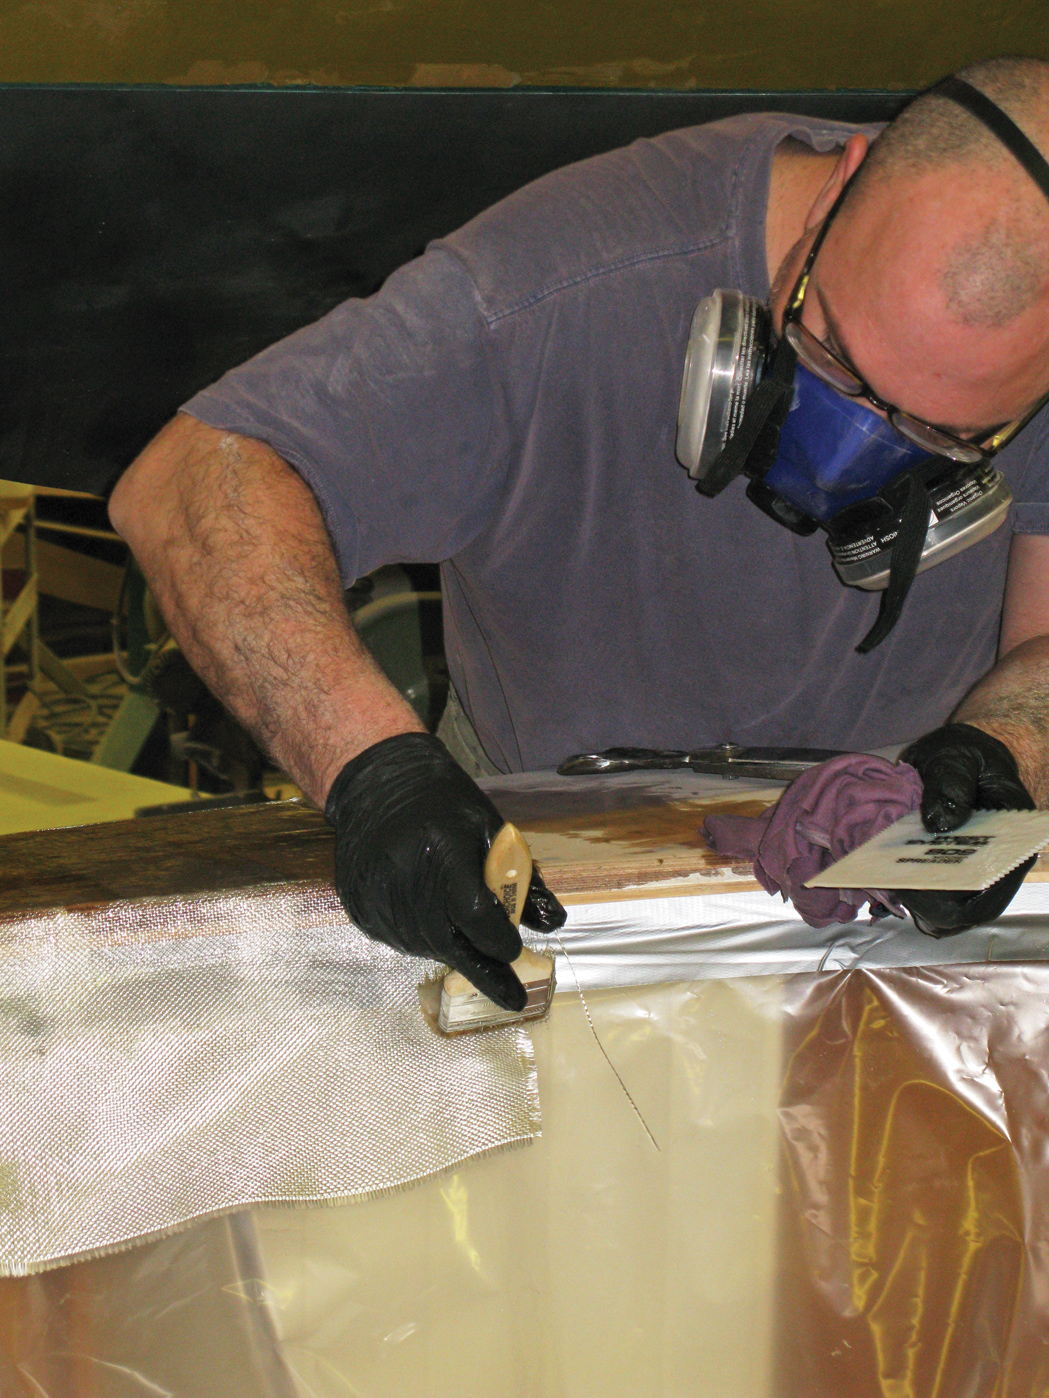
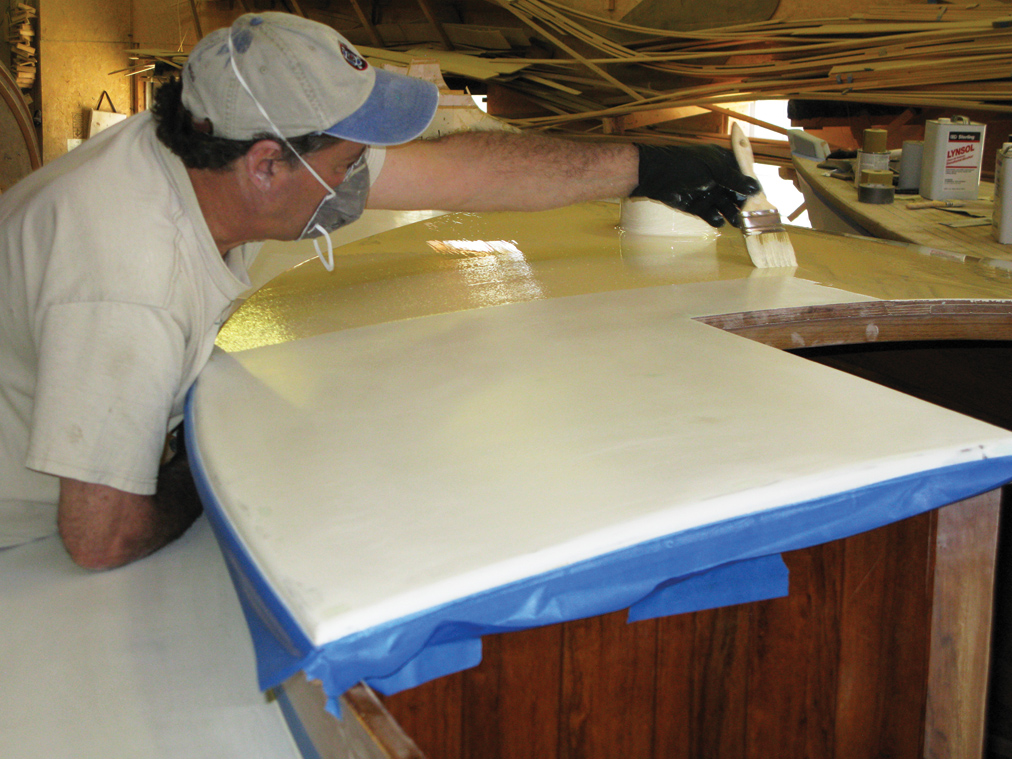
Step 9: Ted follows behind with a brush to wet-out details, such as the bend the fiberglass cloth takes around a corner onto the inner face of the cabin carlin. The cloth can tend to peel away from such edges in places like this, and the brush helps to push it down until enough epoxy is in the weave to hold it there.
Pigment Coat
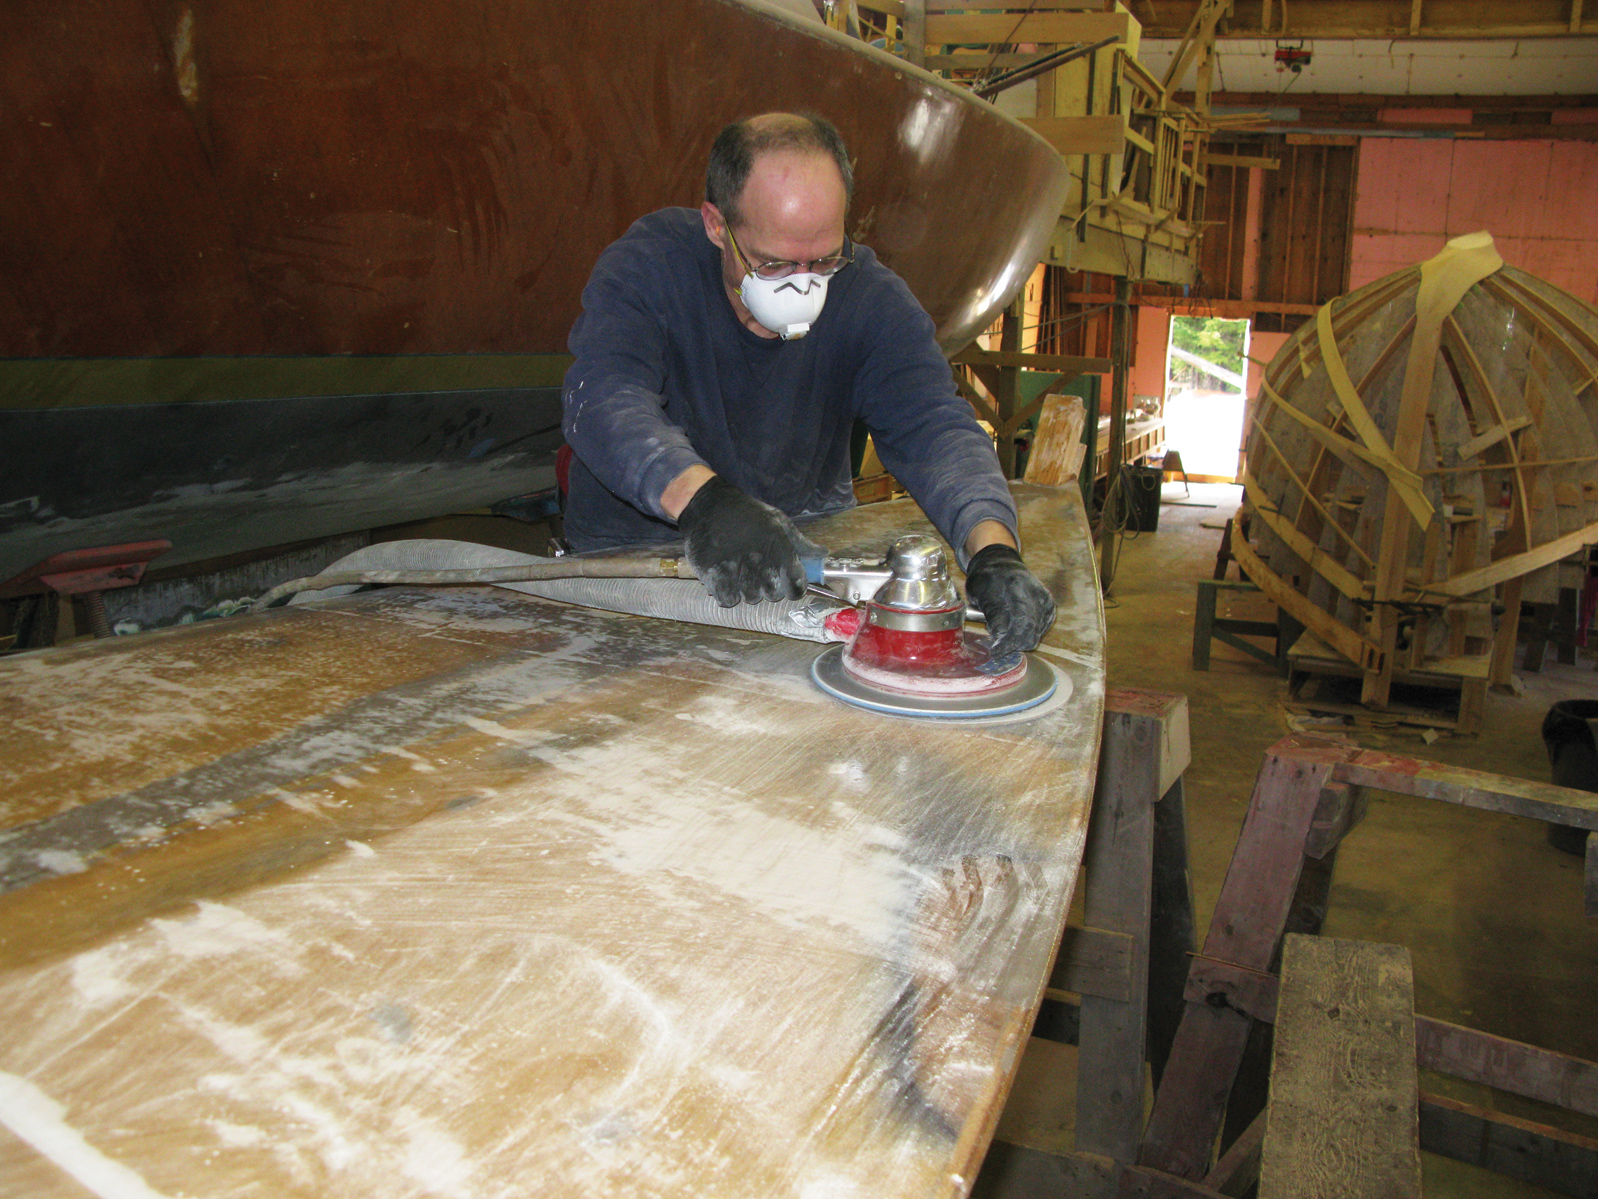
Step 10: After the epoxy has fully set, a 12″ air sander, using 80-grit, helps Bill smooth out the fiberglassed deck to make it ready for the next coat.
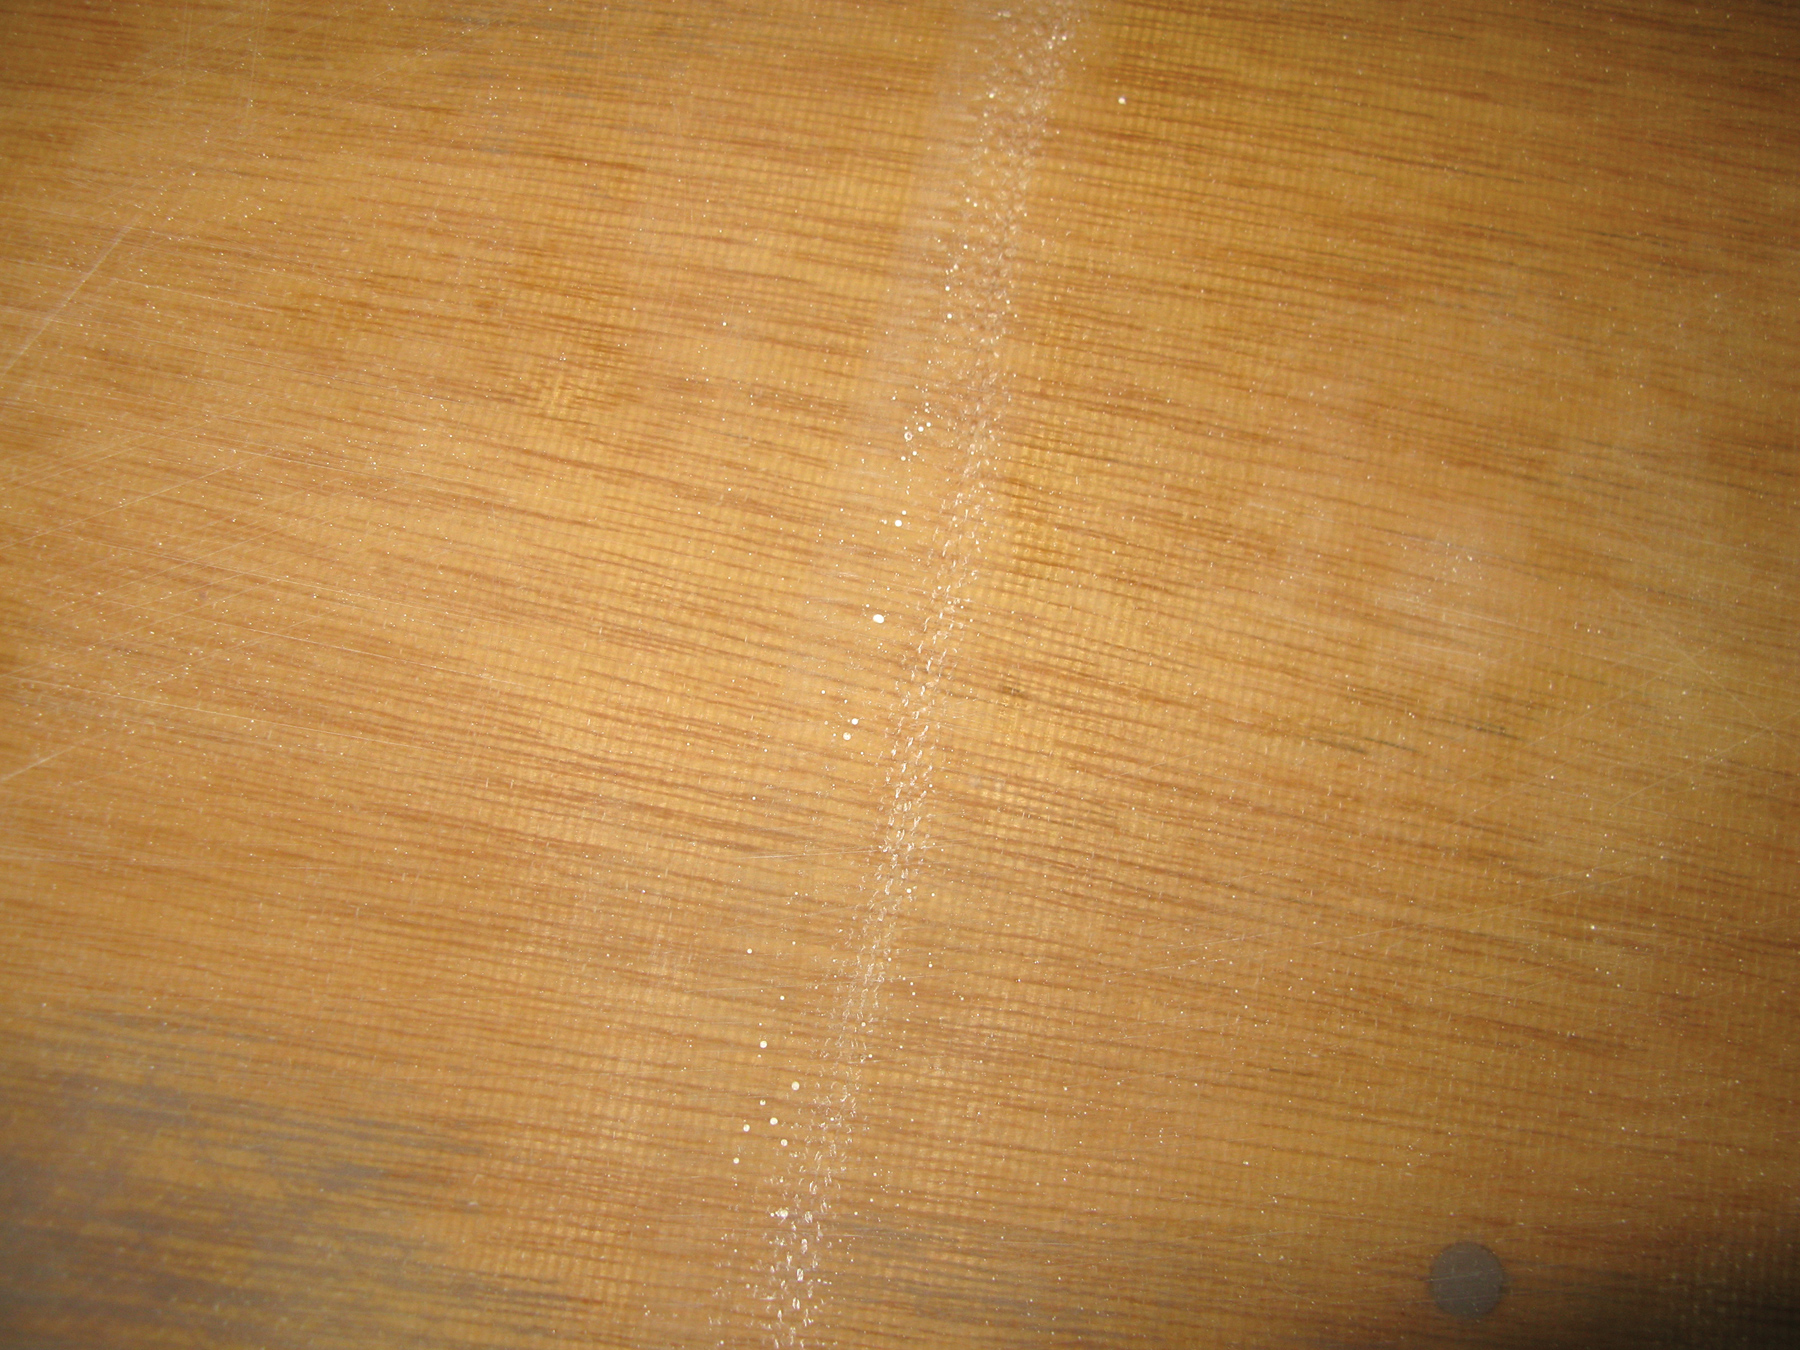
Step 11: Even after the deck has been sanded, the fiberglass cloth remains transparent. Here, the seam where two sections of cloth come together on the foredeck has been sanded fair.

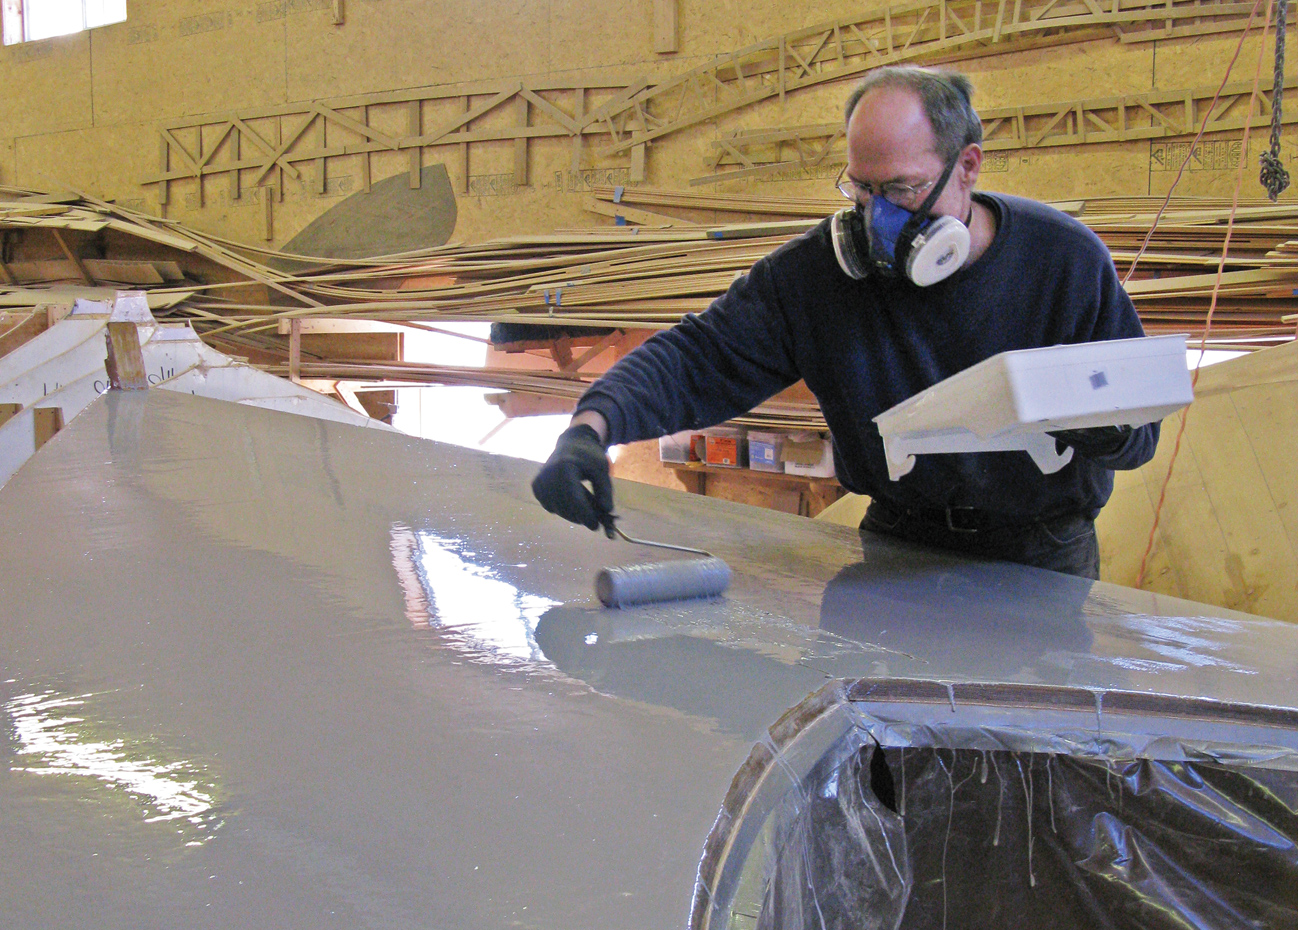
Step 12: We now apply a second coat of epoxy, this time with a gray pigment added. This helps fill in the weave and cover any imperfections we may have.
Step 13: The technique for applying the pigment coat is the same used for the first coat, using a 1⁄16″ notched trowel to apply epoxy and following up with a roller.
Step 14: A third epoxy layer, also pigmented, is the final epoxy coat. This can be applied without sanding if the previous layer is in the “green stage,” or not yet fully cured. Pigmenting this layer to make it darker or lighter than the previous layer can help when sanding, to show whether you’re sanding too aggressively and cutting into a lower layer.
Final Painting
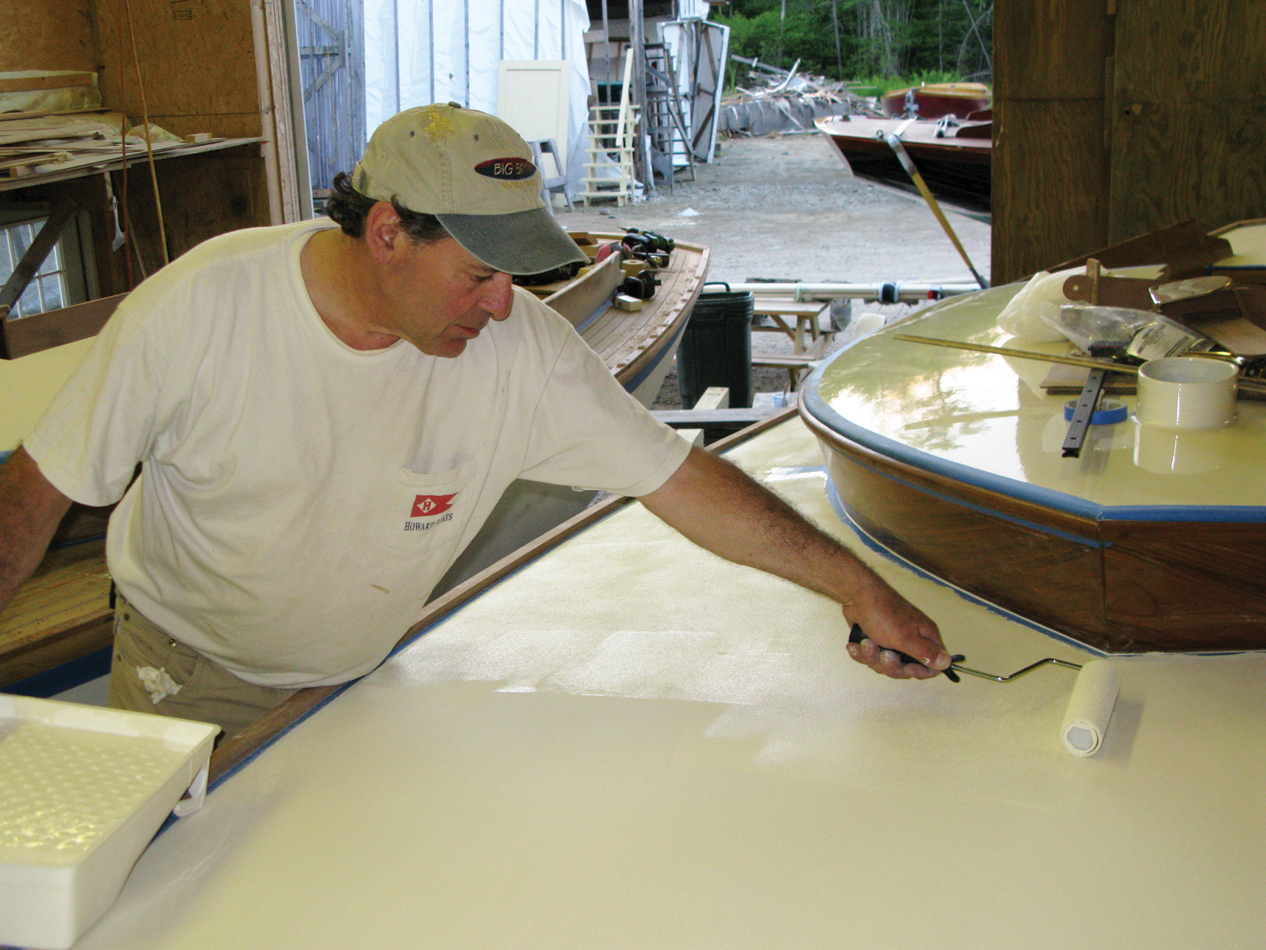
Step 15: After the final pigmented epoxy coat has been sanded, first with 120-grit and then finish-sanded to 320-grit, I carefully paint the cabin top and deck using a roller, after first masking off such things as the edges of the coamings, bulkheads, and toerails.
Step 16: While applying deck paint, I first use the roller but quickly tip-off with a brush, feathering the brush with each stroke to give the paint a very smooth finish.
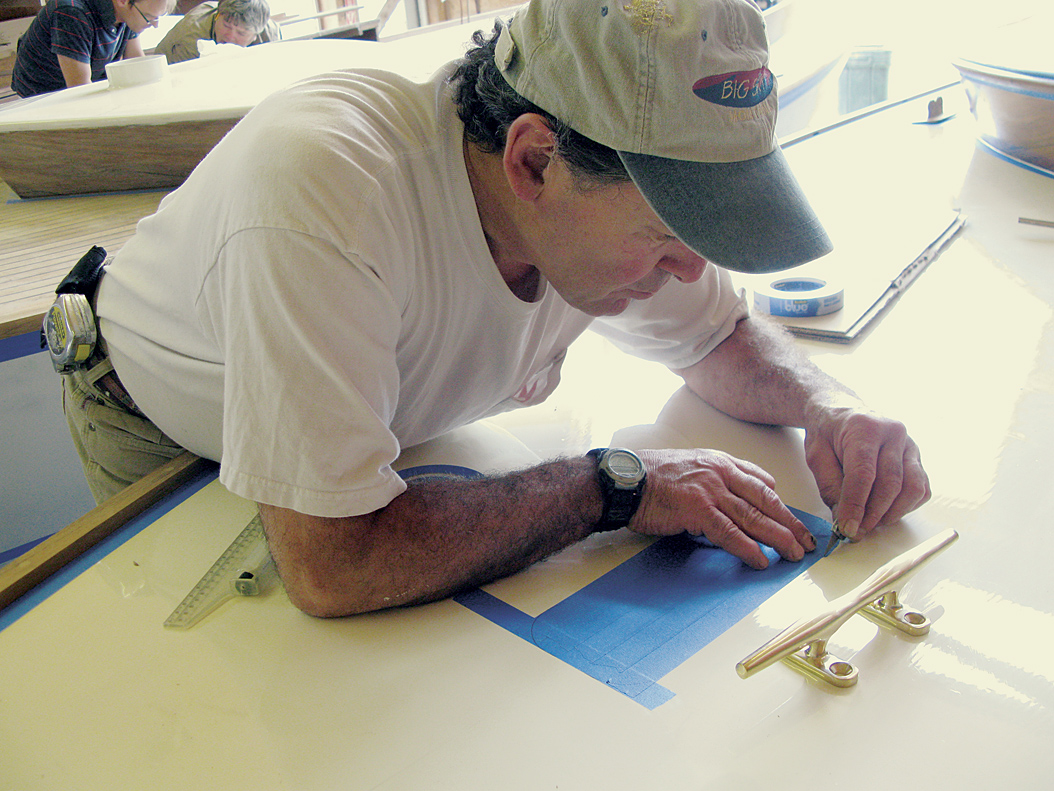
Step 17: After the color coat is dry, I next lay out where all the hardware goes and carefully mask off an area around each piece. This is because I find that hardware can be bedded much more effectively on a smooth surface. I also mask off any place where I don’t want to have a non-skid surface. For example, I always leave a 1” border around the cabin house, coamings, and along the toerails so that these visible wooden surfaces can be masked off more readily when they need to be revarnished in the future.
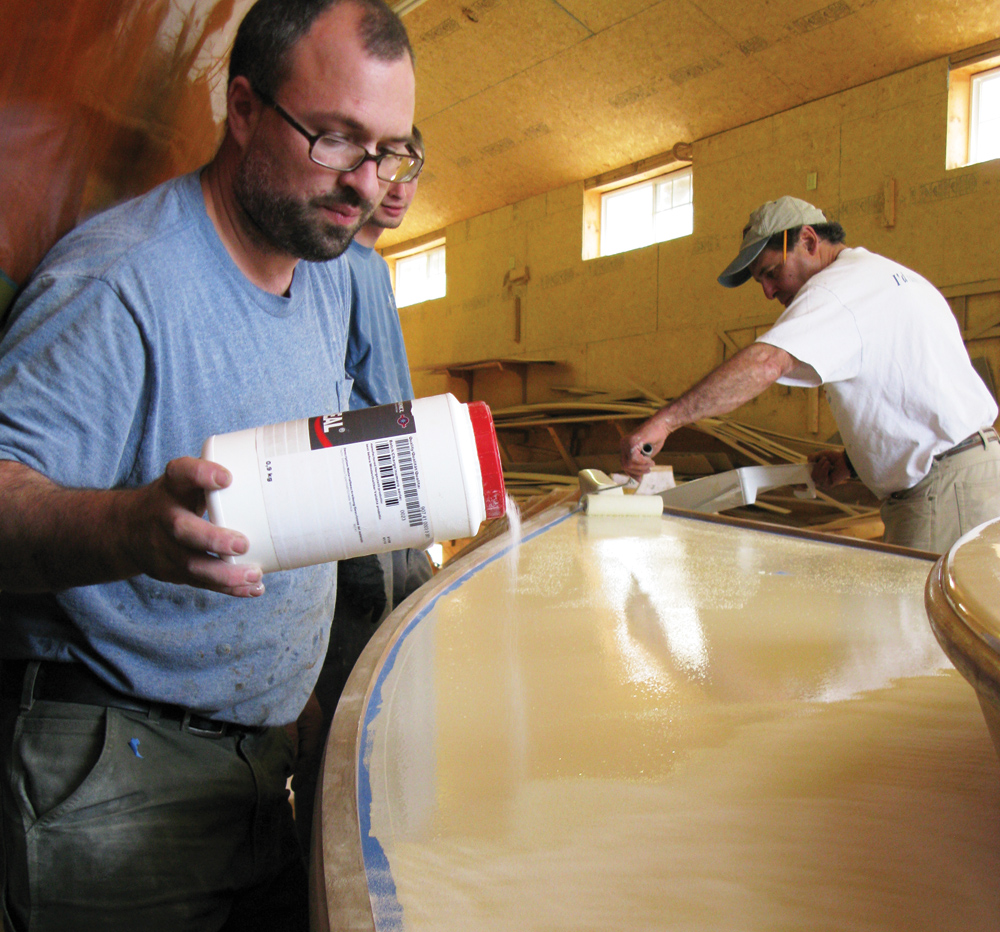
Step 18: With all of the hardware locations and perimeter borders taped off, the deck is lightly sanded with 320-grit to make it ready for the next coat. Now, I roll on another coat of the same paint. I make sure to cover the edges of the masking tape, and often I roll right over whole sections of it. Meanwhile, Ted follows along right away, sprinkling non-skid compound onto the paint while it is still wet. The jar has a perforated top, like a salt shaker.
Step 19: After this non-skid layer of paint dries, I roll on a final color coat on top of the non-skid. After this final coat is dry, I can go back and remove the tape to reveal crisp edges of non-skid where I taped off for the hardware and borders. The deck is then ready for hardware installation.
Alternative Techniques
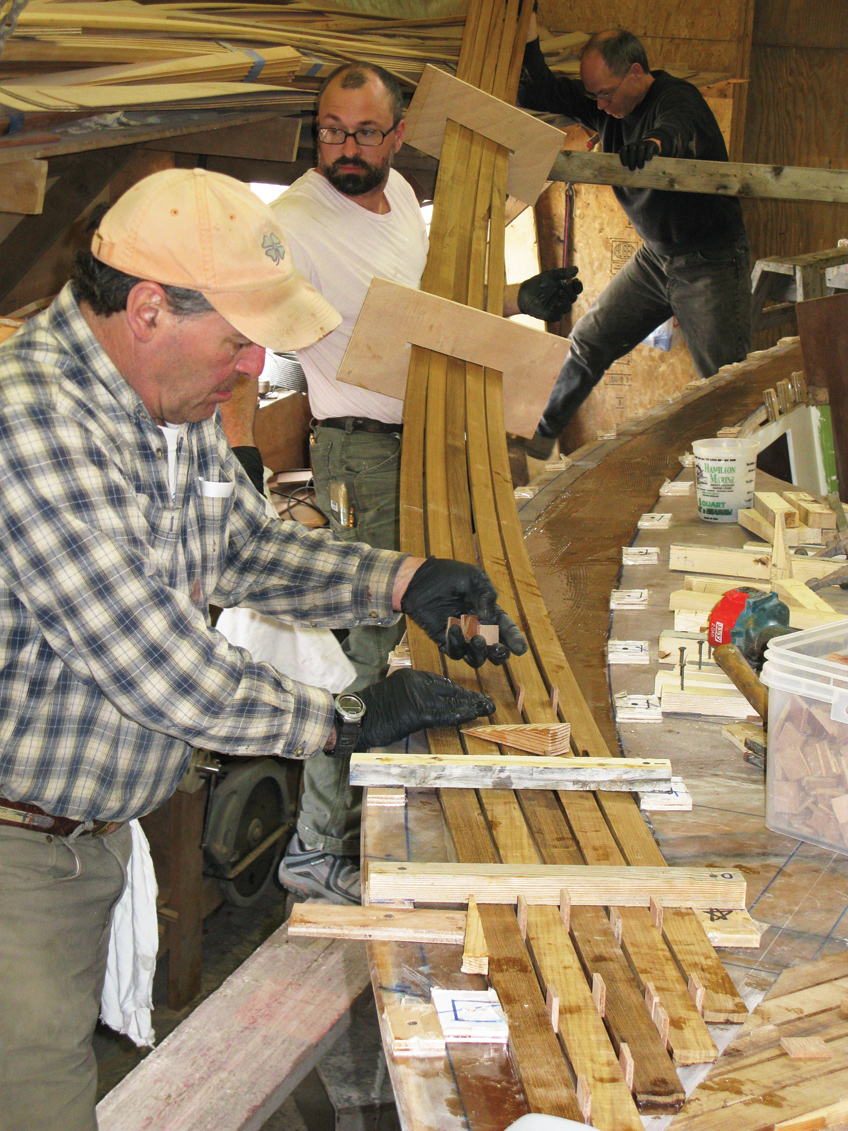
Teak Decks: For some clients, the traditional look of a teak deck is worth the extra expense, and it’s hard to argue with the result (see also WB No. 147). When we do a teak deck, the underlying plywood is faired and covered with fiberglass cloth set in epoxy, following the same techniques described in this article. After sanding the final epoxy coat, the 3⁄8″ teak planks are epoxy-glued to the deck. Here, we are bending in five teak planks at one time.
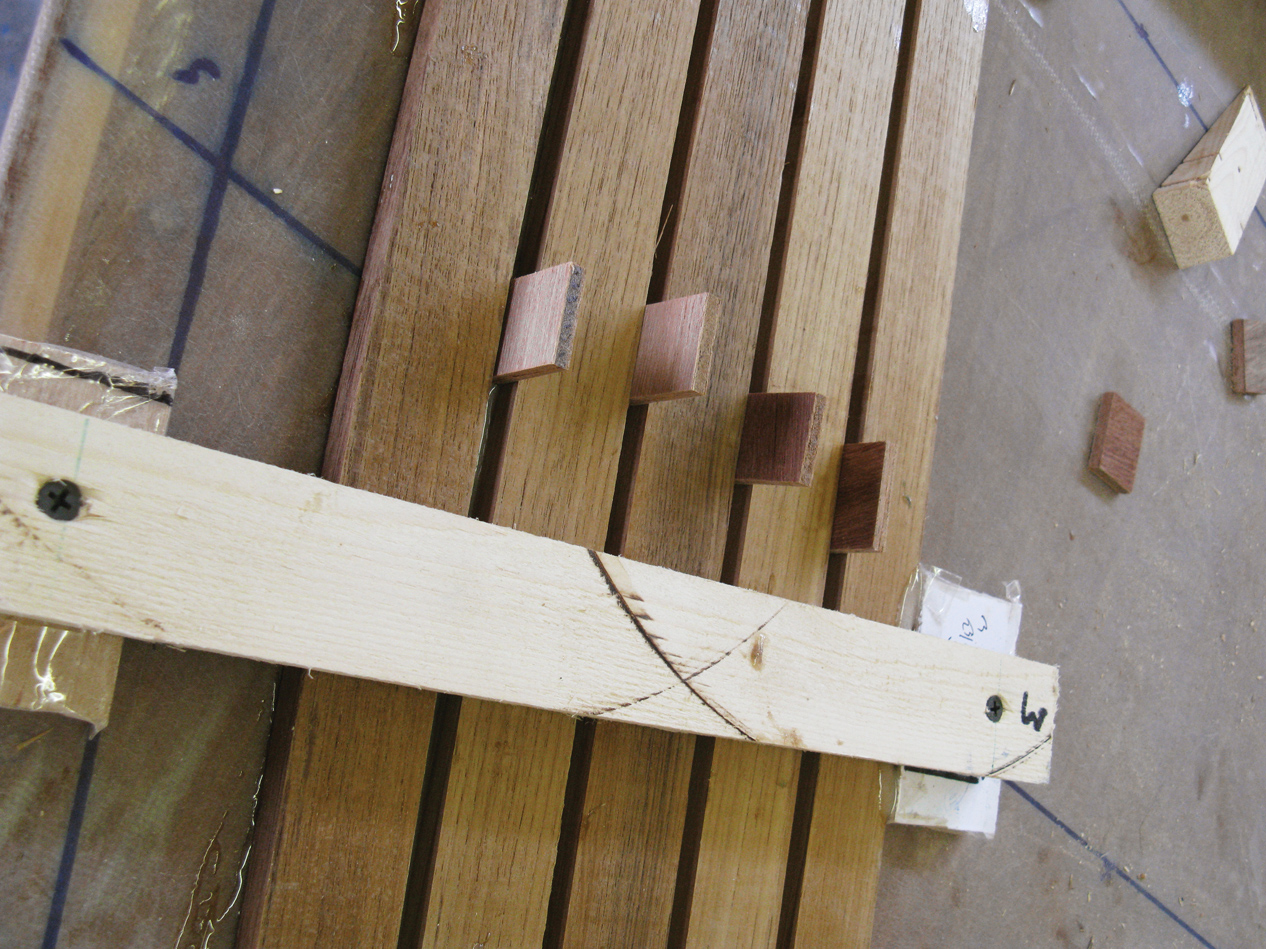
Holding the teak planks in position and applying pressure is always a challenge. Here, we install a crosspiece fastened down to blocks that allow clearance for wedges to be tapped in underneath as needed. Filler pieces ensure uniform plank spacing, and wedges can also be driven to tighten the planks athwartships until the glue sets.
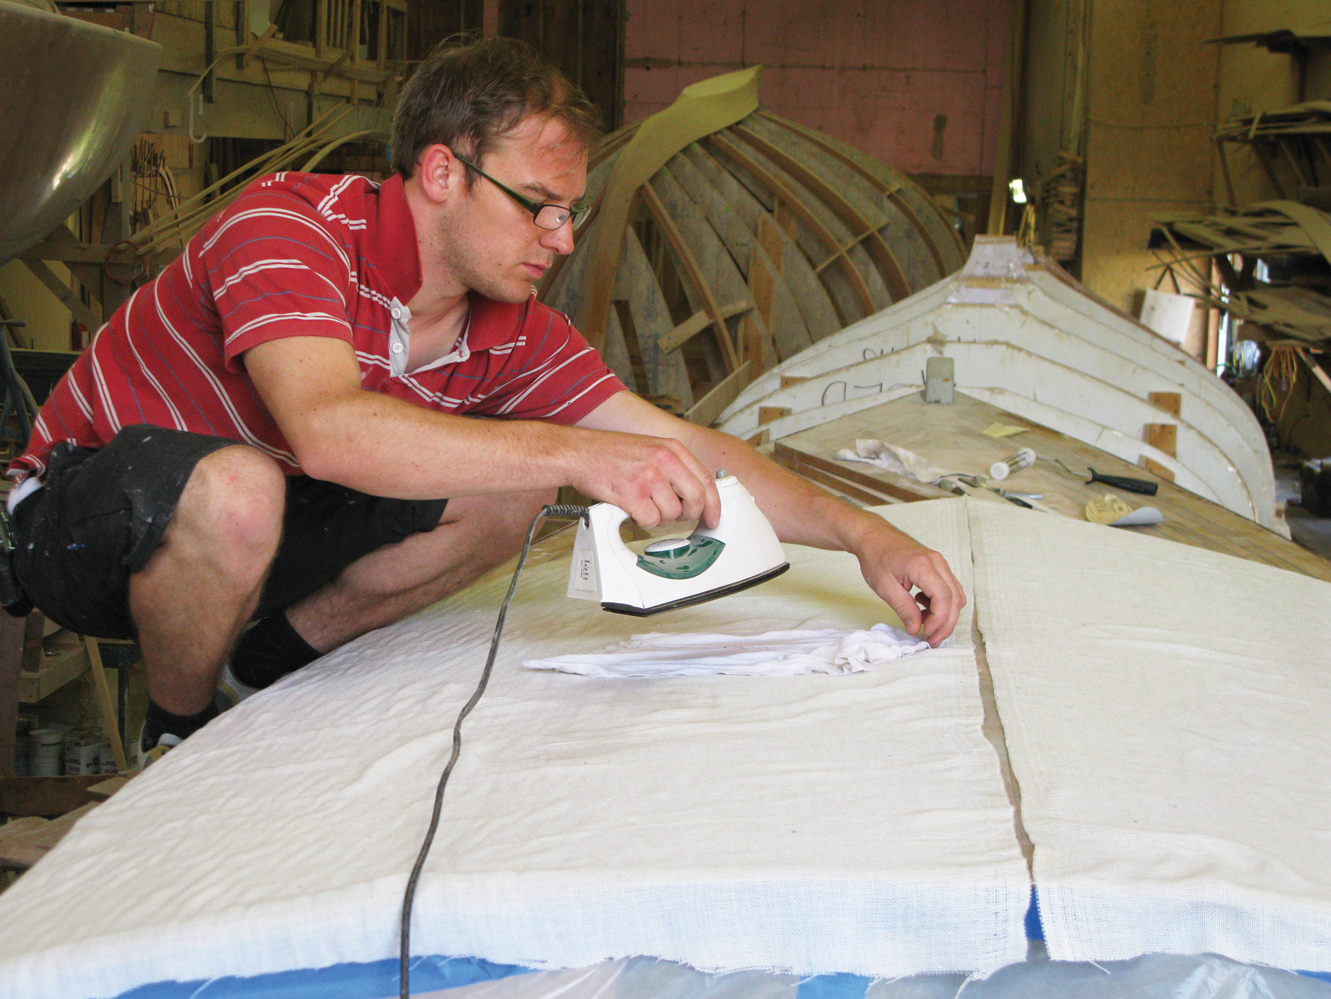
Using Dynel: For those who like a traditional appearance, a deck can be sheathed using epoxy with Dynel fabric instead of fiberglass cloth. Dynel’s textured weave leaves a nonskid surface after it has been wetted-out with epoxy, and this surface can be painted after the epoxy cures. Dynel is harder to manage at first, and here Jonas Kreiner takes a moment to iron out a few wrinkles in the cloth, which handles like linen.
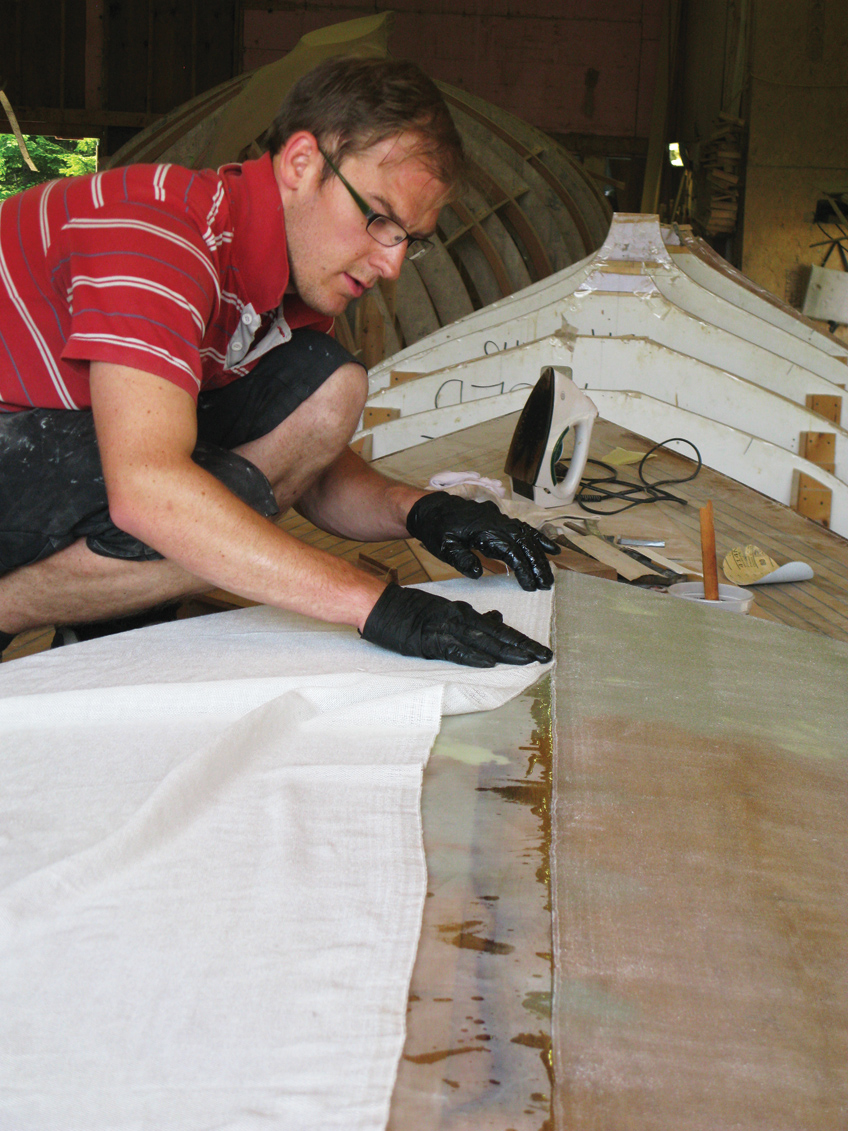
Dynel comes in relatively narrow panels, so the centerline has to be carefully laid out. After marking a centerline and wetting out the first side, Jonas uses the resulting edge as a guide for placing the second Dynel panel, which must be butted to the first at the centerline.
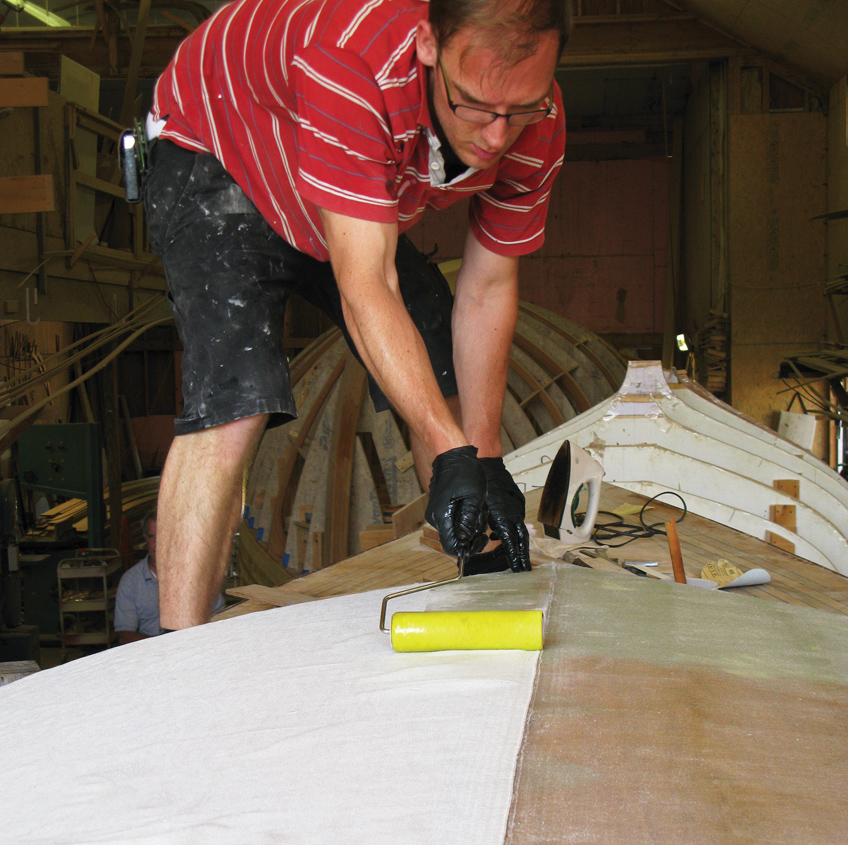
After the second panel has been carefully placed, it is wetted out, starting at the centerline and working outward. Keeping a straight seam goes a long way toward making the finished job look good. The appearance of the final result is similar to a traditional canvas deck, although I have found it to be less durable than a deck sheathed in fiberglass cloth set in epoxy.
This article was originally published in WoodenBoat No. 222, September/October 2011.