Many years ago, one of the big varnish manufacturers had a regular advertisement showing a cowering boat owner eyeing a brightwork project with a feigned expression of terror, and saying “Vvvvvvvvarnish?” Such fear is a common sentiment among would-be and occasional varnishers, and for good reason: Varnish provides excellent protection while showing the beauty of the wood, but it takes a consistent commitment of time and skill each year to maintain it. And achieving a good bright (aka varnished) finish in the first place requires careful surface preparation and application.
There are myriad pitfalls that can compromise the job along the way, and a lack of maintenance during the season can ruin a fine job. Paint, frankly, is a better option for those who lack the time or inclination to maintain varnish. Indeed, vast expanses of paint (cabinsides, for example) accented by bright trim will look much better than poorly maintained varnish. Varnish, however, is not only rewarding aesthetically; because it’s transparent, it also can reveal potential areas of rot that show up early as dark, discolored spots before they become a serious problem.
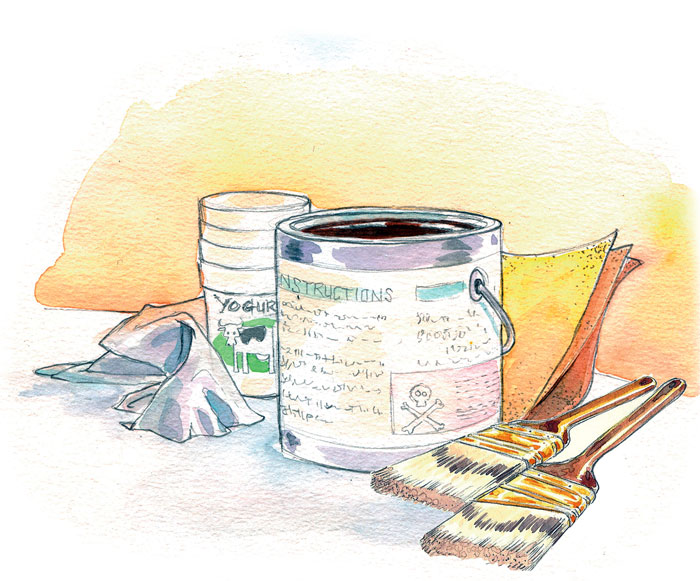
Some great books and articles have been written on the topic of varnishing (see Further Reading at the end of this article). For those seeking a more succinct lesson than those tomes provide, all major varnish brands include on their labels a concise set of instructions. I’d wager that that’s where most of us take our initial varnishing advice. Yet, due to the space constraints of the can, these instructions are typically printed in a barely legible type size, and they leave some room for interpretation—especially for the first-time varnisher.
So, the goal of this article is to interpret the varnish can—to give a bit more depth to those instructions, without writing a book. A can might say to remove all dust. We’ll look at how we do that, and the other basics of varnishing, leaving aside tangential concepts such as two-pack systems, spray application, wood staining, and stripping of old finishes.
 Simon Adams
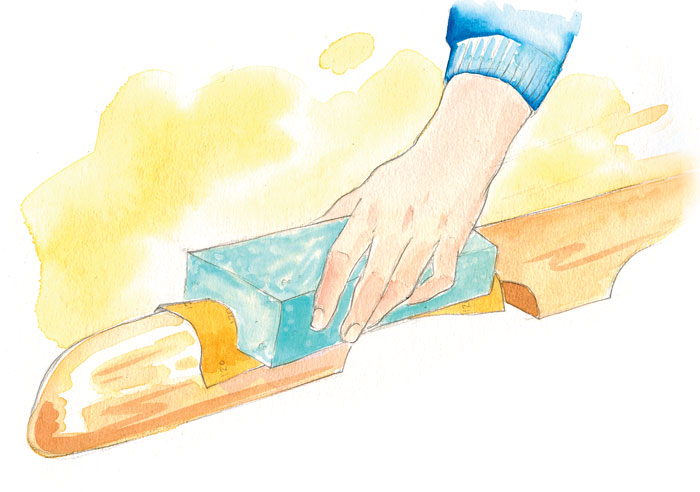
A block of foam insulation can be shaped to a contoured surface to create a custom sanding block.
Preparing and Sealing Bare Wood
All labels will tell you the wood must be clean and dry before varnishing. But there are a few other considerations, too. Painters and varnishers have an old adage: “It’s 90 percent prep work.” Divots and unevenness in the surface will telegraph into the finish coat, so be sure to get your bare-wood surface as smooth and scratch-free as you’d like it to be when finished. If you can live with raised and uneven grain, then a thorough sanding is all it takes. But if you’d like a mirror-smooth finish, now is the time to begin working toward that.
Large, flat surfaces such as transoms and cabinsides can be sanded with sticky-back sandpaper, which comes in a roll, mounted on a hard-rubber sanding block. Alternatively, the surface may be scraped smooth with a cabinet scraper—essentially, a small rectangle of thin tool steel with a uniform burr worked into its cutting edge; when drawn across the wood surface, the cabinet scraper raises the finest of shavings. Rounded and faceted surfaces may be hand-sanded without a backing block, but achieving consistent contact between the paper and the surface can be challenging in this scenario. A better approach is to create a custom backing block from blue foam insulation. To do this, cut off a block of foam of appropriate size, form a piece of 80-grit sandpaper over the surface to be sanded, with the grit side facing out, and rub the foam block back and forth over it until the shape is transferred to the foam. You now have a shaped block to which you can apply your paper. This works especially well on long, straight facets and rounds, such as handrails, railcaps, and half-round trim.
A quick survey of varnish labels reveals strong disagreement over what grit of sandpaper to use before the all-important first sealer coat is applied. One can I looked at specifies using 80-grit on bare wood, while another says 120. And still another recommends 180–320-grit paper. The theory of the coarser grits is that they’ll give the varnish more “tooth,” or mechanical adhesion. Lower-density woods will easily soak in the initial coat of varnish, so a finer grit is a good choice here; denser woods may require a coarser initial sanding, so extra care must be taken to sand with the grain to mask the scratches, because a fine finish requires no visible scratches in the bare wood. For most wood species, 180-grit is a good choice. The sealer coat (which we’ll cover shortly), if thinned properly, will penetrate the wood’s surface to give adequate mechanical adhesion.
 Simon Adams
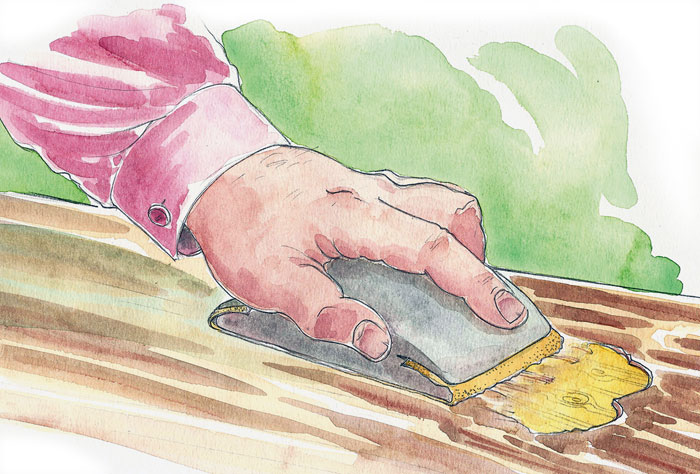
Blisters in a varnished surface must be scraped away. The hard edges of the resulting craters must then be sanded flat before the crater is built up with new varnish. Use a backing block here; don’t create a divot by focusing your sanding efforts on the bare wood.
Preparing Previously Varnished Surfaces
If your task is to apply a maintenance coat or two to an intact finish, rather than to varnish bare wood, then you must first clean the entire surface of grit and dirt, and then sand it with fine-grit paper; 220–320 grit is the right choice for this. But before you get started on that task, you should survey the surface for yellow blisters. These telltale marks show where the varnish has separated from the wood, and they must be carefully scraped away to bare wood before sanding can proceed. (If the surface is littered with these blisters, or if the majority of the finish is peeling, then you must strip the entire piece to bare wood—a process we won’t cover here.) A 1″ hook scraper, filed sharp, is the ideal tool for scraping away small blisters. It’ll dull quickly as you use it, so keep a file handy, and sharpen the scraper’s blade as soon as it can no longer remove fine ribbons of varnish—which will be fairly often if you’re scraping frequently. Don’t do this sharpening on deck; the fine steel dust will rust and make a mess.
If you’re scraping bare spots in a finish that’s been stained, then you have another challenge ahead: These bare spots must either be restained to match the surrounding finish, or you must live with the contrasting patches. Likewise, scraped patches in unstained mahogany are likely to contrast at first with the surrounding finish, though they’ll blend in as the finish ages. On the other hand, if you’re working on teak, you’ll find that scraped bare spots blend beautifully and immediately with the surrounding finish.
Scraped bare spots must have their edges “feathered”—the hard transition from bare wood to varnish must be sloped by careful sanding. The goal here is to gradually thin the varnish around the edges of the crater, but to not remove wood. A sanding block is recommended, and careful use of a scraper can speed things up. With the scraping and sanding done, it’s time to apply a sealer coat to the bare spots—to “spot-prime” them—and then to apply three or more “build coats” to these spots (see application instructions, below).
 Simon Adams
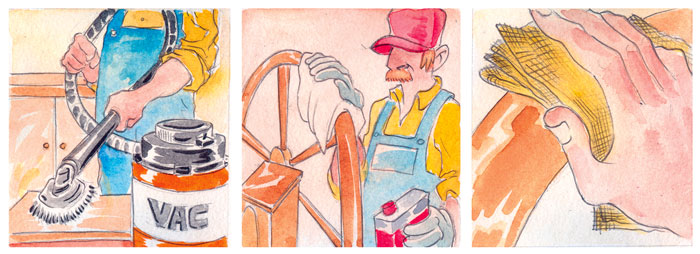
Sanding between coats creates dust; clean it up with this three step process: (1) vacuum, (2) wipe down with solvent, and (3) wipe with a clean tack cloth.
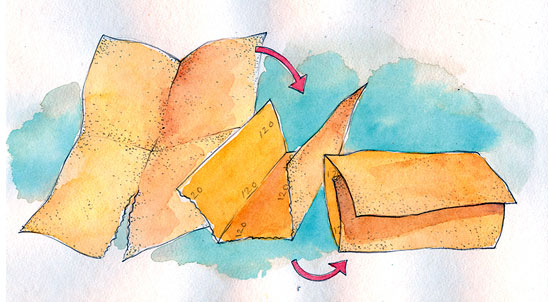
Folding Sheet Sandpaper
For sanding long pieces of trim, handrails, spars, oars, and such, you’ll likely be using 9″ × 11″ sheets of paper. These should be folded and then cut into quarters. These quarters are then folded in thirds, as shown in the photograph, so that none of the grit surfaces touch. When one surface becomes clogged and no longer cuts, flip the paper over for a fresh surface. When that one is clogged, unfold and refold the paper to expose the final unused surface. This can also be done with half sheets—though for surfaces typically requiring pieces this large, you’ll likely want a sanding block.
Sanding and Dust Removal
With scraping and spot-priming out of the way (if you had to do it at all), it’s time to sand the entire surface. This is a step that often befuddles the novice varnisher: The goal, after all, is to build up a thick coat of varnish on the wood. This must be accomplished by applying multiple coats, and you must sand between these coats, typically, to get the later coat to adhere to the earlier one. But in the process of doing this, you want to sand away as little of the previous coat as possible. A light touch and a fine grit are required for this task. If the finish is in great shape, then use 320. If it’s beat up or requires some leveling, then use 220.
There are two exceptions to this sanding-between-coats rule. The first is a technique called “hot-coating,” whereby a subsequent coat is applied to one that’s not yet fully cured, so the two actually melt together, chemically. If you’re new to varnishing, then I suggest you stick to the tried-and-true methods outlined here, and not be lulled by the promise of less sanding. The second exception involves wood coatings specifically formulated for no sanding between coats. They save the time of sanding. And they save material, as there’s no specter of sanding away the previous coat. Sanding between coats, however, has the incidental benefit of dulling the previous coat, giving a nice sharp contrast between varnished and unvarnished areas when you’re actually applying the stuff. Unless the light is just right, you can’t always see where you’ve been when you don’t sand between coats, and thus you risk “holidays” in your finish (see “Applying the Varnish,” below). The other drawback of not sanding between coats is that you lose the chance to eliminate the previous coat’s imperfections. Sags, dust, bugs, lint, unevenness, and other sins are repaired or eliminated with each successive sanding. My caveats notwithstanding, not sanding between coats is a significant time-saver, and once you’ve mastered the art of basic varnishing, it might prove worthwhile to look into these no-sanding-required formulations.
It seems antithetical to do all of that sanding, and then to be instructed to apply varnish only to a surface that’s clean and free of dust. But take heart: There’s an established protocol for removing dust from a surface. First, vacuum as much of it away as you can, using a clean brush attachment on your shop vacuum. If working outside, you can use compressed air to blow off the dust. Second, wipe down the surface with a rag that’s been dampened—not soaked—with paint thinner or some other solvent that won’t leave a residue. The rag itself should be clean and free of lint. The third and final step is to wipe the entire surface with a painter’s tack cloth.
 Simon Adams
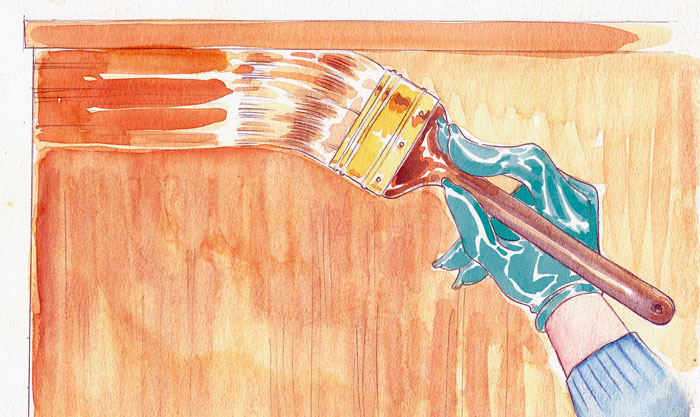
Apply varnish by first brushing it on vertically, and then drawing it out horizontally with long, even strokes. Don’t overwork it in an attempt to make it mirror-smooth; trust that it will level out before it cures.
Applying the Varnish
The man who taught me how to varnish had a rule regarding time of day: He’d never begin applying varnish outside after about 2 p.m. on a summer day. Why? Because humidity on uncured varnish will dull and cloud the finished product. I had this lesson driven home the hard way several years ago when, pressed by schedule to get a coat of varnish on my mast, I did the job after work, at 5 p.m. I knew better, but I guess I thought I was invincible. Within a few hours, the dew dropped on the partially dry varnish, and the next morning the finish on the “up” surface of the mast was cloudy, dull, and textured, while the down side was clear and shiny. Cool, dry weather—classic New England fall conditions—is best, as the varnish has a chance to level out before it cures. In fact, getting your varnish done in autumn is a great way to manage your varnish maintenance, as you’ll feel like a genius for having it out of the way come the press of spring and the promise of boating weather. One word of warning on this: The short, cool days of fall typically require an indoor workspace, because the dew dries late in the day and falls early in the evening.
The first coat on bare wood is the sealer, which should be thinned adequately enough to allow it to seep into the wood before it cures. When it dries, the sealer should all but disappear into the wood; there should be no ambition to achieve a heavy gloss finish at this stage. Thinning is typically specified as a percentage of the varnish in your pot, and the range specified by manufacturers varies depending upon the viscosity of the varnish. One brand of thick-bodied varnish calls for 50 percent thinning for sealing purposes; less viscous, more forgiving varnishes are generally thinned only 10 percent.
Don’t varnish straight out of the can. Instead, pour your varnish through a medium or fine paint strainer into a clean container. This filtering step is especially important if you’re using a previously opened can, because globs of cured varnish can inhabit the rim and find their way into your finish.
Once the sealer coat has dried, it’s time to scuff it with 220-grit paper—just enough to knock down any hardened fuzz on the surface, and to dull the shine, if there is any. With this done, wipe down the surface with thinner applied to a clean lint-free rag, follow with a tack cloth, and apply the next coat. Some manufacturers will recommend that this next coat be thinned by 25 percent, while others will counsel full-strength varnish at this stage. Again, your best bet is to follow the can’s instructions.
The ideal is to not thin your varnish at all for the subsequent buildup coats, but the reality is that your brush will drag after a while on hot days or on long jobs as the solvent in the varnish flashes off. A fraction of a capful of proprietary thinner should thus be added occasionally, to make the varnish flow properly.
Good brushing technique is a matter of experience and concentration. I have good days and bad days applying varnish, probably because I do it only a few times a year. Here are some of my common pitfalls, and how I’ve come to avoid them:
Sags—It’s incredibly disappointing to look back at a surface that was varnished only five minutes ago, and to see an unfixable sag propagating down it. Varnish, you see, has a short window during which it can be worked. Once it starts to set up—to skin over—further brushing will only make it worse. Let’s consider varnishing a sailboat’s cabinsides: I like to apply the varnish in adjacent vertical bands and, once the brush has been emptied of varnish, to brush these out horizontally. This technique “meters” the varnish consistently, and avoids great sags in the middle of the surface. The place I always get into trouble when doing my cabinsides is under the half-round trim that defines the top edge of the cabin. Varnish loads up under there, and no matter how carefully I inspect the area before moving on, it always seems to release a sag or two. To avoid this, I now mask the cabinsides and varnish the trim first, and then freehand the cabinsides once the trim cures. It takes a bit more time, and some tape, but the saved frustration is worth it. If you find a sag in a cured buildup coat, scrape it away carefully before sanding for the next coat.
Dust—This is a disappointing defect, too, though I must say that a small bit of dust in the varnish seems to disappear once the boat is in the water. Perhaps it’s that our focus shifts to other things once the season is underway, or we absorb the boat as a whole, rather than as a brightwork project. Anyhow, don’t despair if you get a bit of dust in your buildup coats. The time to really be attentive to this is when applying the top coat. Varnish on a still day, vacuum, wipe, and tack the surface carefully, even wet down the shed floor if your situation allows you to do so, and use a clean brush. If you still pick up some dust, remember: This is an ongoing process, year after year. There’ll be time for perfection next season.
Holidays—“Holiday,” as you likely know, is the painter’s affectionate term for places that didn’t receive finish, and should have. They are typically a mental concentration issue, though occasionally they may be the result of inadequate amount of varnish on the brush. Be aware of them. Avoid them. And know that you’ll get better at brushing the more you do it.
Brush marks—Brush marks are the result of one of two things: Either the varnish has been overworked to the point that it was curing while being brushed, or it was applied in short, choppy strokes that began in the “wet edge.” The wet edge is the “front,” if you will, of wet varnish that’s advancing along the unvarnished surface as you apply the finish. Always complete your brushstroke into this edge, rather than originating it there. And apply it in long strokes that unload the brush evenly. Short, choppy ones will pile up the varnish unevenly, possibly leading to sags. The idea is to spread a coat of uniform thickness, one that’s sufficiently thick to shine, but not so thick that it will sag. Whatever it takes to achieve this should be done: Speed of application, a good-sized badger-hair brush (1½″ or 2″), easily spread varnish (add retarder on warm days and accelerator on cold ones), and a “feel” for the process, all help.
People new to varnishing often balk at the idea of five to seven coats, thinking it an excessive amount. But that’s typically the minimum required to build up a good and durable varnish finish that will last all season—again, with sanding between each coat. You’ll know you’re sanding a fresh coat too soon if the varnish gums up your paper; you must wait to sand until the varnish doesn’t do this, but rather turns to fine dust. It takes one to two coats per year to then maintain a varnished finish in a temperate climate, and more in the tropics. A few months of neglect in hot summer sun will result in a dull finish, and a little more than that will often result in cracking in the surface, and eventual peeling.
Brushes: Bristle or Foam?
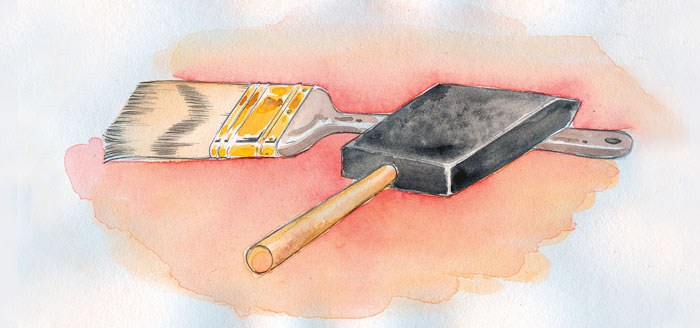
Badger-hair bristle brushes are the standard for serious varnishers. They are worth their cost, because they hold plenty of varnish and release it evenly and cleanly—that is, with minimal brush marks. With careful cleaning and storage, they can be used year after year. Cleaning typically requires three rinses in clean thinner, with a twirl in a paintbrush spinner between each rinse. Then they can be soaked in kerosene or diesel and spun out before being wrapped in a clean rag and hung from a hook for the season; to use them again, soak them in thinner to wash off the kerosene, spin them out, and they’re ready to go. Never store them in a can of thinner, because remnant varnish solids will settle to the bottom of the can, contaminating the brush.
Foam brushes are disposed of after use. Their downsides are: (1) They don’t hold as much varnish as a bristle brush, so they must be dipped more often and thus long, even strokes can be a challenge; (2) they lose their stiffness after a period of time; (3) they don’t work well cutting into tight spots; and (4) they add to the solid-waste stream. Nos. 1, 2, and 3 are generally considered to be acceptable trade-offs for small jobs, or in situations where prompt brush cleaning is challenging or impossible. The solid-waste issue must be balanced against the chemical-waste issue of cleaning brushes with solvent. Neither one is zero-impact.
Further Reading:
Brightwork: The art of finishing wood, and The Brightwork Companion, both by Rebecca Wittman.
“How Not to Varnish,” by Georgia McDonald. WoodenBoat No. 135 (March/April 1997), page 59.
