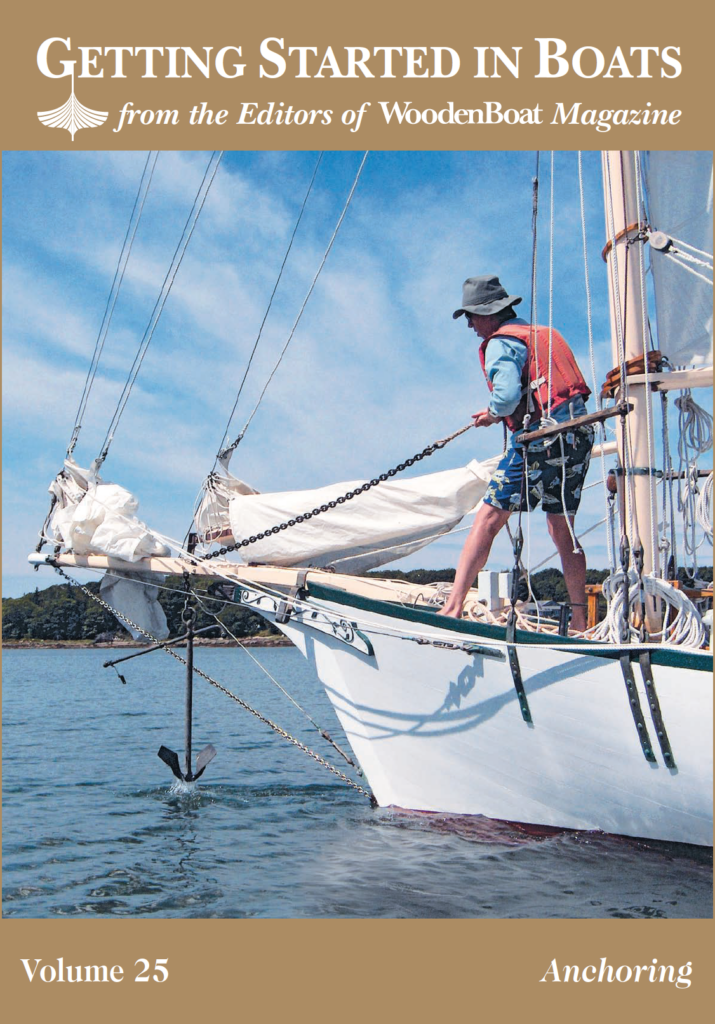
The Basics of Boat Anchoring
Understanding anchors and proper anchoring technique is essential to safe boating. Having your anchor and its accompanying equipment well organized and developing the basic skills to deploy and retrieve it will enable you to stay secure on the water. In the next few pages, we’ll take a close look at some basic anchor types and the techniques for using them. While this article is limited to small craft, the principles given here will take you a long way toward better securing habits for any boat.
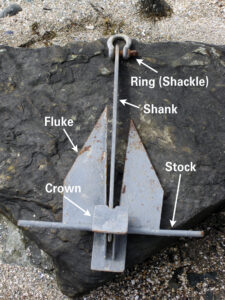
Anchor Anatomy
Like most nautical equipment, the anchor can be described by its individual components. The flukes penetrate the bottom. The crown connects the flukes to the shank. The stock runs at right angles to the shank and allows the flukes to dig into the bottom. There are both stock and stockless anchors.
Types of Anchors
There are numerous types of anchors, each designed for a specific type of waterway bottom. For small boats the most common anchors are the Danforth, the so-called Yachtsman’s or Fisherman’s anchor, and the grapnel. (Larger vessels may use the Fisherman’s, plow/CQR, Bruce, Danforth, and Navy anchor.)
An anchor’s holding power is its ability to resist dragging along the bottom. Holding power is dependent on the weight of the anchor and its ability to grab the bottom. For example, in normal conditions, a 10′ rowboat might require a 2½-lb Danforth, whereas a 25′ powerboat might require a 15-lb Danforth.
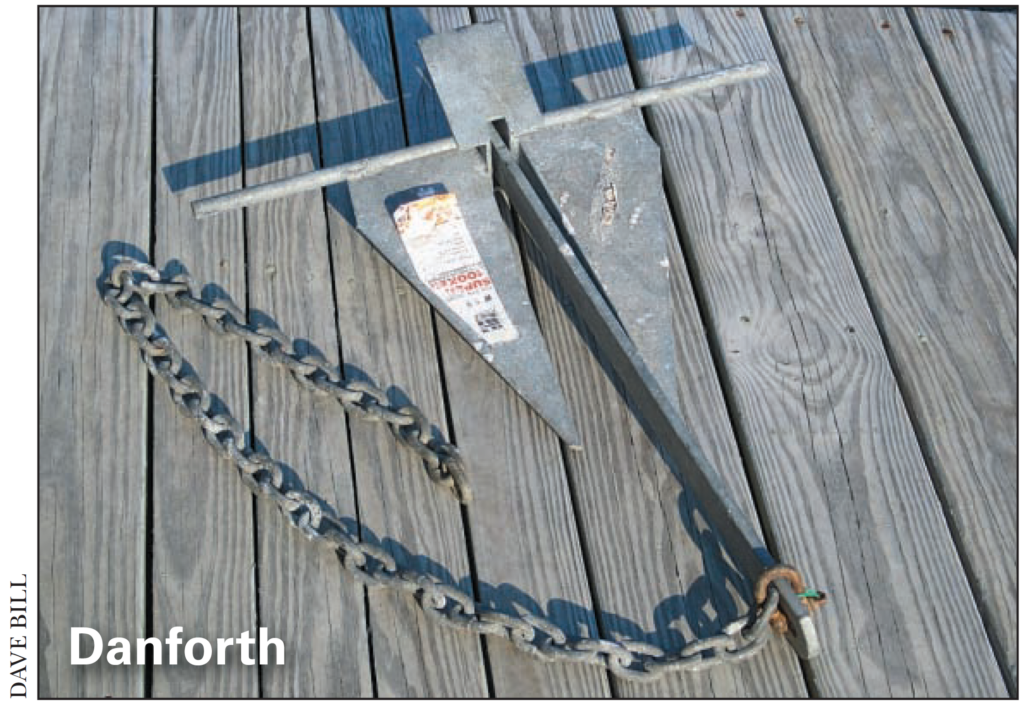
The Danforth is probably the most common stock-type anchor. It is lightweight for its holding power, it stores flat, and its large flukes make it hold well in mud, sand, gravel, and shells. It’s a multipurpose anchor that’s at its best when holding on a soft bottom, but in all uses requires a length of chain, as shown. However, it’s not good for a bottom of rock or ledge.
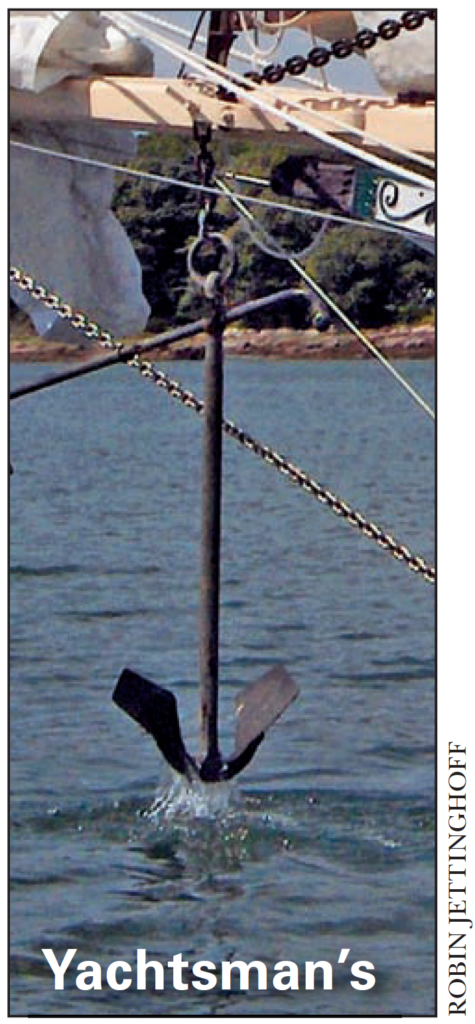
The Yachtsman or Fisherman type anchor is like the tattoo you might have seen on Popeye’s or some other sailor’s arm. It has two flukes that are joined by the crown, and when in use, its stock lies parallel to the bottom so the flukes can dig in. Often the stock of this type of anchor can be folded alongside the shank for stowage. The Fisherman’s or Yachtsman’s anchor works on a hard bottom. Use it on rock, rock ledge, or gravel.
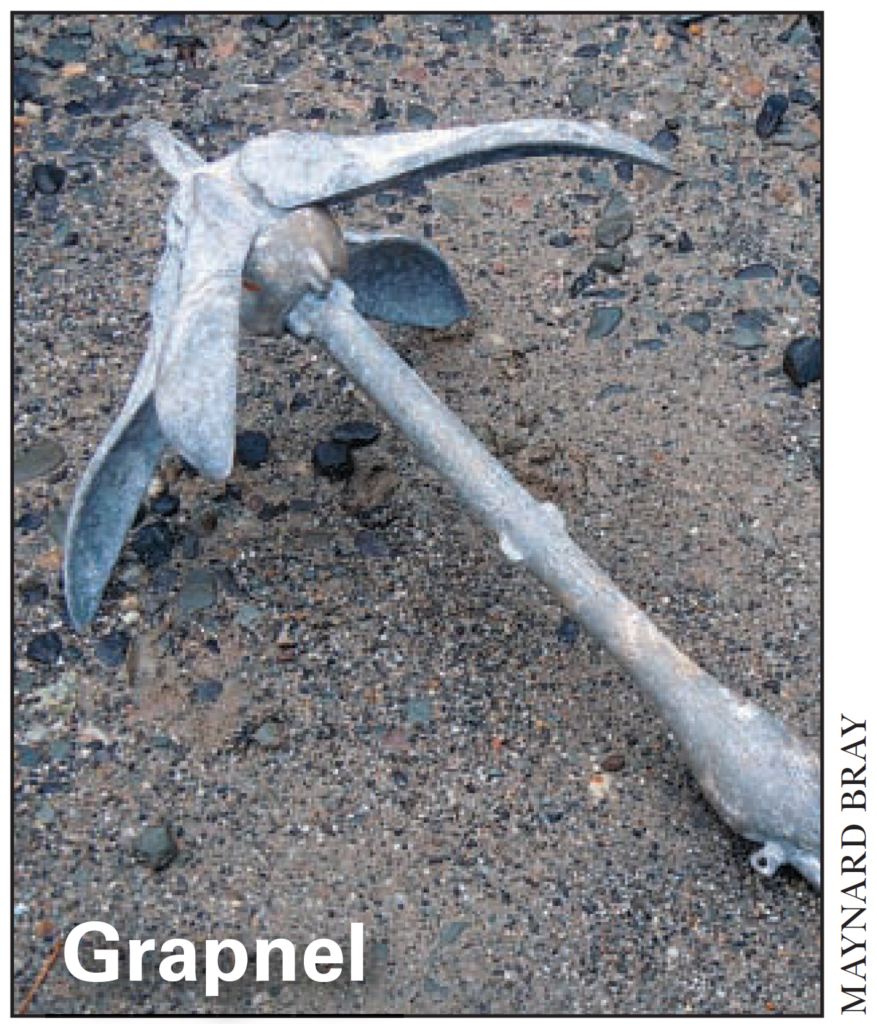
The folding grapnel makes a fine small boat anchor and will work on most kinds of bottoms.
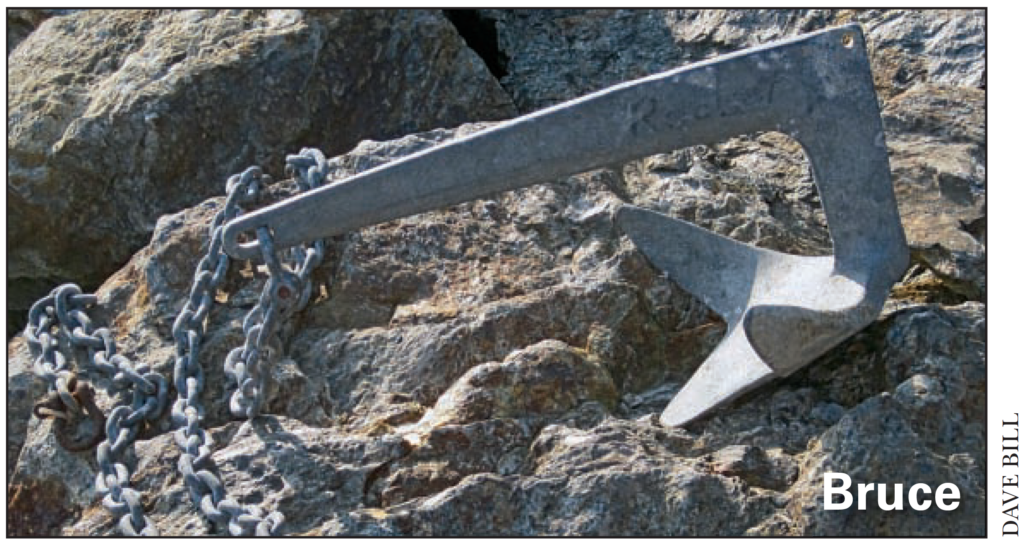
The Bruce is a multipurpose anchor for soft bottoms. It is shaped so that the boat’s direction of pull can change through 360 degrees without causing the anchor to lose its holding power. The Bruce is most frequently used to secure larger boats.
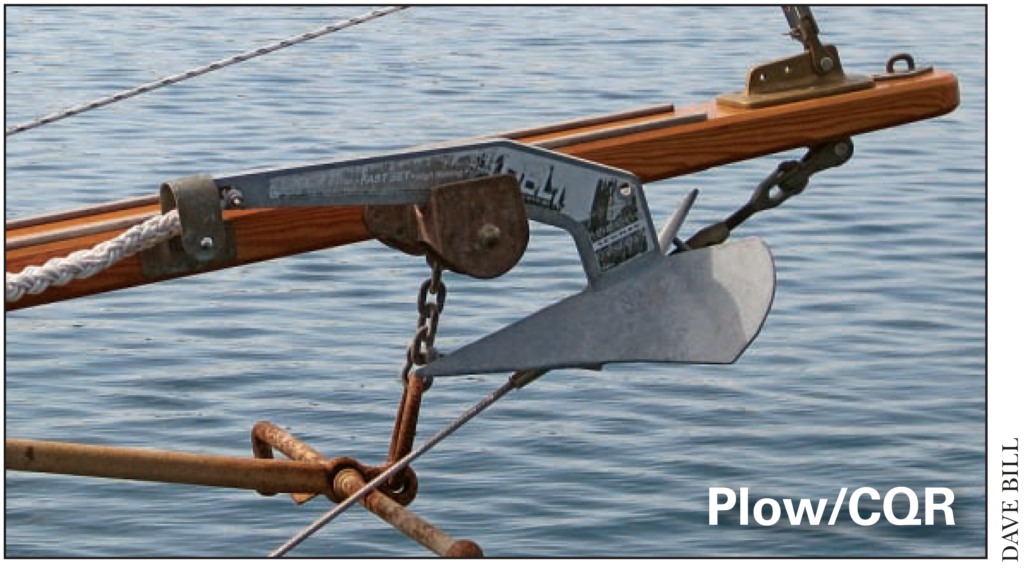
The plow/CQR performs well on a variety of bottoms. It’s a good all-around anchor. Like the Bruce, the plow/ CQR is usually found on larger boats.
More Anchoring Terminology
Mooring: An important differentiation: An anchor is a device to temporarily “secure” your boat on location, after which the anchor is hauled back on board the boat. A mooring is an anchoring device that is set permanently in one geographic location. In other words, an anchor is carried with the boat and a mooring is stationary.
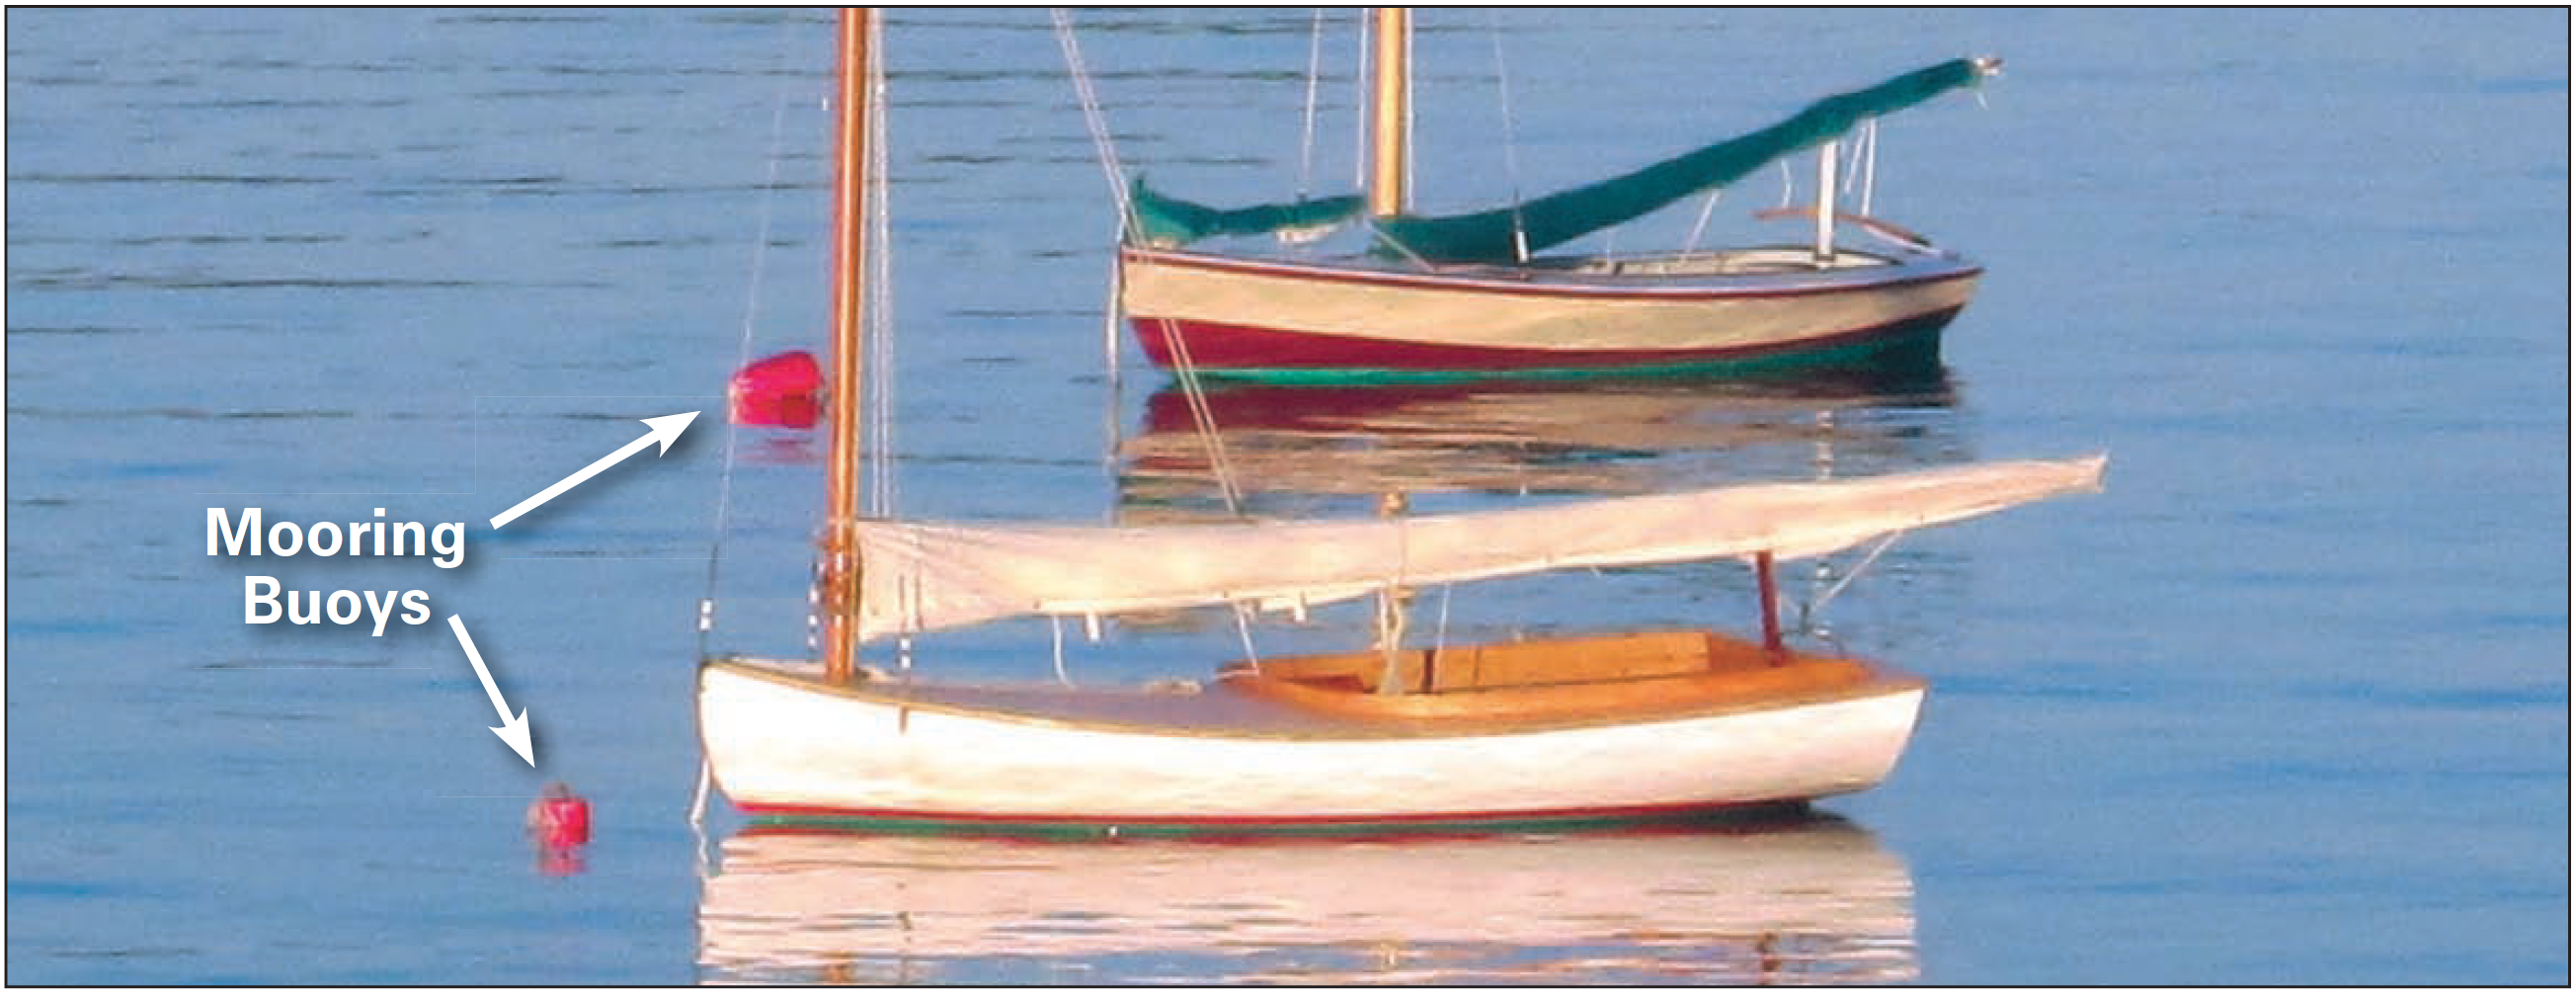
Mooring buoys: Mark permanent moorings, so make sure you drop your anchor where you won’t swing into them. Anchoring takes more thought than pickup up a mooring, but offerings more choices.
Anchor rode: The line or chain connecting the boat to its anchor.
Ground tackle: The anchor, anchor rode, and any fittings used for securing a boat while anchoring.
Anchor chocks: The fittings that secure the anchor in its stowed position on deck or in the bow of your boat.
Chocks: Fairleads on the bow of a boat through which the anchor rode passes to keep it from chafing.
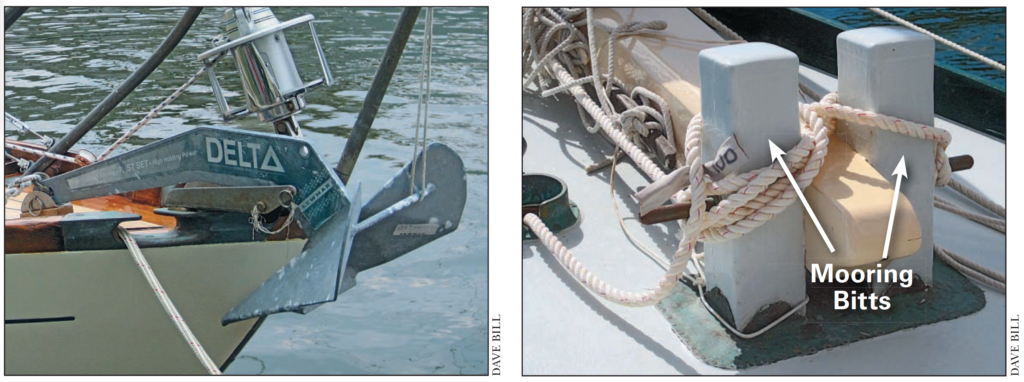
Left—The bronze bow chock leads the anchorline (or dockline in this case) fairly off the starboard bow. Without the chock the line would chafe and weaken. It would also scar the boat’s brightwork. Right—The anchor rode (3-strand nylon line in this case) is secured around the mooring bitts on the foredeck. One end of the line leads out to the anchor, and other end leads down below the foredeck to a rope locker.
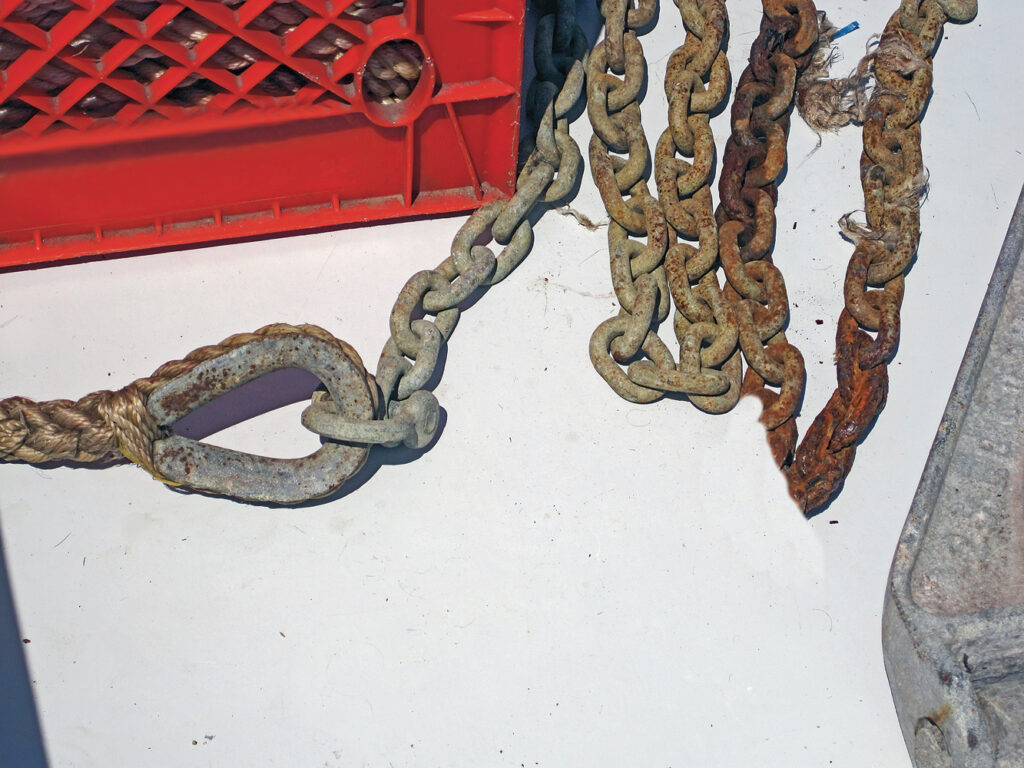
Above-A short length of chain shackled between the anchor and the rope anchor rode gives any anchor a better bite on the bottom for a given amount of scope.
Anchor Rode
On most small boats you’ll see a short length of chain (about six feet) shackled between the anchor and the rode (rope) shackled to it. This chain’s added weight helps the anchor dig into the bottom. The chain also helps prevent the anchorline from chafing or wearing on the bottom. Aside from the length of chain, three strand nylon line makes up the rest of a typical rode on a small boat. Nylon’s ability to stretch makes it a good choice for absorbing the shock loading that a boat can experience while at anchor.
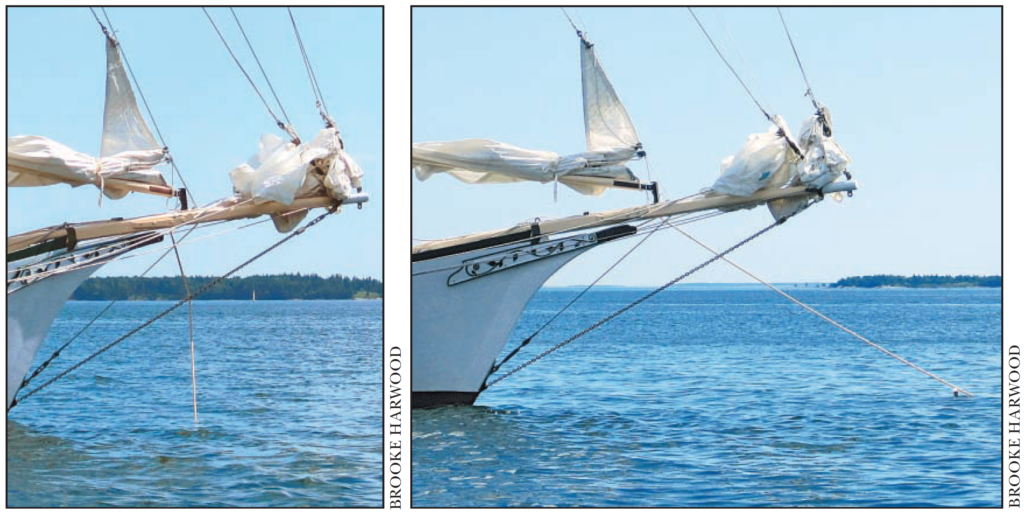
Left—The scope is too small on this anchor (about 1:1). An incoming tide, swells, or even a large wake would surely yank out this anchor. Right—This anchor has been set with enough scope (probably about 5:1) to dig in. If the tide were low, more scope would be let out (payed out) to account for the deeper water later on.
Anchor Scope
Scope is the ratio of the length of the anchor rode to the depth of the water and determines the angle the anchor rode makes with the bottom. The greater the scope, the easier it is for the flukes to dig into the bottom. Keep in mind that large tidal changes (as in Maine with its tides of 10′ and more) will automatically change the scope by changing the water depth. A 5:1 scope (5′ of line for every 1′ of depth) is generally considered the safe minimum.
Proper Anchoring Technique
It is fairly straightforward to anchor under power or oars. Always have your anchor and rode ready before getting to your selected location. You can find out how deep the water is from tide tables, local knowledge, your chart, or a leadline if your boat has one.
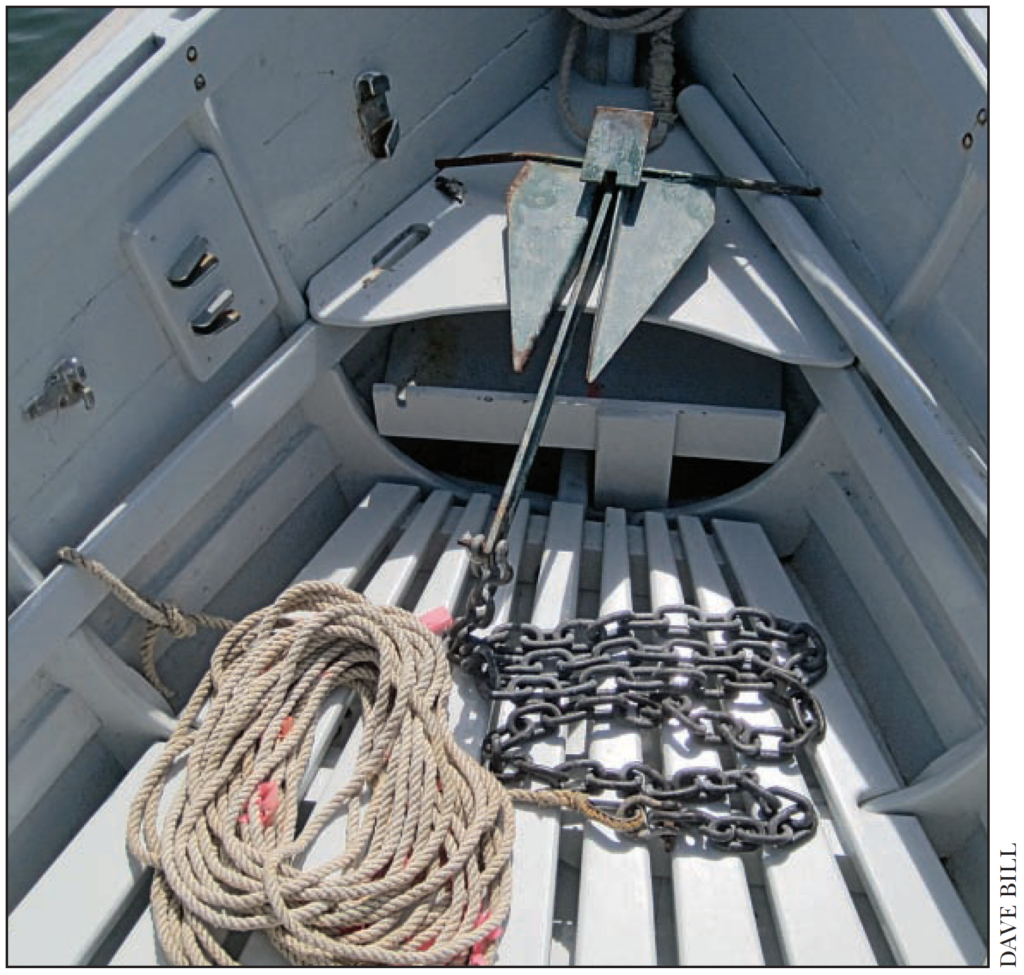
Before dropping the anchor, the rode should be coiled and/or flaked so it will run out free when payed out. When anchoring or mooring, kinked line can snag and cause injury—even the loss of a finger.
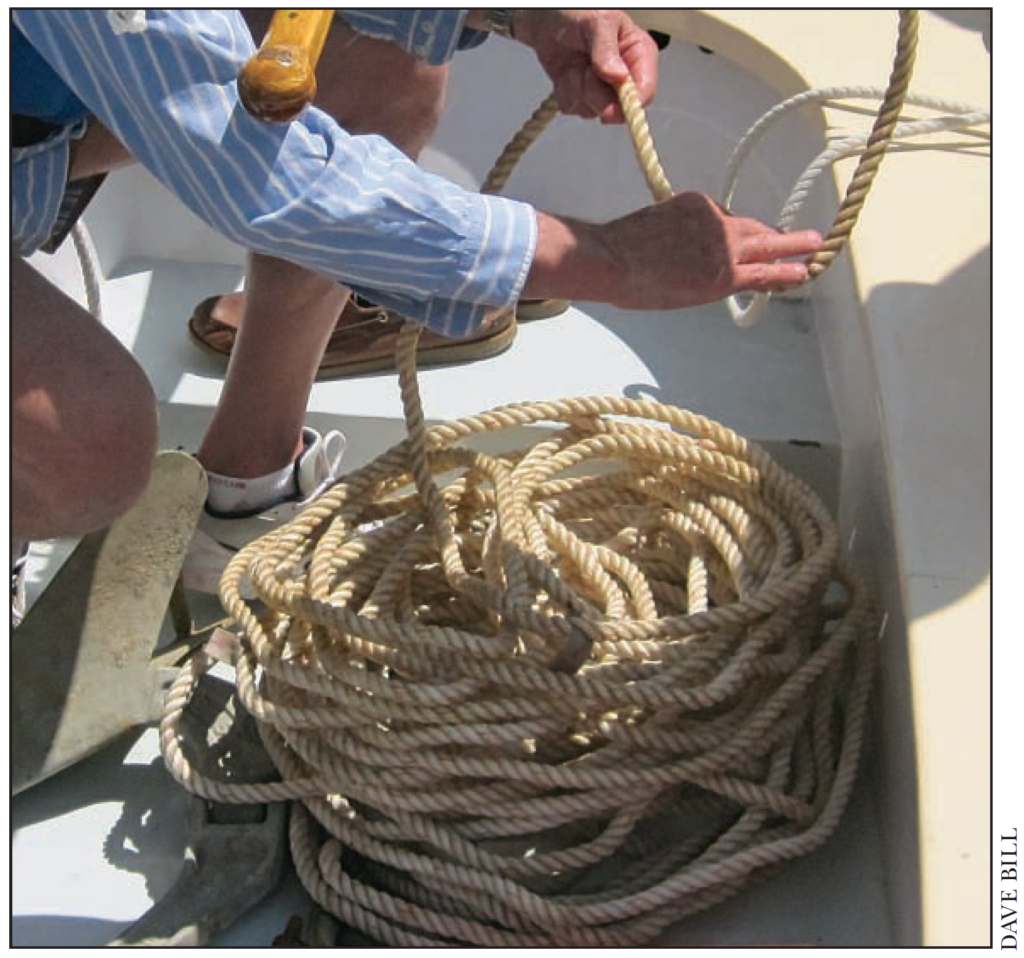
Always coil anchor rode clockwise (in line that is made with a clockwise twist, or lay). This will prevent countertwisting, which unwinds the rope’s twist, weakening it.
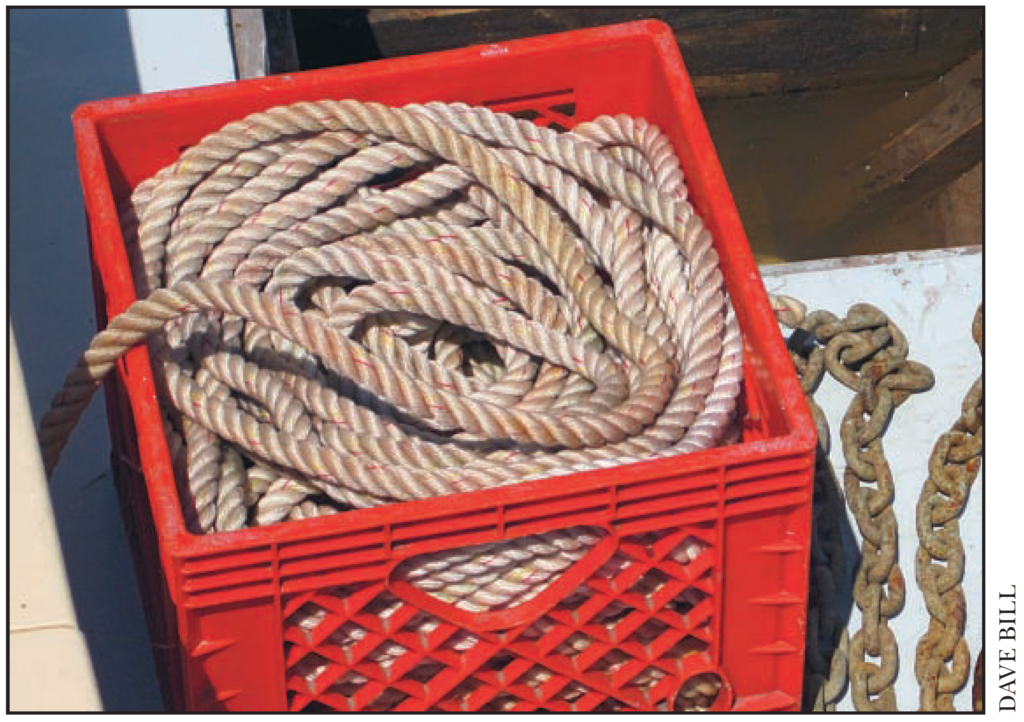
Coil and feed your rode carefully into its crate, ensuring its bitter end is attached to the hull and on the bottom. Match the container to the volume of your anchor rode and use what works best for your boat.
5 Steps to Anchor Your Boat
- Bring your boat to a complete stop.
- Lower the anchor hand-over-hand until it hits bottom.
- As the boat begins to drop back with the wind and current, gradually pay out the anchor rode hand-over-hand. Don’t dump a whole pile of extra rope or chain out, as it will tangle on itself or on the anchor.
- As the boat backs away, check to feel that the anchor is digging into the bottom by snubbing the outgoing rode on a cleat until you feel it pull.
- When the anchor is well set, give it the proper amount of scope (depending on the conditions), and secure the anchor rode.
The same steps as above can be accomplished in a boat under sail. Just come to your desired location as if you were picking up your home mooring, and use these techniques, keeping clear of headsail sheets.
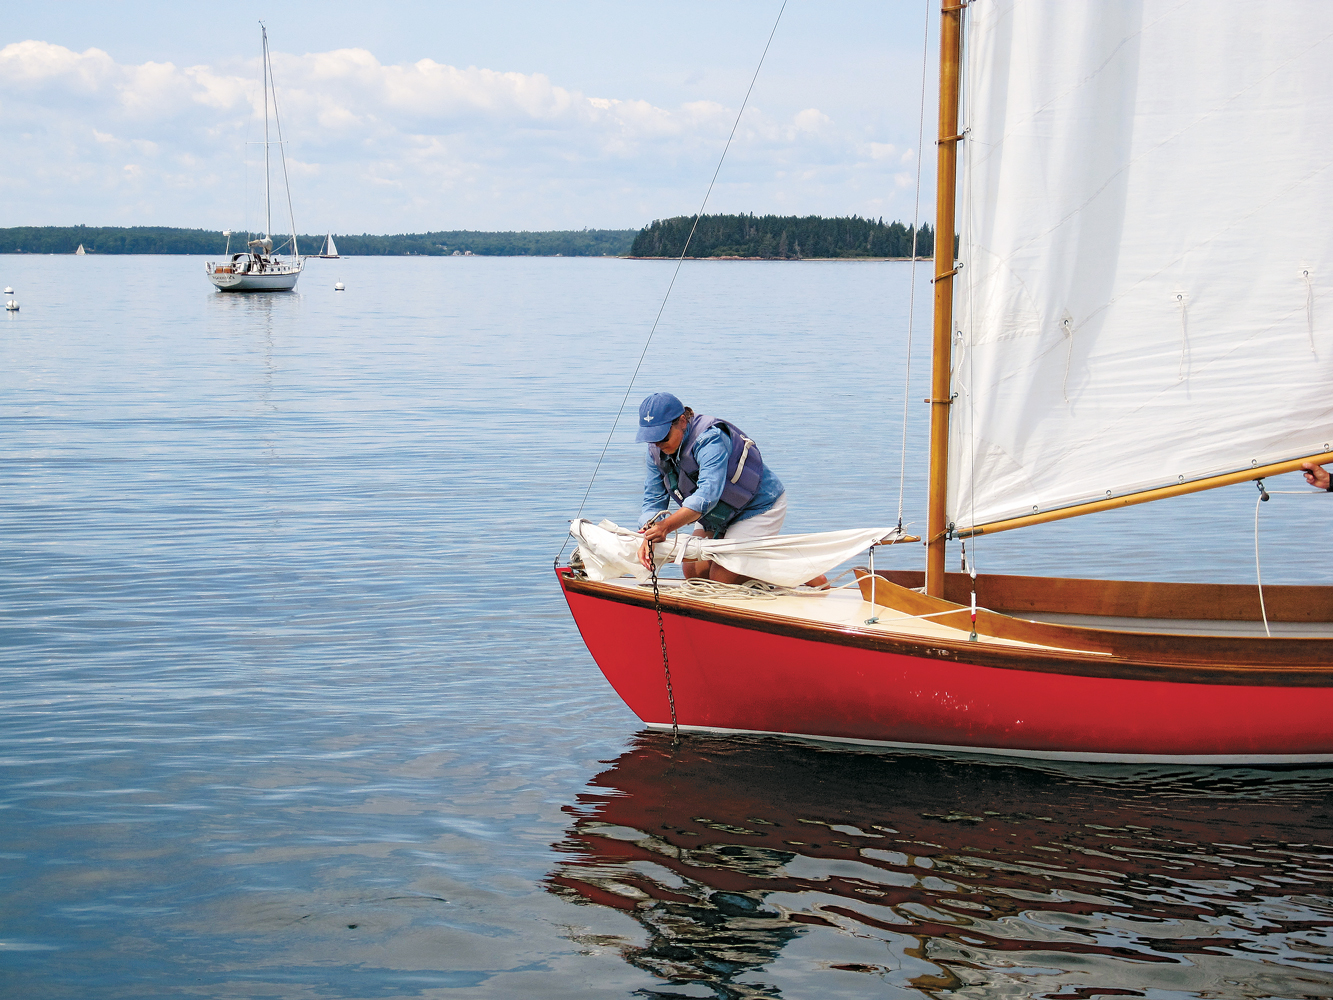
Above-When retrieving the anchor, pull the anchor up once the boat is directly over it—and don’t chafe the varnish.
Retrieving (Weighing) the Anchor
Getting the anchor back aboard by pulling it up off the bottom is a straightforward affair (unless the anchor becomes stuck—we’ll get to that in a moment). When you are ready to depart, keep the boat heading into the wind. If under sail, being ready to go means that you have your aftermost sails up and sheeted in and that you are keeping your jib down.
Break out the anchor by keeping a strain on it after the rode line is vertical. Once the boat is directly over the anchor (scope 1:1), the anchor will normally break out and pull directly up. If the anchor is set well, you may have to propel the boat past where the anchor is. This is easiest to accomplish with an engine-driven boat, but more challenging under oars and most difficult under sail without an auxiliary engine.
When the anchor is at the water’s surface, clean it by swishing it up and down in the water, or use a long handled brush and bucket to wash and rinse it before bringing it aboard.
Occasionally, an anchor gets stuck on the bottom. Usually the anchor will break free if you shorten the scope and run the boat in circles around the anchor. In warm, shallow water you may be able to swim down and free the anchor. If you are concerned that the anchor may foul and you won’t be able to retrieve it, you can put an anchor trip line on the crown of the anchor beforehand with a buoy off the line. With a trip line you can pull the anchor up backward.
Unfortunately, there are some rare circumstances when you simply have to leave the anchor on the bottom. If you know someone with dive gear, you could tie a buoy off on the anchor rode and have the diver retrieve the anchor later.
Anchoring Tips
Here are four tips to make anchoring easier and more effective:
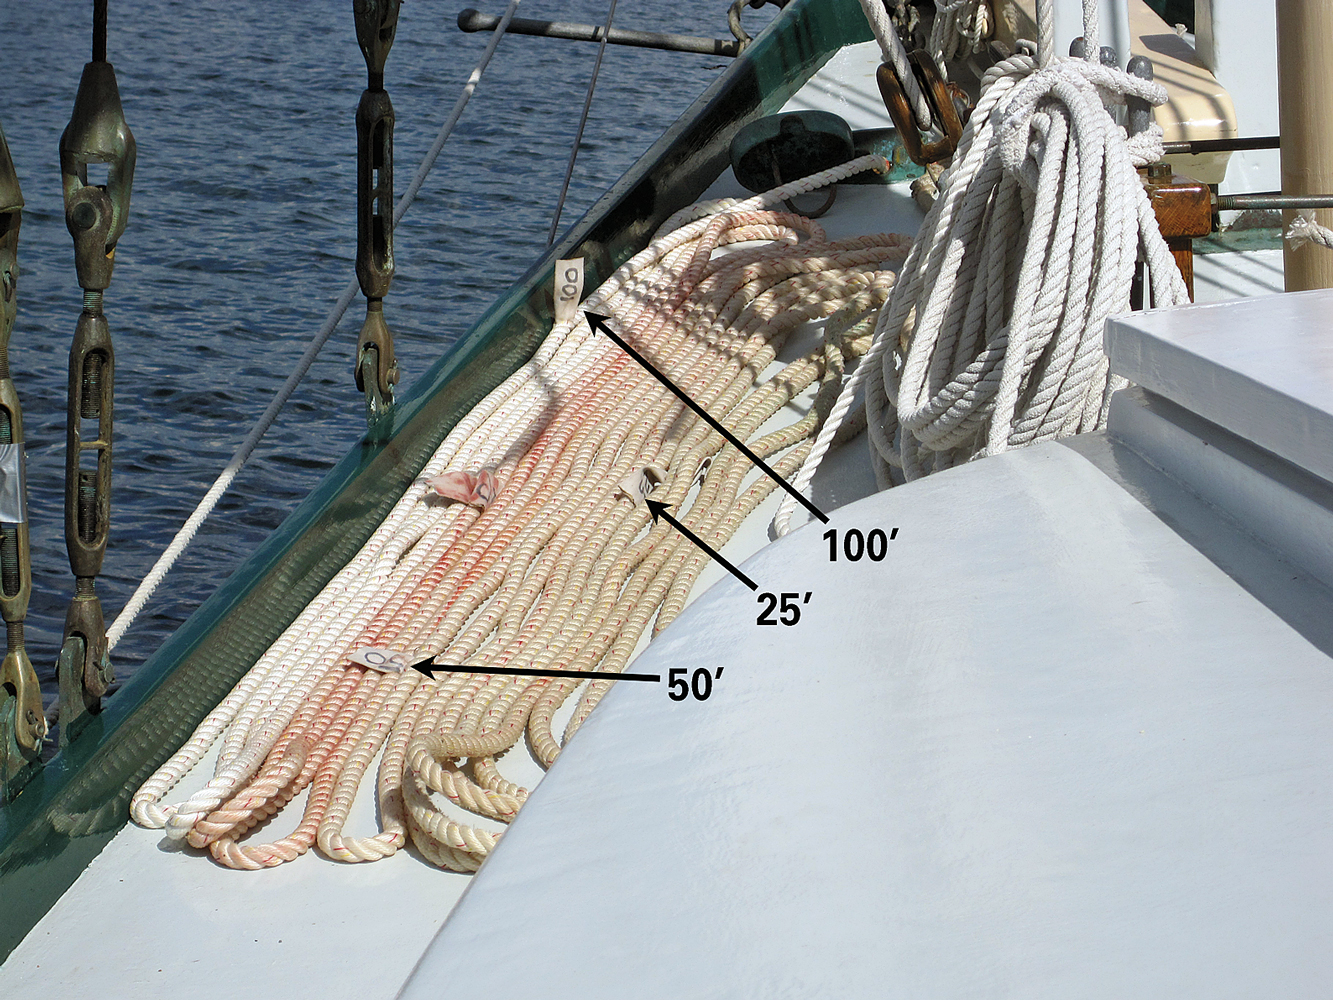
– Mark lengths on the anchor rode so that you know how much you have let out. This can be accomplished by color-coded spray paint in whatever organized format you can remember. Some folks pass strips of cloth between the three-strand lay of the line, making tags with lengths indicated on the strips in waterproof marker.
– The easiest way to lose your precious anchor is to let it go without securing the boat end of the anchor rode (as obvious and simple as this may be, you would be surprised how often this happens).
– When weighing anchor, it is best to get the anchor all the way up and secured before making headway in your boat. Otherwise the anchor can be pushed back with the bow wave, making it difficult to pull out of the water.
– Don’t throw the anchor off the bow when deploying it. This can cause the anchor rode to foul the anchor, prevent a good set, and could even send you overboard. You should simply drive your boat to the desired anchoring location, lower the anchor gradually to the bottom, and let out sufficient rode until the desired scope is reached.
Always Anchor Your Boat Safely
Anchoring takes practice. Like all boating skills, you’ll want to familiarize yourself with the techniques in a safe harbor on a calm day. While no two situations are the same, the information and skills discussed here will give you a good foundation for safe and effective anchoring.

