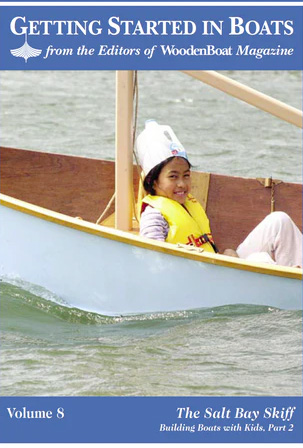
In our last installment, my 10-year-old daughter, Ana, and I constructed the hull of our Salt Bay Skiff. This time we’re going to fit her out. We’ll make and install quarter knees, breasthook, thwarts, aft seat, mast supports, rudder, leeboard, and spars. Then, we’ll paint her, install hardware, rig the boat, and go sailing!
Building the Salt Bay Skiff has been fun for Ana and me. For us, the most important thing was to enjoy the project. To do that, we had to learn to adapt to each other’s style. There are many things that a capable kid like Ana can do in this project. She found that she had a lot of math skills (that surprised her), and she took responsibility for much of the layout, having learned to do that cleanly and with precision. I was impressed with her hand tool and hand power tool use. It was a thrill to see her confidence and her abilities grow. We’ll never forget the fun we had.
We begin this section with fitting the quarter knees and breasthook. Be sure to have Part 1 ( WoodenBoat No. 199) nearby for reference.
Make and Fit Quarter Knees and Breasthook

Lay a piece of stiff cardboard over the aft corner of the boat and mark the underside angle. That line depicts the top of the quarter knee and the angle of its two arms. Use the same technique to pick up breasthook information. Refer to the drawing to lay out the cutting angles and other features of the quarter knees and breasthook.

Use a bandsaw, table tilted to the required angle, to cut out the quarter knee and breasthook pieces.


If the quarter knees and breasthook aren’t an exact fit, use a stiff sanding board with 40-grit sandpaper to shape as needed. Dry-fit all three pieces, one piece at a time. Lay out fastening hole locations. Drill clearance holes from the inside of the planking through the outside of the gunwales. Fit the piece in its proper location and drive drywall screws into it from the outside. Drill horizontally to avoid drilling through the piece. When fitting the breasthook, remember to position it so that it stands proud of the gunwales for shaping later on. Before final installation, drill, file, and sand the mainsheet traveler holes in the knees. Pull the screws, apply epoxy to the mating edges of the piece and the inside planking (hull), and install the breasthook. Follow this procedure for the knees as well.

Use a block plane to shape the breasthook. Begin by planing a bevel along the length of the piece (ours tapers toward the stem). Plane a few strokes per side, gradually working both sides down uniformly. With the first bevel established, split the established angle and the flat area in the center. This is called “halving the facets.” Continue to halve the facets until you achieve the shape you want. Resist the temptation to complete one side at a time, as the result will likely be an uneven shape.

Make and Install the Maststep
To safely build the maststep, it’s best to start with a longer piece of wood and work your way down to the final dimensions (avoid cutting short pieces on the table saw whenever possible.) I used a 2′-long piece of 2 x 4 lumber to build my 6″-long maststep. Begin with a resawing cut. (“Resawing” is sawing a piece on edge to yield two thinner pieces.) Begin with a shallow cut and work your way up to the final depth. At least two passes are necessary to prevent the blade from binding. Then, rotate the piece 90 degrees, lower the blade, reset the fence, and rip the waste from the board (see drawing on page 4.)

Lay out the top of the maststep according to the drawing, then crosscut some of the waste from the long board. Set the bandsaw table to a 25-degree angle. Place a scrap of plywood butt strap material under the cut-out portion of the maststep piece to level it while cutting.

Maststep, continued
To cut the mast opening, make a series of relief cuts as shown, then cut to the marked line.

With the aft edge of the maststep on the drill press table, use a 1⁄4″ bit to drill the two bolt holes. Flip the work and counterbore washer and bolt-head holes using a spade bit that matches the diameter of the washers. Then, use a bevel gauge to pick up the frame angle and cut that bevel (about 5 degrees) on the forward edges of the maststep as shown. Bevel the aft edge at 15 degrees. Use the bolt holes as a guide to bore holes through the frame. Mark the exact position of the maststep and bolts, and then remove it. Drill four clearance holes for additional fastenings (see drawing). Spread epoxy on the mating faces of the maststep and its footprint in the boat, bolt it to the frame, and drive four 1″ screws into it from the outside.


Install Thwart Cleats
Thwart cleats were made in part one of this article. Now it’s time to install them. Level the boat fore and aft. Make two marks along the centerline: one that is 12 1⁄2″ forward of the ’midship frame and one 6 3⁄4″ aft of it. Stand two identical cans at (outside) these marks and level the boat by moving its supports. Level the boat athwartships too, then make sure there’s no twist in the hull. Once it’s level, brace the hull in this position.

Use a small level (the one on a combination square is a good choice) to level the thwart cleat. Trace its outline on the hull. It’s a good idea to level and trace all four cleats at this time. Install them with epoxy and screws, driven from outside the hull.

Make Patterns for Thwarts and Aft Seat

To build both thwarts and the aft seat accurately, you’ll need to make patterns. Use stiff cardboard and wood scraps (sticks about 1″ thick) that are a little shorter than the thwart to make thwart patterns. Cut two pieces of cardboard (the width of the thwart) and fit each one to hull, frame, and butt-strap profiles. Attach them to the wood scraps with hot glue as shown.

Make and Install Thwarts and Aft Seat
Trace the pattern onto the Western red cedar thwart stock for each thwart. The pattern represents the underside of the thwart; the top will be longer because of the flare of the hull. Use a bevel gauge to transfer the flare angle onto the thwart’s forward and aft edges. When picking up that angle, be sure to set the gauge perpendicular to the hull, or you’ll get the wrong angle. Drill the ends of the frame notches, also at the flare angle, with a spade bit. Use a bevel gauge as a guide, as shown. Use the bevel gauge to set a jigsaw blade to the same angle, and finish cutting out the thwart ends. Finish cutting the notches with a handsaw. You may want to try this on a practice piece first.

Use a bevel gauge to transfer thwart angles onto the forward and aft thwart stiffeners for each thwart. Be sure to place a scrap beneath the thwart that raises it to the correct height (making it flush with the top of the thwart stiffeners). Then, use the gauge to transfer end angles to the inside faces of each stiffener. Use a handsaw to trim the ends. Set the stiffeners aside for now.

Build the aft seat according to the drawing. Fit the two outermost slats first, then a center slat, and then fill in the rest. Be sure to install a seat stop at the forward edge of the seat riser to keep it from riding forward.

Make the mast hole in the forward thwart. Check to see that the boat is still level. Position a level vertically against the aft side of the forward thwart. Measure the distance from the aft edge of the maststep hole to the level and transfer it to the top of the thwart. Find the forward edge and side-to-side measurements by similarly plumbing upward from the maststep, which should place the center of the hole in the center of the thwart. Using these marks and a thwart edge, draw parallel and perpendicular lines to form a rectangle that defines the mast hole.

Find the center of your layout and drill a tiny hole (just big enough for a thin piece of line to pass through) at that location. Then make a small plumb bob by tying a nut to the end of some thin line. Thread the line through the hole and drop the weight into the maststep hole to check your layout. The line should fall dead center in the maststep hole. If it does not, adjust the layout. Once you have the mast hole layout on the thwart perfectly aligned with the maststep hole, move the maststep hole center and corresponding hole layout exactly 1⁄8″ aft, as shown on the drawing. This critical position gives the mast the appropriate rake. Glue a 7″-square piece of 1⁄2″ plywood under the center of the thwart to reinforce it. Once the glue is dry, cut the hole through both thicknesses.

Thwarts and Aft Seat, Continued
Glue the thwart stiffeners to the thwarts. Use the boat as a form while gluing, but remove the glued and clamped assembly to the bench to cure.

Make the Leeboards, Rudder, and Tiller


The plywood for the leeboard and rudder were cut out in Part 1. Make sure that the leeboard top block is a little thicker than the combined thickness of the gunwale and hull side so that the leeboard will slide on easily. If you’re lacking the required 1 1 ⁄ 4″ thickness, glue up pine pieces for the 13″ x 4″ x 1 1⁄4″ top block. Leave these to set overnight. Cut out the leeboard top block and tongue. Assemble the leeboard with epoxy and screws.


Draw lines on both faces of the rudder, about 3″ in from the aft edge. Then draw a centerline down the aft edge of the blade. This layout provides a visual boundary for shaping. Use a belt sander with a coarse-grit belt or a grinder to taper the blade. Tilt the tool so that it follows the angle that the layout suggests. The lines made by the plywood’s layers will also help to indicate an even taper.

Use the drawing to lay out the tiller on 3⁄4″-thick oak. Use a bandsaw to cut out the general shape. Strengthen the tiller with a rivet or a small bolt across the grain just forward of the slot, to prevent splitting. Use a router or rasp to round the corners. Follow with sanding and finish.

Making the Spars

Use epoxy to glue up spar stock to the required dimension. Clean off excess epoxy and leave it to set overnight. Then clean up with a scraper and mill, using a planer or hand plane.

Lay out all spar tapers as well as the slot for the halyard sheave.

To accurately drill for the sheave, the mast must be level on the drill table. I didn’t have a roller stand to hold the far end in place, so Ana stepped in to hold it steady. Use the slot end lines to center the drill bit on the work. Drill a hole in each end, then use a jigsaw to cut out the waste.

Use a rat-tail rasp to round the edges of the slot, being especially aggressive at the ends. Remember that line must run through this slot without catching, so don’t leave any sharp corners.


Paint the Boat
Prepare the surface for primer and paint. Sand the hull smooth. Apply two coats of epoxy, inside and out. Fill gaps and screw holes as necessary. Allow enough time for each coat to cure. Wash down all areas that are to be painted with warm water (some people add a little soap) to prevent amine blush, a greasy film that sometimes forms while epoxy cures.

Apply a coat of primer; fill as needed, apply another coat of primer, and then two or more coats of paint.

Rig the Boat
Chris Franklin has worked in boatyards from California to Paris and has been designing boats in Maine, primarily with Bruce King, since 1990. He and daughter Ana wish to thank the Carpenter’s Boatshop, <www.carpentersboatshop.org> in Pemaquid, Maine, for hosting this project.

