
I am the third generation of my family to build wooden ship’s wheels, and I can go to almost any harbor, anywhere, and see a wheel my family made. We’ve built all the wooden wheels for Edson Marine since at least 1965. I can tell by the turnings whether a wheel is one of mine or one built by my father or my grandfather.
A fine wooden wheel is often passed down from generation to generation, just like a finely crafted boat. It’s always rewarding to see that wheels created by my father or grandfather—or those I made early in my own career—have stood the tests of time and nature. I love seeing that a wheel I made 40 years ago is still structurally intact.
I’ve built close to 900 wheels for everything from 20′ skiffs, to the Herreshoff Bounty–class yacht CATRIONA, to a U.S. Navy amphibious assault ship. I began making wheels at 14 years old, and I could only have learned the necessary skills by working with my family. By the time I started, my father and grandfather had recorded tables of offsets documenting the proportions used for wheels of various sizes.
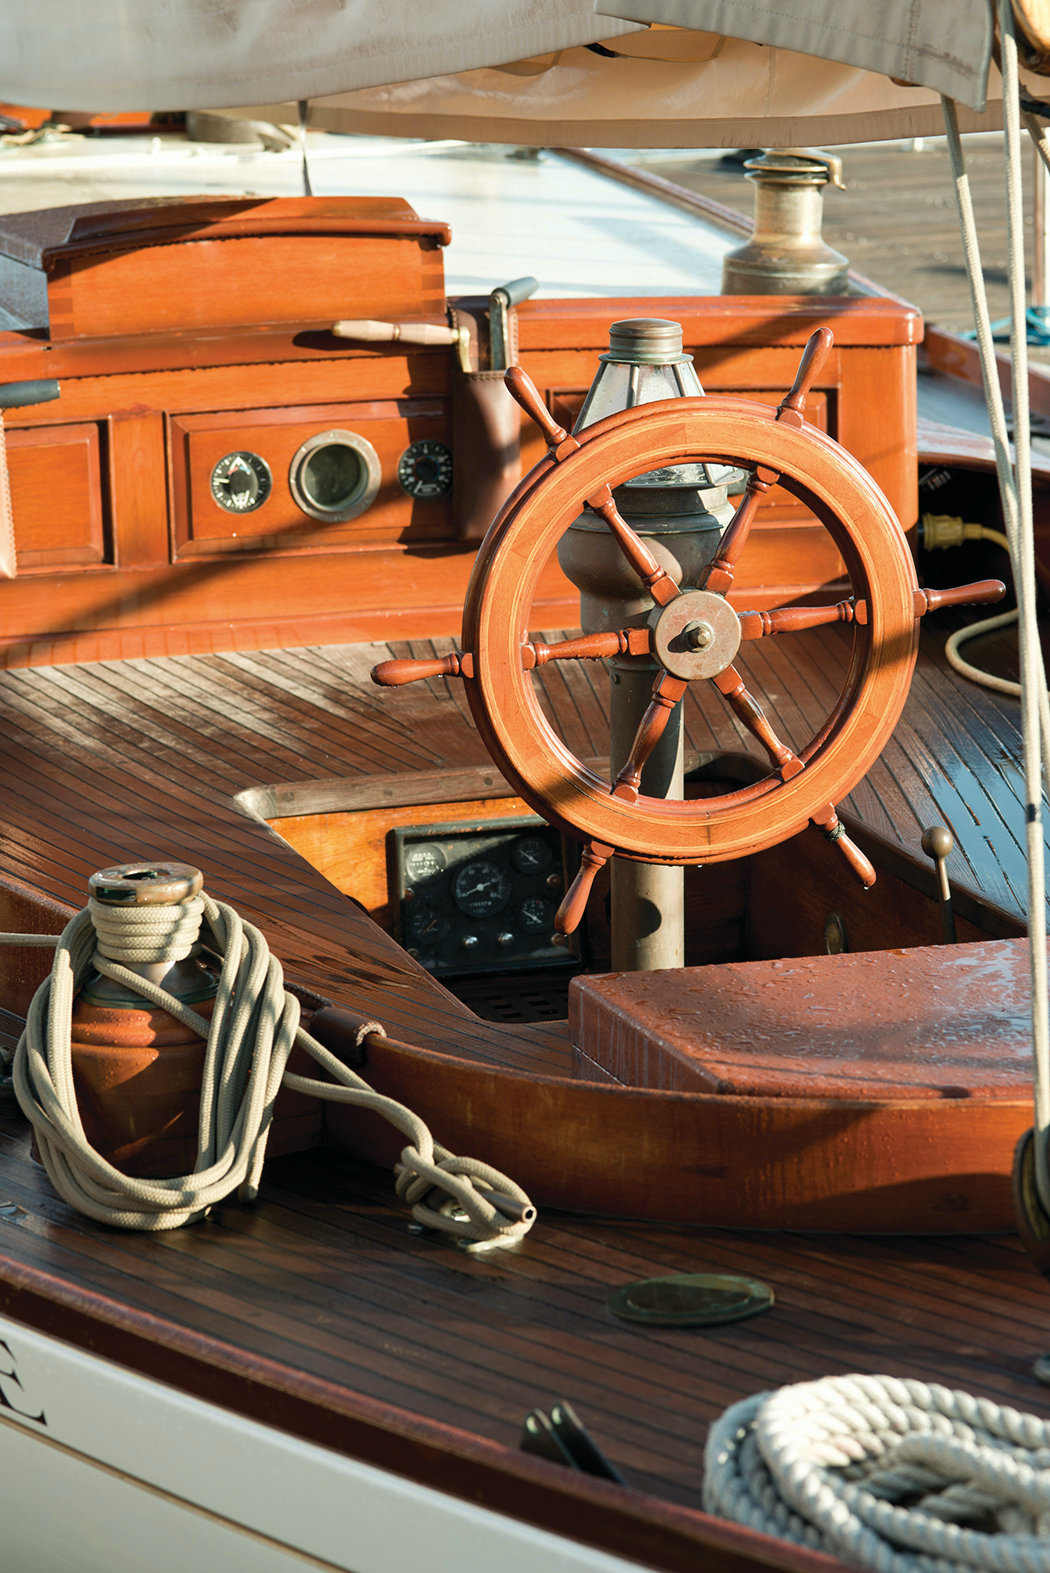
I have taken the slightly different approach of working through consultations, sketches, and prototypes to determine exactly what the customer wants before actually making the wheel, including the one shown in the following photos.
 Nigel Pert
.
The creation of a wheel, including the one shown in this article, begins with a concept. I designed this one for Jon Wilson, the founder of WoodenBoat Publications, who envisioned a classic ship’s wheel for display purposes but built exactly as a fully functional one would be.
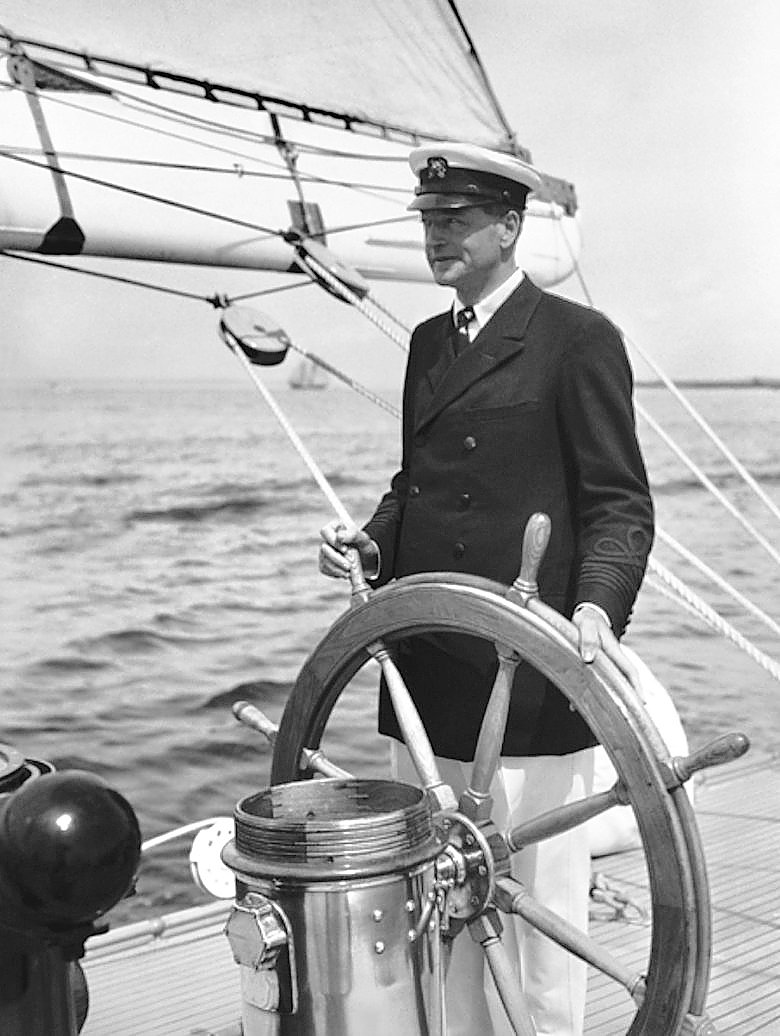
He had been particularly inspired by the classic elegance he had seen in photographs of wheels aboard two yachts: SERENADE, which Nicholas Potter designed for concert violinist Jascha Heifetz in 1938, and RAINBOW, a J-class racing yacht that W. Starling Burgess designed and Herreshoff Manufacturing Co. built for Harold Vanderbilt in 1934. He was able to send me photos of both of them, and that’s where we started.
 MYSTIC SEAPORT MUSEUM/ROSENFELD COLLECTION
.
RAINBOW’s wheel was about 48” in diameter, which was considerably larger than what would work for Jon. SERENADE’s wheel was closer to the right size, at about 34”. Determining the size of a steering wheel for a yacht, where it will be a central focus of the cockpit, is a combination of mechanical factors. Among these are the configuration of the cockpit, how the wheel is attached, and how much force needs to be applied to the steering system. The number of spokes can vary, as well: RAINBOW’s wheel had eight spokes while SERENADE’s had six.
 Bob Fuller
.
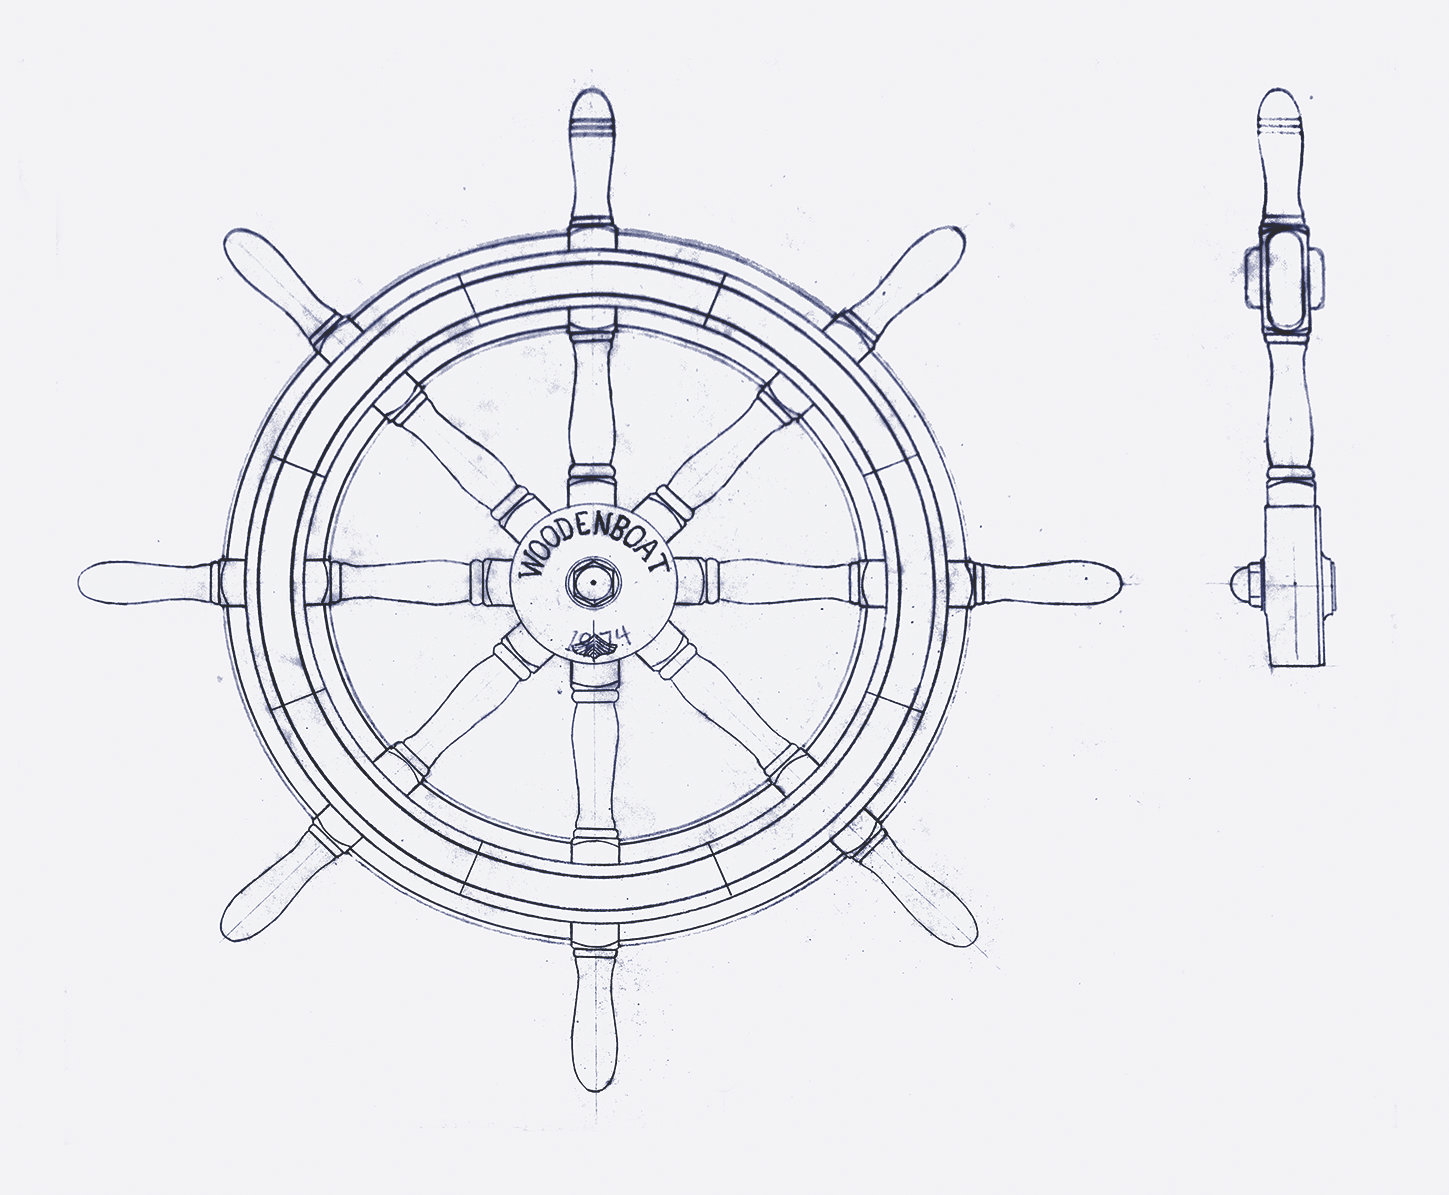
Jon was looking for a wheel 32” or 33” in diameter. I felt that eight spokes would make his wheel as strong and well-balanced as possible. So, I morphed all those factors together into an original new design, with spoke profiles and details inspired by what Jon had seen in the photos.
Working from the photos, I also dove into research about the two original wheels. The more I could learn about their histories, specifications, and materials, the better, so I contacted Kurt Hasselbalch, formerly the curator of the Hart Nautical Collections at Massachusetts Institute of Technology, and Evelyn Ansel, who is on the curatorial staff at the Herreshoff Marine Museum in Bristol, Rhode Island.
But my digging uncovered that although these museums had extensive documentation on both yachts, there was really nothing concerning their wheels. We decided to focus instead on Herreshoff designs and traditions as a starting point. I developed construction drawings, drawn at half-scale by hand. I shared those with Jon as well, so we could visualize the final product.
 Peggy Fuller
.
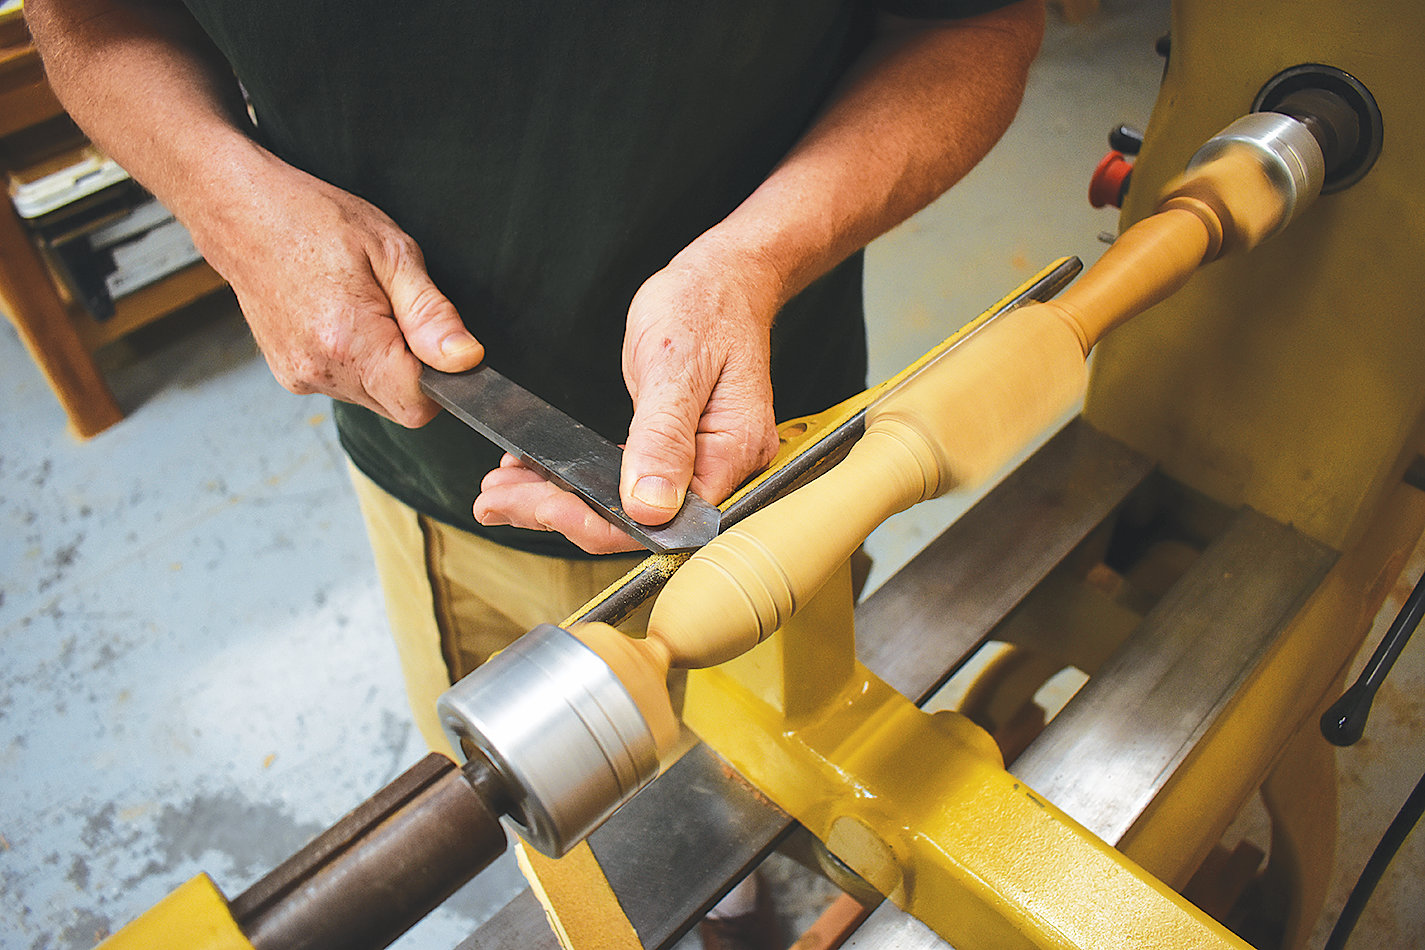
At the lathe, I turned two identical prototypes to the initial spoke profile design. Since Covid-19 restricted most in-person meetings, I sent one spoke to Jon and kept the other one so that when we talked on the phone, what he was holding and what I was holding would be the same thing. That helped us to compare notes and really see and feel what we were talking about. We went through this process two more times, revising the profile until we had a spoke that felt right in Jon’s hands. The one shown being turned, at right, is the king spoke, which my family has always given three notches near the tip to serve as a visual and tactile reference for when the helm is amidships.
After Jon approved the plans, several steps began to happen simultaneously, one of which involved making the hub.The hubs for all of my wheels are machined out of bronze by my brother, Charles. In keeping with the shipbuilding traditions of our family, he is a machinist and pattern maker whose company meets broad demands, and wheel hubs are only one of his many specialties. Although we’ve long had different shops in Massachusetts—mine in Hanson and his in nearby Halifax—we’ve worked together all our lives, so communication is easy and seamless.
The balance between metalworking and woodworking has to be just right in wheel construction: you don’t want either one overpowering the other. Charles knows, in every detail, exactly what I expect. He has to precisely match the dimensions of the bore hole, and he has to know whether the hole is straight-sided or tapered and, if tapered, how much. He has to know the length of the bore, the configuration of the keyway, and the threading of the nut that will be used to attach the hub to the wheel shaft. It all has to be exact. He also sent the finished hub to Ariston Engraving in Woburn, Massachusetts, where the forward face was engraved with the WoodenBoat name and the company’s distinctive logo.
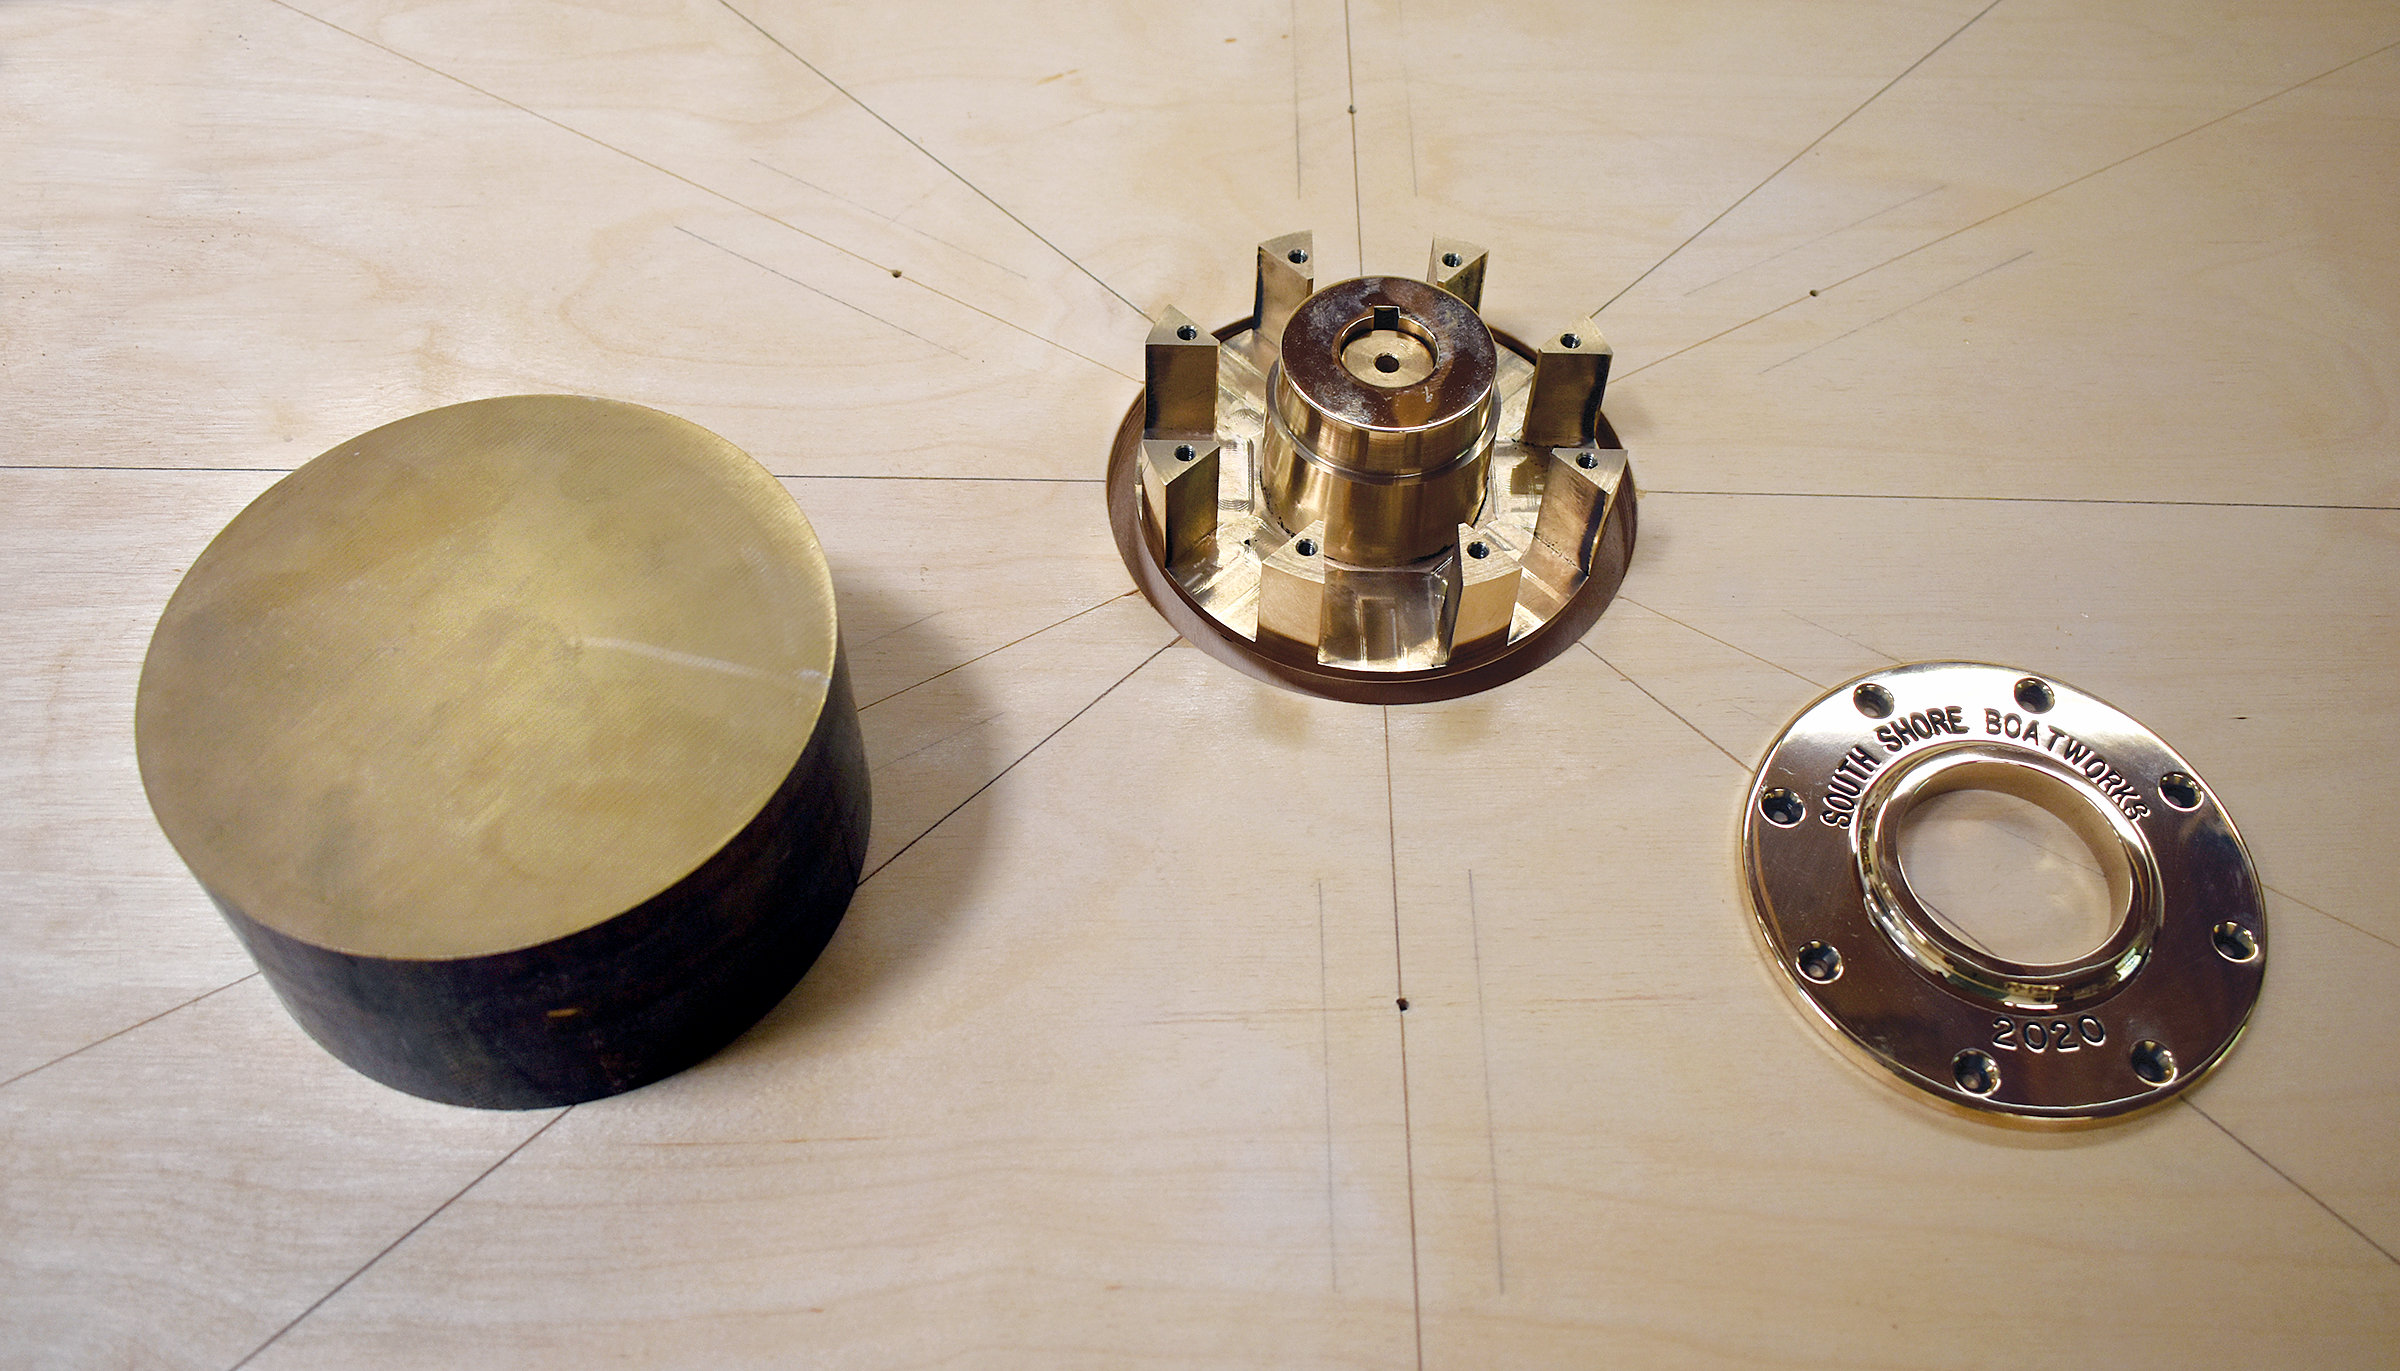 Bob Fuller
.
To lay out, finish, and assemble the individual pieces of the wheel, I work over a layout board, or “jig board,” which has all the necessary angles worked out ahead of time. The shaft in the center receives the hub, which has a snug fit to keep the wheel in exactly the right location but allows the wheel to rotate on the jig board. The weight and feel of the wheel depend on perfect symmetry.
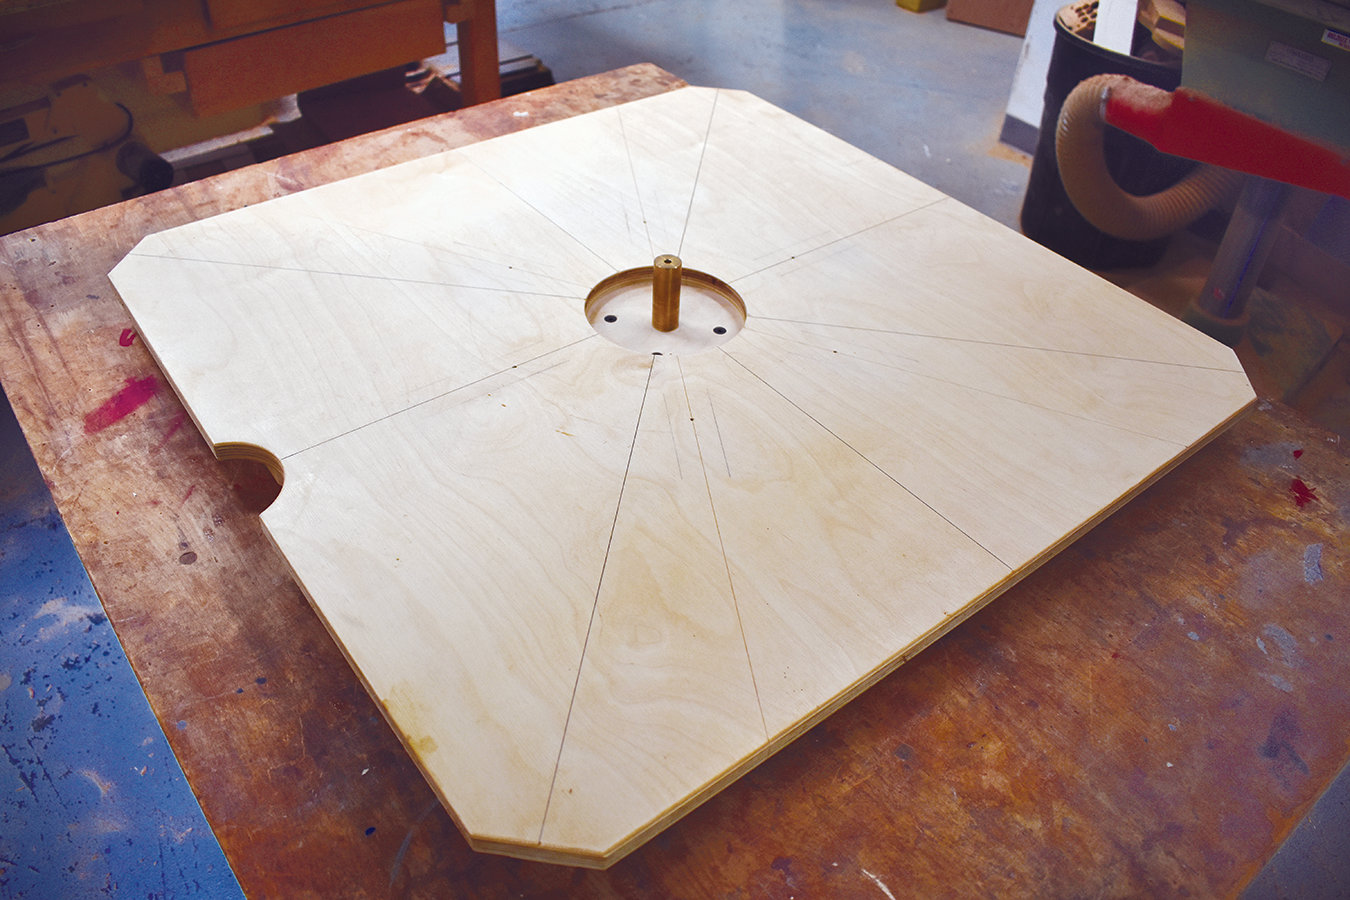 Bob Fuller
.
Making a wheel requires very precise measurements. I’m constantly remeasuring throughout every step as I tweak the fits and make adjustments. Because a wheel is all about its center, rulers are not nearly as effective for measurements as compasses are—and I have a wide selection of them in various sizes. A compass is great, because once it’s really in the center, it’s always in the center.
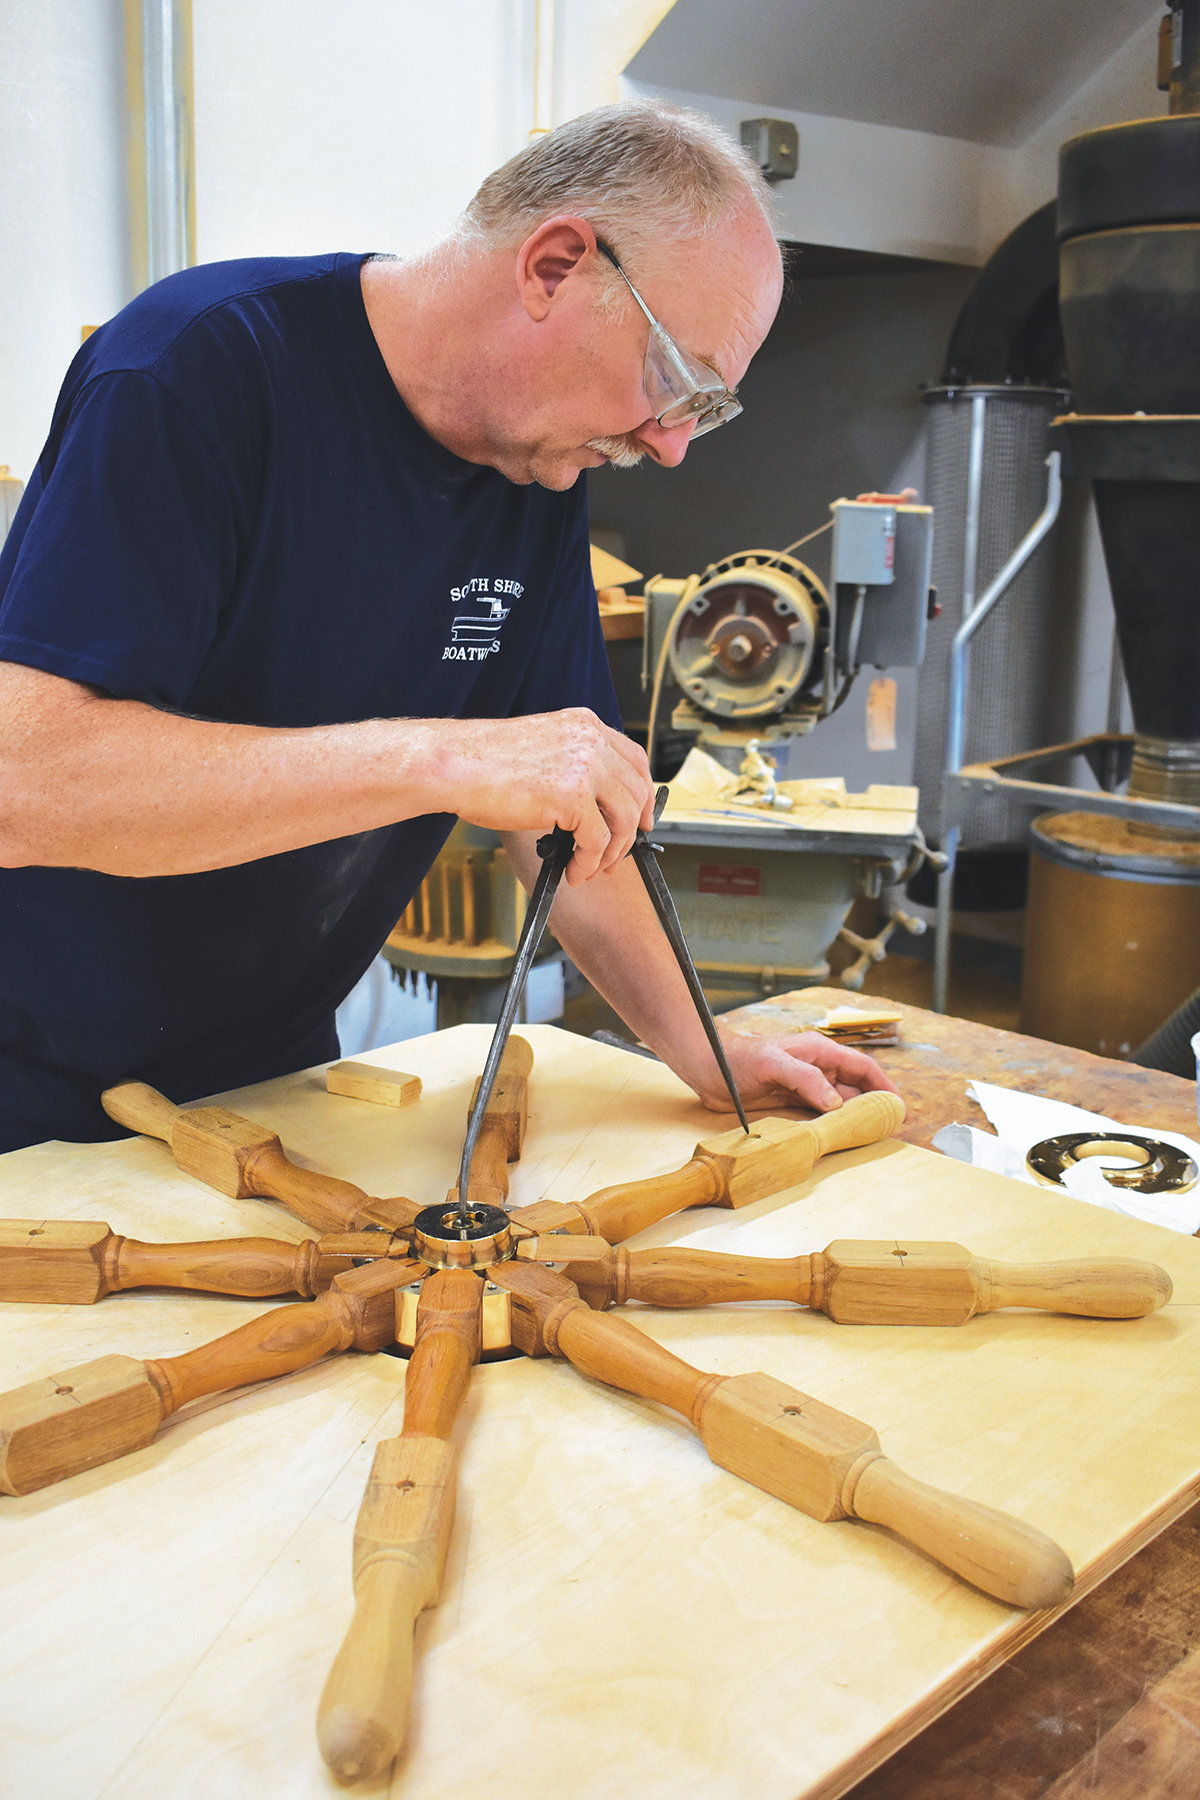
.
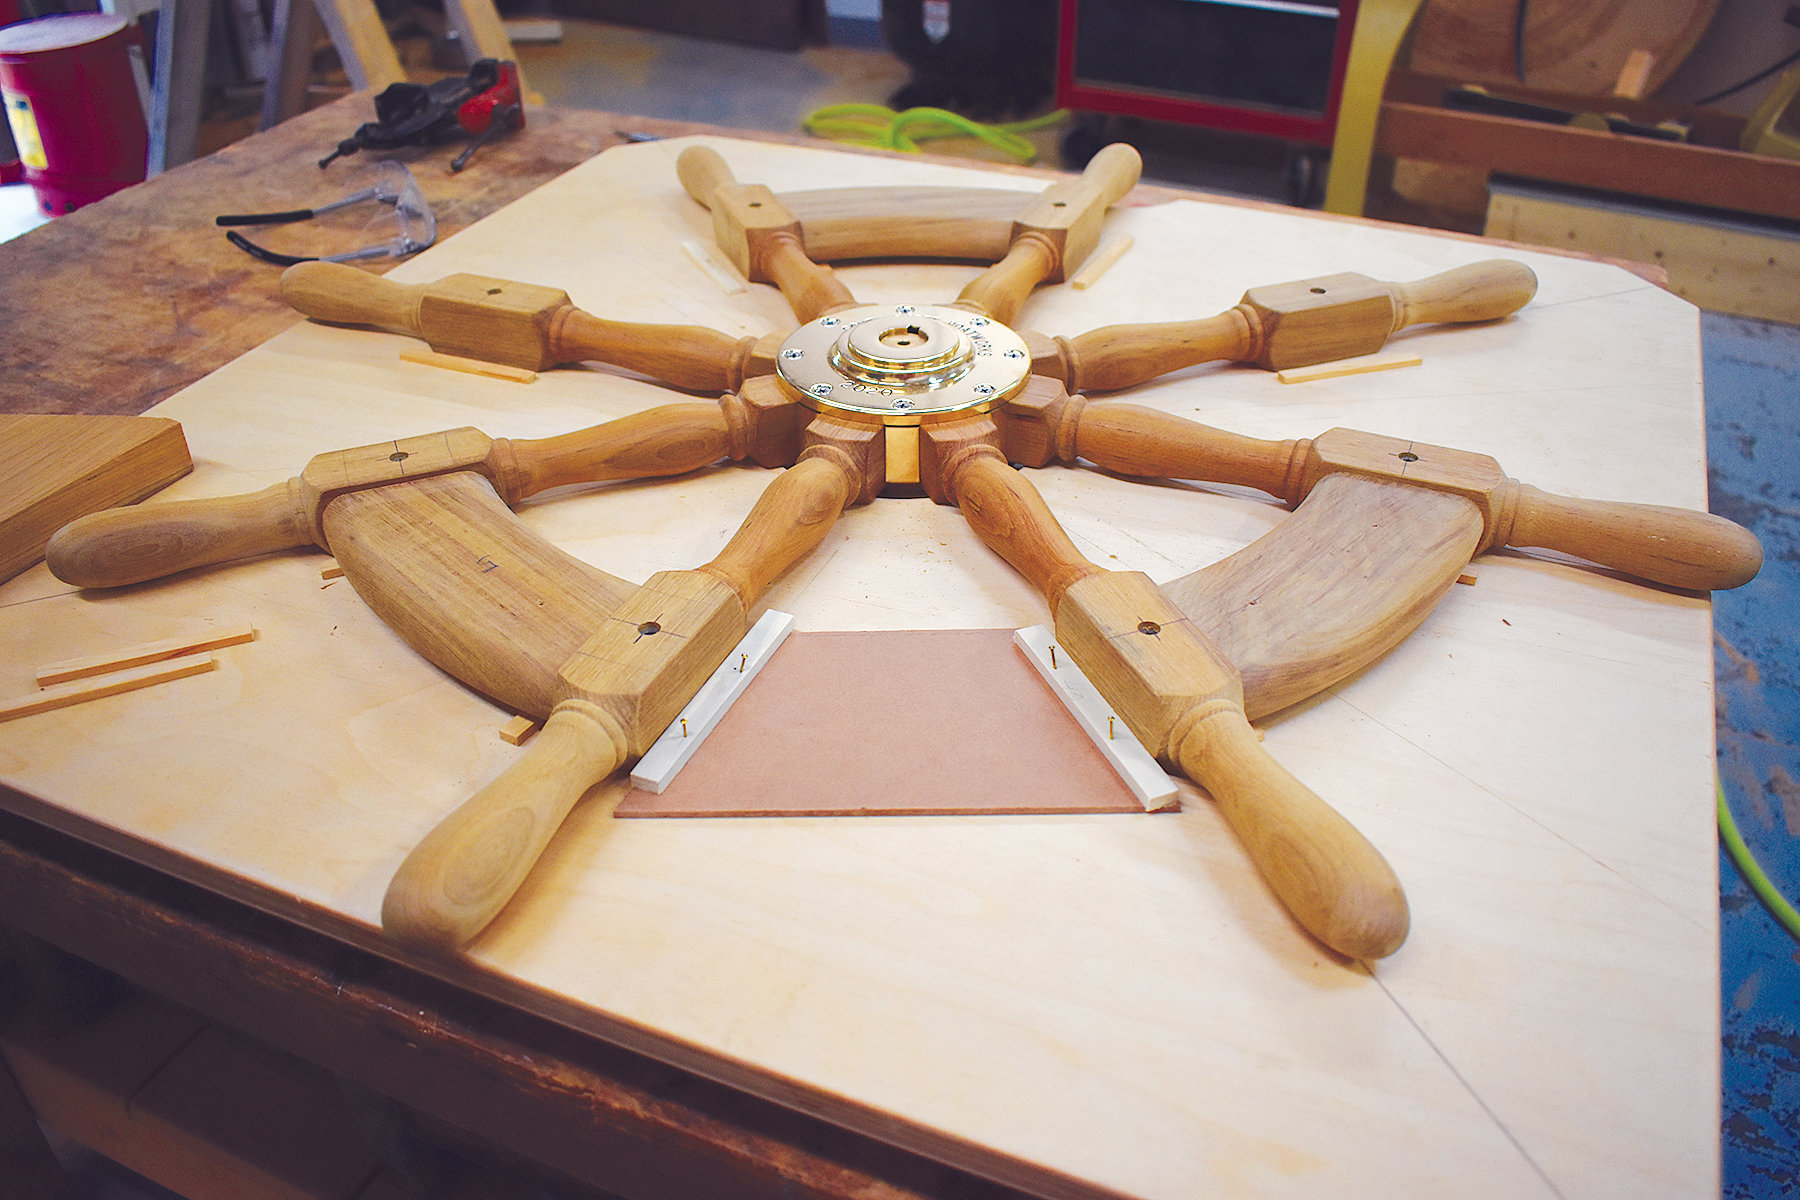
I start assembling a wheel by fitting the spokes into the slots in the hub. The wood must fit precisely; there is no room for error. If the inner end of the spoke doesn’t fit on the first try, its faces have to be meticulously shaved until it does, with the spoke at exactly the right angle. The slots in the hub are tapered, so I have to shave carefully and symmetrically. Each spoke can take five or six fittings.
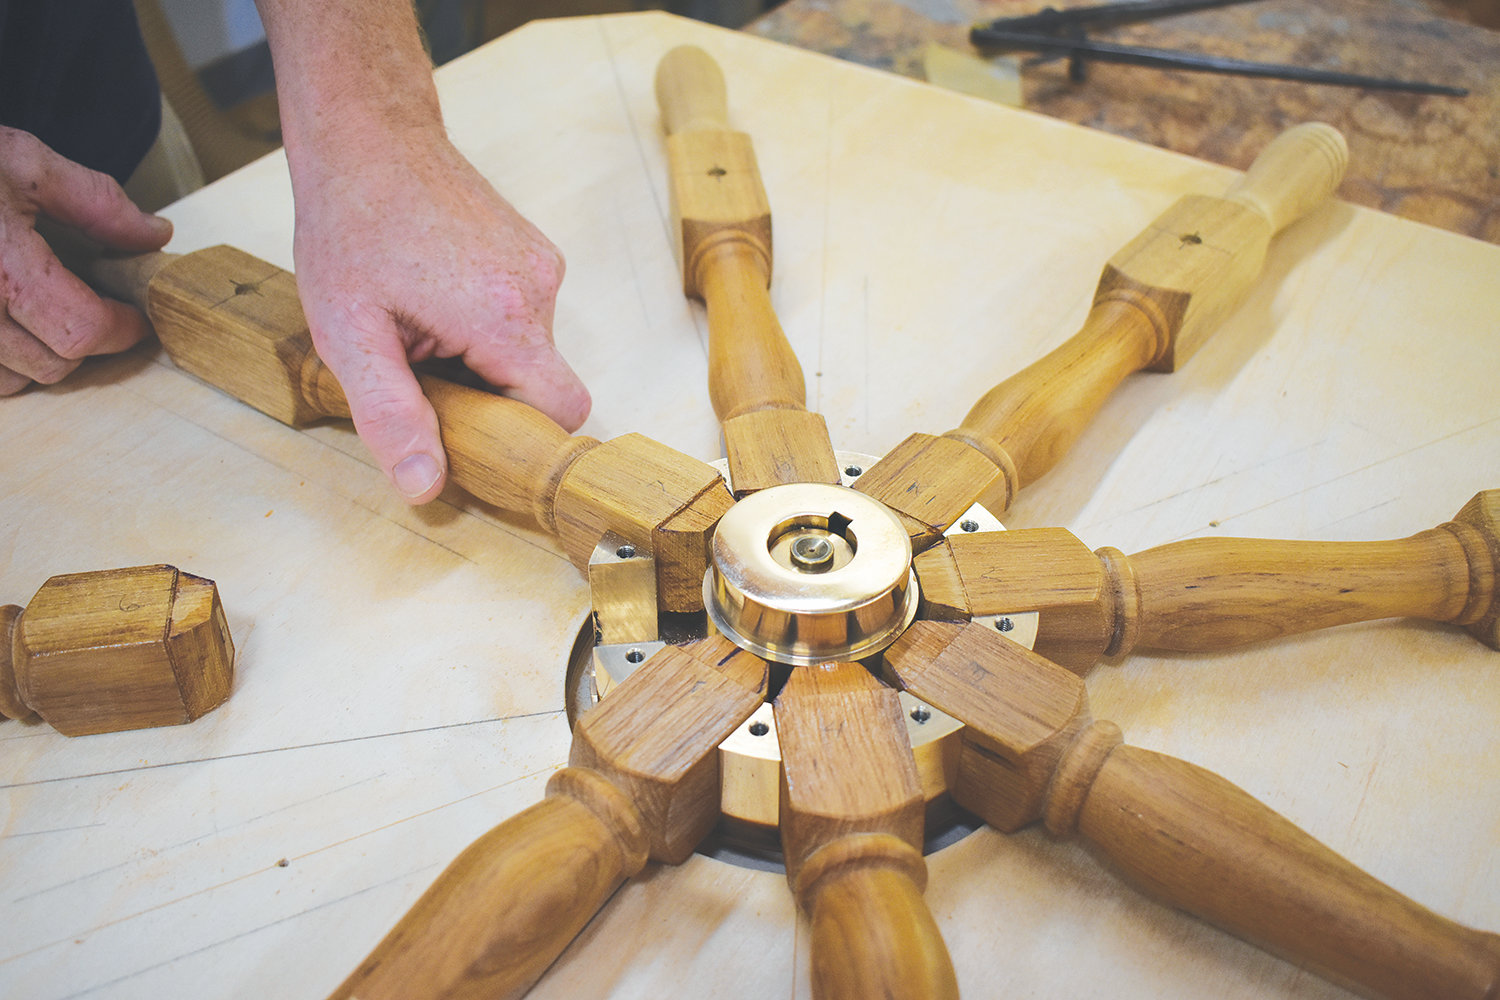 Peggy Fuller
.
There’s not much tolerance between fitting and not fitting, and if a spoke wiggles at all I have start over with a new one. For an eight-spoke wheel, I’ll usually make 12 spokes, knowing a few of them won’t survive to become part of the final assembly. The extra work is worth it in the end when the fit is really precise.
 Bob Fuller
.
The sections of the rim are traditionally called “felloes,” but I simply call them segments. Each segment forms an arc from one spoke to the next and holds the spokes together and in place. Like the spokes, each segment is shaved, measured, and adjusted over and over until the fit is perfect. After they are all made, they are glued to the spokes.
At the lumberyard, I’ll look at the surface of a board to try to figure out whether its grain and color are likely to work for the various pieces. Back in the shop, as I start to work it down, I see what’s under that skin. I try to find repetitive patterns within the grain structure that will look good and match up with other components. That’s how I spend a lot of my time, and I’m passionate about it. That’s why wheelmaking is considered nautical art.
 Peggy Fuller
.
Power tools can enhance accuracy and reduce production time, but when you do the work by hand you know exactly what is going into each element. All the surfaces are hand-sanded as well. It’s the way I was taught. There is no one way of building a wheel, but this is how I do it. Over the years, I’ve rebuilt wheels by other makers that failed because of the construction technique. In the sun and the spray, gaps open in a poorly constructed wheel and it starts coming apart.
 Bob Fuller
.
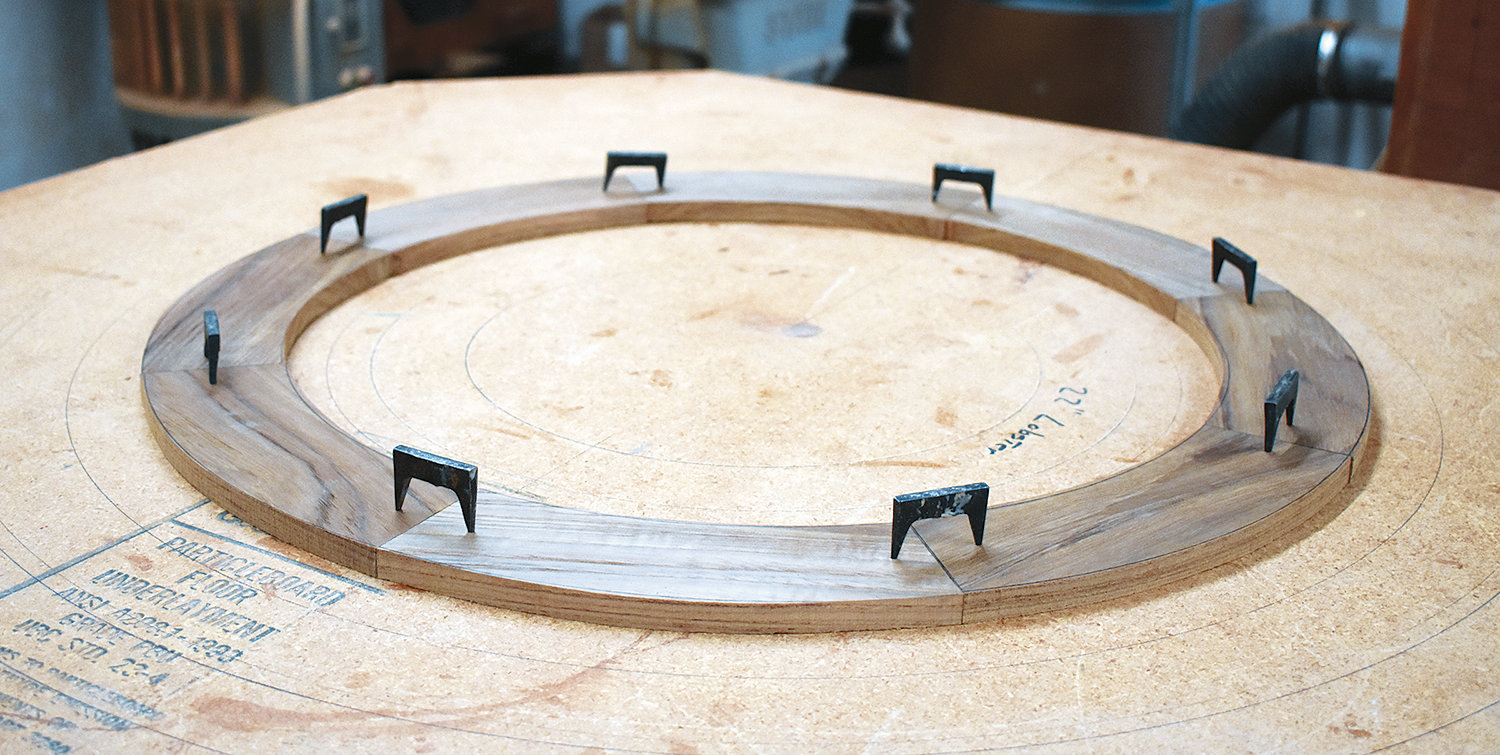
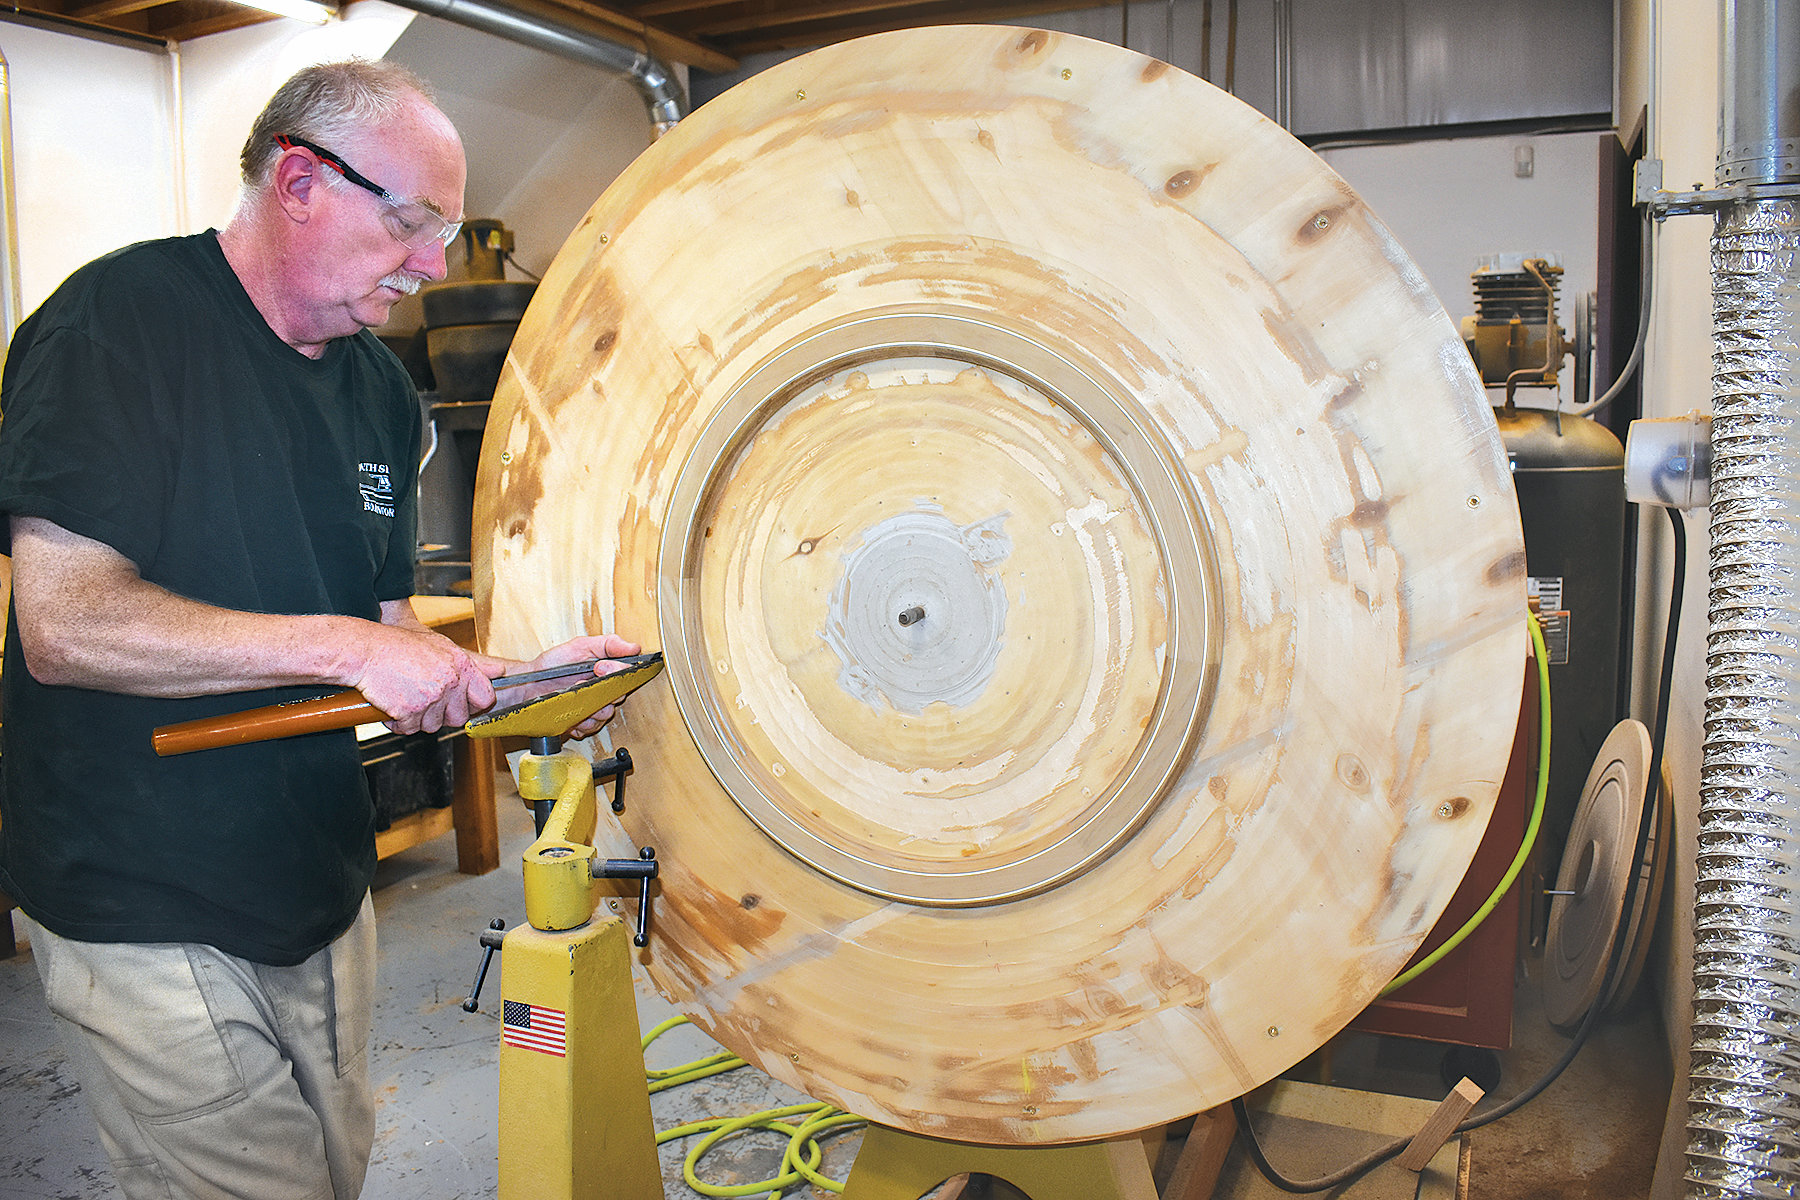
Additional segments make up what I call bands, the outer pieces of the rim. Bands are let into very precisely cut grooves on each face of the wheel rim. I cut the grooves after making the bands, which I start off by making slightly oversized. First, I make the segments to fit exactly and then glue them together. Then, using one of two methods depending on the wheel, I shape them to the exact diameter and width needed, as shown above.
 Peggy Fuller
.
One method of refining the bands is to turn them on a lathe using a very large faceplate, as shown here. At the same time, the narrow grooves for inlaid pieces of contrasting wood can be cut. The other method of shaping the bands is to temporarily screw them into position on the wheel, then take the jig board setup to a very large drill press fitted with a router bit, which cuts the perimeter profiles while the wheel is rotated slowly on the jig.
 Peggy Fuller
.
I also use the drill press as a router to cut the groove in the rim to receive the bands, rotating the wheel on its shaft as the cutting proceeds. Here, the grooves are visible after the first cuts through the spoke intersections. The groove eventually will extend into the segments as well, making a continuous circular groove.
 Peggy Fuller
.
After a band has a perfect fit to the continuous groove, it is glued and reinforced with screws set in pilot holes that are counterbored to receive bungs. Because the bands fit into the continuous grooves on both faces, they very firmly lock the segments and the spokes together. Both the bands and the segments, in keeping with tradition, are hand-crafted out
of specific types of wood, often teak. After both bands are installed, the bungs set and trimmed flush, and the final sanding completed, the wheel is ready for finish.
 Bob Fuller
.
Here, my apprentice, Derek Sprague, applies one of the 10 coats of varnish to one of our ship’s wheels (not the one made for Jon, in this case). All varnish coats are applied by hand, which provides more protection than sprayed-on varnish. I use Pettit’s Captain’s Varnish, which I’ve been using for years because it dries well on teak and protects against sunlight. I use semigloss for the final two or three coats; some owners prefer a glossy finish, but I feel that semigloss does a better job of bringing out the depth and character of the wood.
Some years ago, eager to see these skill traditions continue on
into the future, I had brought in my first apprentice through a Commonwealth of Massachusetts program. Derek, though, came later, after working as a swordfish fisherman. He had taken a boatbuilding class in high school and came here to help out on a boat restoration project, but he developed an interest in the wheels. He didn’t have a mapped-out, formal apprenticeship, but he took to the work and has been learning every day since spring 2020.
My daughter, Christina, who is now 23 and works as an animal-care technologist at Tufts University, has also worked in the shop from a very young age, just as I did. Often, she builds cradle boats for us. She, too, might become a formal apprentice in making ship’s wheels through the state program, and could very well take the family business into a fourth generation.
.
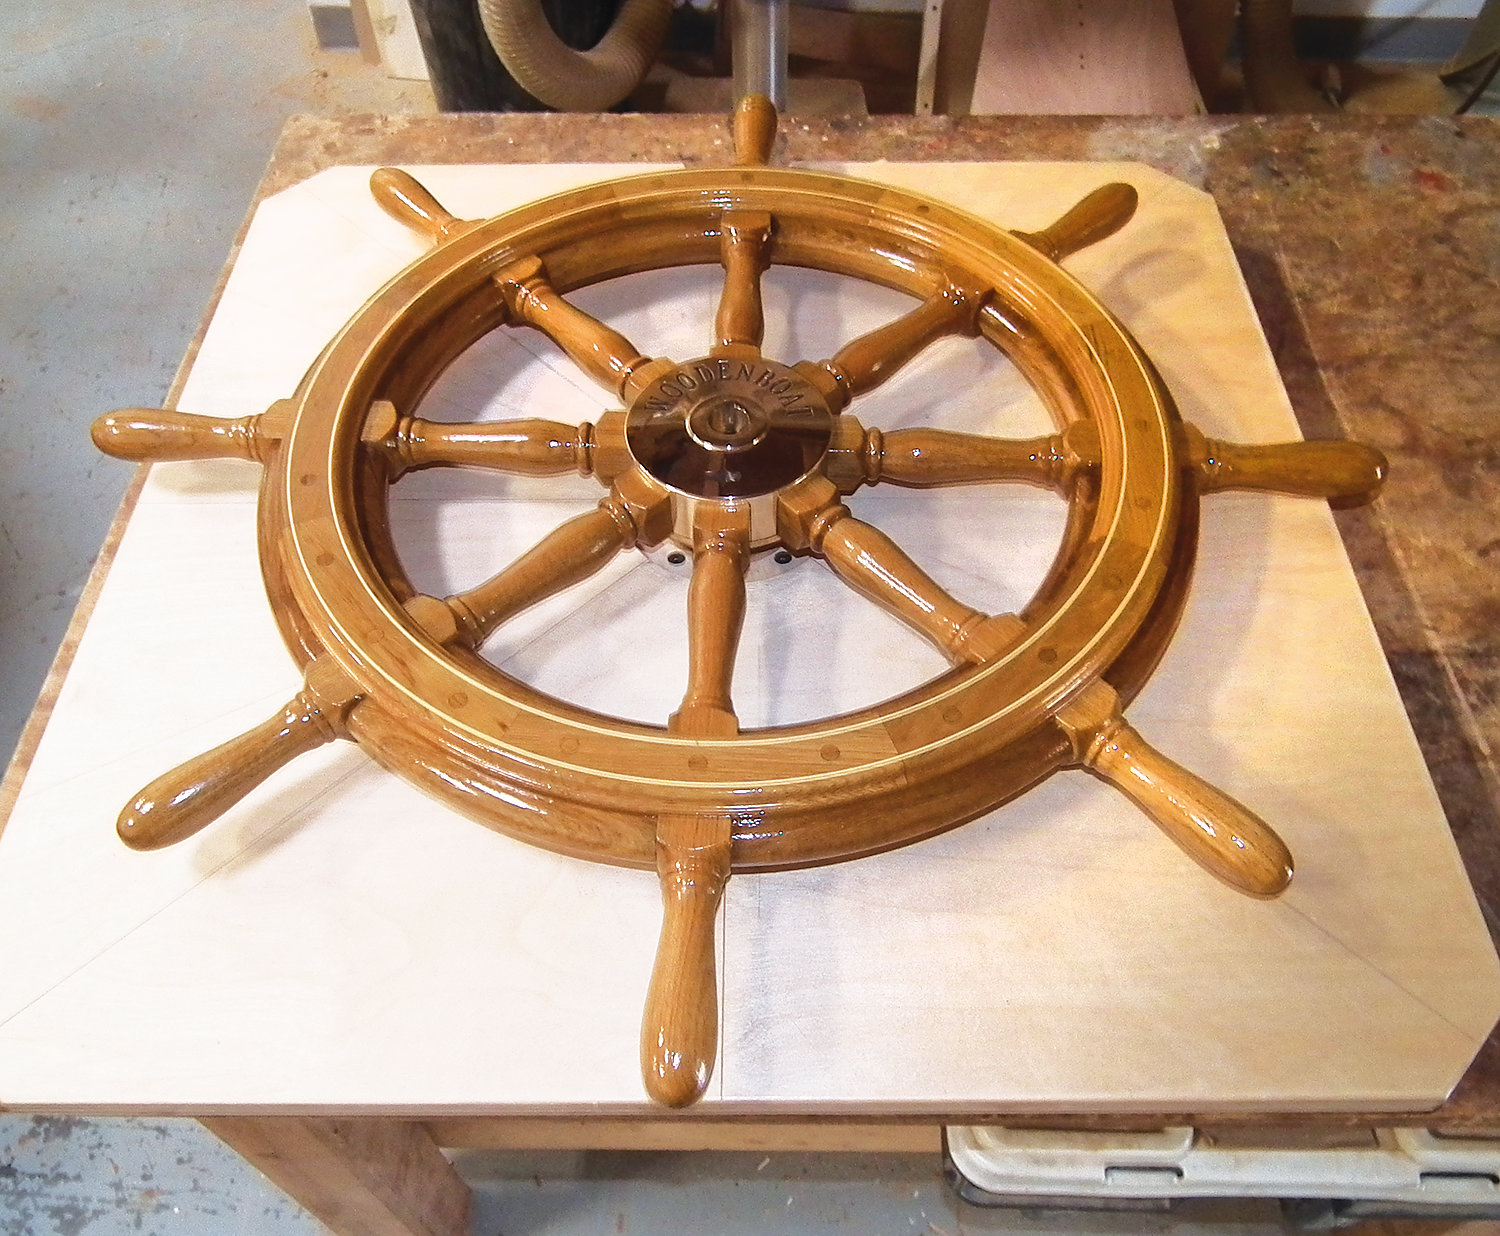
This photo and the lead photo on page 26 show the wheel as finished. The final step in making a wheel, mounting it on the boat, is something that I prefer to do myself, because it’s my opportunity to see the finished wheel in place. It verifies that the final result complements the boat. For me, it becomes almost sad to see the wheel go, because when I’m making one it becomes so much a part of me.
Wood transports people back to a simpler time. They have boats to get away from it all—even, or maybe especially, during pandemic times. In fact, the wheels we’ve been making since March 2020 have included some of the biggest ones we’ve ever done: 38″, 42″, even a 48″ one for a schooner. And wooden wheels are timeless. I built one for a 251′ mega yacht, not because they needed one, given all of its modern systems, but because they didn’t like having a bridge with no wooden wheel. Its wheelhouse, with extensive cherry and teak joinery and accents, looked strange without a wooden wheel at the center of it all.
Wooden ship’s wheels are part of our tradition they’re never going away. Wood is still a preferred material, not only because it is non-magnetic, and therefore doesn’t throw off compass readings, but also because it is durable. Moreover, it has tactile warmth that modern materials lack. It needs to feel good in your hands—you’re going to spend a lot of time at the helm.
This article was originally published in WoodenBoat No. 279, March/April 2021.
Bob Fuller, who owns and operates Southshore Boatworks (www. southshoreboatworks.com), is one of the world’s foremost craftsmen specializing in building ships’ wheels. His work has been included in Keepers of Tradition: Art and Folk Heritage in Massachusetts, by Maggie Holtzberg of the Massachusetts Cultural Council’s folk arts and heritage program, and exhibited at the National Heritage Museum in Boston. At WoodenBoat School in Brooklin, Maine, he has taught boatbuilding subjects such as fundamentals of boat building and patternmaking for metal casting for the past six years. He hopes to eventually teach a ship’s wheel course at the school.
