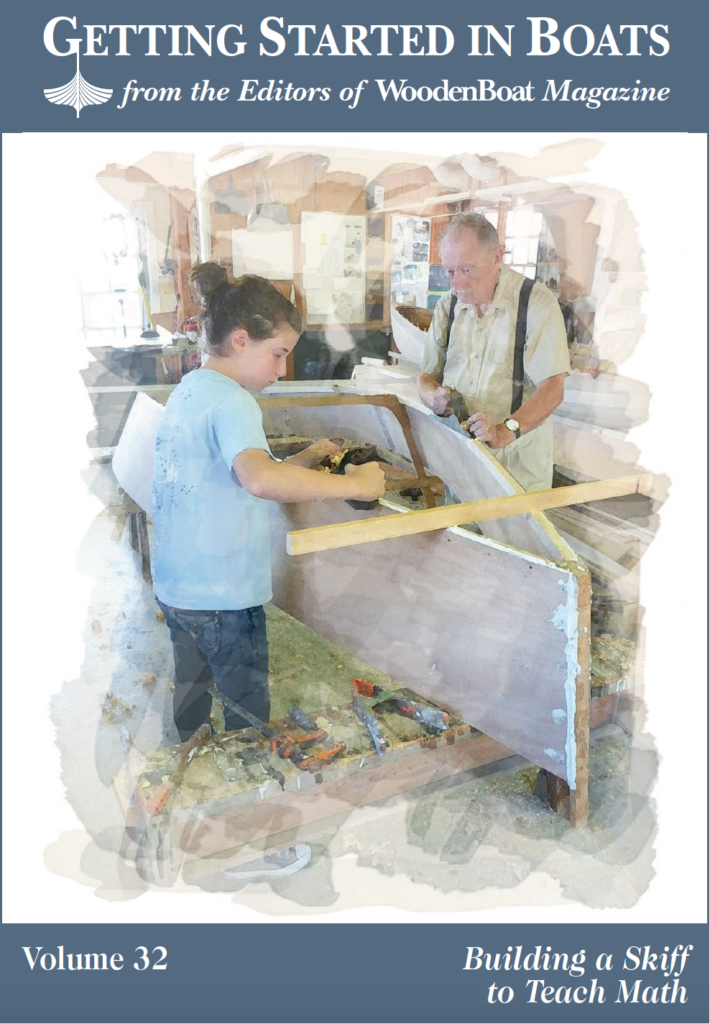
Teaching Math Through Boatbuilding
Our kids need to learn how to use math. They need more “hands-on” experiences than they usually get in a classroom. I believe, by working as teachers, wooden boat builders can help. This piece introduces how to do this work, and I hope it will also serve as a call to action.
Build a boat with kids and they’ll learn fractions, geometry, and maybe even a little bit of algebra. More important, they’ll learn that without math they can’t do the job right. Being unable to do the job right has direct consequences: the boat will leak and they are going to get wet. Kids who learn to use math in the shop can transfer those skills to the classroom with confidence and ability.
Most of my experience in building boats with kids has involved the Bevin’s Skiff, a 12′ rowing and sailing skiff that we designed at the Alexandria Seaport Foundation in 1997 specifically as a teaching tool. A “Math Instructor’s Guide” accompanies the volume of building instructions for the boat. So, naturally, that’s the boat we like to use in teaching these skills, and it’s the boat shown in these pages. But most of these skills can be taught by building any simple skiff.
The usual process of skiff-building starts with raw lumber and a set of plans. You then lay out and cut the parts; assemble the stem, sides, center frame, and transom; put on the bottom and keel; and install the frames, rails, and seats. We have found that when we want to optimize math instruction, boatbuilding happens in a different order.
When teaching math, jump right in. Start with a kit of parts, so the students see the shape of their boat quickly—usually the first day. After one class launches its boat, we have those same students lay out and cut the parts for the next building group. This order of work keeps the students motivated and matches their growing math skills with the tasks they need to accomplish.
Many math skills and concepts are repeated throughout the construction. This is a wonderful teaching environment. Repetition reinforces concepts, and the same topic can challenge different kids in different ways. For example, one student may learn about isosceles triangles by measuring back along each side the same distance from the stem while laying out frame spacing. Another student may already know that isosceles triangles have two equal legs but may be challenged when using the same kind of triangles to lay out perpendicular lines.
Repetition of math skills also gives the instructor multiple chances to figure out how an individual kid learns best. Remember, if the student hasn’t learned, the instructor hasn’t taught.
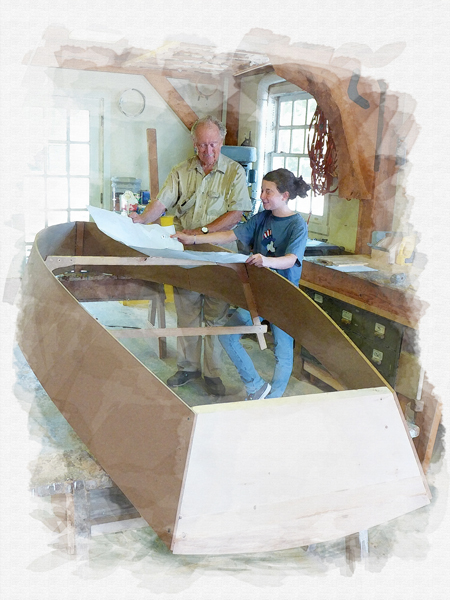
When a set of two-dimensional boat plans becomes a three-dimensional boat under their hands, students see a direct connection between mathematical principles and their practical application.
Measuring and Ratios
Measuring and Mathematics
In almost every building step, you have the opportunity to measure, add, subtract, multiply, or divide fractions and mixed numbers.
When you are measuring the spacing of nails used to fasten the side panels to the stem, don’t be surprised if your builders can’t read a ruler. When they need to measure the width of the bottom and divide it in half in order to locate the keel centerline, they’ll be using a ruler and successfully dividing mixed numbers.
And by the time they get to laying out the side and bottom panels for the next class’s boat, they will be fluent in fractions and how to use them. They will even be combining geometry with fractions to plot the necessary points.
You can also have the kids who have mastered certain skills teach those who haven’t. Pair them up to do particular jobs. The ability to teach a skill is a student’s best proof that he or she has learned the skill.
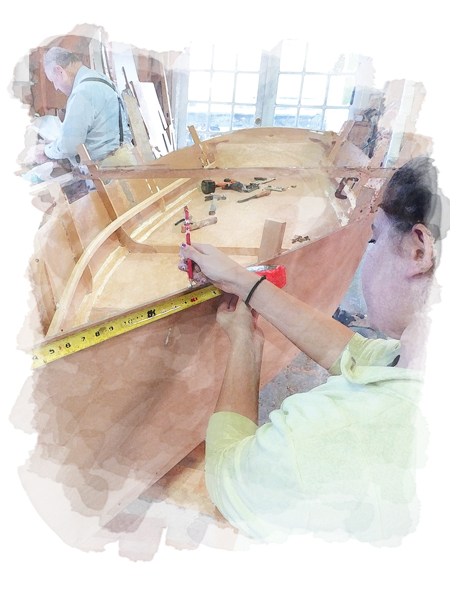
A task as simple as measuring instantly emphasizes the importance of fractions in addition, subtraction, multiplication, and division, and the tape measure provides an easily understandable visual reference.
Ratios and Mathematics
Boatbuilding relies on ratios almost as much as measuring. The proper length of the first nail you drive is three times the thickness of the plywood it is fastening to the stem. A bucking iron enables the nails locating the center frame to be easily driven because the mass of the bucking iron is so much greater than the mass of the hammer (which incidentally provides a chance to talk about momentum and the conservation of energy).
Ratios are used when mixing epoxy, and also when using scale drawings to lay out side and bottom panel shapes. The plywood scarf joints you’ll need to make are an example of the ratio of “rise over run,” or slope, which offers a great introduction to algebra.
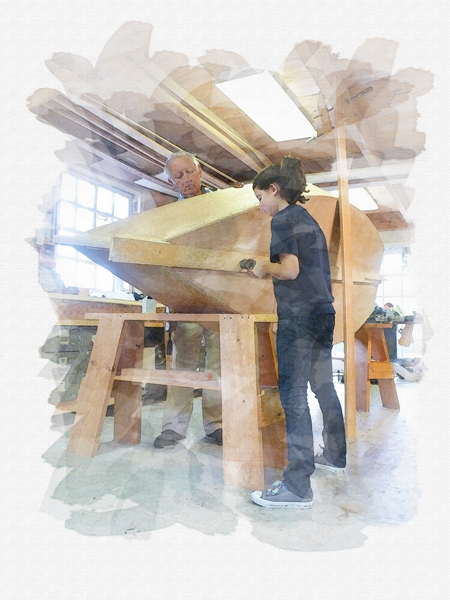
Practical geometry comes into play in the use of straight lines in marking curved surfaces, as when springing a chalkline dead amidships on the hull bottom to determine where to center the keel timber.
Geometry in Boatbuilding
The saying that “carpentry is geometry” also applies to boatbuilding, which relies on many of the spatial truths described by geometry.
Lines and Planes
Lines are a basic geometric building block. There are straight lines throughout a boat; they’re just usually bent over curved surfaces.
Using the chalkline to mark the centerline on the bottom, and then two parallel lines where the edges of the keel will lie, demonstrates that the shortest distance between two points is indeed a straight line.
When the chines are beveled to receive the bottom panel, another straight line is the straightedge used to check if enough of the chine has been planed away. (Planing the bevel on the chines is the creation of a geometric plane through the process of subtraction. Every time you make shavings, you are subtracting. Hmm, subtraction without numbers—what a concept!)
The concepts of parallel and perpendicular lines are fundamental to both geometry and to almost any building process. Whenever you have two lines perpendicular to the same line, you’ve created two parallel lines. Therefore, the center frame and transom are parallel in plan view, because both are perpendicular to the boat’s centerline. Thwart edges are parallel to one another, and the center frame is perpendicular to the keel. Also, when drawing the shapes of the side and bottom panels, all the station lines are parallel to each other because they are perpendicular to the baseline.
If you choose to make your own gauge to locate the nails that will fasten the bottom to the chines, you’re using the concept of parallel lines to make a tool that will mark a line you can’t see.
Demonstrating the basic properties of planar geometry is simple because all the boat parts start with faces that are flat, geometric planes. Many of these flat planes change into curved planes, or surfaces, as they are bent into their final shape to form the boat. Although bending the flat side panels around the hull’s flaring center frame is a simple mechanical process, it takes complex math, like differential geometry, to describe the resulting curved surfaces. This is an opportunity to challenge more advanced students and introduce the usefulness of more advanced math. Without this math built into their software, computers wouldn’t be useful design tools.
An understanding of planes also affects more basic tasks. The ability to use a handsaw, for example, depends upon the sawyer’s ability to line up his saw, wrist, and shoulder in the same geometric plane.
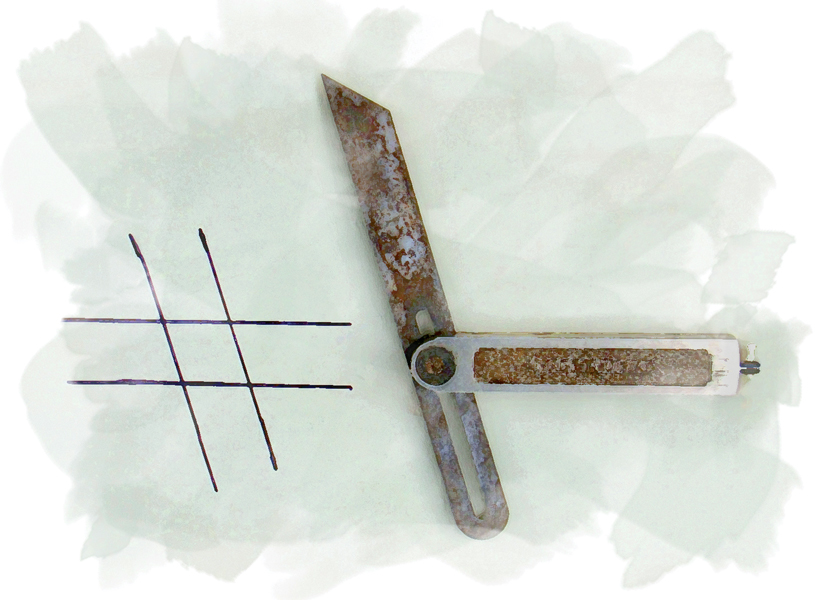
The use of a bevel gauge is a great way to demonstrate the principles of parallelism, supplementary angles, and corresponding angles.
Angles
When two pieces of wood meet, they make an angle. Where the boat’s sides meet the stem is a good example of an acute angle, and where the center frame extends across the bottom and up the side is a good example of an obtuse one. Have your builders measure angles using a bevel gauge and then read the angle on a protractor, which will help them to understand degrees.
The bevel gauge is a great teaching tool. In the classic geometry textbook, the tool is represented by the illustration of two sets of parallel lines intersecting, making corresponding and supplementary angles come alive. Parallel lines once again prove themselves useful. The bevel gauge will get a lot of use when marking the compound angles on the ends of the chines and deckbeam.
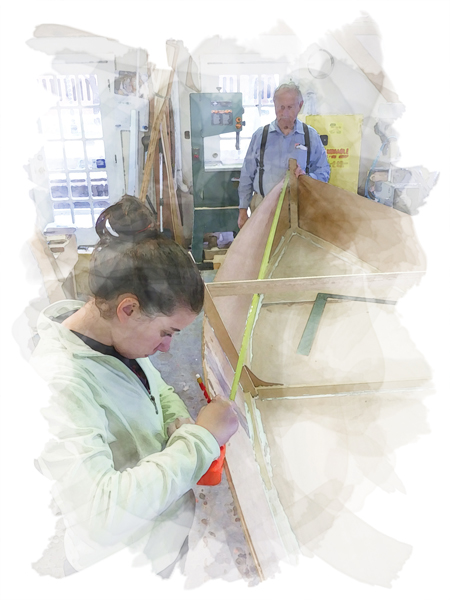
Marking points equidistant from the stem, for example, to accurately position molds, frames, or oarlocks—a process boatbuilders call “horning”—demonstrates the use of isosceles triangles.
Isosceles Triangles
Isosceles triangles occur at almost every step of boatbuilding. They first appear when the stem, center frame, and transom have to be lined up. An isosceles triangle’s centerline creates two symmetrical right triangles and is perpendicular to its baseline. By creating symmetrical shapes, isosceles triangles help a boatbuilder make sure one side of the boat measures the same as the other. If the sides are different, the boat will not only look funny but will tend to go in circles.
Isosceles triangles can also be used to erect station lines in the panel layout, by using the basic “arc scribe” geometric construction. In this method, relatively short arcs are marked on the baseline on both sides of a starting point that is also on the baseline. Then, somewhat longer arcs are marked from these new points to cross at a point above the baseline; marking a straight line from the starting point to where the two new arcs cross creates a line that is perfectly perpendicular to the starting point.
Right Angles
Right angles are another basic geometric element. Even though we think there aren’t many right angles in boats, they are very important to the building process. The corners of plywood panels and dimensioned lumber are all 90 degrees. We’ve already mentioned how the center frame and transom are perpendicular to the boat’s centerline. The students will use framing squares when marking the center frame’s location on the side panels.
They’ll also use a square resting on the top of the chine to mark the locations of the frames. Measuring along a right angle from a given reference line is the only way to get a true measurement, such as altitude of a triangle. It’s also how your builders will use a combination square to measure from the sheer to establish the height of the seat riser.
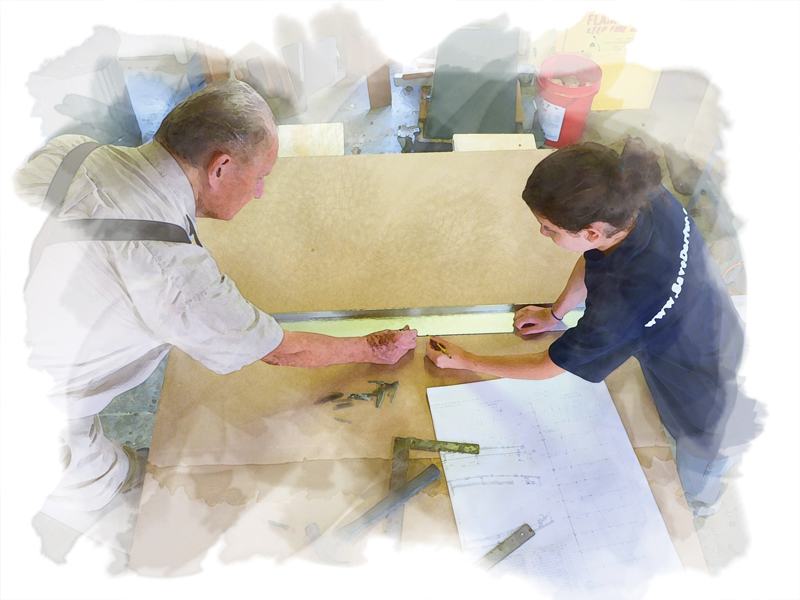
Laying out shapes such as molds requires the use of x- and y-axis coordinates, providing an opportunity to introduce algebra.
Algebra in Boatbuilding
Each year, it seems that we ask kids to learn algebra at a younger and younger age. Yet, even though they may learn the subject in seventh grade, they may not have a chance to apply it in a class, other than math, until they take chemistry, usually in the tenth grade. Boatbuilding offers multiple ways to introduce algebra while (or even before!) kids are learning the subject in math class.
Coordinate planes are used to lay out panel shapes. Remember the perpendicular “x” and “y” axes intersecting at a point of origin? Every point on a side or bottom panel has x and y coordinates. The widths on either side of the bottom panel’s centerline are really positive and negative numbers. And scarf joints can be considered one example of the rise and run of a slope.
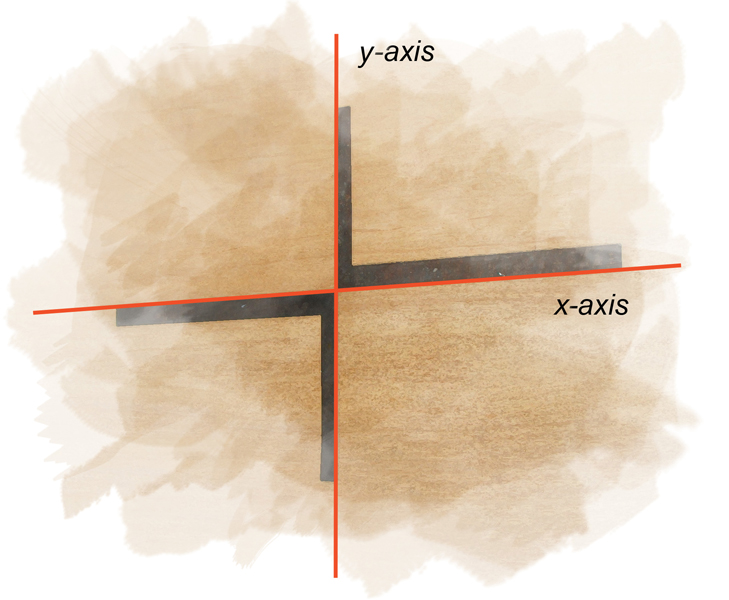
A couple of framing squares on a piece of plywood (seen from an oblique angle in this photo) can easily represent coordinate planes and demonstrate how to plot slope.
Every kid wants to know, “How many people will this boat hold?” Algebraic formulas can calculate the answer. Once you have calculated the underwater area of the skiff’s cross sections and plot those points on perpendicular lines at each station, you can draw the resulting curve, called a curve of areas.
Figuring the boat’s underwater volume from this curve of areas is a great example of how a formula such as Simpson’s Rule (look it up!) comes into play when facing challenges like trying to calculate the total volume of the boat’s underwater shape. Then, a little more multiplication using the ratio of water’s weight to the boat’s volume gives you its displacement, which can be used to determine its capacity. It’s pretty complicated math to answer a simple question, but, again, it’s a great opportunity to challenge students and to show them that complicated-looking formulas have real-world uses.
Quadratic equations are intimidating and may seem useless for most algebra students (and ax2 + bx + c = 0 still makes me nervous). Yet, you can make factoring them familiar when you show your builders that doing so depends upon the same concept they used for finding the least common denominator when adding measurements that are expressed in fractions.
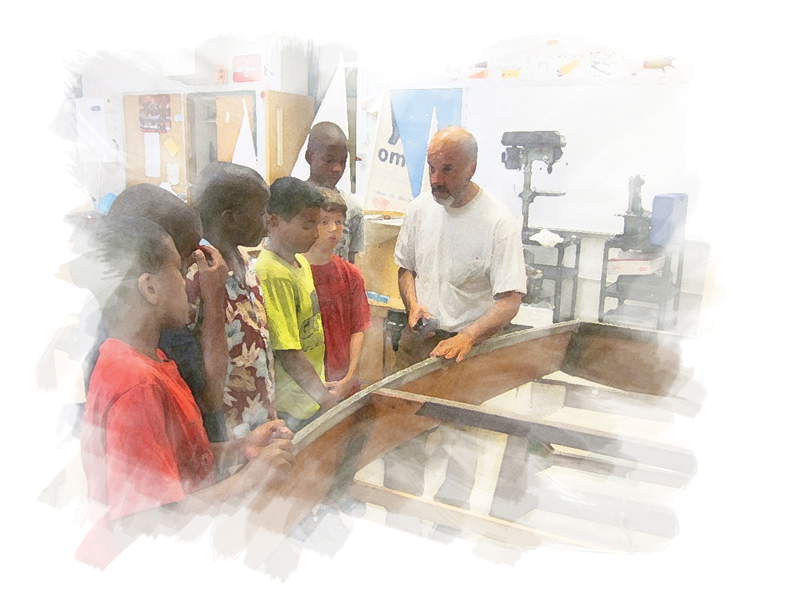
Many lessons can be learned from building a simple skiff, but they need to be coordinated with a teacher’s parallel efforts in the classroom.
Integrating the Project Into the Classroom
As a society, we tend to think schools are the places where kids should learn math. Building a boat to teach math can often occur in the classroom. If you’re going to build a boat in conjunction with a school, finding a good teacher as your partner is critical. A major part of your job is to support that teacher. You are building the boat to help his or her students learn math and apply it. You need to be able to function in the teacher’s world and be aware of the realities that govern his or her work.
In the United States, the national Common Core Standards, or your state’s educational standards, determine how the students and teachers are judged. Whatever their shortcomings, these standards and their accompanying tests at least indicate which skills our students need to acquire. From the test results I’ve seen, the math skills inherent in building a skiff—especially fractions and geometry—are exactly the ones that our kids aren’t learning very well.
Fifth graders need to divide fractions and plot points using a coordinate plane. Eighth graders need to understand the angles created when “parallel lines are cut by a transversal.” (Sounds like a bevel gauge to me….) Geometry students have to “apply geometric concepts in modeling situations, explain volume formulas and use them to solve problems, and visualize relationships between two-dimensional and three dimensional objects.” Algebra students must “create equations that describe numbers or relationships and represent and solve equations and inequalities graphically.” When you build a boat, you have the opportunity to make these abstract words from the standards concrete.
So, we have to speak the current language of education. Teachers and administrators need to see that the time spent building a boat results in increased math competencies. A couple of pieces of advice for those who want to pursue this possibility:
• Don’t be afraid to use simple tests. Testing before the class tells you the skills your students already have as well as those they need to learn. A test afterward shows the students (and the school) what you’ve been able to accomplish. We usually use five-question quizzes.
• Bring other resources, contacts, and connections into the boatshop or classroom to support the teacher and serve the students. When we build, we always bring in volunteers who can talk about boats, work individually with students, and let the kids hear about the importance of math from someone other than their teachers.

When building a full-sized boat isn’t possible or practical, having a class build boat models can go a long way toward illustrating the same principles, and all of the students will have something they can call their own to take home and treasure.
Using Models to Help Teach
Models are also great teaching tools. Sometimes you can’t build the full-sized boat or don’t want to. Sometimes there’s not enough time, space, or money, or maybe it doesn’t fit the program design if you want all the kids to go home with something of their own. In our programs, we use three models that are based on Bevin’s Skiff: a cardstock model, a “pinewood derby” sailer, and a radio-controlled, plank-on-frame model.
Building a model boat can introduce the same building steps involved in the full-sized boat and demonstrate the same use of math, as well as create enthusiasm and motivation. Which model we pick depends upon what we want to accomplish with the class. For example, we build the cardstock model before we build the full-sized boat to give the students a “run-through” of the process. It takes less than an hour, tests their measuring skills, and gives them something to take home. The pinewood derby model is the next step up. Cut from a block of 2×4 with dowel masts and plastic sails, this simple model introduces measuring, fractions, and basic geometry—plus the kids can sail it and take it home.
The RC model is more complex. It’s built up plank-on-frame, just like the full-sized skiff. We use it as a substitute for building the full-sized boat and when we’re working with a class over a longer period of time. It’s small enough so that all the kids can build their own boats. And, sailing the models can really give them a boating experience.
Connections between boatbuilding and math can be made by building any of these models, although not as thoroughly as through building a full-sized boat. The more involved the project, the more teaching opportunities if offers.
As part of the Alexandria Seaport Foundation, Joe Youcha has helped hundreds of community groups build their own boats. With a new program called Building to Teach, he’s now helping boat building groups learn how to teach math as part of that process.

