John Gardner, the dean of American small-boat builders, once wrote, “Flat-bottomed skiffs are the easiest of all boats to build and the hardest of all boats to design.” Thousands of poorly designed but easily built “sharpies,” “flatirons,” or “flatties” as they are sometimes called, have given the type a bad name over the years. I’m talking about boats that have no rocker (fore-and-aft curve in the bottom), straight sheerlines (fore-and-aft curve in the rails), and are wedge-shaped in plan view. They were often built with low-grade Douglas-fir plywood, which checks or splits. The ones with the straight sheerlines are not pleasing to the eye. These unfortunate models are almost always disappointing performers. Boats without rocker will not row or sail well because their stems and transoms are partly submerged, making them slow and reluctant to turn. These boats have convinced many people that plywood is not a good choice, and that a flat-bottomed skiff cannot make a great workboat or beautiful tender.

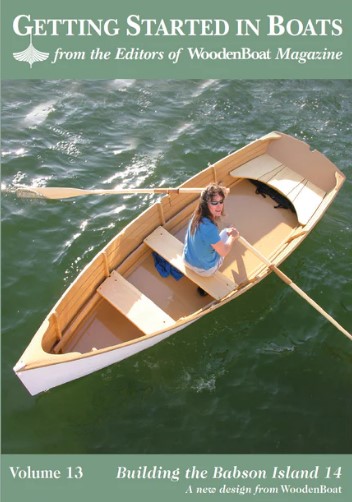
Babson Island 14
Our challenge at WoodenBoat was to design a simple skiff for entry-level builders. The boat had to be stable enough to be considered family-friendly and light enough for two to lift. We wanted an affordable kit that could be shipped on a UPS truck. Most important, she had to have sweet lines and row well. A friend of mine who is an accomplished rower and oar maker once told me he could see an advantage to using spoonbladed oars in performance rowing boats, but with a flat-bottomed rowing boat there would be no advantage to spoon blades over flat blades. Rowing the Babson Island 14 changed his mind. We knew people would want to sail this skiff, and power it with an outboard, so we adapted a sail plan from the Nutshell pram. Also included in the plans is a slightly different version with a more vertical transom and no rocker aft of amidships; these changes will allow her to be used with a trolling motor or small outboard. A drawing showing how to build her lapstrake is also included in the plans.
Sailing a well-designed flat-bottomed skiff is exciting. Downwind it can plane and surf on the waves. Upwind, with the boat heeled, the immersed section becomes a V-bottomed shape that can point to windward better than you might think. Flat-bottoms are the most stable of all hull shapes and, with flat sections, require less horsepower and plane more quickly than their round- and V-bottomed cousins. This efficiency comes at a price, since flat-bottoms pound and slap going to windward.
If you are an amateur builder with limited skills, tools, and space, a flat-bottomed skiff built with marine plywood is a logical first boat. Today’s high-quality marine plywood is easily obtained. It comes presanded from 1⁄ 16″ to 3⁄ 4″, and panels can be glued together face-to-face if a thickness greater than 3⁄ 4″ is required. Panels can also be scarfed together to achieve greater length or width.
In this first of two parts, I’ll take you from the setup through fiberglassing the bottom of the hull. Although the information you’ll need to build the Babson Island 14 is provided here, I would recommend purchasing a set of plans, which includes many full-sized patterns, the sail plan, and the details of the outboard-powered version.
Let’s get started.

Materials
Here are the materials I used to build the prototypes. Feel free to make appropriate substitutions. For example, I used clear pine, which is easy to get in Maine and an easy wood to work for first-time builders. But if you have some nice mahogany out in the barn, use it! I chose okoume plywood because it’s light, easy to scarf, and is nice to plane. If your skiff is going to live on a mooring and see heavy use, and weight is not a concern, you might choose the denser sapele plywood.
BUILDING JIG
- Strongback: Two pieces 1″ x 8″ x 13′ poplar
- Cross spalls: Three pieces 1″ x 8″ x 30″ poplar
- Station molds, jig transom, and stem transom profiles: Two-and-a-half sheets 1⁄ 2″ MDO plywood, faced both sides
- Mold cleats: Twenty linear feet 1″ x 2″ pine or similar wood
- Chine blocks: Three linear feet 1 1⁄2″ x 1 1⁄2″ softwood
- Fastenings: Sixty 2″ and thirty 1 1⁄4″ coarse-thread drywall screws
THE HULL
- Sides: Two sheets 6mm okoume plywood (1⁄4″ )
- Bottom: Two sheets 9mm okoume plywood (3⁄ 8″ ) or 12mm (1⁄2″) for the outboard version. 12mm may also be used on the rowing/sailing model for a stronger, more trailer-friendly boat.
- Transom: 5⁄4″ solid stock (pine or similar wood) or 3⁄4″ plywood
- Inner stem: 1 1⁄2″ x 1 3⁄4″ x 2′ pine (or glue together two pieces of 3⁄4″ stock)
- Outer stem: 1 1⁄2″ x 1″ x 2′ pine
- Seat risers: 3⁄4″ x 2″ x 12′ pine
- Guardrails:1 1⁄4″ x 3⁄4″ x 12′ pine
- Frames: 5⁄4″ x 1 1⁄2″ x 16′ pine
- Seats: 1″ x 12″ x 14′ pine
- Keel: 3⁄4″ x 3″ x 14′ pine
- Skeg: 1⁄2″ plywood glued up from scrap planking stock
- Brass half-oval: Six feet of 1⁄2″ stock for stem and skeg
- Fastenings: 100 each 1″ No. 8, 1 1⁄2″ No. 8, 1 3⁄4″ No. 8, 1 3⁄4″ No. 12 bronze or stainless-steel
- Epoxy resin: 1 gallon, with hardener
- Fiberglass cloth: 38″ x 13′, 10-oz.
The Building Jig
1. Build the Strongback
The strongback consists of three 30″ cross spalls and two 13′ rails. With the rails clamped together, measure 6′ 6″ back from one end and draw a line across their top edges with a square and pencil. From that line (which represents station No. 3), lay out the remaining stations as shown on the plan. Screw the rails at each end into the end-grain of the cross spalls, forming a rectangle. The third cross spall is fastened at the center, in line with station No. 3. Make a 1⁄8″-deep saw kerf in the center of the cross spalls and cut a Vnotch in the center of the middle one, 1″ deep. Pull a length of thin string or fishing line taut from end to end. Place the strongback on sawhorses, square it by measuring the diagonals, and level it up in both directions. Shim the strongback if your floor is not dead level, and screw it to the horses. Screw the horses to the floor if possible. This is your foundation. Like building a house, if the foundation is square and level, the rest of the building process will be easier.

2. Make the Molds
Draw and cut out all five station molds, along with stem and transom profiles. Mark the centerline, sheerline, and seat riser lines on all molds. Mark the sheerline on the stem profiles. Glue and screw the stem profiles together to make 1″ thickness. Glue and screw the mold cleats and chine blocks to the molds as shown in the illustration below. Carry the centerlines that you have drawn on the molds onto the mold cleats.
3. Set Up the Molds
Place the molds one at a time on the strongback, aligned with the appropriate station lines. The centerline on the molds should be directly
over the string. Double-check with a framing square that the molds are square to the string.

4. Complete the Jig
Attach the stem profile to the forward face of mold No.1 and the forward crosspiece. Then attach the transom profiles to mold No. 5 and the aft cross spall, and screw the jig transom onto the transom profiles 15″ from the centerline (see station No. 5 on the plan). The sheer ribband gets screwed 1 1⁄ 2″ back from the forward edge of the stem profile at the sheerline, and at each mold at the sheerline mark. Be sure to check that the molds are plumb before attaching the sheer ribband and again, later, when fastening the chine to the molds. Then screw the sheer ribband to the 1 1⁄ 2″ x 3″ block on the jig transom. Now your building jig is complete.
Building the Hull
1. Scarf the Plywood
Rip the two 1⁄4″ sheets of plywood in half lengthwise, creating four 2′ x 8′ panels. Using an 8:1 ratio as a guide to determine the length of the scarf results in a 2″-wide scarf for the 1⁄4″ sides.

Mark a line 2″ in from both ends of all the panels. You now have eight scarfs marked for cutting. You only need four, but practice by cutting all eight. Cut each scarf with a sharp, low-angle block plane. Plane from the end of the panel to the drawn line, creating a feather edge at the end. As you plane, the inner plies are revealed. The idea is to make the surface flat, so check it occasionally with a straightedge. After the eight cuts are made, you can pick the four best ones to glue together.
Next, cut four scraps of 1⁄2″ x 8″ x 24″ plywood. Cover one side of two of them with clear packing tape. These two will be used to sandwich the scarf. The other two will be placed at either side of the scarf and act as shims to keep both panels the same height off the bench; at the shim locations you’ll clamp the panels to the bench to keep them from sliding apart. But first spread epoxy over both surfaces of the scarf and clamp or weight it together.

2. Install the Chines
Make the chines about a foot longer than they need to be. Drill and temporarily screw the chine from the inside through the chine blocks, starting at station No. 3. Leave it long at both the transom and stem. Temporarily screw the chine from the outside to the stem profile and transom profile with drywall screws. Using a Japanese backsaw, trim the chines flush with the jig transom and the stem profile.

3. Make the Stem and Transom
You can either make up the transom from 5⁄4″ solid wood (I used pine) or from 3⁄4″ plywood. Saw out the inner stem, then glue the stem and transom to the end-grain (end) of the chines. Use drywall screws to hold the inner stem to the stem profile temporarily. Do not forget to remove them when installing the outer stem, and use clamps to hold the transom to the jig transom. Once the glue has cured, the screws can be removed from the chines at the profiles. Then bevel the stem and transom to accept the sides. These bevels can be intimidating to first-time builders, but they are actually not very difficult. Once lines (taken from the plans) are drawn on the forward and after edges of the stem, you simply plane a flat surface connecting the lines. The same applies to the transom bevel.
There is further detail on stem beveling in Getting Started in Boats No. 1, which was bound into WB No. 191.
4. Make the Sides
Clamp one of the scarfed side panels to the chines and sheer ribband and trace all the way around transom, stem, sheer ribband, and chine. Clamp that panel on top of the other side panel and use a jigsaw to cut both at once, leaving about 1⁄4″ extra wood all the way around.

5. Install the Sides
Glue and clamp the side panels to the chines with a 3⁄4″ x 3⁄4″ x 14′ batten between the clamps and panel. The batten will protect the side panel from dents and help spread the pressure. Glue and screw the panel at the stem and transom but do not glue it to sheer ribbands. The sheer ribbands are part of the jig, not the boat.

6. Plane for the Bottom
Using a straightedge placed athwartships across the bottom as a guide, plane the chines and transom flat to accept the bottom.
7. Fit, Scarf, and Attach the Bottom
Starting at the transom, temporarily tack one of the 3⁄8″ 4 x 8 bottom panels to the chines. Trace around the sides and transom. Cut out the bottom, leaving a 1⁄4″ overhang all the way around, then cut a 3″-wide scarf on the forward edge of the aft panel and tack the panel back on the jig. Repeat these steps for the forward panel, establishing its outline from the aft edge of the scarf you just cut on the aft panel. Next, glue and screw on the bottom (using 1 1⁄4″ No. 8 screws), sandwiching the scarf joint between two pieces of scrap 1⁄2″ x 8″ plywood, covered with clear packing tape. Screw through the sandwich with drywall screws to pinch the scarf joint together. After curing (typically at least three hours at 72°, but consult your particular glue’s literature), trim the bottom flush with the sides using a low-angle block plane, and then fiberglass the bottom.

7. Fiberglass the Hull
Drape the fabric over the bottom and smooth out the wrinkles. Starting in the center, pour a generous amount of epoxy onto the cloth, and spread it with a plastic squeegee. The cloth will become transparent as you wet it out. If air bubbles form, force them out with the squeegee. When the glue is almost hard, but still flexible, use a razor knife to trim the excess fabric flush with the bottom. Apply two more coats of epoxy with a foam roller to fill the weave of the cloth.

Designer-builder Tom Hill is author of the book Ultralight Boatbuilding. He is also WoodenBoat’s technical projects manager.
Plans and kits for the Babson Island 14 are available from the WoodenBoat Store, P.O. Box 78, Brooklin, ME 04616; 800–273–7447; www.woodenboat.com.