
The previous installment of Getting Started in Boats appeared in WoodenBoat magazine No. 191 (September/October 2006). It featured the construction of the Lumberyard Skiff—a 14'6" flat-bottomed boat built of pine and cedar planking. In this issue, we show how to build a set of oars, how to paint the skiff, and how to attach a painter (bow line) permanently, using an eye-splice. Let’s get to the oars.
The Plans
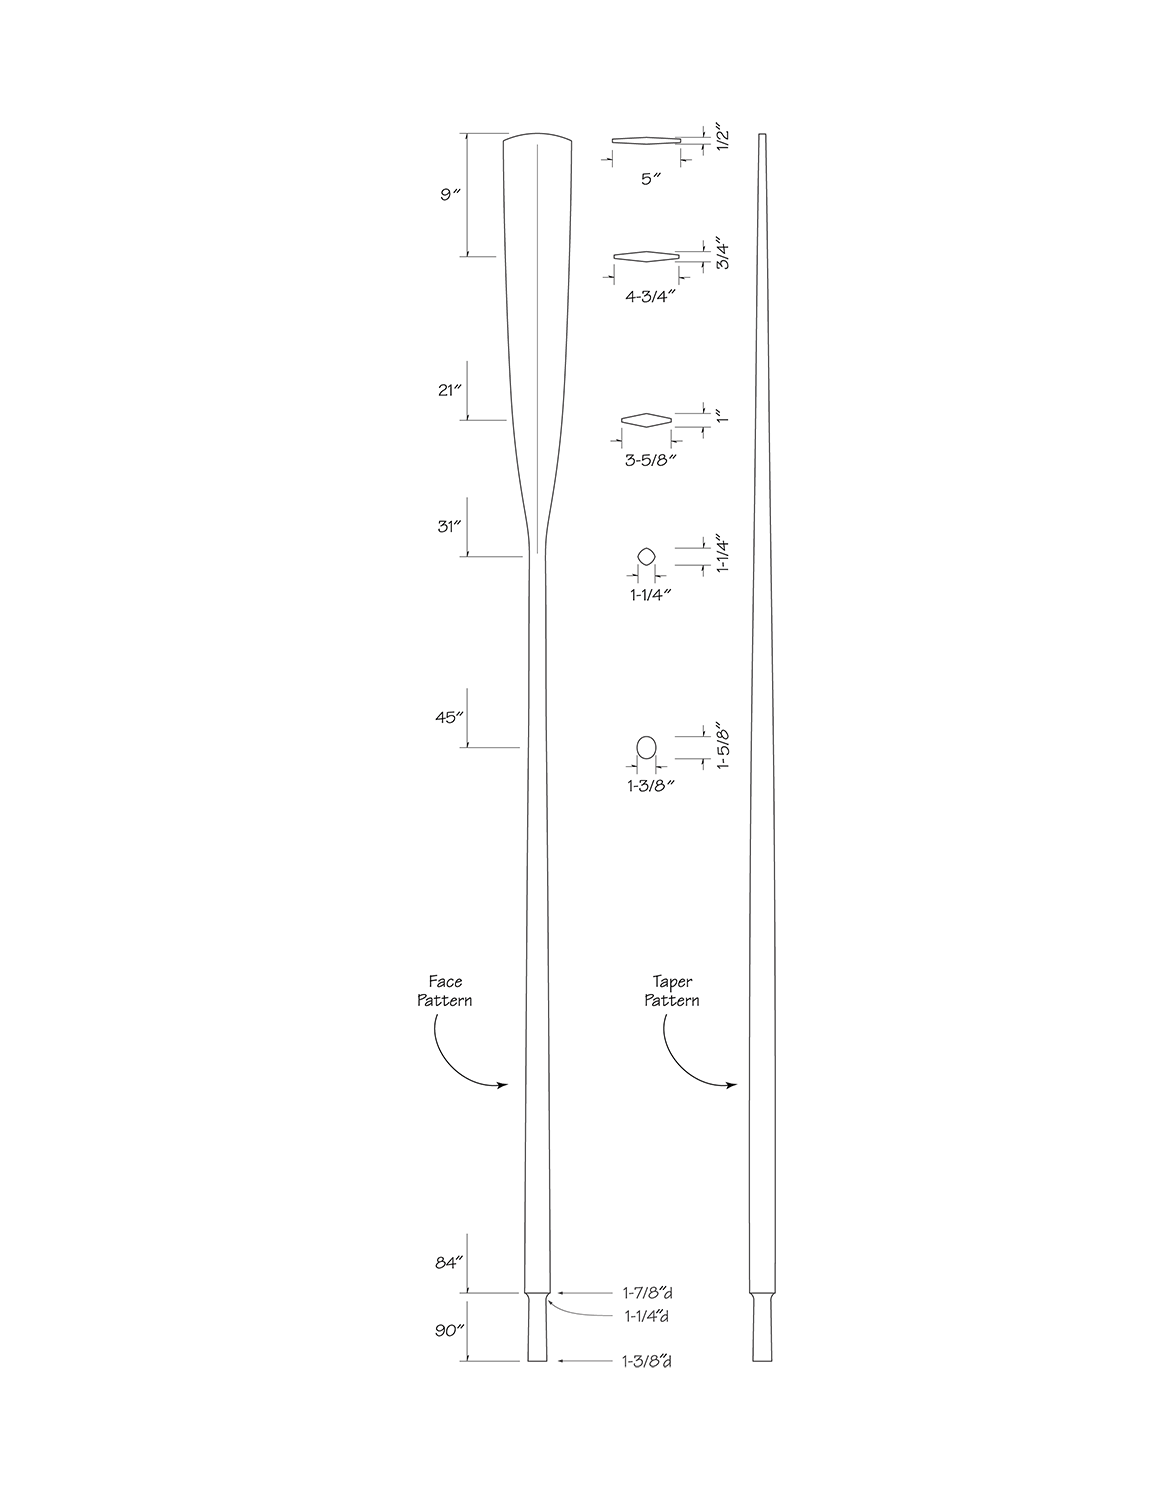 Here are plans for a pair of 7 1⁄2' oars. Either ash or spruce is an appropriate wood for this project. Ash is much heavier than spruce; the choice comes down to personal preference.
Laying Out the Oar Pattern
Using a Pattern
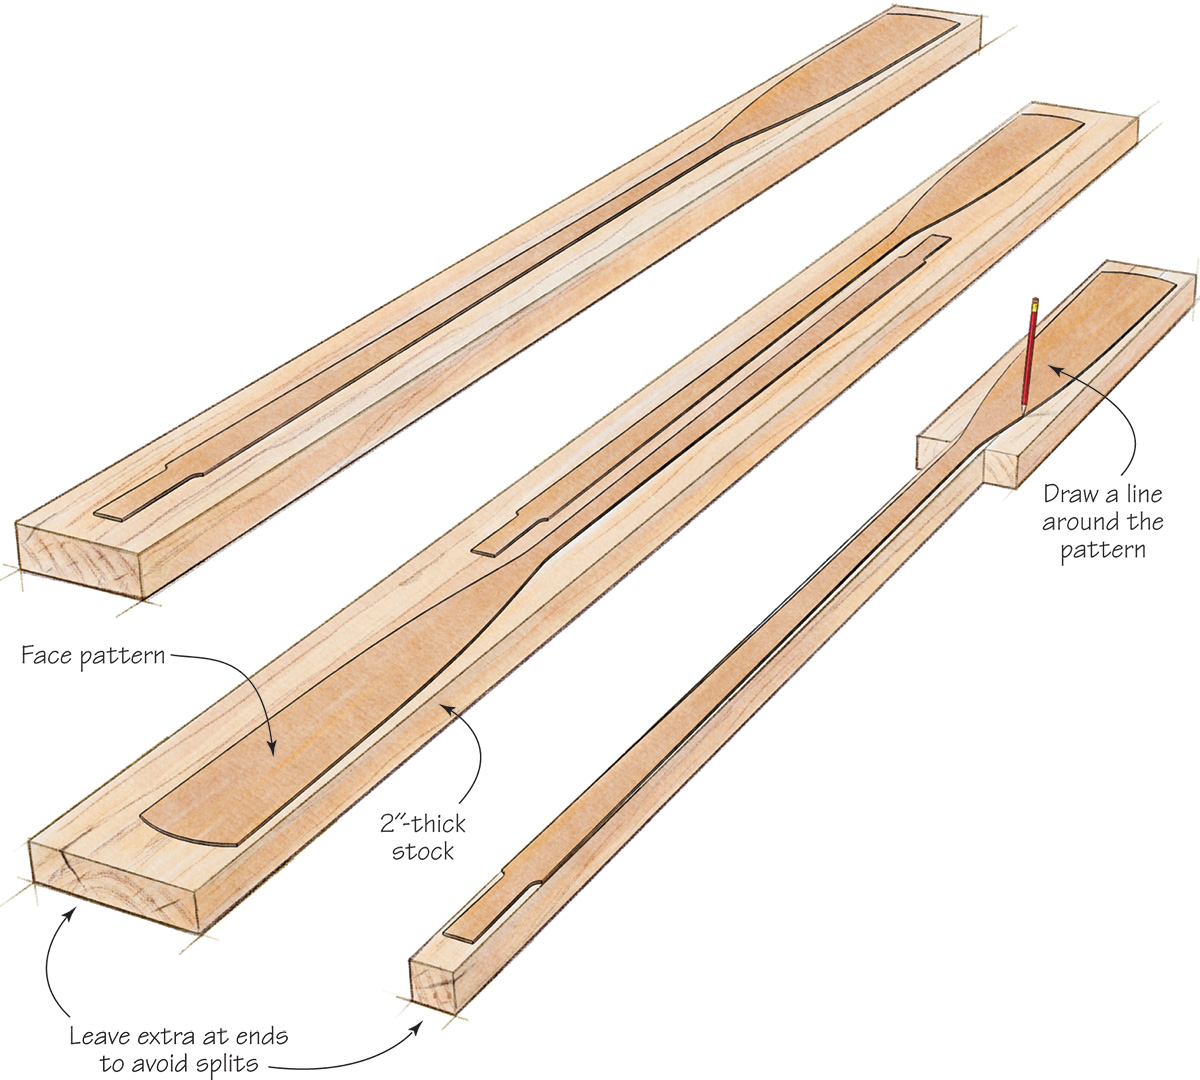
Begin making your oars by laying a plywood (doorskin) pattern of the oar’s profile on a 2" board of appropriate length and width. It’s common for a board’s ends to split during drying, so you’ll likely need a piece that’s over-length, to avoid these splits.
Making the Most of Your Stock