 Martha Bryan
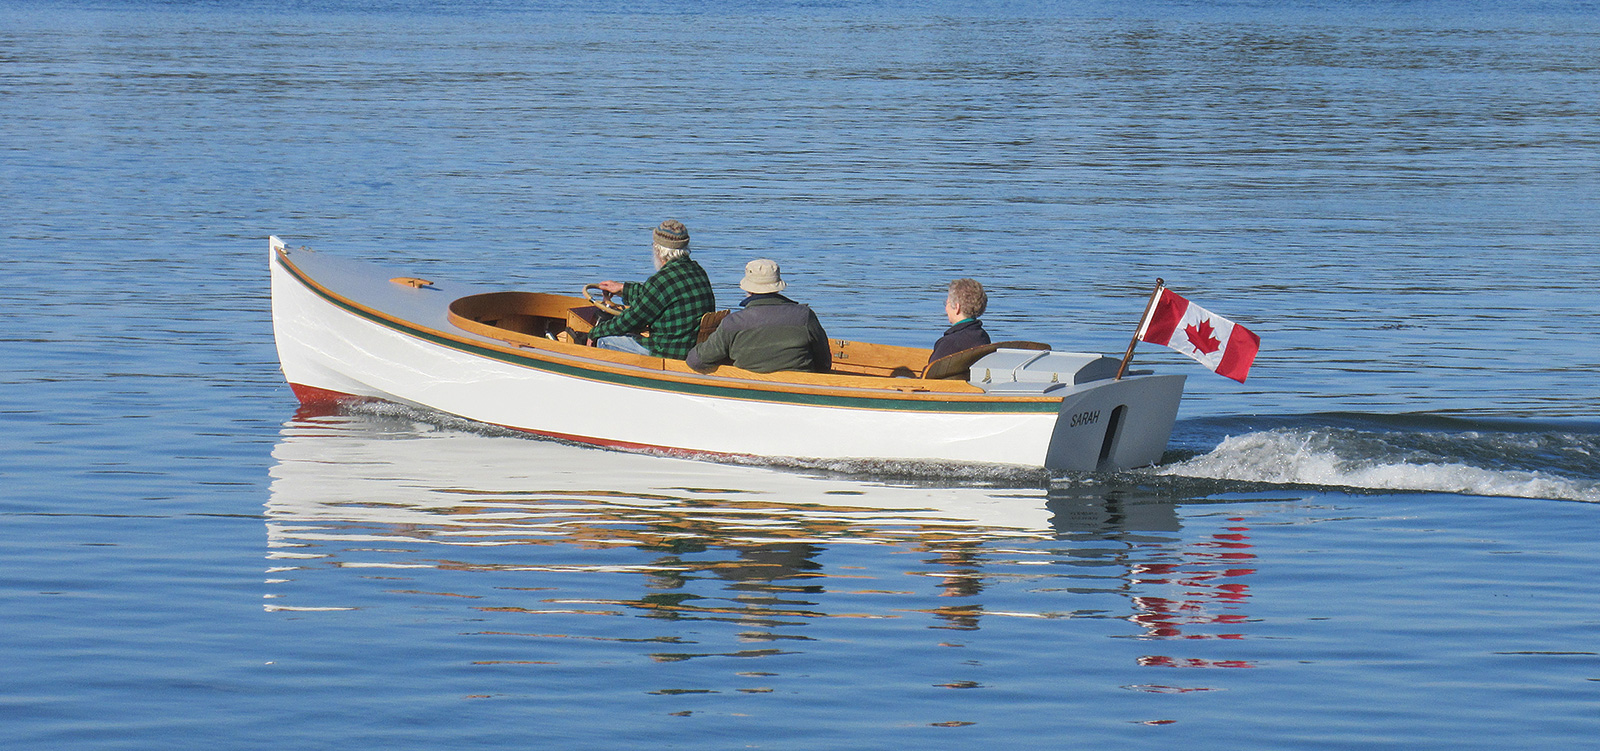
SARAH, a modification of the author’s Handy Billy design of 1997 that he calls the Hand-e-Billy, is powered by a 3,000-watt electric outboard to her hull speed of just over 5 knots. Built to be trailerable, she has an 8,960-watt-hour lithium-iron-phosphate battery that charges on household power and can go 40 miles on a full charge.
To address climate change, it would seem that recreation should maximize well-being and minimize harm to the environment. If fossil fuels are consumed in the process, the goal should be to get the most recreational value for the least amount of fuel.
To illustrate how far we are from this thinking, consider this: a 16′ boat, designed to be efficient while carrying a family of four at a speed of 5 knots, will consume as little as one-quarter of a gallon of fuel per hour. Today’s ubiquitous 16′ deep-V hull with the same family aboard and traveling at 20 knots will consume approximately 4 gallons per hour. If recreation is the goal, the family that chooses speed should aim to get 16 times as much enjoyment from their hour on the water. Until we have a pleasure meter installed in our cell phones, the foregoing math can at least illustrate the size of the gap between the fuel use we have come to accept in order to reach planing speed and the far lesser amount needed if we choose boating at displacement speeds.
Designed in 1997, my first Handy Billy—named to recognize William Hand Jr.’s efficient V-bottomed designs of the early 20th century—is an 18′ boat with a 15-hp outboard (see WB Nos. 159–161). I had hoped that it would inspire even lower-horsepower and more-efficient boats. Instead, in the 26 years since then, the average horsepower of recreational boats has increased dramatically; today, the largest outboard motor on the market is 600 hp and weighs 1,269 lbs.
Presented here is SARAH, the first of what I’m calling the Hand-e-Billy design, an adaptation for electric power that attempts to help recreational boating address the problem of climate change. It is my belief that no matter how many wind generators and solar panels we employ, we cannot live sustainably on Earth without also simply slowing down and consuming less.
In spite of the buzz surrounding high-speed electric boats and the lure of flying on foils, moving a number of people efficiently on the water will always require a displacement boat. If that boat lives on a trailer and is to be towed behind a modest-sized family car, it will probably have a maximum waterline length of 16′ to 18′, and such a boat will have a theoretical hull speed of about 5 knots.
Is 5 knots slow? The answer depends not on speed through the water but on what we compare that speed to. A modest effort at the oars of a nicely designed rowing skiff will keep up a speed of about 3 knots. Few small recreational sailboats average more than 5 knots, considering varying wind speeds and points of sail; 5 knots dead to windward is rare indeed. Measured against muscle and wind power, the 5-knot electric boat is not slow. The answer also depends on how we relate to the natural world; the quiet operation at 5 knots promotes easy conversation and helps the crew feel a part of the larger environment.
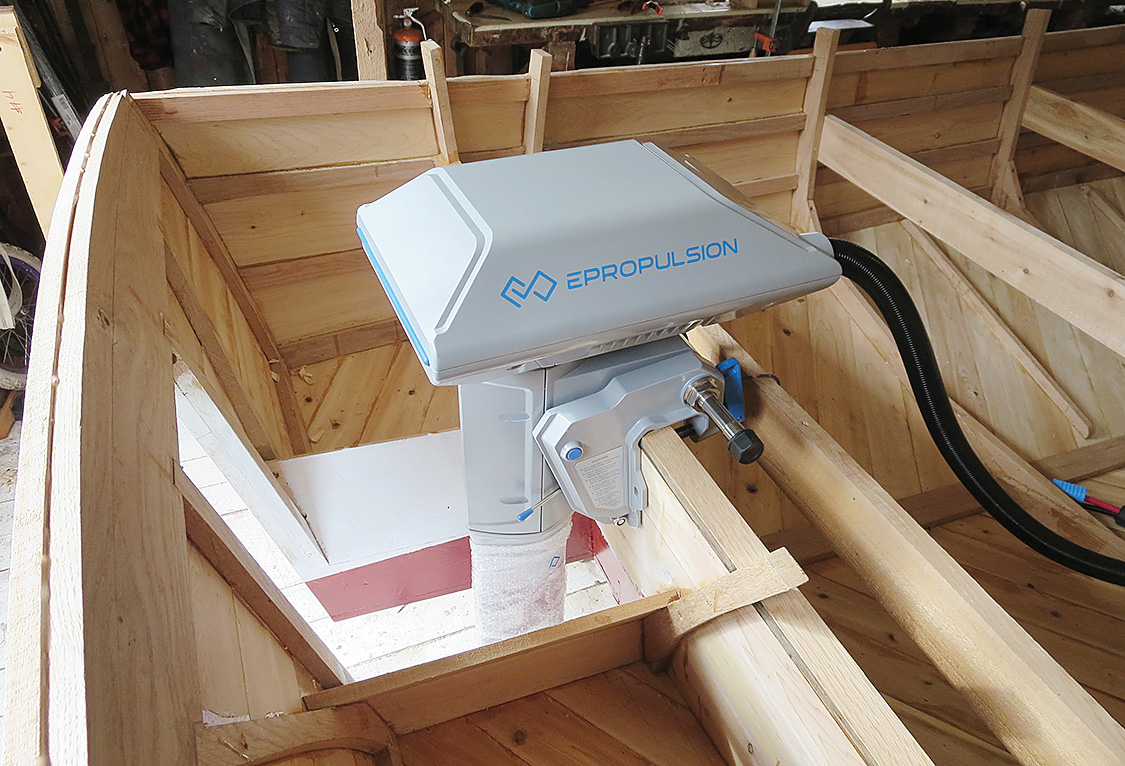
The design of the original Handy Billy put the outboard motor in a well to muffle sound as well as to improve the aesthetics of the boat. Noise is generally not an issue with an electric motor that runs in almost complete silence, but the Hand-e-Billy nevertheless retains the well to keep the motor out of sight and to allow it to be easily lifted clear of marine growth and the corrosive potential of salt water when not in use. I chose an ePropulsion outboard, since its underwater direct-drive promised the quietest possible operation; having a dealer and good service close to where I live in New Brunswick, Canada, was also an important factor in the selection.
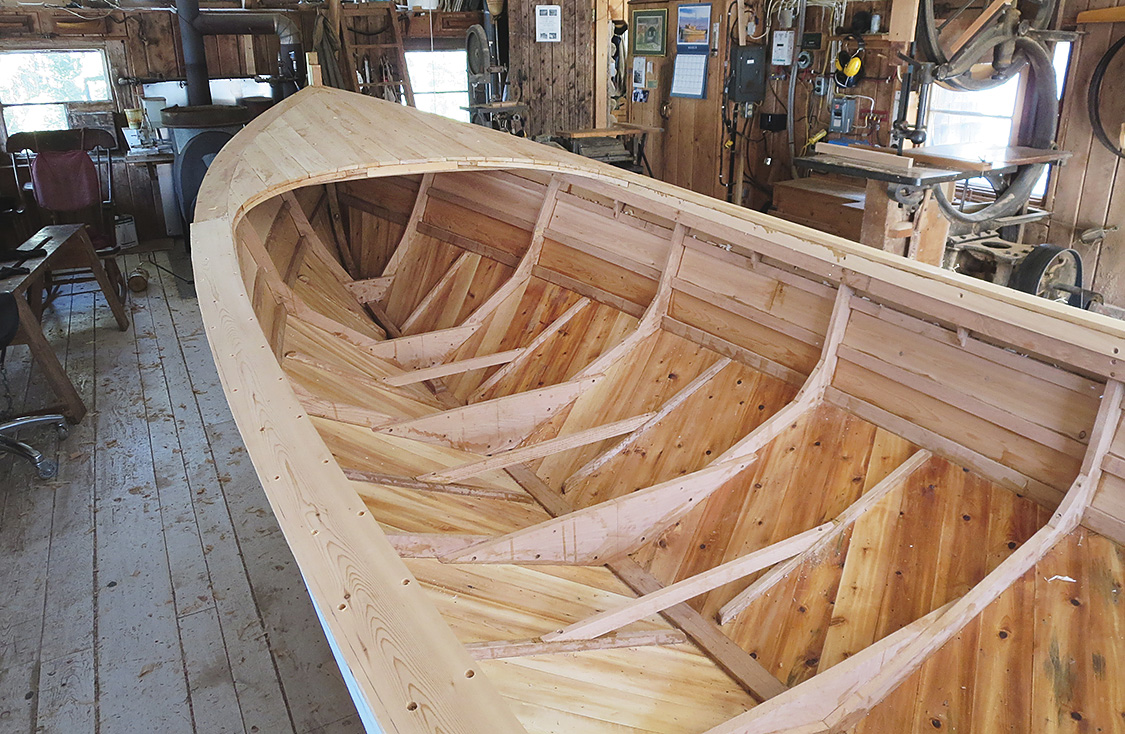
The Hand-e-Billy’s V-bottomed design is suitable for amateur construction and is more stable than round-bottomed boats of similar proportions. The hull is designed to remain watertight despite living most of the time on a trailer. To that end, conventional batten-seam planking, in which the plank edges land on permanent battens let into the frames, is used for the topsides. The bottom is double-planked with two epoxy-glued layers of 4″-wide cedar planks laid on opposite diagonals, 60 degrees to each other and 60 degrees to the keel, for a combined thickness of ⁹⁄₁₆″. To ensure uniform clamping pressure for the thickened epoxy, I used drywall screws with fender washers to draw the planks firmly together (see sidebar).
Throughout construction, consideration must be given to weight, because much of the benefit of the Hand-e-Billy’s avoidance of fossil fuels will be lost if a large vehicle is required for towing.
 Harry Bryan
Step 1.
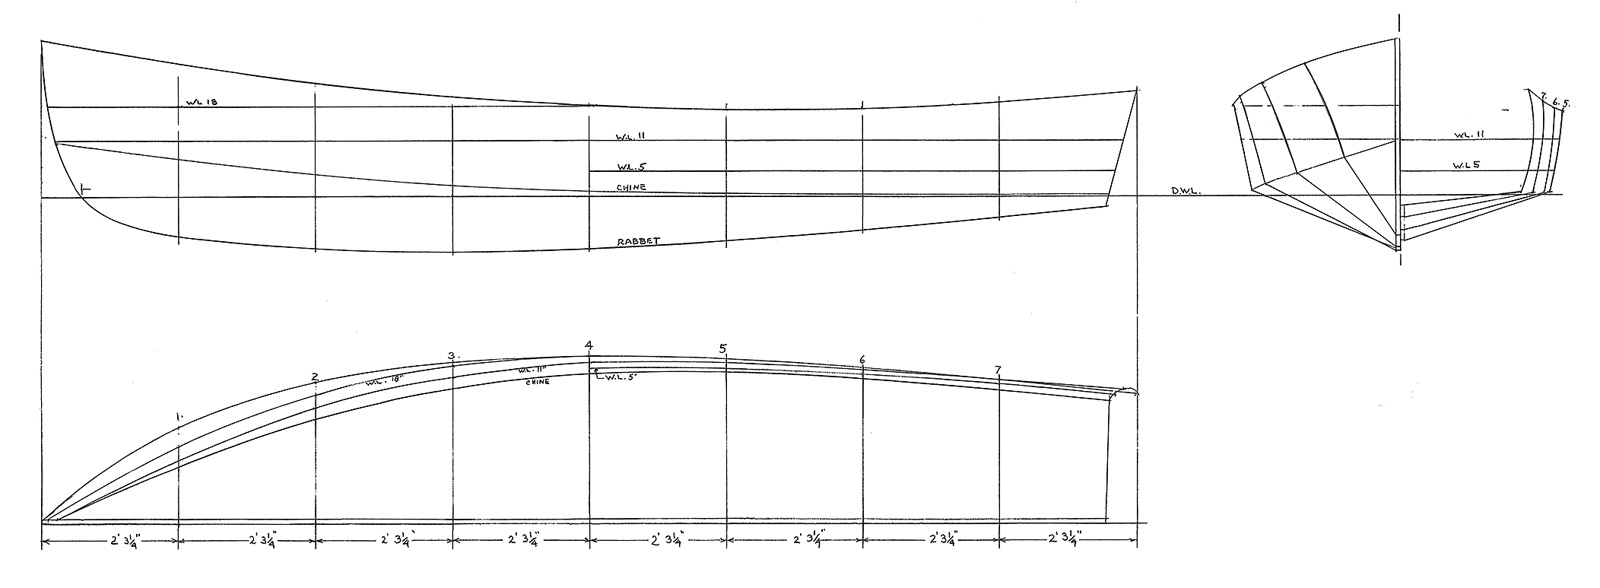
1. To accommodate the 180-lb battery amidships, the author revisited his 18′ Handy Billy design, keeping its outboard profile but increasing the beam. The project began with a one-quarter scale lofting, in which 3″ equals 1′ (see WB No. 196). At that scale, the lofting was 4′6″ long, allowing most of the work to be done in a comfortable position at the drafting table; the result was accurate to within ⅛″. Full-sized drawings were necessary only for building the frames, stem, and transom.
 Peter Tomasi
Step 2.
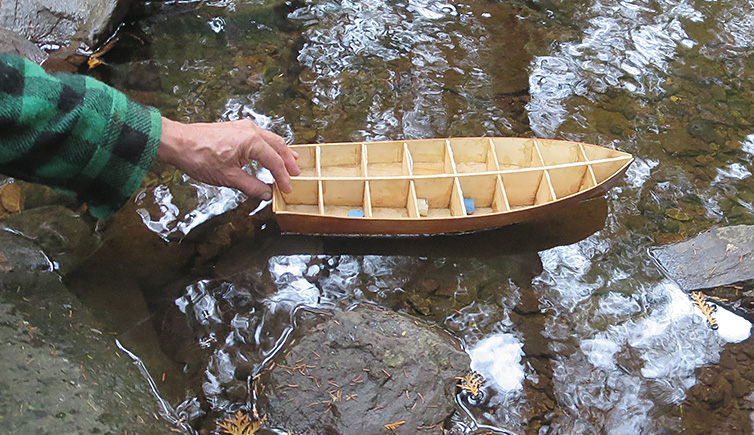
2. In a relatively small boat such as SARAH, the distribution of weights for such things as the motor, the battery, and the crew are critical to the balance of the boat. This 18″ model was carefully constructed by tracing shapes from the 1″-to-1′ lines plan. With the model afloat, the fore-and-aft location of the center of buoyancy was determined by pressing down with a finger to find the point where the model went straight down on its designed waterline. Weights accurate to the model’s scale helped in analyzing the trim. A Canadian penny weighs 10.3 lbs at this scale, so a pack of 16 pennies taped together represents 165 lbs, the average weight of a human. The scaled weight of the 180-lb battery was placed far enough forward of the center of buoyancy to balance the anticipated crew weight and placement. My first model represented a boat with a beam of 5′. A flotation test convinced me to increase the beam to 5′6″ to better accommodate the anticipated weights.
 Harry Bryan
Step 3.
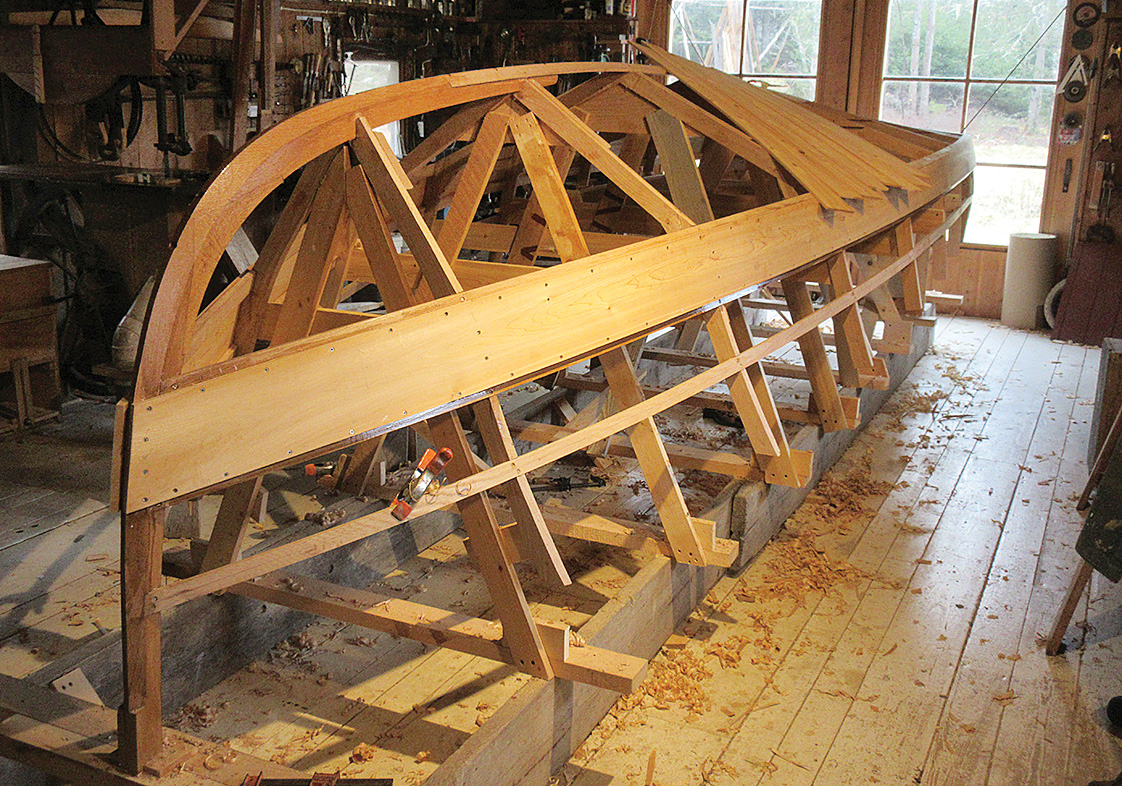
3. Three batten-seamed planks covered the topsides from the chine to the sheerline. Their seams are centered on ⁹⁄₁₆″ × 1⅜″ battens let in flush with the surface of the sawn frames. The lowest topside planks, which landed on the chines, had to be laid before starting the laminated bottom, the planks of which overlapped the topsides aft; forward, where the sections straighten, they are mitered into these same planks as in typical V-bottomed construction.
The frame futtocks were straight enough to be sawn from straight-grained stock, since the bottom pieces were always straight and the topsides’ curvature was slightly concave forward, transitioning to slightly convex at the transom.
This boat uses an inner and outer stem. In this photograph, the planking runs past the inner stem’s face; after all the planking was completed, the ends were trimmed flush and the laminated outer stem added.
 Harry Bryan
Step 4.
4. At the chine, the frame futtocks have half-lapped joints backed up with a gusset and fastened with bronze screws and epoxy.
 Harry Bryan
Step 5.
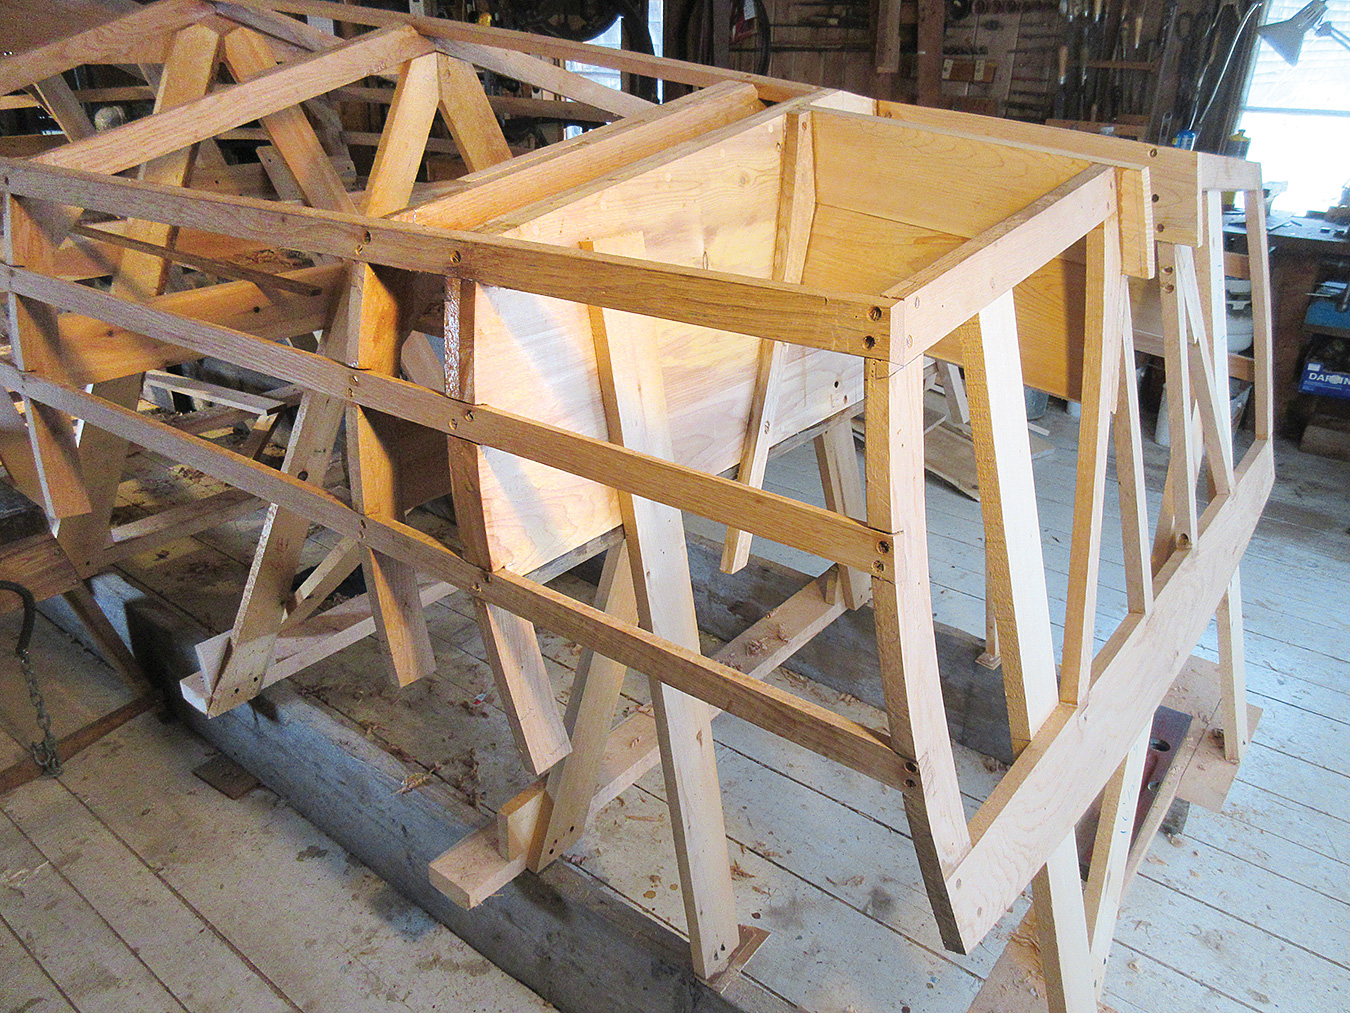
5. The advantage of lofting can be seen here, as the true shape and placement of each piece of the framing for the outer transom and the motor transom can be determined before any wood is cut.
 Harry Bryan
Step 6.
6. Before being fastened to the convex outer transom’s framing, the individual planks were cupped by dampening their outer surfaces with hot water and then clamping them to slightly curved pieces of wood. Pre-bending in this way reduced the possibility of splitting and eliminated the need for “backing out” the inner faces of these planks with a hand plane.
 Harry Bryan
Step 7.
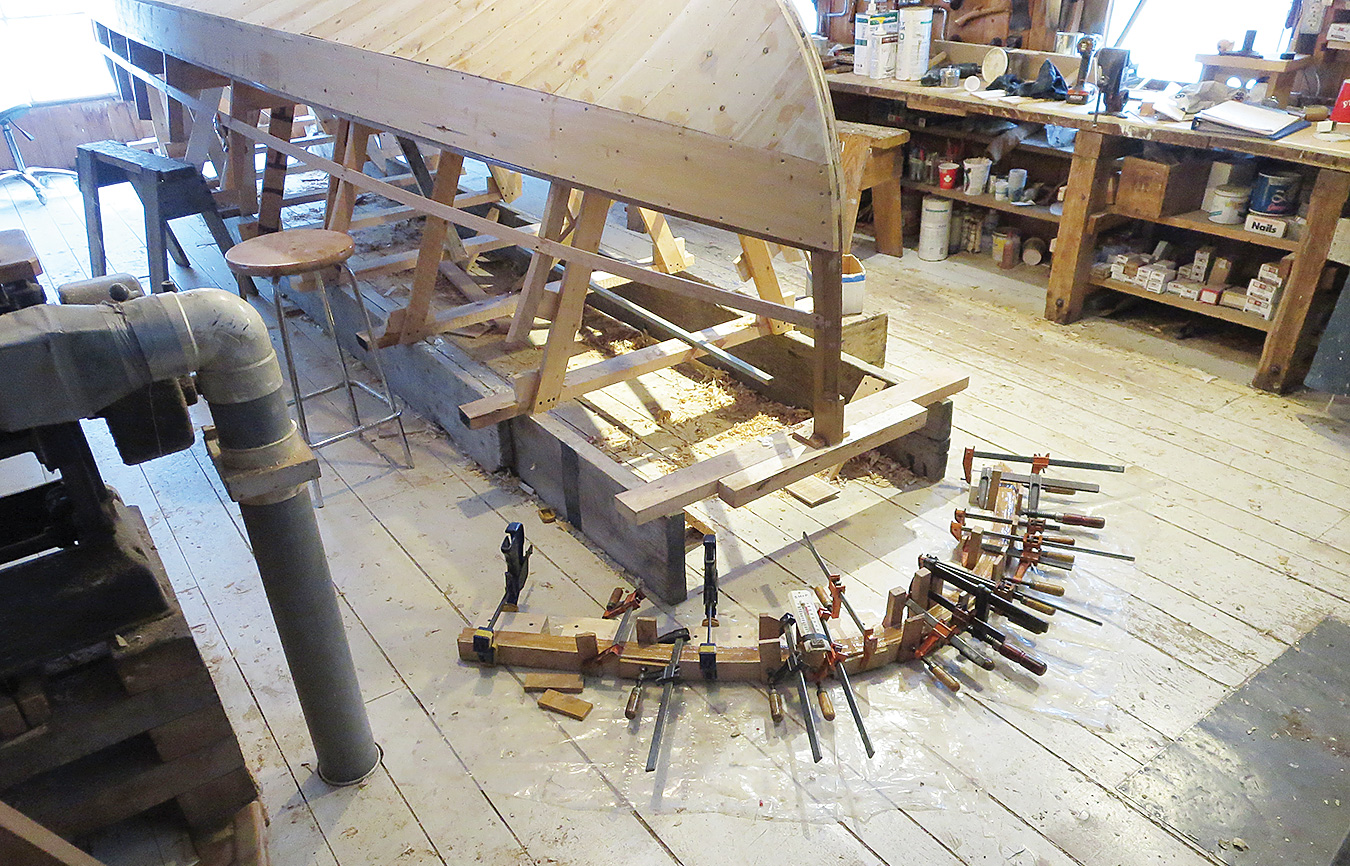
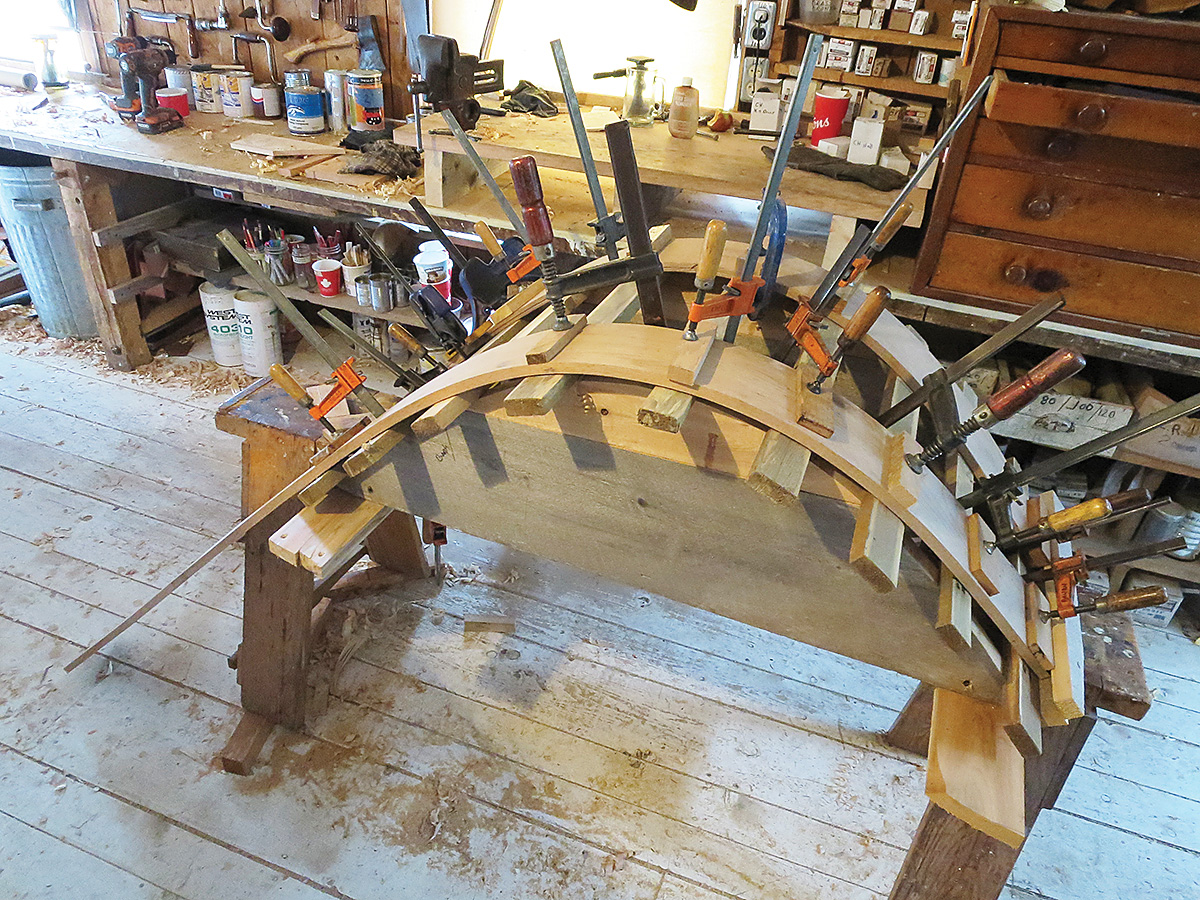
7. A pattern was taken from the inner stem’s curve and then traced onto the shop floor so that blocks could be fastened along the resulting line, forming a bending jig for laminating the matching outer stem.
 Harry Bryan
Step 8.
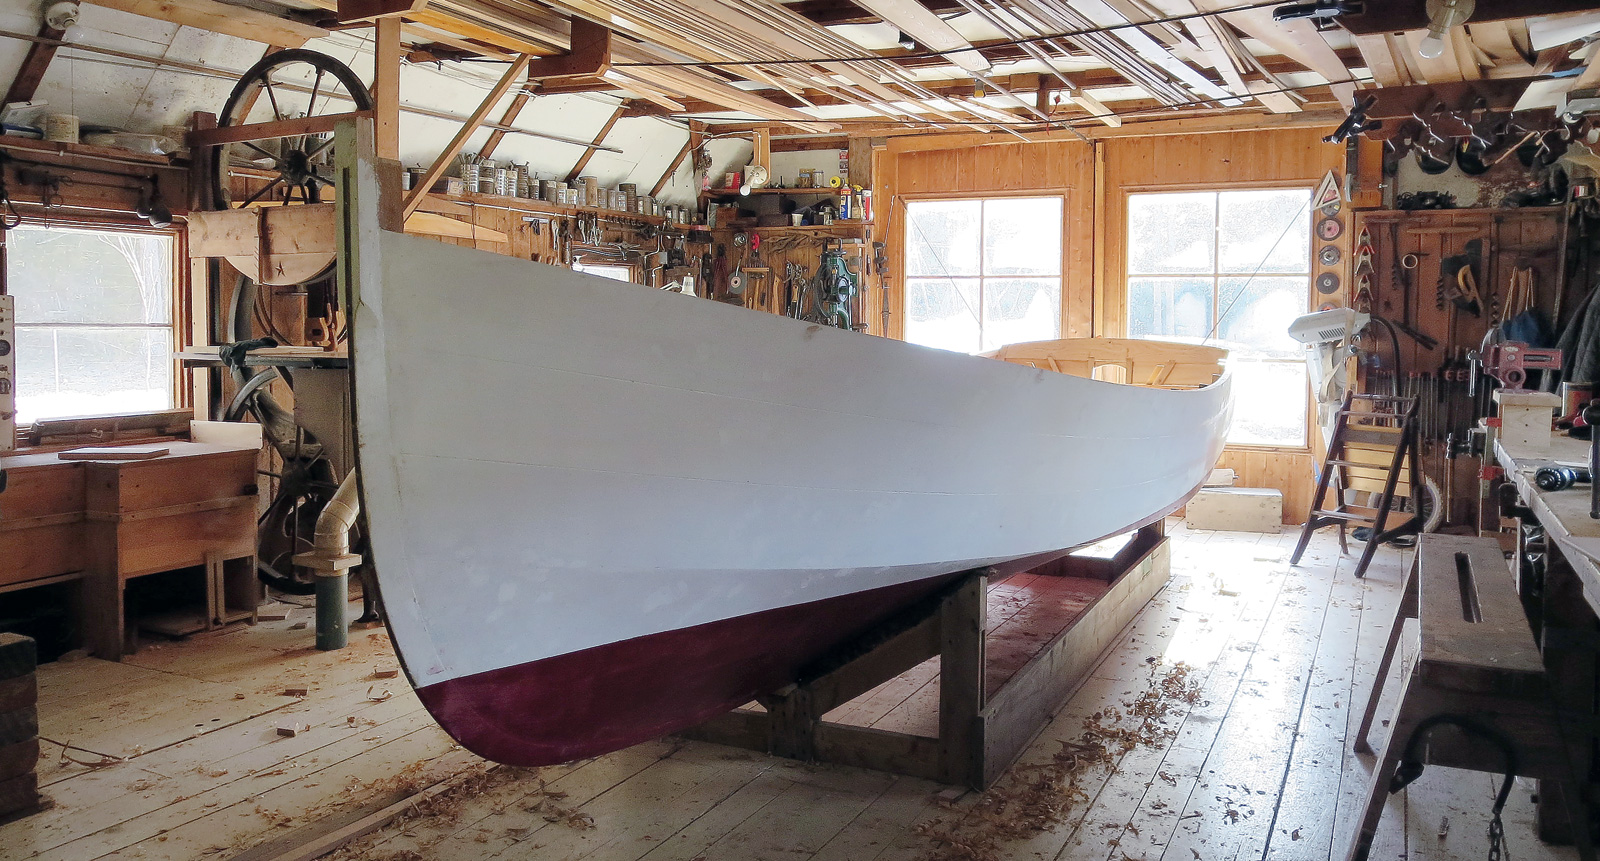
8. Turning a planked and painted hull right-side up has much of the excitement of a launching. Until this point, the hull had not been viewed in its natural orientation; for the first time, the subtleties of its hull form could be imagined working in the element that gives it life.
 Harry Bryan
Step 9.
9. Batten-seam construction of the topsides allows for widely spaced frames, but these frames were too far apart to support the relatively short bottom laminates as they were pulled into alignment with each other. For that reason—and also to give adequate stiffness to the completed bottom—intermediate ⅞″ × 1½″ stiffeners were glued and screwed between each frame pair after the first layer of the bottom was applied. Because these pieces primarily serve to stiffen the double-planking, they did not need to be fastened to the chine logs or the keel batten. After the hull was turned over, lightweight cockpit-sole beams were added to these stiffeners, installed level with the floor timbers at each frame.
 Harry Bryan
Step 10.
10. The motor is an ePropulsion Navy 3 outboard, which promised quiet operation; its direct drive eliminates the whine from a reduction gear. It is a 3,000-watt unit, which is roughly equivalent to a 6-hp gas-powered outboard motor. While that may seem inadequate for an 18′ boat, the motor easily pushes the loaded boat to hull speed at half throttle (1,500 watts), leaving plenty of reserve power. The boat has proved itself able to buck the notorious currents of both Woods Hole, Massachusetts, and Letete Passage in the Bay of Fundy, New Brunswick.
 Harry Bryan
Step 11.
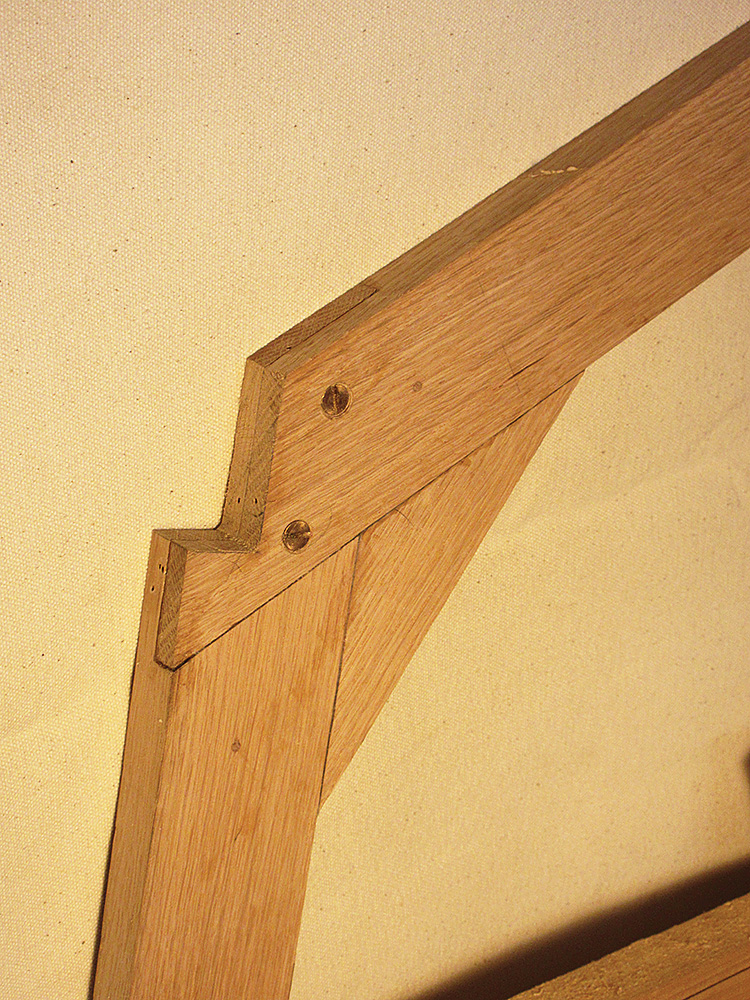
11. After picking up a pattern for the forward coaming pieces, I built a bending form allowing for a slight overbend. Using straight-grained white oak with wide growth rings made this an easy bend with little springback.
 Harry Bryan
Step 12.
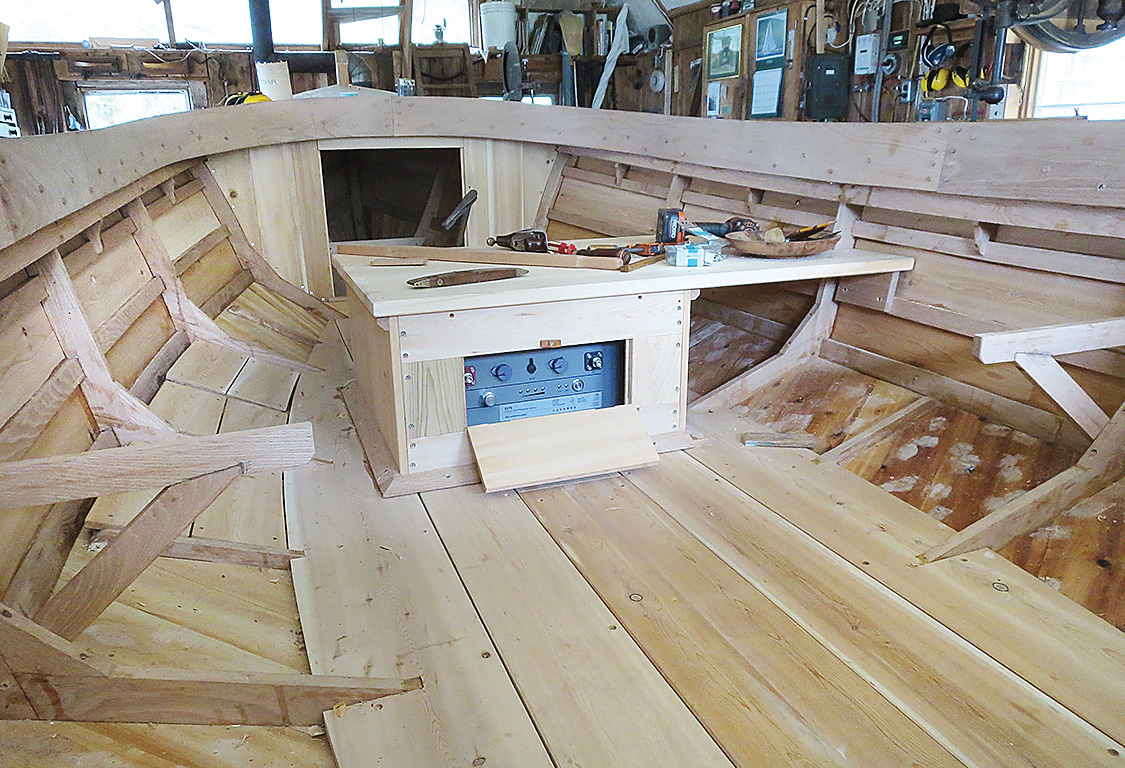
12. SARAH’s 8,960-watt-hour lithium-iron-phosphate battery weighs 180 lbs. At the time of this writing, this was the largest battery available from the ePropulsion company. The choice was meant to eliminate “range anxiety,” the fear of running out of power before reaching port. At 5 knots, she can travel more than 40 nautical miles, or 10 hours, on a full charge. The battery’s weight, placed low in the boat, adds to overall stability.
This boat is expected to live on a trailer, which means that the battery can be charged on household current. At 120 volts, about one hour of charging is required for each hour of boating at 5 knots. A dedicated array of three 330-watt photovoltaic panels can also give an hour of boating for each hour of full sunlight.
 Peter Tomasi
Step 13.
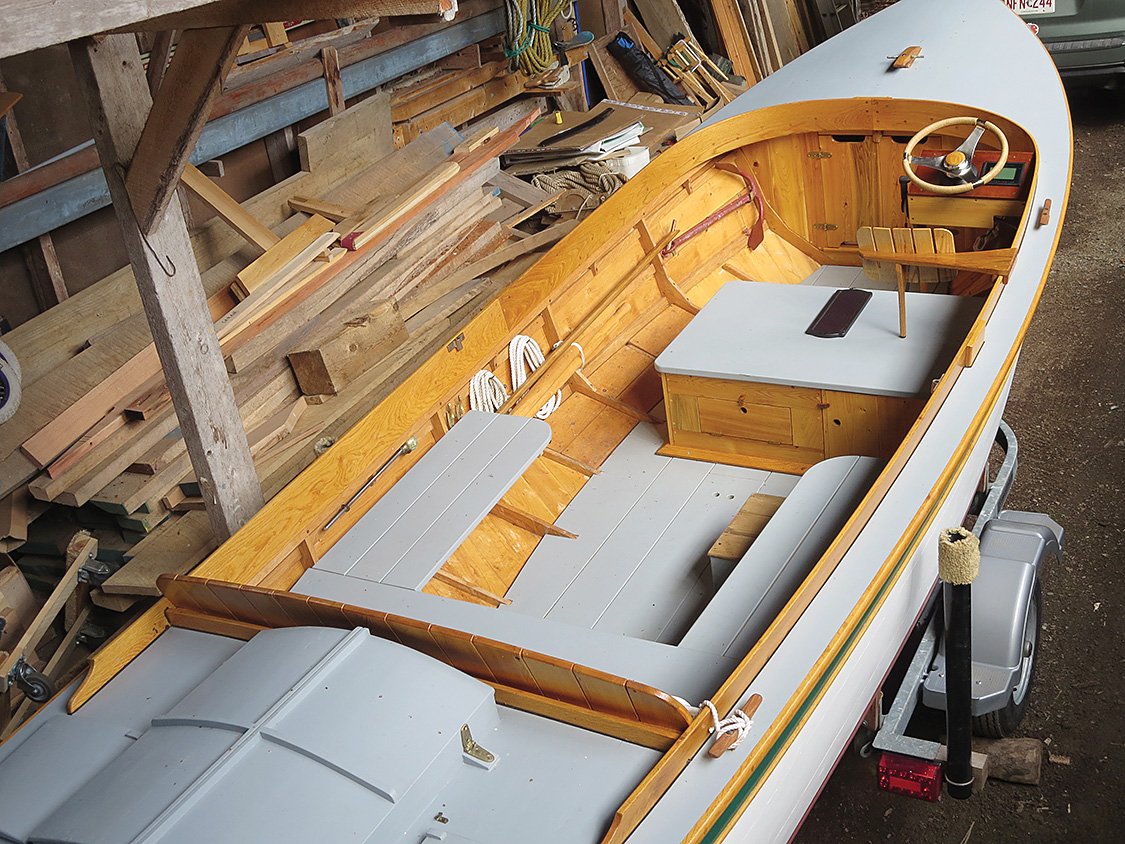
13. SARAH was originally launched with stick-steering, using a vertical fore-and-aft tiller alongside the starboard coaming. I’ve often used this type of steering, and it works well when connected to an easily turned rudder; however, the stiffness built into this outboard motor’s steering system translated into jerky and imprecise control when maneuvering in close confines. A small console with a steering wheel operating a conventional cable system has proved a far better fit for this design. The stainless-steel wheel was wrapped with heavy cotton twine and given several coats of varnish.
 Harry Bryan
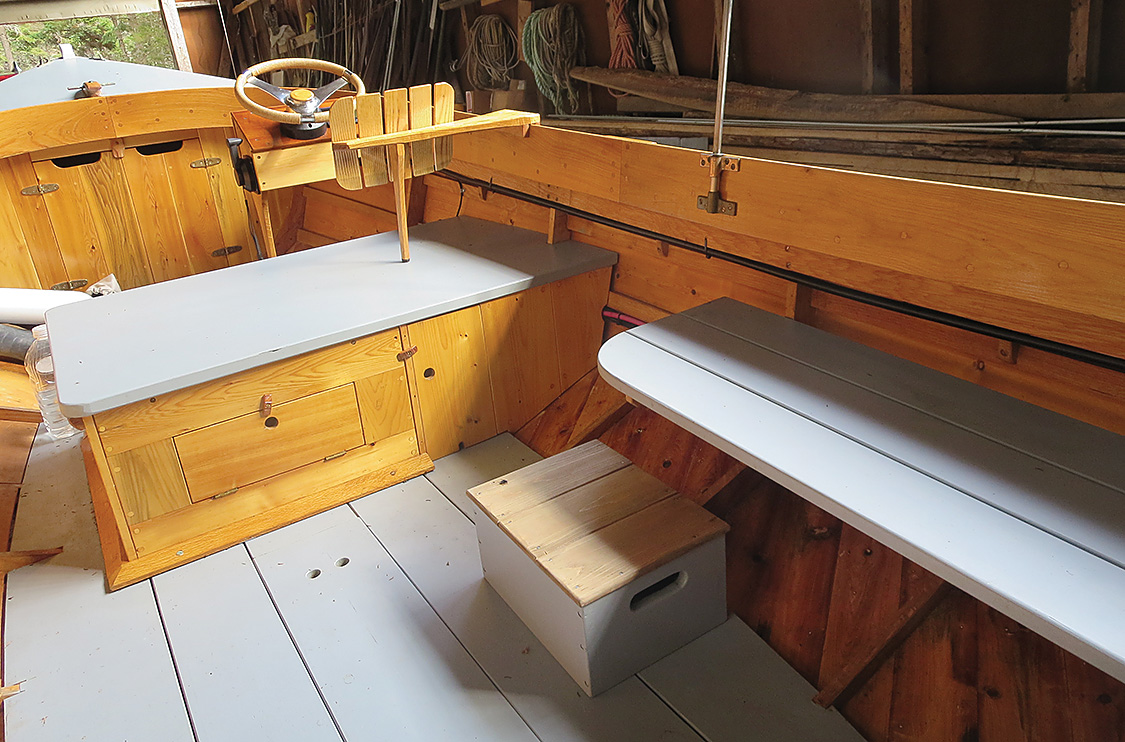
Step 14.
14. SARAH’s battery compartment doubles as a seat for the helmsman; covered with a red-and-white checkered tablecloth it can also be the center of an onboard picnic. A locker under the seat, outboard of the battery compartment, accommodates the charger, a small deep-discharge 12-volt battery used to power the boat’s bilge pump, and a 5-watt solar panel that is used to charge the pump’s battery when the boat is not in use.
 Harry Bryan
Step 15.
15. The coaming supports oarlock sockets, which are used if auxiliary propulsion is needed. A hand grip can be inserted into the starboard oarlock socket which, along with a step between the cockpit sole and the side seat, helps when entering or leaving the boat from a float.
Ole Evinrude invented the outboard motor in 1909. Ever since then, the overwhelming majority of boats powered by outboards have been designed to reach planing speeds. Using an accepted ratio of one horsepower needed for every 45 lbs of the weight of boat, crew, and gear, SARAH would need just over 30 hp, at the minimum, to plane. However, because she is designed to be efficient as a displacement boat, she will need only one-tenth of that power (the equivalent of 3 hp) to reach her designed speed and will have plenty of power in reserve for adverse conditions.
 Harry Bryan
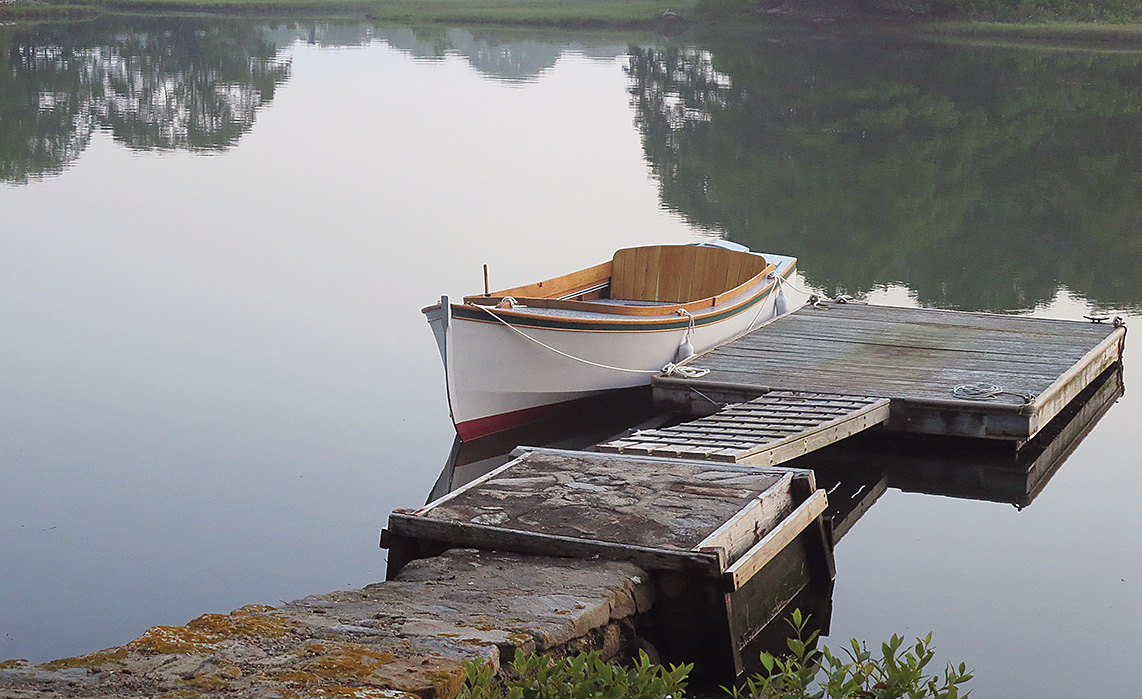
SARAH’s sociability, silence, and low impact on her surroundings make her an inviting way to simply slow down.
We will not all agree on how to respond to climate change or the urgency of doing so. The Hand-e-Billy is offered as a clean, quiet, seaworthy alternative for those who feel that slowing down can make a difference.
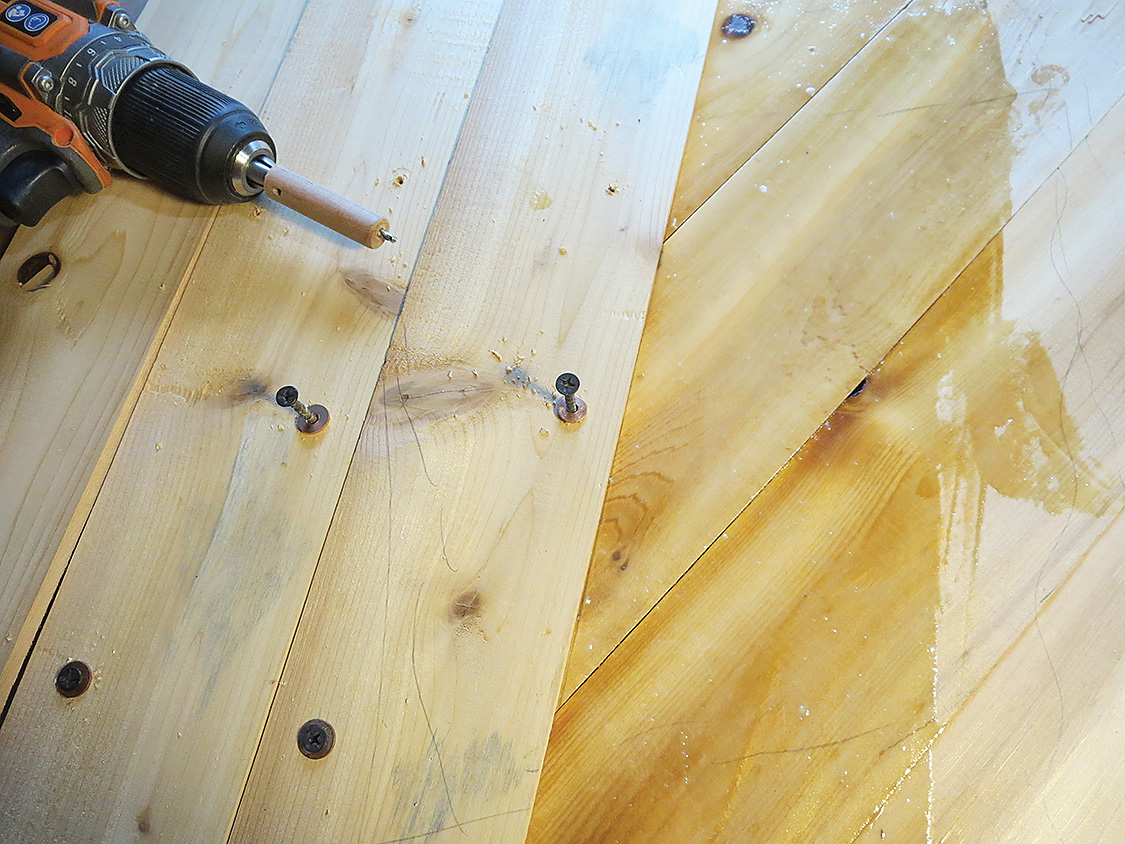
Laminating two-layered bottom planking
 Harry Bryan
Temporary drywall screws, fitted with fender washers, draw the outer layer of planking tight to the inner layer during glue-up. Pre-drilling holes—with the one in the outer layer large enough for the screw to pass through freely—assures a good seating for the screws. A dowel on the bit, as shown, provides a simple and effective depth stop.
Since 1991, we have successfully used a two-layer bottom planking scheme for our Daisy skiffs and wheelbarrow boats. For these flat-bottomed designs, the inner layer is placed athwartships, while the outer layer is laid fore-and-aft. For the V-bottomed Hand-e-Billy, diagonal planking is used. Each plank is ⁹⁄₃₂″ thick and 4″ wide. The first one is laid at 60 degrees to the keel near the middle of the boat, angling forward as it goes from keel to chine. It is fastened to the keel, frames, and chine with bronze ring nails and thickened epoxy. Subsequent planks in this first layer are jointed if necessary to improve the fit against those laid previously. No adhesive is used in the seams of the first-layer planks.
When installing the second layer, it is best to have two people working together. These planks are applied at 60 degrees to the first layer and 60 degrees to the keel on the opposite diagonal. One person spreads epoxy adhesive over the outer face of the first layer and also coats the inner face of a plank of the second layer. We use temporary drywall screws to hold the outer plank in place and also to pull the two layers together until the glue sets, placing screws where needed, about 6″ apart, to ensure that the seams in the new layer lie flush with each other.
In order for the screws to pull planks together effectively, a hole large enough to prevent the screw threads from engaging the wood is drilled through the outer layer of planking. A depth-limiting stop on the bit is needed to be sure that the hole goes only through the outer layer; an effective one can be made by drilling through a dowel of a length that allows the drill’s point to protrude an amount equal to the outer plank’s thickness. Small washers placed under each screw head provide enough area to prevent undue crushing of the wood as the screw is driven. We use 1″ screws, which are long enough to pass fully through both layers of planking to assure a good grip and a tight fit.
Drawing the two layers together requires caution to avoid stripping the threads in the thin softwood. It’s possible to use a power screwdriver to bring the washer in contact with the surface of the wood, but I always switch to a hand screwdriver for a better sense of the torque of the final set; this also allows time for the viscous, thickened epoxy to flow.
It is far better to err on the side of too much adhesive than to risk having an area with too little epoxy. The correct amount will, over a few minutes’ time, flow into the seams of both layers and fill small knot holes and other defects. After the epoxy has cured, we remove the screws and fill their holes with an epoxy filler pressed in with a putty knife. This method of laminating works well when two layers are used, and it avoids the plastic waste of vacuum-bagging. ![]()
Harry Bryan is a contributing editor for WoodenBoat. Contact him at Bryan Boatbuilding, 329 Mascarene Rd., Letete, NB E5C 2P6, Canada; 506–755–2486; www.harrybryan.com