
 Wikimedia Commons
Rot prevention in wooden boats begins during construction. Considerations include wise material choices, such as rot-resistant timber and compatible fastenings, and careful planning to avoid. standing water and to promote airflow.
Repair and restoration account for most of the work in my shop. Although there are the occasional problems caused by collision or grounding, the work usually entails replacement of rotten components or decomposing fastenings. The degraded wooden items include frames, transoms, decks, keels, coamings, toerails, windshield frames, and more. In retrospect, nearly all of it has been in predictable locations and preventable at the time of construction. It’s not the age of the wood that causes rot. A humble 50-year-old open skiff can be quite sound while a pricey 30-something-year-old runabout can be a compost heap.
Rot prevention should be a fundamental consideration at the beginning of a construction project. One should use the most rot-resistant woods available, avoiding sapwood, painting end grain, properly bedding, and, when possible, pretreating with rot inhibitors such as borate salts. The longevity of a boat is also dependent on keeping water—especially fresh water—from pooling and stagnating inside the boat. Proper drainage and ventilation are thus of paramount importance. Entrapped water and still air promote fungal growth and can turn a wooden hull into a stew pot full of soft components.
The fungi responsible for decay need quite specific conditions to thrive. Wood will decay above 30 percent moisture content. Wood below 20 percent moisture content cannot sustain wood-attacking fungi, nor will waterlogged wood. Moisture contents between 20 percent and 30 percent represent a gray area. Some woods are nearly impervious to rot, while others have little resistance to it.
Generally speaking, decay favors sapwood and heartwood of low durability. It prefers fresh water to salt. Warm, stagnant air, roughly 75–90 degrees F (24–32 degrees C) is necessary to provide the proper conditions for promoting growth of wood-chomping fungi. And, like most sinister agents, it prefers to work in the dark. Change one or more of these prerequisites and you stand a good chance of extending the longevity of your boat.
 Matthew P. Murphy (Photo), Greg Rössel (Drawing)
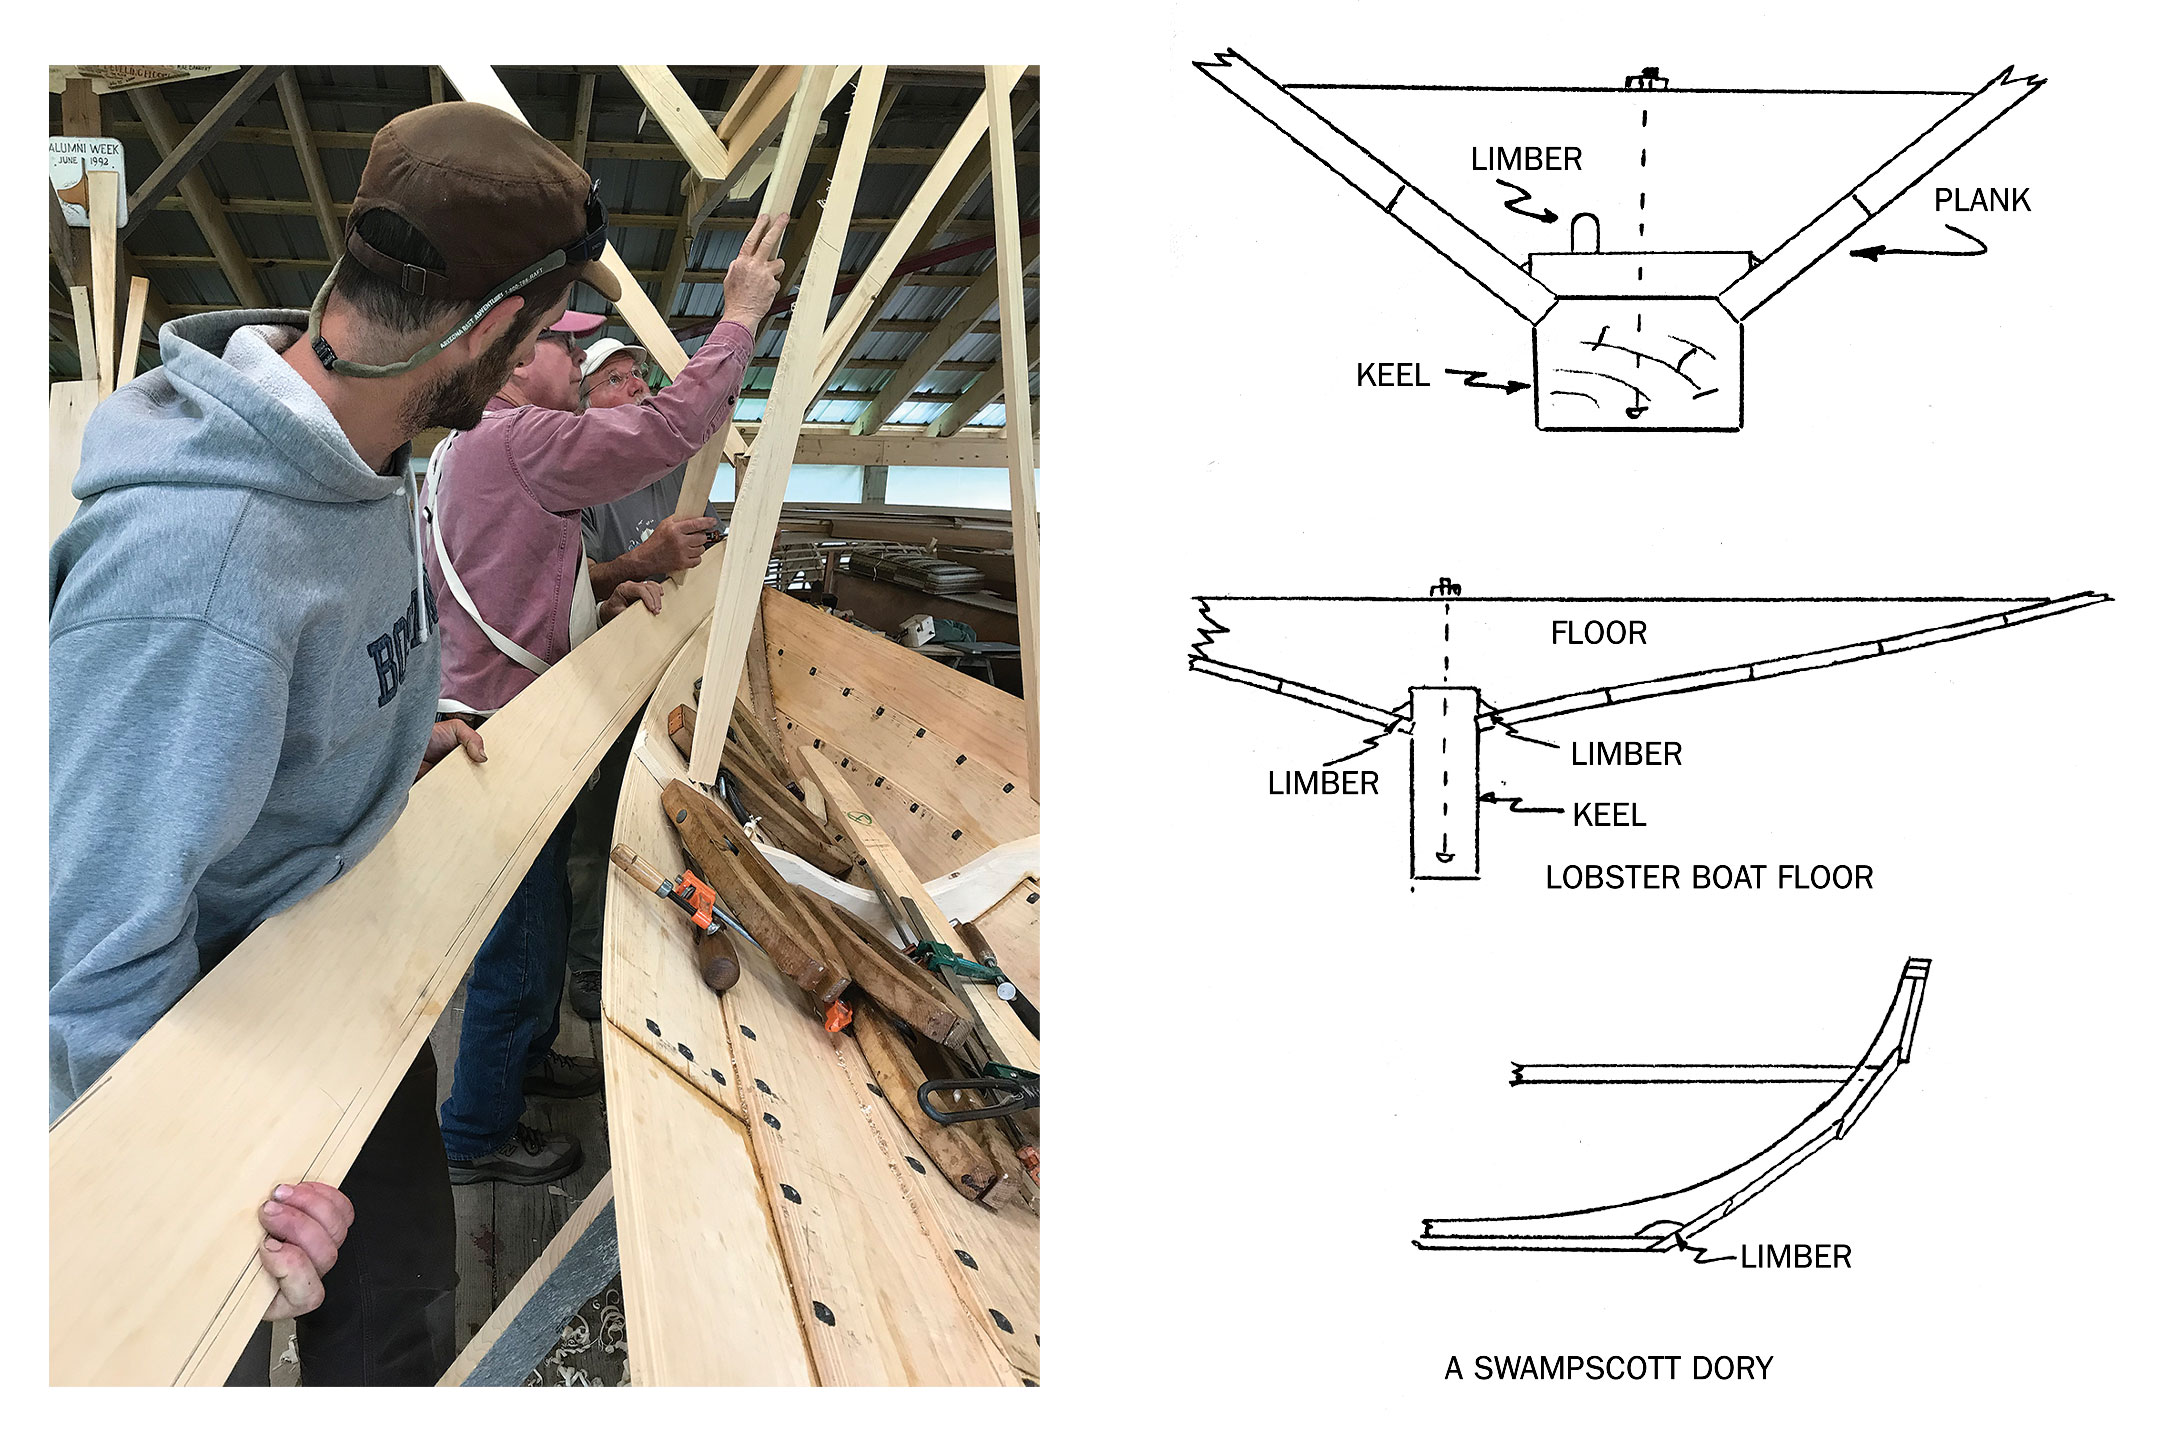
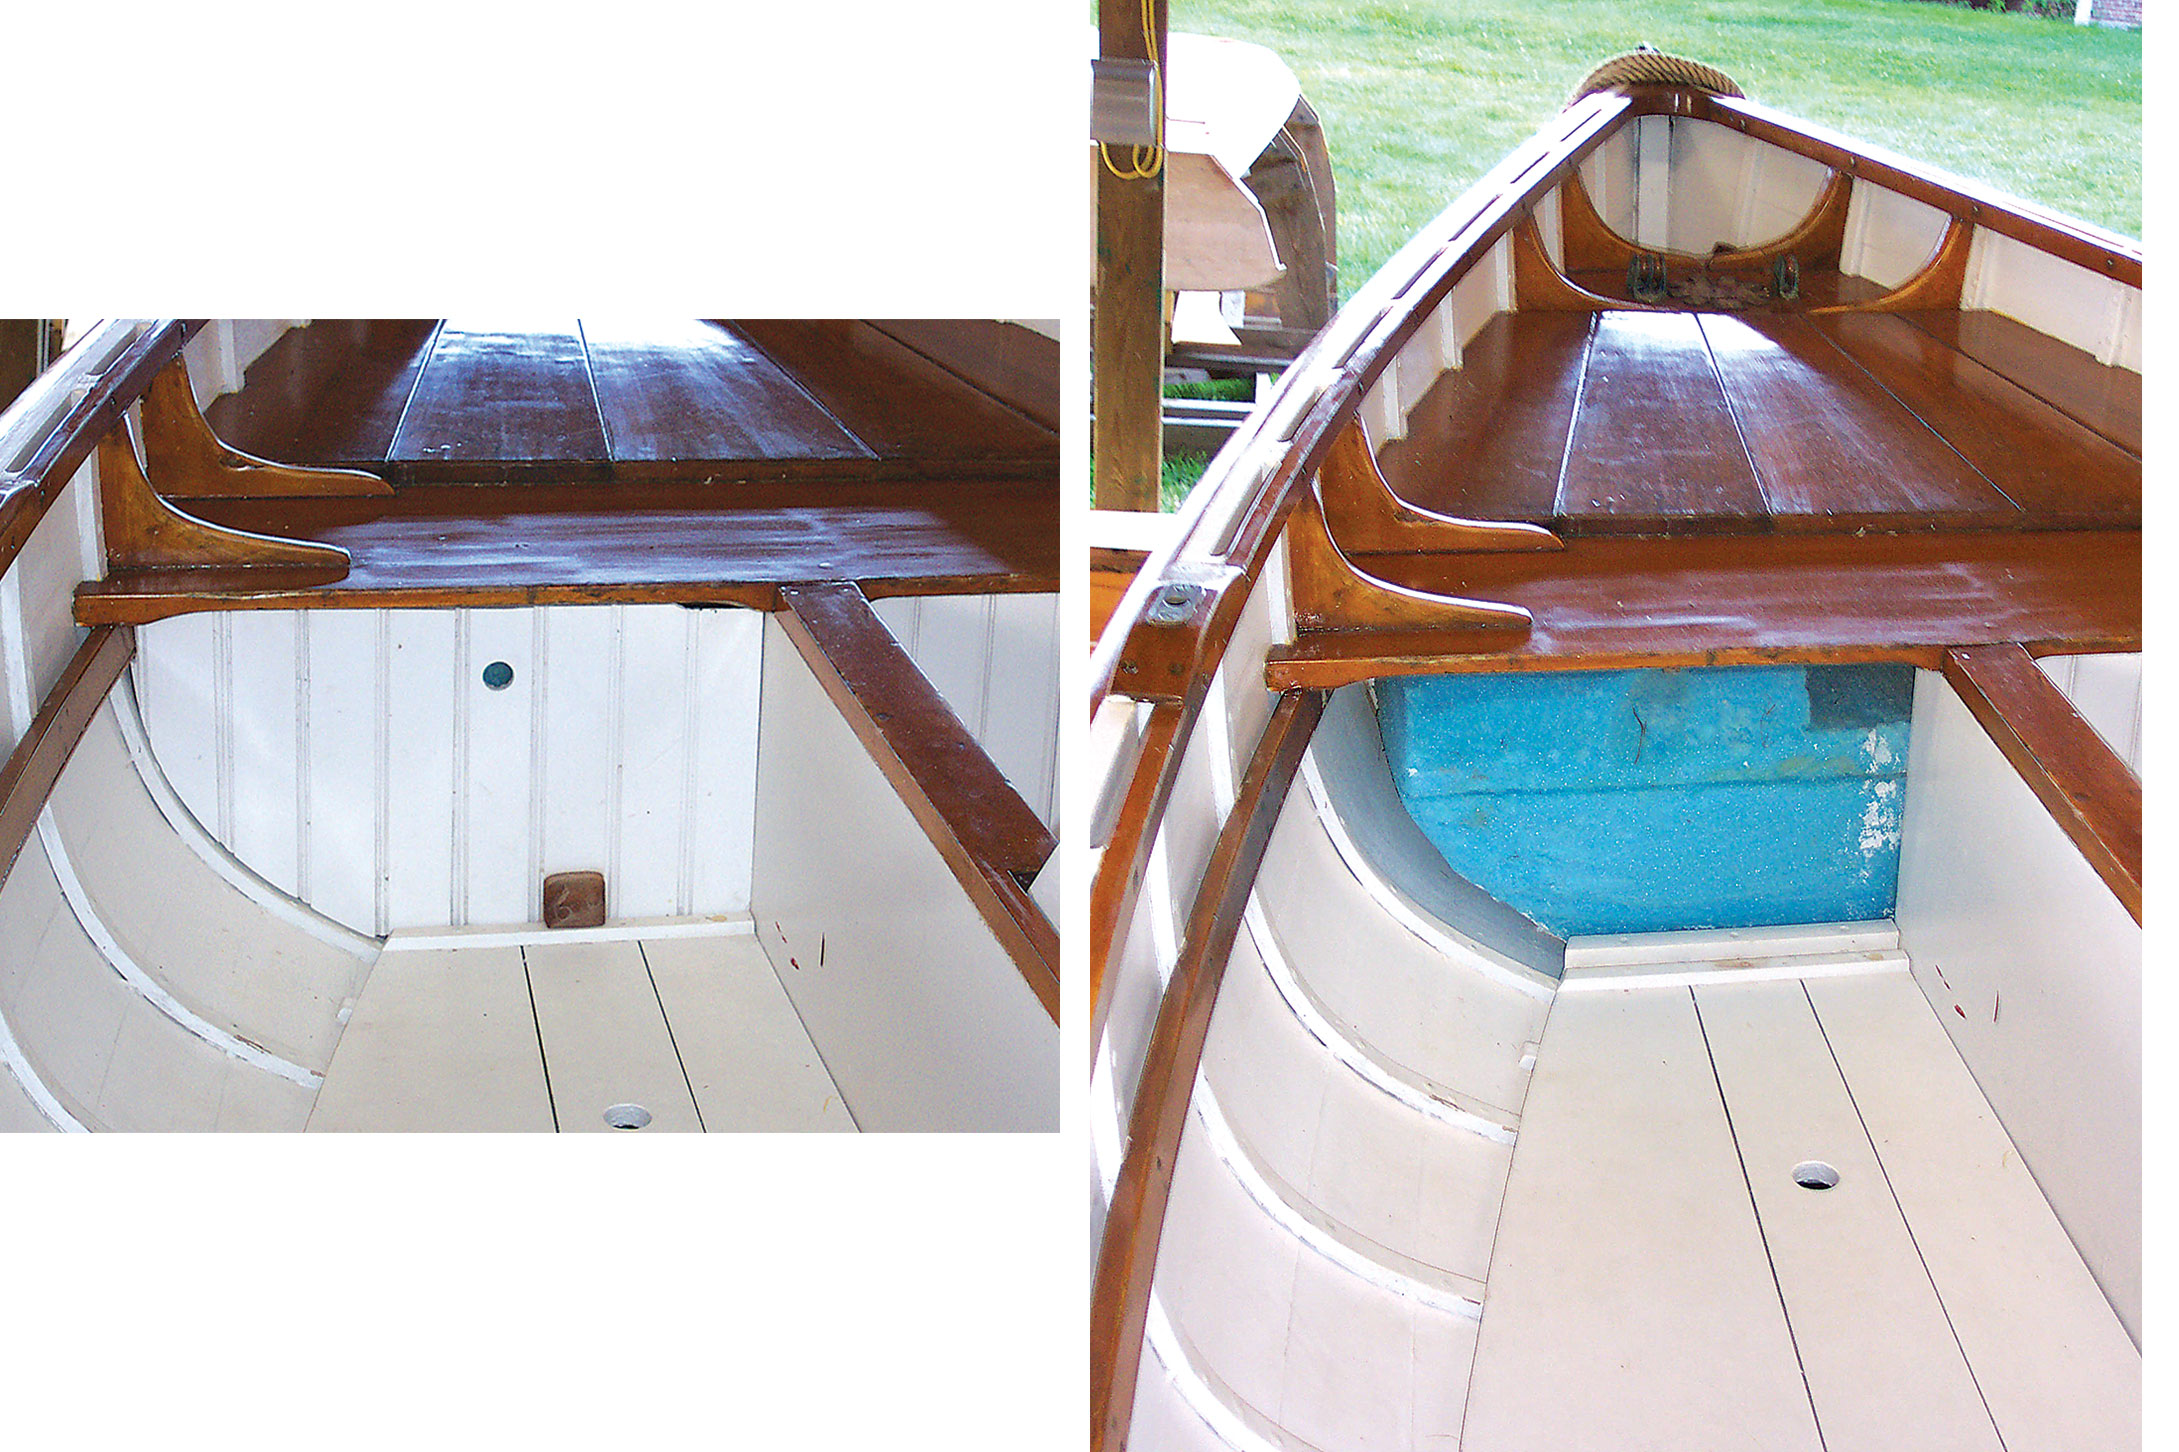
Left—Planking stock should be free of sapwood. For traditional lapstrake and carvel construction, it’s good practice to determine what woods have worked best locally and follow suit. Right—Limber holes allow the passage of water between floor-timber bays; the boat’s framing specifications will guide the best strategy.
Wood Selection
Selecting the right wood can be vexatious. Certain types of wood are more resistant to rotting than others. For example, tropical hardwoods such as teak, iroko, mahogany, and ipe contain natural oils and resins that make them highly resistant to fungal attack and decay. Whether they will do what you want them to do, need, or can afford is another question.
In New England, local woods such as white oak, black locust, white cedar, clear white pine, and hackmatack are top-of-the-line for longevity and utility. A builder in Newfoundland, the South Pacific, Belize, or Australia is going to have an entirely different range of choices, from king billy pine to kauri. Novice builders might consult a local or regional boatshop to see what they would use. It’s also worth a visit to a nearby marine museum to check out the unrestored boats in their collection and see what woods worked (and didn’t), historically. Yet another source would be the agricultural division of your local university. An excellent, if somewhat dated, reference is Wood: A Manual for its Use as a Shipbuilding Material Volumes I through IV published by the Department of the Navy Bureau of Ships. Another online resource is The Wood Database.
After selecting the best available wood, let’s examine the techniques to prolong the life of the components that are made of the stuff.
Managing Fresh Water Intrusion
The most common source of freshwater intrusion is rainwater either directly falling on an open hull or sneaking in through a leaky deck or poorly bedded fittings. Condensation is another source. Hot humid air infiltrating an enclosed hull sitting in cold water can turn your vessel into a still that provides continuous fresh water to the interior.
Limbers
Well-fitted triangular floor timbers are the essential vertebrae of your vessel’s backbone. Typically, their locations are well defined on the construction plan. The size and location of the drain ports cut into them—the so-called limbers—which allow water to flow freely beneath them rather than be trapped between them, often are not. A novice builder might undersize them or perhaps not install them at all. Limbers that are too small can easily become plugged with detritus or unintentional refuse, resulting in the impoundment of leaked or precipitated fresh water that can eventually attack the bottoms of frames, keelsons, or even the keel itself. The situation can be made worse if the floors are covered by floorboards or cabin sole, making them inaccessible, unhandy, or inextricable (more on this shortly). Limbers should be well planned, well placed, ample in size, and hopefully not in the same locations as a planking screw or keelbolt. Some forward-thinking builders used to align the floor limbers in a fashion that a light brass chain could be run through them (sometimes with a quick return spring at the end) where the chain could be tugged forward and aft to dislodge any blockage. Floors should be well dosed with preservative or paint and well bedded to extend their longevity.
While on the matter of limbers, it is worth considering other fixtures that can capture fresh water. These include maststeps, oarlock pads mounted on deck, winch bases, and anything else that might create freshwater wells. Without limbers, such fixtures can become prime places for rot.
 Greg Rössel
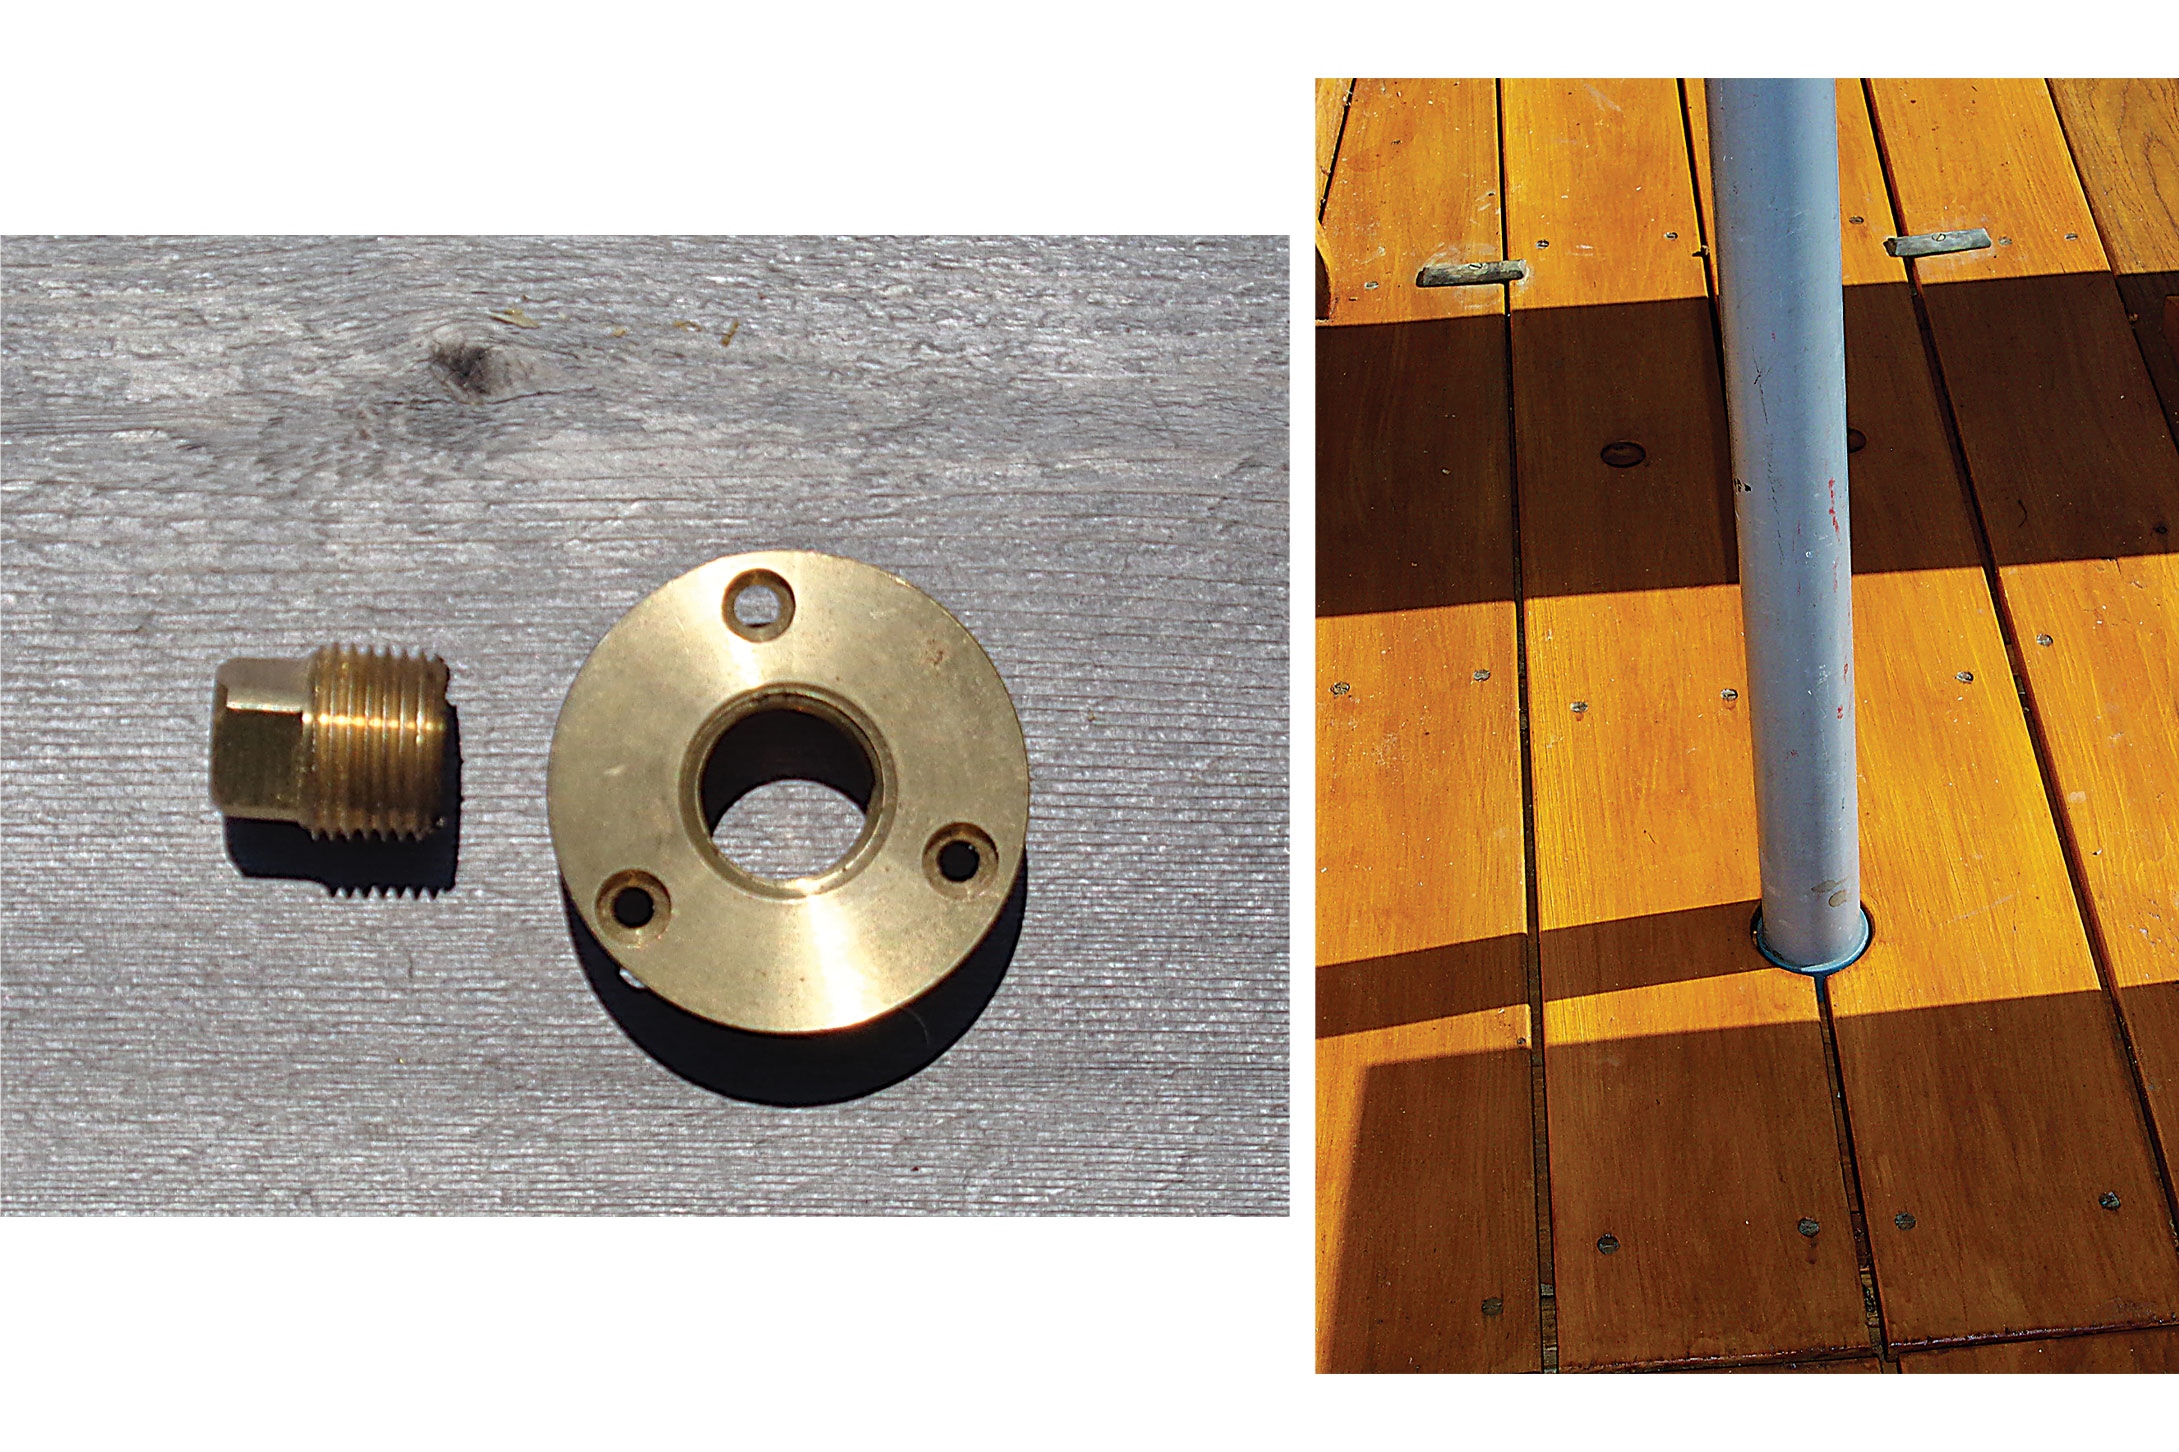
A properly placed garboard drain is essential to getting all of the water out of a boat at the end of the season. Above right—A bilge-pump-sized hole in a small boat’s floorboards is likewise essential to getting all of the water out of a boat that’s in commission.
Garboard and Transom Drain Plugs
Forty years ago, there was a renaissance of interest in elegant outboard-driven runabouts. These were generally acquired through swap-and-sell ads that read, “Trailer for sale $400. Buyer must take boat on trailer.” Most of the runabouts were constructed by canoe firms that were used to building lightweight boats that could be stored upside down and under cover. These new boats were heavy and lived on their trailers, outside and right-side up. As time went by, and easier-to-maintain fiberglass hulls came into vogue, the runabouts were parked out back with their tight-fitting covers in place and the transom “drain” open. Over the years, the canvas began to fail, letting in rain, leaves, and other debris but keeping the interior warm and stagnant. The drain mounted above the bottom (which really was only intended to be plugged when the vessel was under way), quickly clogged. A small perpetual pond would form that lasted until a smitten new buyer arrived.
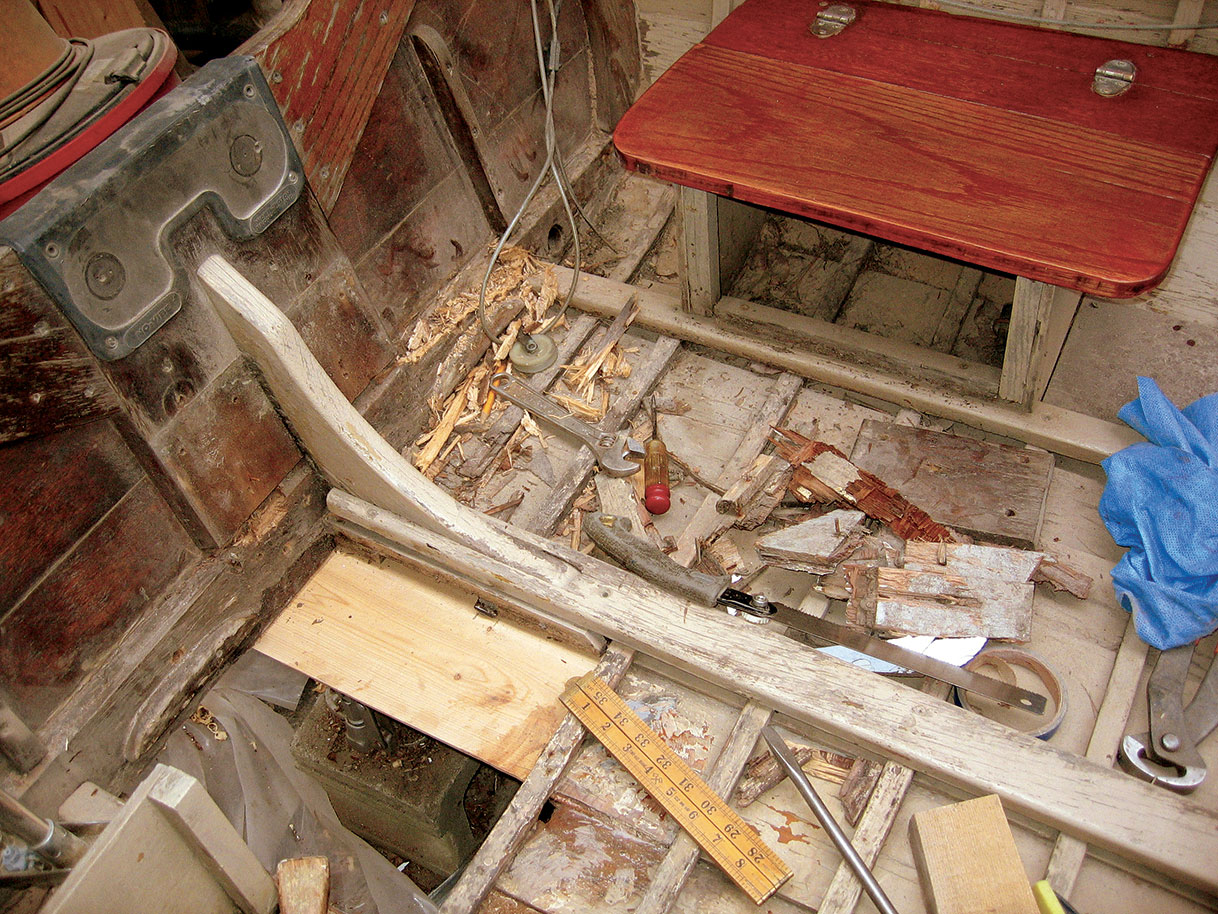
All the patients arriving at my shop exhibited the same chronic symptoms: a rotten keel (usually made of non-durable wood such as ash), decayed frame ends, and the bottom of the mahogany transom turned to mush. All of this could have been avoided with a bit of canvas-cover maintenance and decent garboard drains.
A few strategically placed garboard drain plugs will rid the hauled-out hull of nuisance water. These fittings are similar to a pipe flange and fabricated in bronze or brass; they come in three sizes— ½”, ¾”, and 1″— and are extraordinarily easy to install. Just bore a hole of the proper size, bed the fitting and place it in position, and install the screws. The plugs come in three styles: a raised square “nut” (like you’d see on household plumbing), a recessed “socket wrench” type that keeps the plug flush with the planking, and a T-handle. There is even a patented one-way safety plug that lets water out of your bilge but not back in—an ideal device for anyone who has ever forgotten to put in the plug, which we’ve all done once. Whether your Friendship sloop lives on the hard in the winter or your Whitehall’s homeport is a trailer, you’ll be glad to have a good garboard drain.
Floorboards
Small-boat floorboards and cabin soles don’t seem to get enough respect. Construction plans tend to contain sketchy details (if anything) of these pieces. Occasionally there will be overly complex (yet handsome) presentations that look great but are impractical for easy bailing or sponging out. Floorboards are tricky to fit; they have lots of curves, bends, and tapers to be dealt with. It is easy to overlook the fact that not only do they serve as a base to walk on, but they also should be easy to access and lift out for inspection and water removal.
When building, ask yourself whether you have enough liftable sections to easily access the entirety of the hull below. Is there enough clearance in the joinery that will still allow the sections to be removed even after swelling? Are the finger lift holes, or mechanical finger pulls, big enough to get a real finger into them? If you are using turnbuttons for holding the boards down, are they of ample size to work easily? If there is a situation where removable boards are impractical, consider installing bilge pump-out holes or mini hatches.
Drains, Gaps, and Scuppers
After chasing down some of the prime hidden decay-promoting suspects it’s time to survey for those lying about in plain sight and in daylight.
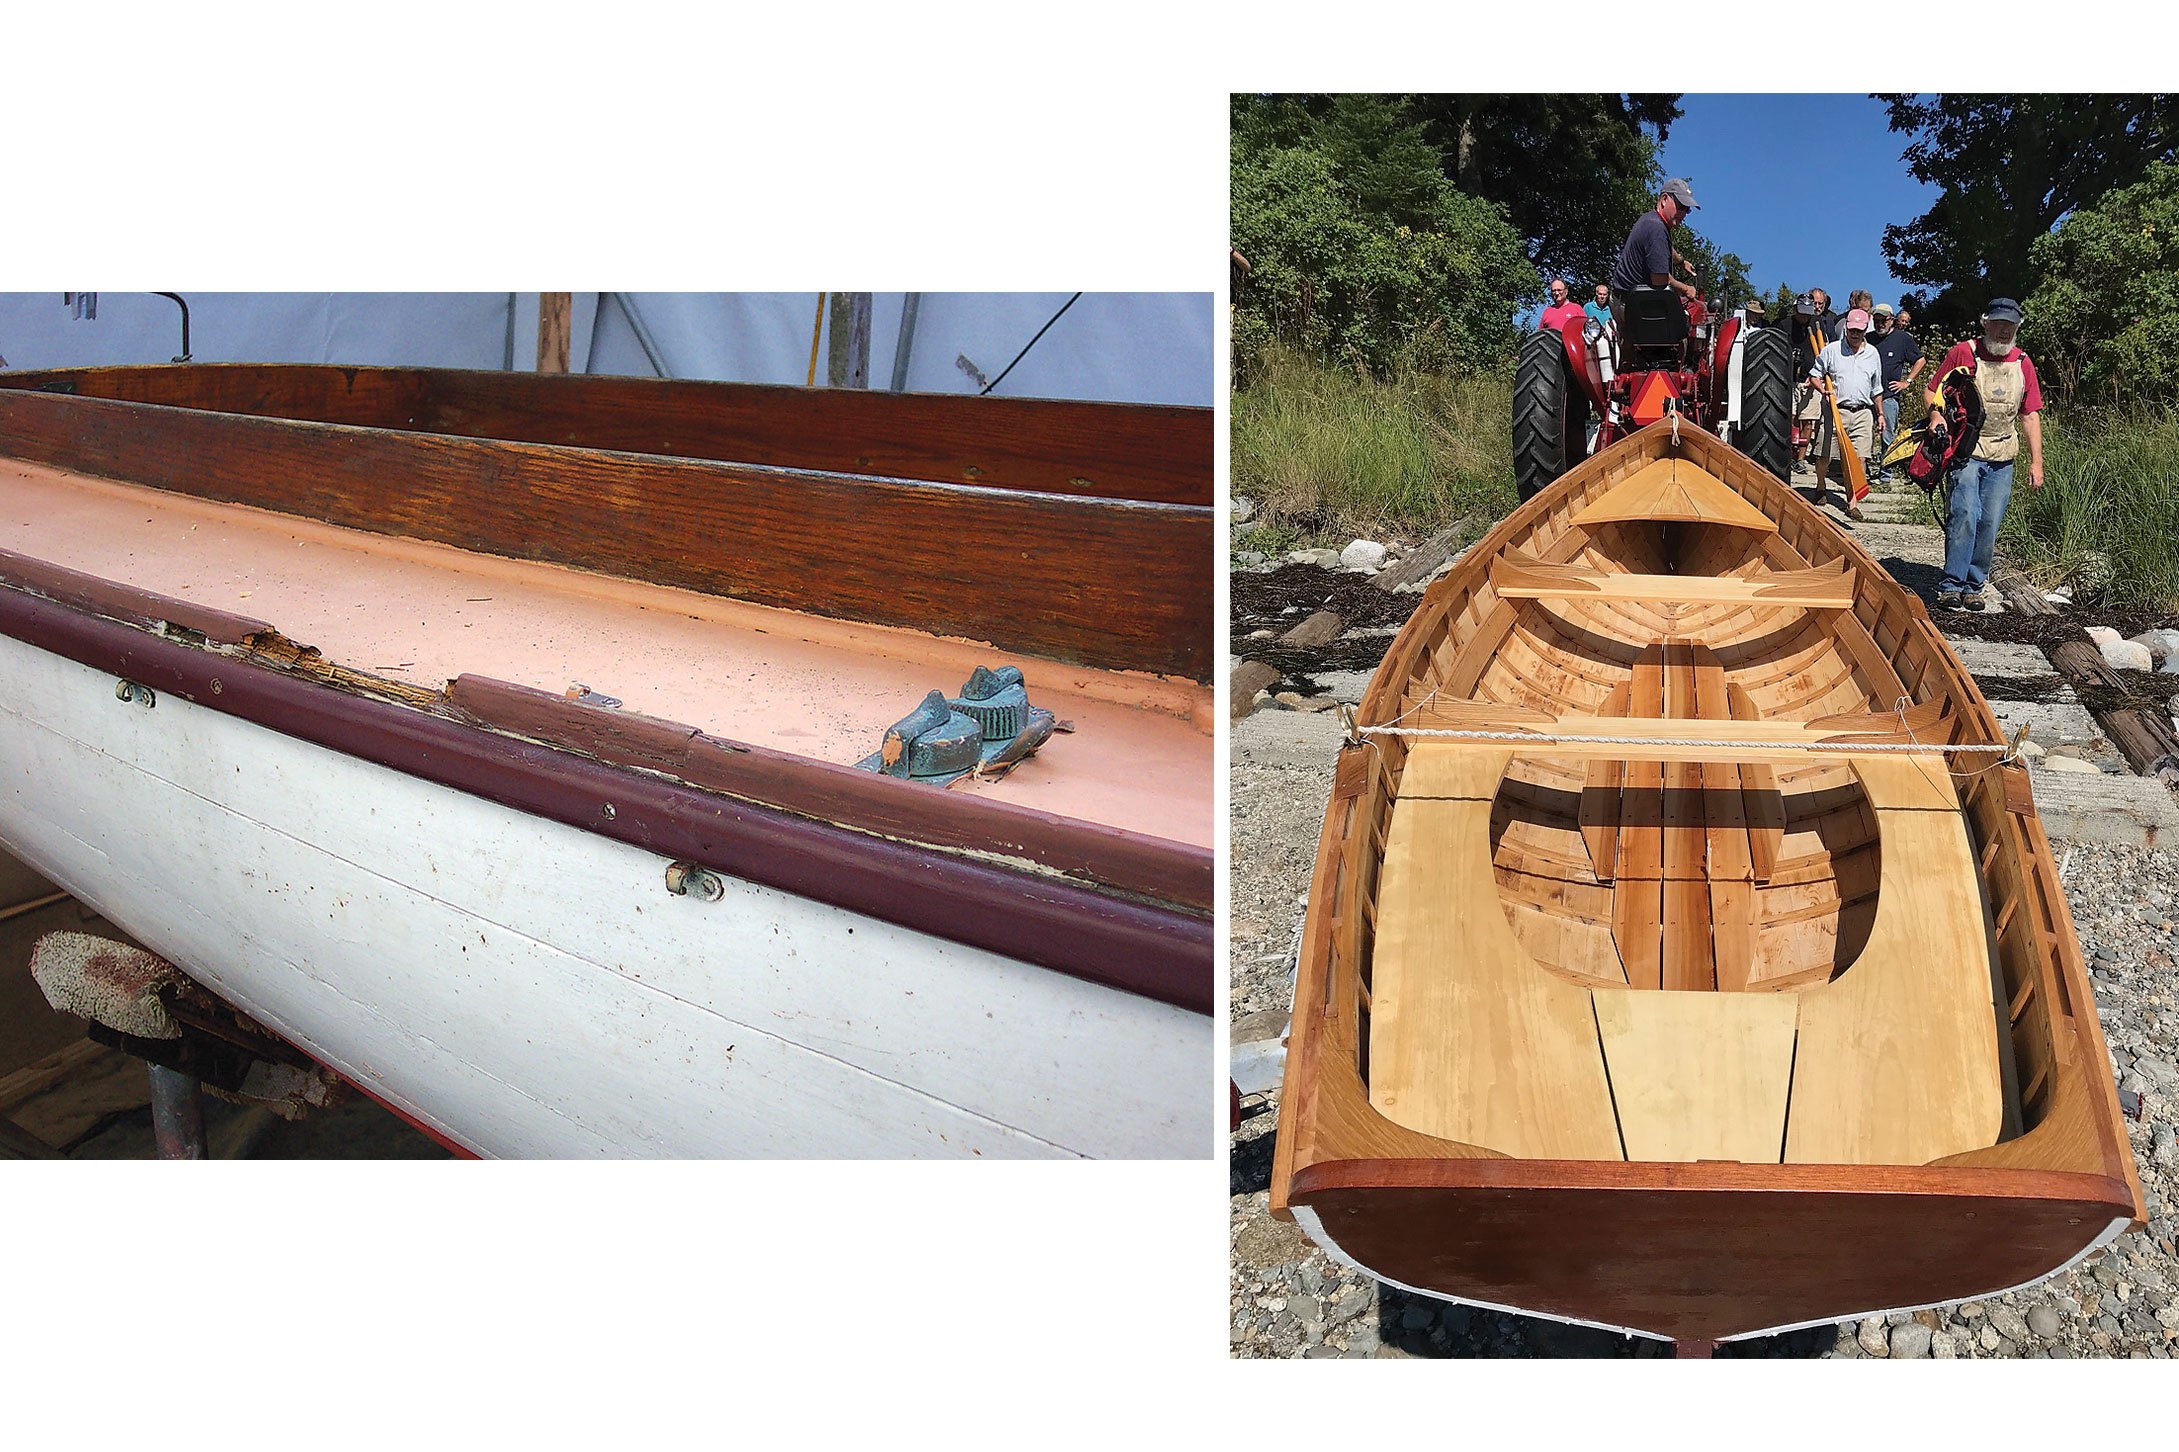
- If your boat has toerails, have they been well bedded and are there ample drains through them at the lowest part of the sheer? Pooling water there can make for a big repair in the not-too-distant future.
- Are there limbers on the bottom edges of cabin windows and wooden windshield frame? Water lying there will first attack the varnish and later the wood itself.
- On a boat propelled by an outboard motor, is there a properly sized drain in the motor well?
- Are the interior faces of scuppers and other drains well painted or varnished?
- On small craft, leaving the ends of thwarts just short of tight against the planking not only makes for easier fitting (and an elegant air of savoir faire) but also avoids a possible trap for water against the end-grain of the thwart. The same can be said for leaving gaps on the pieces making up the after seats (aka sternsheets). Using homemade versions of the spacers used in laying down bathroom tile makes this seemingly tedious job a breeze.
 Greg Rössel
Left—The lack of limbers in a toerail can cause fresh water to pool on deck, promoting rot. Right—Gaps between seats boards and along their edges will keep water from pooling.
Butt Blocks
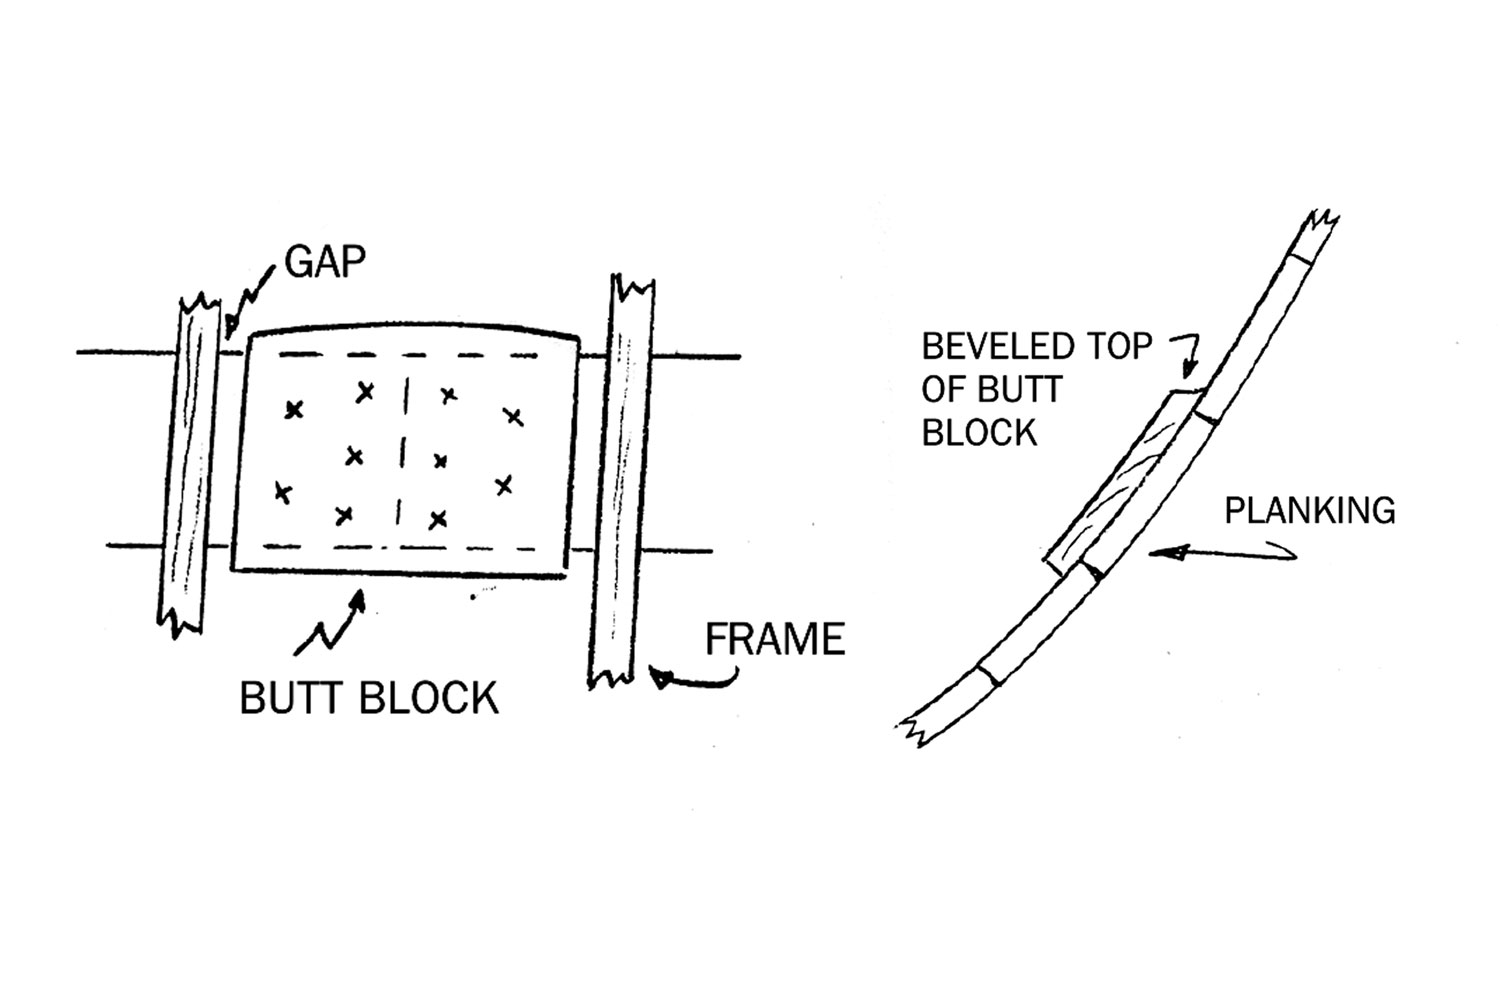
In these days of bulletproof epoxy and scarf joints, it’s easy to forget that butt blocks are still a viable solution on many traditionally built carvel hulls. Though they look similar to the gussets on the trusses on your garage, they are considerably more complex. They must fit the curvature of the planking both up-and-down and fore-and-aft; they must slightly overlap the planks above and below; and they must be installed in a fashion that deters rot and premature failure. They should be painted—especially the inside face of the butt block and end grain—and bedded in an oil-based bedding compound. To avoid them turning into a water-impoundment device, crown and bevel the upper edge of the block so it will shed water. Fit butt blocks with a gap between them and the frames to let water pass by.
Decks
Few things are as traditional-looking as a canvas-covered deck, which is relatively skid-proof and tasteful in appearance. Few things are also as traditional as being awakened in your bunk on a dark and stormy night by water dripping on your forehead. Like a leaking roof on your house, water creeping in under the deck is bad news, and the source is often hard to track down. Capillary action can take the water anywhere.
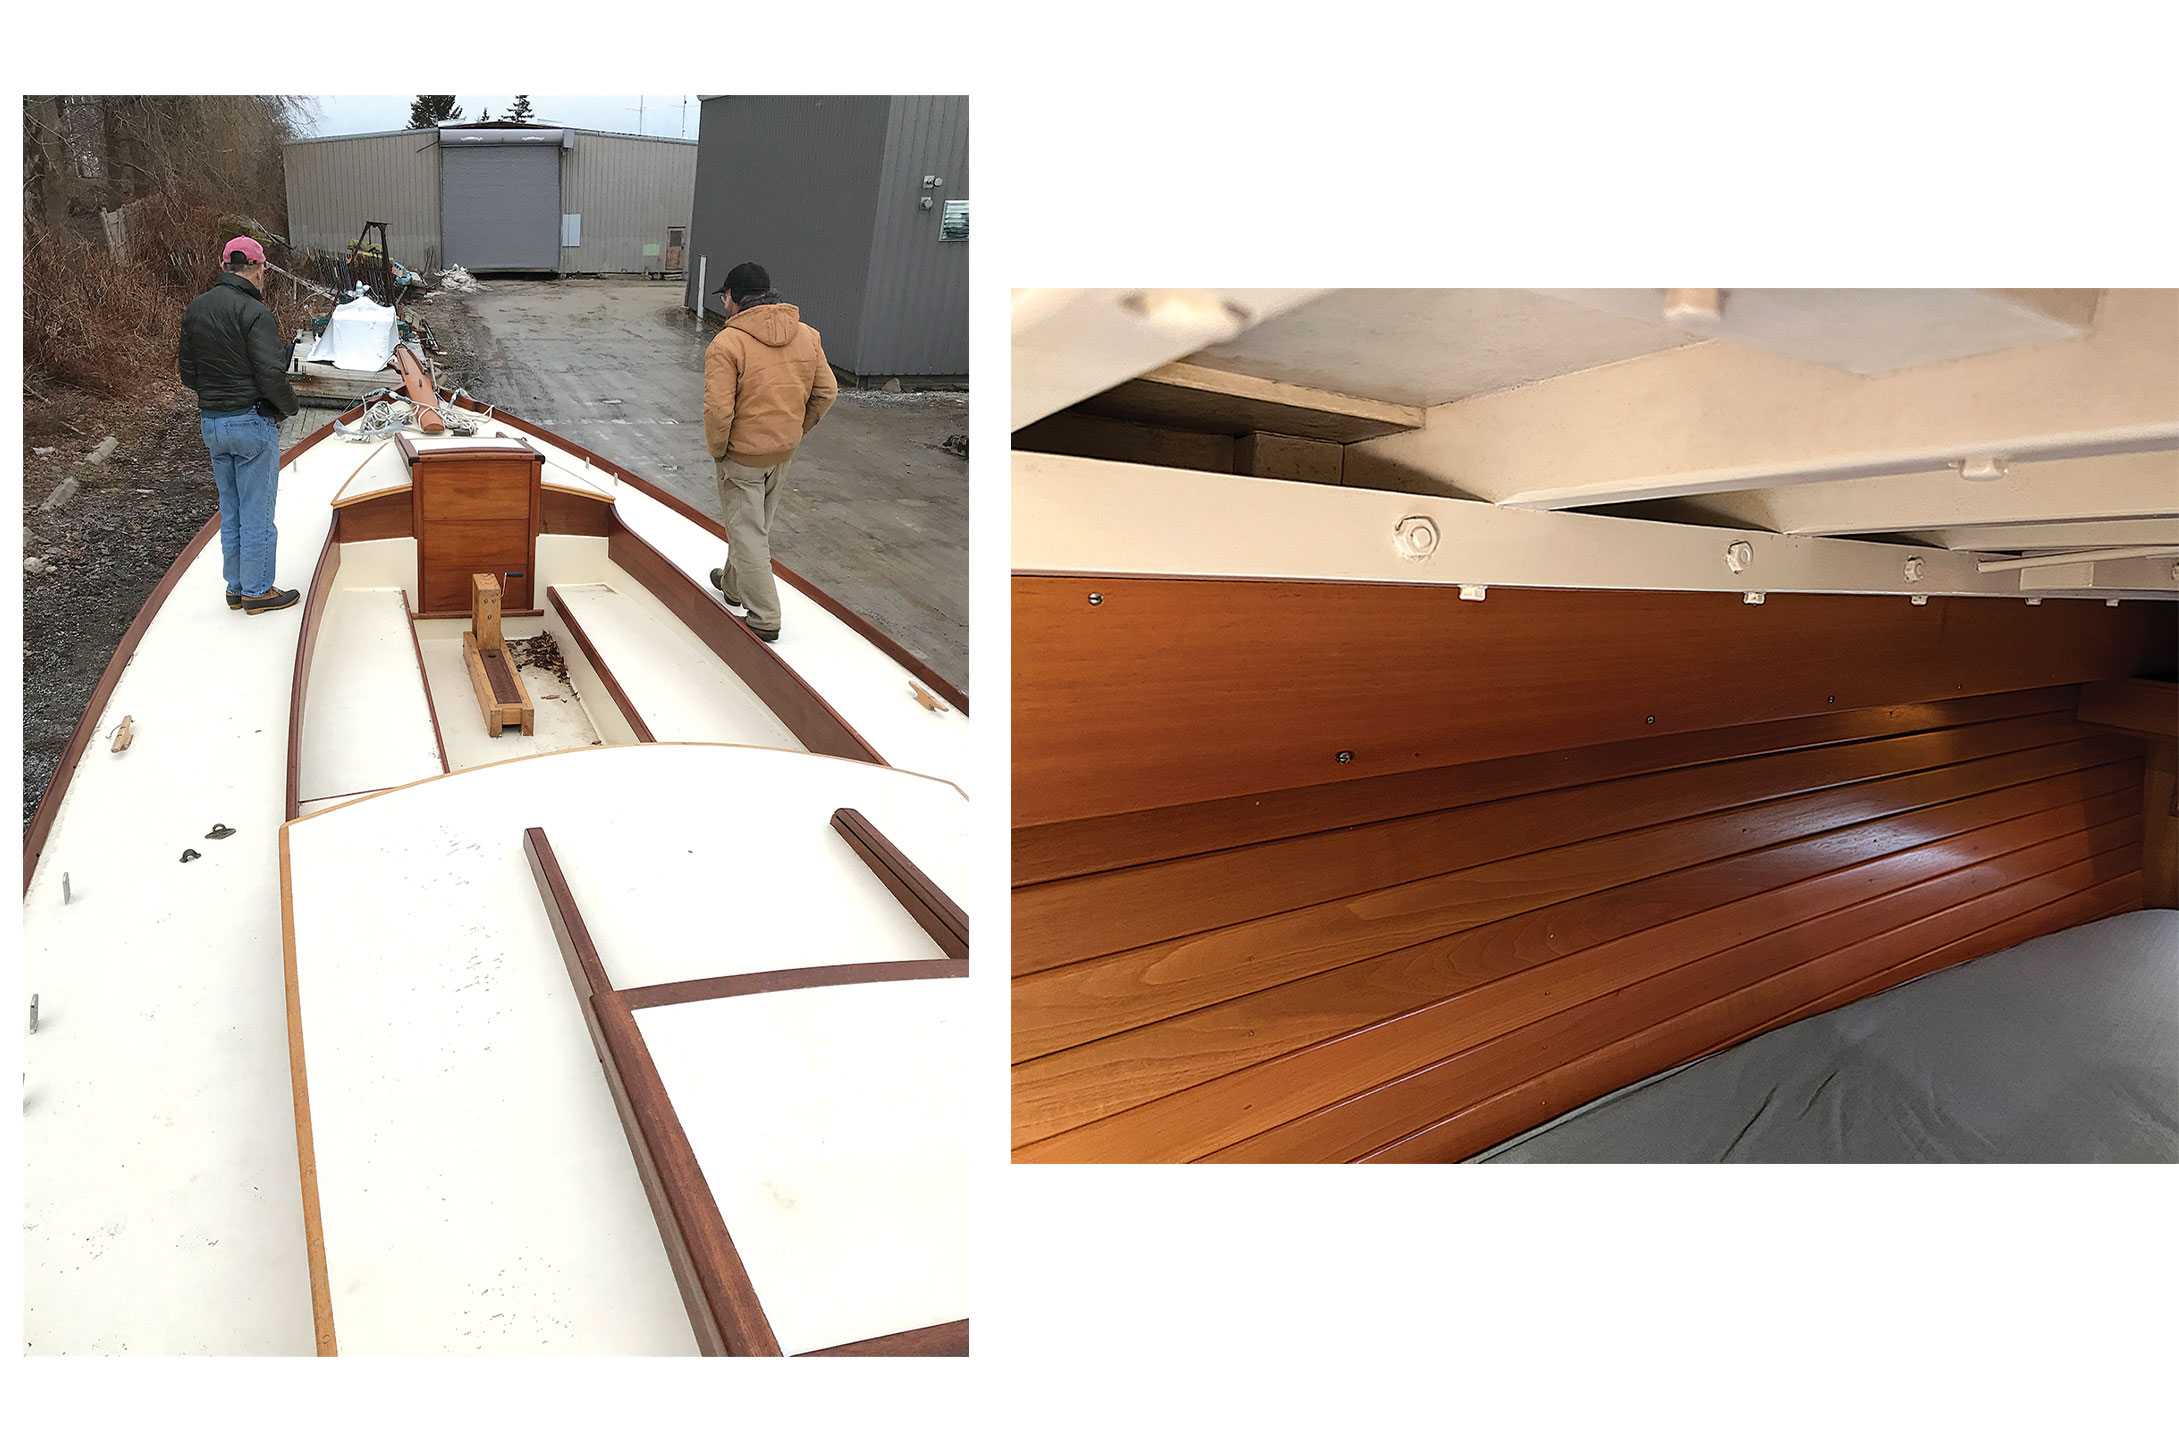
When doing a fabric-covered restoration of a classic hull with an underlying planked deck, I will still use a preservative-treated canvas laid over a similarly preservative-enhanced bedding compound. But when building new, it’s hard to beat Dynel fabric set into epoxy over mahogany plywood. The plywood is stronger than the individual planks and the Dynel provides a non-slip surface. It also has the appearance of canvas fabric and can be shaped around sharp turns in the shape of the surface. The fabric is very abrasion resistant and the potential for leaks is nearly eliminated.
 Greg Rössel
Butt blocks are simple in concept, but three details will keep them from becoming rot traps: 1) gaps where they meet the hull frames, 2) crowned tops, and 3) beveled tops.
 Matthew P. Murphy
Left—It’s hard to beat Dynel fabric set in epoxy as a good, waterproof deck sheathing. Right—A gap above the beam shelf promotes fresh-air flow in the otherwise stagnant space behind the ceiling.
Ventilation
Good air circulation should be planned for during construction, because stagnant air and moisture promote rot.
When the boat is complete and in commission, the shipboard routine should include:
- Leaving locker lids and doors open
- Leaving hatches open
- Leaving dropboards out if security is not an issue
- Leaving a few floorboards up
- Providing positive ventilation, if you can, with solar-powered fans
- Orienting Dorade ventilators and wind scoops for maximum ventilation
Here are some considerations for building with ventilation in mind:
Ceiling planking
Back down in the cabin interior, tasteful interior planking—called “ceiling”—is often affixed to the frames. It is tempting to approach this the way a house carpenter would, carrying the ceiling tightly all the way to the sheer clamp. Unfortunately, that can create an uninspectable and unventilated location where moisture from leaks and condensation can hang out. The problem is easily solved by leaving off the planking below the cabin sole and leaving a gap, called an “air strake,” below the sheer clamp. This configuration will generate a chimney-like action, drawing air from the bilge and providing circulation in the frame bays.
Ventilating enclosed spaces
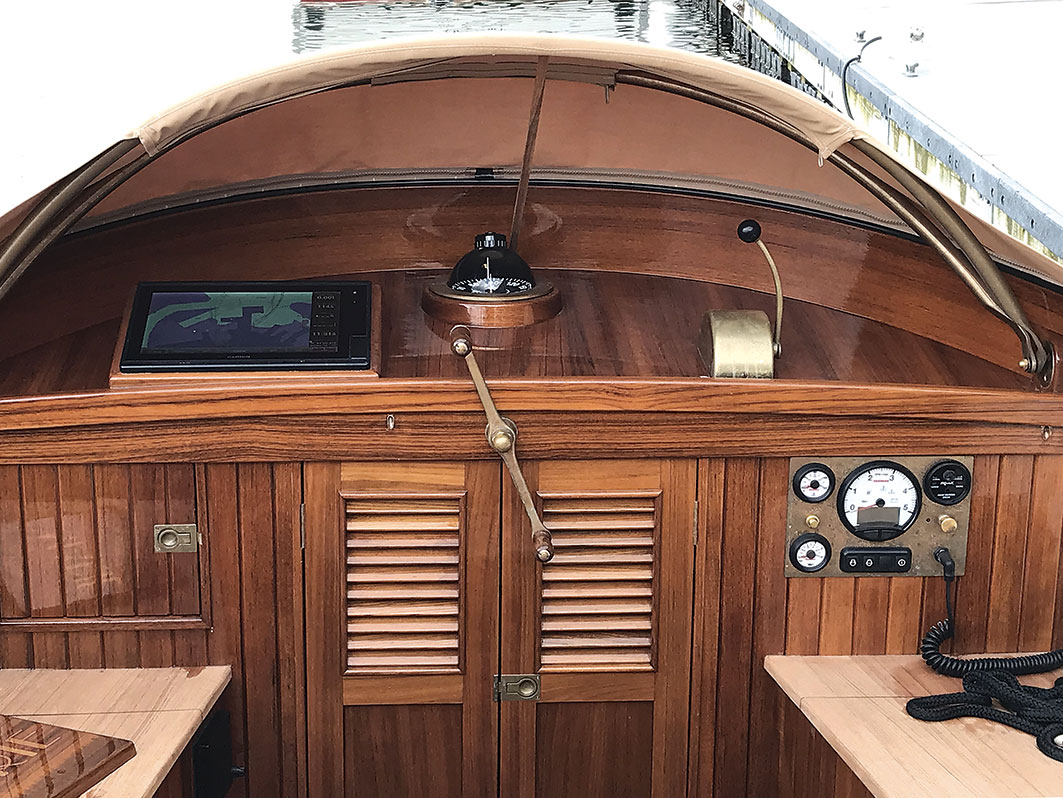
Storage lockers are another prime area of decay, especially if they are overstuffed with gear tucked into nooks and crannies with the interiors in near-perpetual darkness. To encourage air circulation, some builders incorporate ventilation in their locker door designs, using caning similar to that used on canoe seats, louvers, or decorative cutouts. Strategic vents can be cut into the upper corners of bulkheads. Done symmetrically, this becomes a design feature.
Some small craft have flotation chambers. It is tempting to make them as watertight as possible, but aside from needing to be ventilated to allow for the expansion and contraction of the air within, a tight chamber on a traditional wooden hull is yet another invitation to rot. Moisture is going to get in there some day, and there will be no way for it to get out. One option is to install loosely fitted foam shapes cut from the blocks used to build floating docks. These can be hidden behind removable bulkhead-like panels held in place with finger latches (beaded staving is a nice touch for such panels). The panels can be left open when the boat is in storage and the foam can be removed for easy inspection.
 Greg Rössel
Louvered locker doors allow ventilation of storage spaces; leaving these doors open when possible is also good practice.
 Matthew P. Murphy
Louvered locker doors allow ventilation of storage spaces; leaving these doors open when possible is also good practice.
Bedding and Preservatives
Yet another arrow in the quiver of rot defense is the use of bedding compound. Along with proper sealing of fixtures with either paint or varnish, joints should be buttered up with an appropriate compound to form a reliable watertight gasket. Preservatives also go a long way toward preserving wood that does not have natural decay resistance.
Bedding compounds
There are a number of compounds sold as “bedding.” They vary quite a bit in composition, ease of use, adhesion (or lack thereof), cost, and durability.
“Boatyard,” or “natural,” bedding compound is the go-to product for wooden hulls. Composed of ingredients such as soybean and menhaden fish oil and mineral spirits, these flexible semi-paste potions are perhaps the most user-friendly of the options. While flexible, boatyard bedding compound is not as permanent as the others, which makes it a good choice when bedding anything that may need to be removed or repaired. Examples include butt blocks, toerails, grabrails, and hardware such as winches, cleats, chocks, and such.
Polysulfide compound has been around for years. It is basically a synthetic rubber with decent adhesive characteristics but still removable if necessary. It bonds well to most surfaces (even teak) and it is non-shrinking and flexible. It has great UV resistance, and is a good choice for caulking the seams on the deck of your mahogany speedboat. It is also a good choice for below the waterline sealing—for bedding items such as through-hull fittings, keels, and transducer mounts—due to its ability to cure underwater. Generally speaking, polysulfides should not be used to bed plastics. Check with the manufacturer before any such attempt.
Polyurethane compounds used to be best known around the boatshop as simply Sikaflex or 3M 5200. They should be regarded as an adhesive first and a bedding second—though they are now available in varying strengths and curing times. The cured product is rubber-tire flexible and tough. Although the bond of the most rugged and tenacious versions can be cut with a knife, razor blade, or piano wire, it’s generally best to use them for permanent assemblies. They are solid performers for stem and backbone construction.
Borate Preservatives
Borates are derived from borax, a white anhydrous, crystalline mineral salt formed millions of years ago in the beds of ancient lakes. The most basic borate preservative is simple boric acid. Other commercial formulations such as disodium octaborate tetrahydrate have been developed to address particular needs, such as stability and improved penetration of wood. They are quite effective in fighting many wood-decay fungi in enclosed high-humidity areas such as boat cabins. Borates are also useful in controlling wood-destroying insects. Best of all, compared to many other preservatives, borates have very low toxicity to humans. The powdered version is easy to mix; just add one pound of powder to one gallon of water. It can be brushed, sprayed, dipped, or rolled. It also comes in a liquid form in which it is mixed with ethylene glycol, which allows it to penetrate deeper into the wood.
 Greg Rössel
The rot in this runabout’s bottom might have been avoided by including a well-placed garboard drain—and careful application of borate wood preservative.
To get the upper hand on rot, plan ahead, starting from when the blueprints are first unrolled. Select the most durable building materials you can afford. If your boat requires specific or snazzy ventilating hardware—opening portlights, hatches, cowl vent, Dorade ventilator, or sporty patent ventilator—ask around to see which ones work for your design. Think about winter-storage options, and then build for the ages, or at least as though you want it to be around for your grandkids to use. 
Greg Rössel is a contributing editor for WoodenBoat.