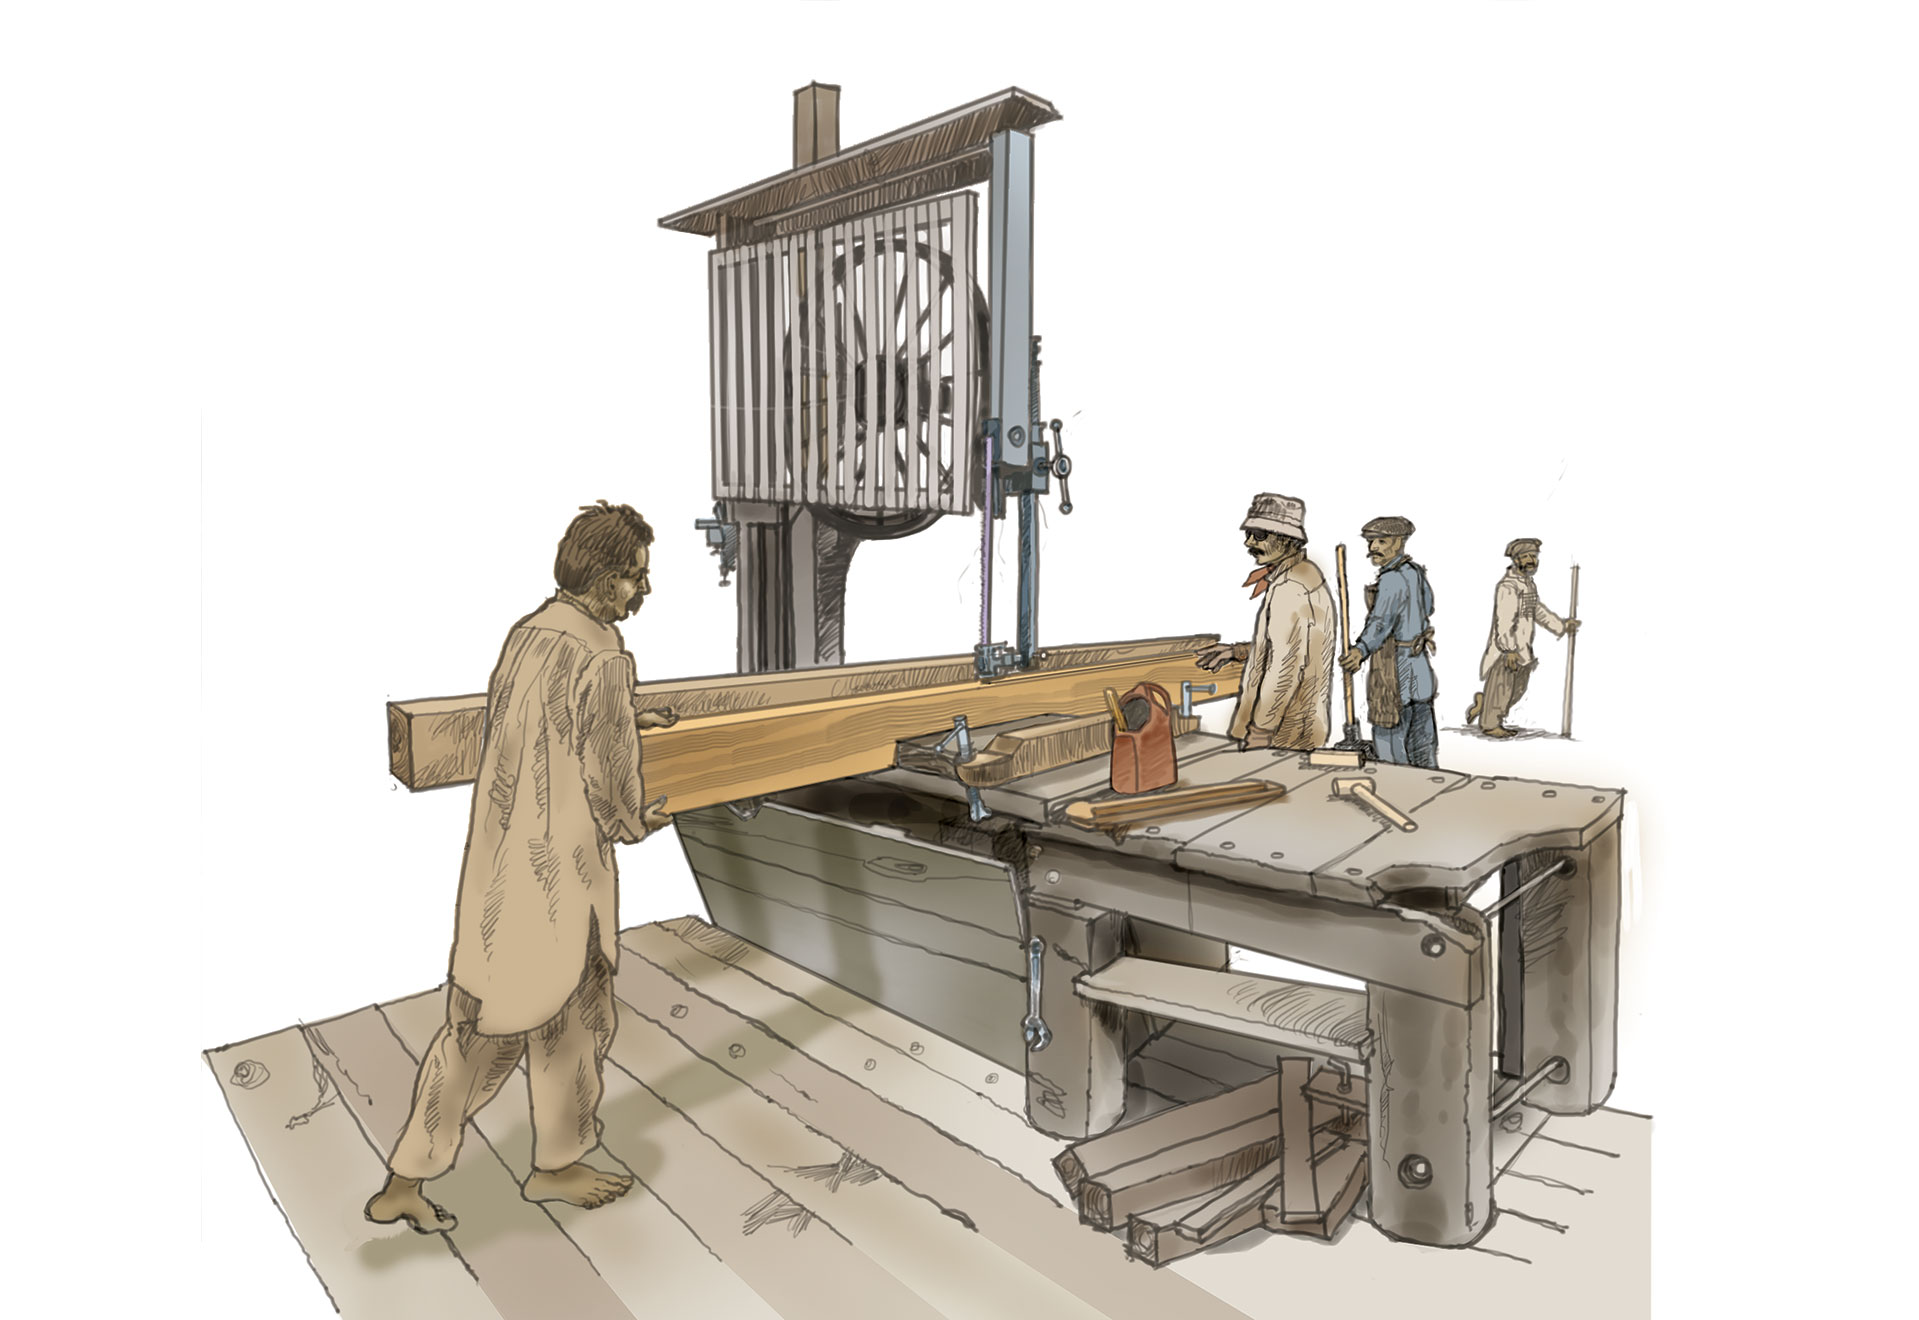
Jan AdkinsThis large bandsaw is locally built and powered by a large electric motor; it serves a boatyard in India making traditional wooden dhows. It shapes interior structural elements and offers the bandsaw’s virtue of ripping consistent plank thicknesses with a minimal kerf, cutting with very little waste. The table is broad, the fence clamped to the table is stable, so wood fed through the blade by hand yields excellent results.
Bandsaws are simple, practical, and indispensable for the boatwright. They can cut through a depth of wood with minimum waste and predictable accuracy. Most of the boatshop’s cutting tools aspire to the truth of the cut—a straight line at a precise angle. The bandsaw can perform curved cuts through heavy timber.
The bandsaw has another specific ability. A balk of wood is not a popsicle stick but a heavy, rough slab. The bandsaw can cut away a precise thickness of stock from heavy timber for robust deck planks or delicate cabinet panels. The scope of rip sawing is limited by the gape of the bandsaw—the height of the bandsaw’s usable blade from the bandsaw table to the upper limit of the adjustable, blade-taming upper blade guides. For stationary bandsaws in the shop, 12“ or 14“ is common; benchtop models usually have a smaller gape and may feature three blade-supporting wheels.
Jan AdkinsBetween the Civil War and the First World War, a workshop might be powered by water wheel or by a sighing, puffing steam engine occupying a separate shed and overseen by a steam engineer. Motive power was transmitted to multiple circular saws, lathes, and other big shop tools by belts of laminated bison leather.
At industrial museums and a few traditional boatyards, you may see bandsaws a hundred years old, enormous cast-iron monuments to mechanical engineering, timeless and indestructible. Their flywheels are impressive giants, and the reason for their size is the reason the bandsaw is a child of the Industrial Revolution. It was not possible to make a bandsaw before advanced metallurgy could offer a steel alloy strong enough to bend around the flywheels many times a minute. Larger flywheels required less blade stress. To make the bandsaw blade an “endless” strip, it was necessary to fasten its ends. The first American patent for a bandsaw was issued in 1809 but it was unsuccessful; the mechanical “end” fastening fatigued and broke quickly. It wasn’t until 1846 that Anne Paulin Crepin patented a welded bond to make the bandsaw practical.

Bandsaw parts

Blade roller bearings
The bandsaw blade is driven by a powered wheel at one end of its oblong shape, and it is supported by a passive wheel at the other end; it is steadied to a great extent by the tension introduced between the two wheels. Blade guides provide more support just above the cut and just below the bandsaw’s table. In most modern bandsaws, these are roller bearings that contact the saw blade only when stress displaces the blade slightly. The bearing that meets the thrust of the material being cut is the thrust bearing behind the blade back. Large bandsaws often have roller bearings on both sides of the blade that turn only when the blade’s cut pushes right or left.
Blade blocks
A traditional method of right and left support is a pair of composite low-friction blade blocks individually adjusted to within a few hundredths of an inch on each side of the blade.

Invest in blades as they’re needed and as your budget allows. Three different starter blades will yield good service for general work.

This graph suggests ideal blade widths for certain radii of cut. It’s not a legal document; you’ll develop a feel for the ideal blade for the curve.
Blade choice
Blade style and width varies for different materials and cuts. Blades over 1⁄2” wide, measured from the tip of the cutting teeth to the back of the blade, track straight lines more easily then narrow blades. Wide blades are best for consistent ripping; narrow blades cut tighter curves. Some blades are rated for metal, some are designed to cut plastic, and some cutting configurations are more aggressive than others.

The challenge is friction-generated heat: keep the blade cool. Hot blades dull quickly, and blades lose dimensional stability rapidly after reaching a given temperature. Dull blades and heat expansion produce unpredictable cuts. Cutting hard woods or deep cuts efficiently demands a slow feed and a blade design that clears the kerf quickly. A skip-tooth pattern works this way. Most blade teeth cut at 90 degrees, parallel to the table. Hook teeth cut beyond 90 degrees, are larger, set farther apart, have a deep gullet to clear the kerf, and are meant to make rougher deep cuts. The number of teeth per inch can be an index of cut smoothness; more teeth yield a smoother cut (but more friction). Bandsaw blades clear a narrower kerf than circular saws but their teeth are set (slightly) side to side. They can be set alternately right and left or in a wave pattern to improve clearing and reduce friction.

There are many blade configurations. Looking at a blade catalog will only depress you. Rely on broad blades for straight rips; narrow blades for curves; and hooked blades for rough, deep cuts. One choice will depend on the volume of your work. Carbide-toothed blades can cost more by a factor of 10, but they will last and cut more cleanly over a longer time. For casual work, a hardened-tooth blade can last for two or three years of professional use and can be resharpened. Broken blades can be rewelded. You’ll evolve your own shop sense.
How to Store a Bandsaw Blade
The illustrations below show how to fold a blade for strorage. Unfolding a blade is more difficult to manage gracefully. Some excellent boatwrights simply toss the folded blade on a grass or wood surface to let it unfold itself—a practice that can be done gently and safely after some study and experience.
Folding a long, broad blade
Folding a short, narrow blade

Setting up the saw
You must reset a few crucial adjustments every time you change a blade. It’s not an onerous chore. Unplug the bandsaw. Release the wheel blade tension and place the new blade so the tooth gullets run along the center of the flywheel. Bring up the tension gently while turning the upper flywheel with your hand. The built-in tension gauge, if there is one, is seldom accurate; adjust tension until the blade resists no more than 1⁄4“ side deflection without straining your finger. Working on upper and lower sets of bearings, bring the guide bearings close to the blade surface so they turn only when side strain is applied. Likewise, dial in the thrust bearings so they turn only when a scrap of wood is being cut as you move the upper flywheel with your hand. A woodworker’s trick to assure that the table is properly 90 degrees to the blade is to cut a 2×6 to a blade depth, pull the wood back and flip it. If the blade fits without effort into the kerf, the table is level. ![]()

