
After fumbling with tools and wood screws when climbing in and out of a Haven 12½ I was building, I remembered a photograph from around 1938 that appeared in Maynard Bray and Carlton Pinheiro’s book, Herreshoff of Bristol (WoodenBoat Books, 1989) of a tool tray sitting on cross braces in a Herreshoff 12½ under construction.
Boatbuilding and boat repair are more efficient if tools, fastenings, and hardware are organized and readily at hand. Such organization is easy at a workbench, but it’s more difficult when work has to happen in the boat. Curved or slanted surfaces make tool storage a challenge, fine finishes are at risk, and space is at a premium.
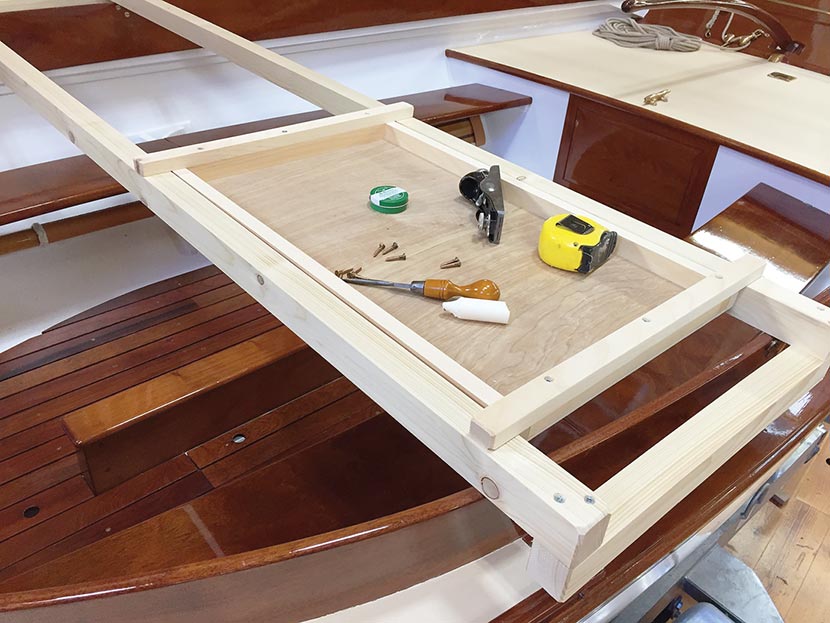
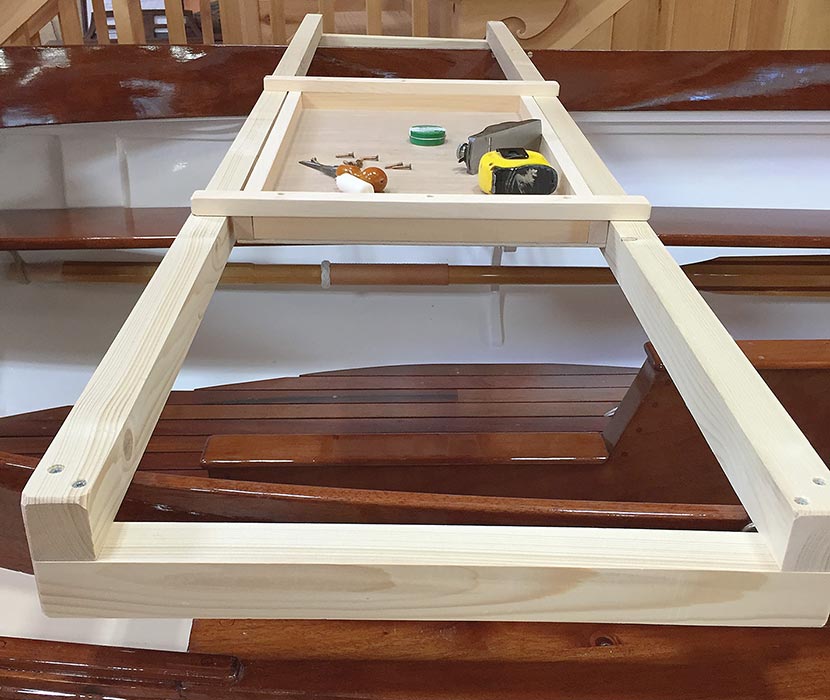
Inspired by that old photograph, I designed and built a tray to meet these challenges. It can be put in place from outside the boat and then easily slid to where it’s needed, usually with one hand. Parallel rails rest on the gunwales, sheerstrakes, or coaming. Those are joined by cleats fastened below them to keep the entire assembly from sliding off the boat athwartships. The tray rides on these rails.
The Rail Assembly

The length of the rails equals the distance between the outboard sides of the pieces upon which it will ride (coamings or gunwales), plus additional length to accommodate the two end cleats (marked as “fences” in the photo above), plus about ½″ to 1″ to allow enough “play” so the cleats won’t bind against the boat. Thus, for a boat having a coaming-to-coaming (or rail-to-rail) beam of 6′, the rails should be 72″, plus the combined 3″ width of the two cleats, plus about an inch, for a total of 76″, or 6′ 6″.
The space between the rails should be about 12″ to 16″; 18″ cleats work well for the larger dimension. This economizes on stock: a single 8′ 2×4 can be cut in half to yield two 76″ rails with enough stock left to make two 18″ cleats.
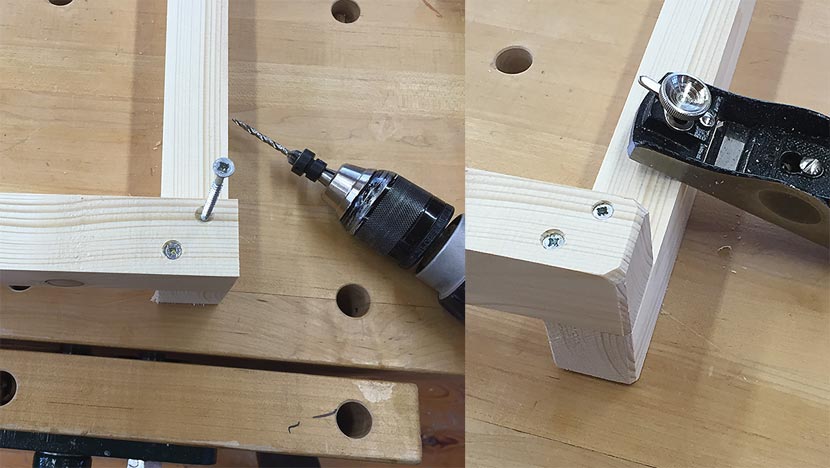
Countersunk wood screws attach the cleats to the rails. Chamfering or rounding all corners and edges protects finishes and eliminates splintering.
The Tray
After the cleats and rails are assembled, the tray is built to fit inside the assembly. Other than cutting to length to fit within the rails, the dimensions of the raw materials for this part are not particularly critical. I made my tray sides and sliders from ¾″-thick white pine (so-called “one-by” stock). Rip strips 1″ wide for a tray like the one shown in these photos, or rip wider strips for a deeper tray. The sliders that hold my tool tray on the rails dress out at ¾″ × 1″, and they are cut to length according to the desired tray dimensions, addressed in the next step.

The tray bottom dictates the length and width of the tray. The bottom can be any suitably sized scrap of plywood, fiberboard, MDO, or the like. I prefer ¼″-thick lauan plywood; it’s inexpensive, and the scrap is useful for making patterns for boat components. Cut the bottom width ¼″ to ½″ narrower than the space between the rails (indicated by arrow mark) and as long as you’d like your tray to be. I’ve found 24″ to be a good length for my needs.

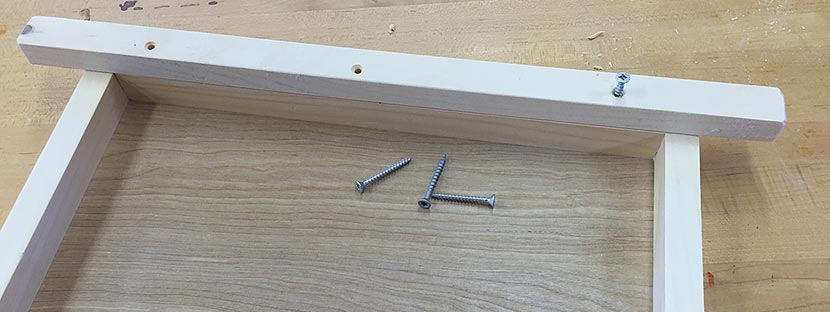
Attach the bottom to the tray sides and ends with nails or screws. Turn the tray over and fasten the slider arms to the ends with three screws, as shown below. They should overhang equally on either side by about 1½″.
Reasonably clear, construction-grade 2×4s are cut from spruce, pine, or fir, and typically will not mark the finish or surfaces of the boat components they touch. But for assurance, the boat-contact surfaces of the rails and fences can be padded with felt, leather, or another soft material. Alternatively, the contact surfaces could be rubbed with paraffin (stubs of used candles work well), tallow, or paste wax so the rails and fences slide easily in contact with the boat, and the tray slides easily along the rails. There may be some cleanup or a small cost involved in these options; you’ll know what’s best for your boat and your shop.
A Word on Materials
Since this tool tray is meant to be custom-fitted to a particular boat, there’s no specific materials list for the project. However, as a guide, you can review this list of wood and fastenings required for the tray shown in this article:
- 1: straight and clear 2×4 to make the rails and cleats
- 1: 24″ pine 1×6, for tray sides, ends, and slides
- 14: No. 8 × 1½″ flat-head steel wood screws, for fastening cleats to rails and slides to tray ends
- 16: 2D nails, for fastening the bottom to the sides. (Screws will work for this, too.)
John Pratt is a retired patent attorney, who is now a full-time woodworker building boats and furniture in the mountains of southwestern North Carolina. He has recently finished and launched a Haven 12½ and a skin-on-frame Adirondack Guide Boat on nearby Lake Chatuge, the southern-most Tennessee Valley Authority lake.