Peapods are great little boats. They were developed as inshore workboats, and you could see them all along the Maine coast at the turn of the century. Used for lobstering, clamming, and all kinds of waterfront work, the old pods were usually 13′ to 16′. Burdensome and stiff, they could carry a big load, and lobster traps could be hauled right over the side with ease. Even heavily loaded they would row easily. A peapod loaded almost to the gunwales with a fisherman standing up and pushing on the oars in the late-afternoon slanting sunlight—it was a common sight years ago. Of course, that was when men were men!
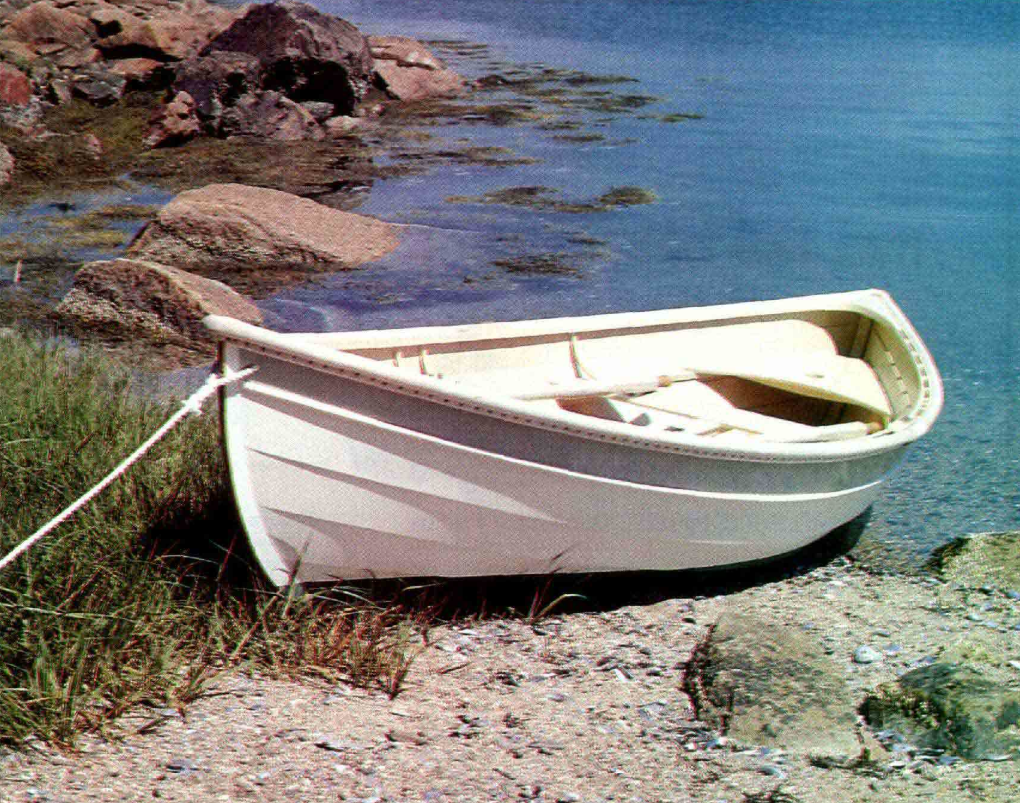
Today, men are…well, still men, but they like their rowing even easier than before—and they’re not so interested in being able to carry 1,000 lbs of gear. I’ve drawn Beach Pea a bit shorter and with more flare to the topsides for good looks and reserve buoyancy. She is somewhat lighter and, with a bit of rocker to her keel, somewhat handier than her traditionally built ancestors.

At 13′ long, Beach Pea is a bit small as peapods go, but she’s big enough to retain the good qualities of the type. She has good stability and will carry a big load and row easily. Why? Well, she is probably longer than the dinghies most people are used to rowing, and you know how waterline length affects ease of driving. That extra length also allows for a finer entry, so perhaps you’re doing a little more cutting and less plowing. But probably the biggest reason is that there is no transom. Lots of dinghies are great with one person aboard; but, as soon as they’re loaded down to where their transom is even slightly immersed, they start trying to suck the ocean around behind them.

There are other benefits to a double-ended boat: seaworthiness, for one. I’m sure you’ve noticed that lifeboats are almost invariably double-ended. A well-handled Beach Pea will be comfortable in conditions that would make you wish you were closer to shore in most transom-sterned boats her size. Another advantage is push-rowing—if you get tired of pulling on the oars and looking over your shoulder, you can turn the boat around and push. You’ll proceed at a more modest rate, but the view forward will be welcome. Proper trimming (so that the boat is either level or slightly down by the stern) is easy in a pod. If your particular combination of passengers and gear won’t allow the boat to trim properly going in one direction, just make the other end the bow.

As with all good things in life, there are disadvantages to a peapod. For one thing, a motor is out. Having said this, I can envision a hundred inventive boatmen scheming up ways to mount an outboard on Beach Pea. Of course, it can be done, but my honest advice is that if you must have a motor, another boat would be a better choice. In any case, Beach Pea will row so easily that you may be willing to forgo the racket, expense, and pollution of a motor. Enough words; let’s get started!

Getting Ready

If you have never picked up a hammer, these instructions are probably not going to be enough for you. If you’ve built several boats, you can probably skim over much of the detailed advice on the following pages. I’m writing here for the person in between— someone with some experience with woodworking but who has perhaps never built a boat.

If you have very little experience with woodworking, you might try to enlist a partner or helper who is more practiced. You will be surprised how easy this is—lots of people would love to build a boat, especially if someone else is paying the bills. Two heads are better than one at puzzling out problems, and the work will proceed much faster.

I’ve done my best to make these instructions as clear and complete as possible, but I have built quite a number of boats of this type and construction method, and many of the questions that plagued me on the first one have vanished into the mists of time. Some of these procedures are more difficult to explain than they are to do; don’t be intimidated by something that sounds complicated.

The glued-lapstrake plywood building method is a good one, producing a boat that is strong, lightweight, easily maintained, and impervious to drying out. For the amateur builder, construction time is less and fewer tools are required than with traditional carvel hulls. Materials, though more expensive than those used in traditional construction, are more easily obtained, and more uniform in quality.

Beach Pea is not a stitch-and-glue boat. It is probably true dial the stitch-and-glue method will produce the most quickly built hull with the least skill required of any wood construction method. However, even in a boat the size of Beach Pea, the hull is only half the work. The stitch-and-glue method tends to produce hulls that are less than faithful to the designer’s lines and it can be difficult to produce nice, fair chine lines. And, there is a lot of glue and fiberglass to deal with.

Beach Pea was designed for the person who is willing to spend a bit more time to produce a nicely detailed and quite traditional-looking boat. Her glued lapstrake construction allows a more sophisticated shape than is practical with stitch-and-glue; and her sweeping plank lines, if carefully done, will provide an eyeful of graceful detail, both inside and out.

The other reason that I prefer Beach Pea’s construction method over stitch-and-glue is that it teaches many more construction techniques that are applicable to other boatbuilding projects. When you have finished with Beach Pea, you will have many of the skills required to tackle a more complicated project—perhaps a larger plank-on-frame or cold-molded boat.

Shop and Equipment

Tools are great things. You can never have too many—or can you? I know of lots of people who will not start any project until they have the best and most specialized tools available. Remember that tools are the means and not the end. Acquire what you really need, and let’s get on with the work at hand.

You can build this boat with very few tools, but some are really necessary. Others are nice and will speed the work along. If you don’t have access to a lot of power machinery, you may be able to find a nearby cabinetmaker who will be willing to do some of the table-saw and planer work such as ripping out laminations, gunwales, and thwarts. I prefer to rough out planks on the table saw, but a small portable circular saw or even a saber saw will work. For that matter, a hand saw will do.

A drill, screwdrivers, hammer, block plane, spirit level, bevel gauge, tape measure, and a couple of chisels are necessary. A few inexpensive spring clamps, a combination square, some kind of saw, and a sharpening stone will be wanted. Laminating the stems will require several C- or bar clamps—perhaps you could borrow some of them for a weekend. There are lots of other tools that I use when I build a boat like this, but most of them are not absolutely needed. A little ingenuity and muscle power will usually make up for their absence.

Two of the most important tools in boatbuilding can be made by you. One is a straightedge, which can be just a well-seasoned board or piece of plywood about 6″ wide and 8′ long with one edge planed good-and-straight. The other tool is a batten— or two or three. A batten is just a strip of wood that is used for marking and sighting fair curves. To use it, you bend it around the points being connected—molds, tick marks, nails, etc. I don’t believe a good boat can be made without these fairing battens. They are easy to make, but the clear, straight-grained stock for them can be hard to find these days. Any boatbuilder worth his or her salt will always have an eye out for a piece of wood that might contain one.

When you go to the lumberyard for your ladder frame stock, look for some batten stock as well. What you’re looking for is a long, clear, straight-grained piece of softwood. I’ve found most of my good battens on one edge of a larger piece of 2″ construction lumber like spruce or fir. If you look through a pile of 2 x 8s or 2 x 10s, you will probably be able to find a piece with one edge that meets the requirements. Buy it! You will probably be able to find a use for the rest of the piece, and even if it only yields one good batten, your money will be well spent. For this boat you ought to have one batten that is 3/4″ x 5/8″ x 14′. When you sight down your batten, it should be straight or may have a slight, smooth sweep. It must not have any significant bends or “quick” places in either dimension. A couple of smaller-sized battens, of the same general proportions, will be handy to have and are usually much easier to find.

For a workspace, about the only real requirements are a roof to keep the rain out, and means to keep the temperature up to 50°F or better. The boat is only 13′ long, but you’ll want at least a foot on either end to walk around, and more is helpful for stepping back to sight curves and admire your work. A long workbench with a vise will be very handy. I have a spacious shop with lots of benches and open space, but I realize that most of you will probably not be so lucky. So, I have tried to arrange the steps in these instructions to take best advantage of a small workspace, a garage or basement, or perhaps even just the living room! If you have lots of benches and space, you may want to proceed in a different sequence.

You’ll need something to hold the boat at a convenient working height— I like a pair of small sawhorses because they are useful for so many other jobs.

Well, it’s time to get to work! The first thing to do is to skip down to the local lumberyard for some materials. You’ll be looking for stock for the ladder frame and maybe horses, and some particle board for molds. You might even get lucky and find some good stuff for a batten or two, and possibly some spar stock if you plan to go sailing. Chances are you’ll have to order your plywood planking stock and other wood elsewhere—better do it now, as it might take a while to get there.

Gather Your Materials

I’ve done my best to make this list as complete as possible, but I’ve probably forgotten a few things. I’ve listed the materials that I would use; substitutions could be made for many of these items.

For the Building Jig

  • Ladder frame rails: 2 ” x 6″ x 14′ (nominal) kilndried spruce, two pieces, as straight as possible
  • Ladder frame cross pieces: 2″ x 6 ” x 10′ kiln-dried spruce, one piece.
  • Molds: 5/8″ x 4′ x 8′ particle board, two pieces
  • Mold cleats: 2 x 2 ” kiln-dried spruce, about 45 lineal ft
  • Various braces, etc.: 1″ x 4″ pine or spruce, about 20 lineal ft
  • 3″ drywall screws, 1/2 lb
  • 2 ” drywall screws, 1/2 lb
  • 1″ drywall screws, 1/2 lb

For the Boat

  • Bottom board, floorboards, bow and stern sheets: 3/8″ (9mm) x 4′ x 8′ marine ply, one sheet
  • Planking: 1/4″(6mm) x 4′ x 8′ marine ply, four sheets
  • Guardrails, inwales, thwart risers, stem, floor and knee laminations, keel, etc.: about 40 bd ft lumber, mahogany or fir, 1″ thick, including one piece at least 14’4 “long
  • Breasthooks: one piece 1 1/4″ lumber, mahogany or fir, at least 6 ” wide and 4′ long
  • Glue: two quarts epoxy resin, double if you want to coat all surfaces
  • Hardware: bronze oarlock sockets and horns, one pair each
  • Stemband: 17′ of 1/2″ brass half oval
  • Fastenings: silicon-bronze flathead wood screws:
    • 50 #8 x 1″, seats, floorboards, etc.
    • 25 #8 x 1 1/4″, thwarts, etc.
    • 50 #8 x 1 1/2″, inwales, etc.
    • 10 #8 x 2 “, outer stems, etc.
    • 50 #6 x 5/8″, thwart risers, floors
    • 70 #6 x 3/4″, stemband, etc.
    • 6 #10 x 2 “, oarlock sockets, maststep
    • 4 #12 x 3 1/2″ breasthooks
    • 1/4 lb Anchorfast nails, #15 x 3/4″

Making the Ladder Frame

Your peapod should be built upside down on a ladder frame, the top of which corresponds to the construction baseline shown on the plans. In order for the boat to come out as designed, the top of the ladder frame must be as close to a level plane as you can make it. It should be set up at a good working height (about 24″) and be level both athwartships and lengthwise.

The general dimensions of the ladder frame are shown on the plans. It should have three “rungs” to hold the side rails the proper distance apart, as well as a cleat on each end to hold the stems, and some kind of diagonal bracing to keep the whole affair from racking. I usually build a small tray into each end of the ladder frame by screwing a piece of plywood onto the bottom. This helps keep tools and materials close at hand and performs the bracing function as well.

I would recommend using kiln-dried 2 x 6 ” construction lumber, as it is less likely to change shape during the construction project. The ladder frame is fastened together with drywall screws. I may be just an old crank, but I believe that all screws, even drywall screws, should have a clearance hole drilled for them through the part being fastened. Otherwise, they just will not pull the two parts tightly together, and the joint will loosen up as soon as the wood dries a bit.

Go to your local lumber company and beg to be allowed to paw through their stacks of 2 x 6s (promise that you’ll put the stacks back together neatly when you’re done) to find a pair that are reasonably straight and not twisted, and at least 14′ long for the rails of the ladder frame. When you get these beauties home, plane one edge straight and use that edge as the top of your ladder frame. The “rungs” of your ladder, except for the end ones that hold the stems, should be left about 1/8″ below the top of the rails so that a string can be stretched tightly just below the construction baseline plane to mark the centerline.

If possible, fasten the legs of your horses to the floor to keep your setup from moving around. Set the ladder on top of the horses and carefully shim between it and the tops of the horses until the top of the ladder is level both ways. Then screw the ladder to the horses. If you don’t want to make horses, install some legs to support the ladder.

How to Scarf Plywood in Four Steps

Scarfing plywood is one of those boatbuilding chores that has inspired countless ingenious methods, tools, and jigs. All this strikes me with wonder. Making scarfs is so simply done and requires such rudimentary tools, that I can’t understand why it has inspired such a profusion of articles, chapters, and lectures. Nevertheless, I shall proceed with my own.

1. Arrange the Planking Plywood in Steps for Cutting Scarf Tapers

You will need to wind up with two pieces of plywood that are at least 14′ long. Because the scarf itself will use up a couple of inches, you should cut off two of your 4 x 8 sheets at 6’3″ and leave the other two at 8′.

Stack these four sheets on a flat table, with the long sheets on the bottom, such that one 4′ edge of the bottom sheet lies right at the table’s edge. The corresponding edge of the next sheet up should be set back 2″ from the edge of the first sheet, and so on, until all four sheets’ long edges are lined up one above the other and the short edge of each sheet is two inches back from the one under it, like shallow steps.

Now mark a line across the top sheet two inches back from its edge. Once everything is carefully aligned, step back from the top edge another 6″ of so and send a couple of nails or screws down through the entire stack of sheets and into the table top to hold the whole mess in position.

2. Plane the Scarf Tapers

Plane a flat surface between the line that you marked on the top sheet and the table’s edge; in other words, turn the shallow steps into a ramp. This will cut the tapers on all four sheets at once and produce a better job than if you did each sheet separately.

You can do the rough work with a power plane or a grinder, but you should finish up with a sharp hand plane. When you think you are close, hold a straightedge on your ramp and make sure it is truly straight from top to bottom and that the bottom edge of the bottom sheet comes to a feather edge.

3. Glue the Scarfs

Now we can glue up the scarfs. Staple a sheet of plastic, about 1’x5′, down the middle of your table. Place one of your 8′ sheets, ramp up, on the table with the ramp in the middle of the plastic, and clamp or tack it to the table top.

Mix some glue, add a little milled cotton fiber (available from your epoxy supplier), and spread it on the taper of both the sheet on the table and the 6 ‘3″ sheet you will be gluing to it. (Use plenty— this is no place to skimp on glue.)

Place the 6 ‘3″ sheet on the table, ramp down, in its approximate location and put another strip of plastic over the scarf. Slide the 6’3″ sheet around until it is properly lined up and clamp or tack it to the table top.

Be sure to line up the joint carefully; I like to run my fingers over the top of the plastic to make sure there is no bump or gap at the scarf.

Now take a board or piece of plywood about 8″ to 10″ wide and a little over 4’ long, and mark two lines down the length of it, each 2 inches out from the center. Place this board over the scarf joint such that the center of the board is over the center of the scarf joint.

Drill two rows of holes, each hole about 6 inches apart, down through the two lines, through the plywood but not through the table top. Send drywall screws down these holes and into the table to squeeze the scarf joint tight. (If this is your dining room table, you’d best wait until mother isn’t home.) Be sure the screws go on either side of the scarf joint and not through it.

“Wait a minute, you!” you say. “My planking is full of holes!” Don’t worry a bit about it—epoxy and microballoon putty will fill them up and, as long as you do the job thoroughly, you’ll never have a bit of trouble.

But, say that you have just removed your clamping board and found that your joint has not come out up to your exacting standards. In fact, it’s a hopeless mess. Not to worry—cut the plywood on either side of the scarf, and start over. The first three planks up from the bottom board are considerably shorter than 14′, and you’ll have plenty of length for a second try. All the long planks can be gotten out of the second 14′ panel. (You can do this only once. If you think you might flub up more than once, leave the 6 ‘3 ” sheets long by another 5″ or so.)

One of the hardest things about scarfing plywood is finding a spot to do it. If the dining room table is off limits, you can fasten the sheets of particle-board mold stock to the top of the ladder frame, and use this as the table. Also, I should mention that it is sometimes possible to get your plywood supplier to do the scarfing for you. The cost is modest, but the larger panels might be more expensive to ship; and I’ve never thought the store-bought scarfs were as good as mine.

4. Saw Out the Planks to Their Rough Shape

If space is tight, you might want to cut out all the planks now, while you can still use the ladder frame as a work surface. The plank-layout sheet in the plans shows the approximate shapes needed.

Lay out the measurements, and connect the dots by springing your batten around small nails driven at each dot. But please, oh please, don’t cut your planks exactly to these lines yet. The slightest difference between my setup (which I used to get these plank shapes) and yours can have a surprising effect on plank shapes, especially near the ends. Leave extra width on your planks, especially at the ends, and you won’t have to buy more plywood.

Laminating the Stems

While you’re waiting for the glue in your plywood scarfs to cure, you might want to get started laminating stems. Laminating wood can be impressive and fun until you figure out how much time it takes and how much material it wastes. It wasn’t just for lack of good glues that our grandfathers used grown crooks and sweeps for stems and knees.

Together with steam-bending, natural crooks are by far the fastest way to produce a strong, curved piece. But today few of us have access to them, and I’ll bet most of you don’t have a steambox at the ready. Besides, our plywood planking is a dimensionally stable material. So laminated stems, which will also be relatively stable, will make a good marriage with the planking. So, a-laminating we shall go!

A key to good and (relatively) efficient laminating is to get the thickness of the individual laminations just right. The thinner they are, the easier they will bend and the more likely they will be to hold their shape when you take them off the jig. But thinner laminations take more time, more glue, and waste more wood. Thicker laminations go together faster and are less wasteful; but they may break when bending or straighten some when undamped.

Obviously, the tighter the bend, the thinner the laminations should be; and, generally speaking, any lamination should consist of at least five layers. When gearing up for a laminating job, I rip out two or three veneer planks that I think will be about the right thickness, then try bending them around the jig to get a feel for what a whole stack of them would be like. Usually I end up making them thinner. In any event, I’ve indicated on the plans about how many laminations you should use, and you shouldn’t stray too far from these numbers.

You may be able to buy sliced veneers of mahogany or fir. These do not waste wood but are hard to find in small quantities, so you will probably end up ripping your laminations on a table saw from solid stock. Make sure that the stock is a little wider than the finished lamination to allow for cleaning up the sides later, and a little longer as well, so that you don’t wind up with a stem that is too short. Don’t cry when you realize that more than half of your expensive stock is now sawdust. This is a fact of life in boatbuilding, and you might as well toughen up and get used to it, as this is just the beginning. You can use the laminations right off the saw as long as they are not burnt (discolored by heat produced by the saw blade); planing is not necessary, but can be useful if your laminations turn out to be just a hair too thick.

When you get a stack of laminations of the correct thickness, drill a hole right through the stack at one end. Put a nail through this hole before bending to help keep at least one end of the mess from getting away from you. Before spreading glue for the first episode, clamp the stack to the jig, starting at the end with the nail, to get an idea of what you’ll be in for when the glue is spread, everything is slippery, and the clock is ticking.

You should either wax up your jig (but don’t get wax on any of the veneers) or cover it with plastic to keep the lamination from sticking to it. Then mix your glue, thicken it slightly with milled cotton fiber, and spread it on both sides of each glue line. Finally, clamp the stack to your jig, but don’t try to impress the girls with how fiercely you can tighten the clamps; high clamping pressures are not necessary with epoxy and can lead to a glue-starved joint.

When the glue is set, you will need to clean up the lamination and bring it to its specified thickness. When I have the equipment, my favorite method is to disc-sand off the biggest gobs, run one side over a jointer, then steer the lamination through the thickness planer. Faced with less luxurious accommodations, you can always hand-plane both sides. Just be careful to keep things square. Small laminations can be run by the table saw, but this can be a bit hair-raising, and I don’t recommend this procedure for novices.

The Steins

So much for laminating in general; let’s get specific. The stems can be made in two ways. The first is the more usual, consisting of stacking up laminations to make the molded thickness of the inner and outer stems.

Make a hard pattern of the inner and outer stem by pricking through the full-sized paper patterns onto some thin cheap stuff (such as plywood doorskins). Make a prick mark every inch or so, along the curves; then cut and plane the patterns to the exact size. Make a jig of some 2″-thick stock sawn to the shape of the inner face of the inner stem. First glue up enough laminations to make just the thickness of the inner stem.

Clamp the inner stem lamination to the jig. Note the nail in the end to help hold everything in line.

When the glue has set, glue up the outer stem directly over the curve of the inner stem. But don’t glue the two stems together! As a matter of fact, maybe you’d better put some plastic between them.

When the glue sets, separate the inner and outer stems, bring them to their sided thickness, and use your patterns to mark the molded shape, leaving the upper end long for now. Run the stem laminations over the jointer to make one side flat and square. Next bring them to their correct siding with a thickness planer.

The second method makes sense if you do not intend to use plywood for floorboards. In this case you will have a fair amount of 3/8″ plywood left over, and you can use this for the inner stems.

Trace around the inner stem pattern 10 times on your 3/8″ ply and cut these pieces out a little oversize. Glue up two stacks of five pieces each, and when the glue sets, bring them down to the pattern shape.

Mark the outer stem for sawing with a plywood pattern lifted from the full-sized patterns.

Transfer the construction baseline, stations, and plank laps from the patterns to the inner stem.

Use three or four drywall screws to fasten down one of these inner stems to a bench or a piece of scrap so it holds its shape while serving as the laminating jig for the outer stems, glued up in the usual way. (I don’t recommend using stacked ply for the outer stems—just too much exposed end-grain when you plane the bevel on the sides.) This kind of inner stem should have a couple of coats of epoxy resin on the inside face and one on the outside beveled faces before the planks are glued to it.

Whichever way you make your stems, after they are brought to the proper siding and molded shape, they should be marked with reference lines. On the inner stems, mark a centerline on the inside and outside faces, and mark stations No. 1, No. 2, and the construction baseline on the side faces.

Chamfer the inboard face of the inner stem for improved appearance. The chamfer should be stopped just below where the breasthooks will land.

Also mark both the inner and outer lap marks for each plank on the outer face of the inner stem. I hope you’re keeping your inners and outers straight.

Doug Hylan builds, maintains, and restores wooden boats at Benjamin River Marine in Brooklin, Maine. Large-scale plans for Beach Pea are available from The WoodenBoat Store (800-273-7447). The price of the set is $75.

Construction photographs by Sherry Streeter