 Matthew P. Murphy
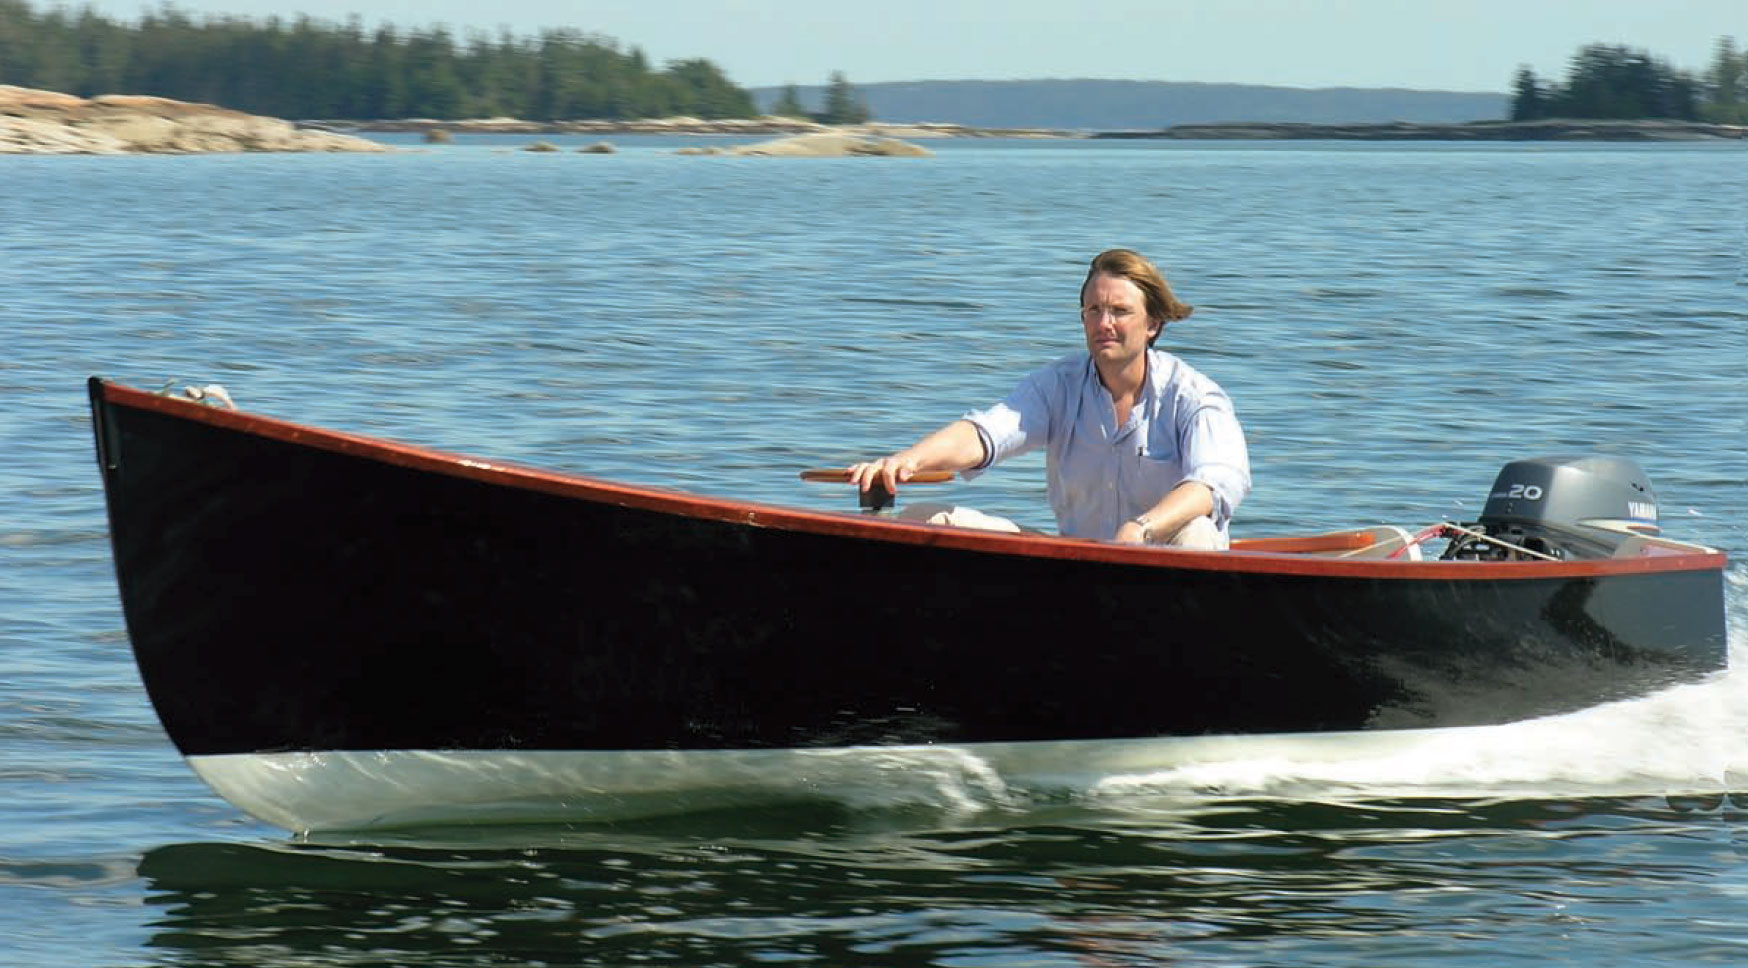
With her near-midship console, the Jericho Bay Lobster Skiff’s center of gravity is well forward of that of a tiller-steered skiff, whose helmsman, batteries, motor, and fuel all occupy the stern. Shifting the weight forward allows for quicker planing and, ultimately, greater efficiency.
This little gem of a skiff first caught my eye a couple of years ago as she sat on a trailer in a field at Wooden Boat. She belonged to Aaron Porter, managing editor of Professional Boat Builder magazine, and he’d purchased her from a man on nearby Deer Isle. Built of cedar on oak, carvel-planked, the boat had been sitting in a garage for the previous 15 years, and Aaron brought her back to life, bending-in some new frames, refastening, recaulking, and painting. Aaron also added a small, slightly off-center console for a steering wheel (the boat was originally tiller-steered).
Small outboard skiffs have a lot of appeal. They are challenging to design, but you don’t have to be an expert to build one. They can be carvel, lapstrake, or strip-planked and built and stored in a small garage at a price affordable to many. Small skiffs can easily reach speeds over 20 mph with 20 horsepower or less, with fuel-efficient, four-stroke outboards. They can cover a lot of territory in a day of fishing or sightseeing on less than five gallons of gas, and can be used as workboats for commercial fishermen or yacht tenders.
Joel White designed Aaron’s boat and Jimmy Steele, the legendary peapod builder, built at least two of them in the mid-1970s. The overall length is 15’6” and the beam is 5’4″; the 1:3 beam-to-length ratio works well in small outboard-powered boats. Above the waterline, with her flared bow, and tumblehome transom, she looks like a well-proportioned Downeast lobsterboat of the 1950s or ’60s, only smaller. Thirty or so years ago, skills of this shape were common; they seem to be a rarity these days. Underwater, the boat has flat after sections, allowing for quick planing, moderate deadrise (or V-shaped sections) forward minimizes pounding.
 Kate Holden
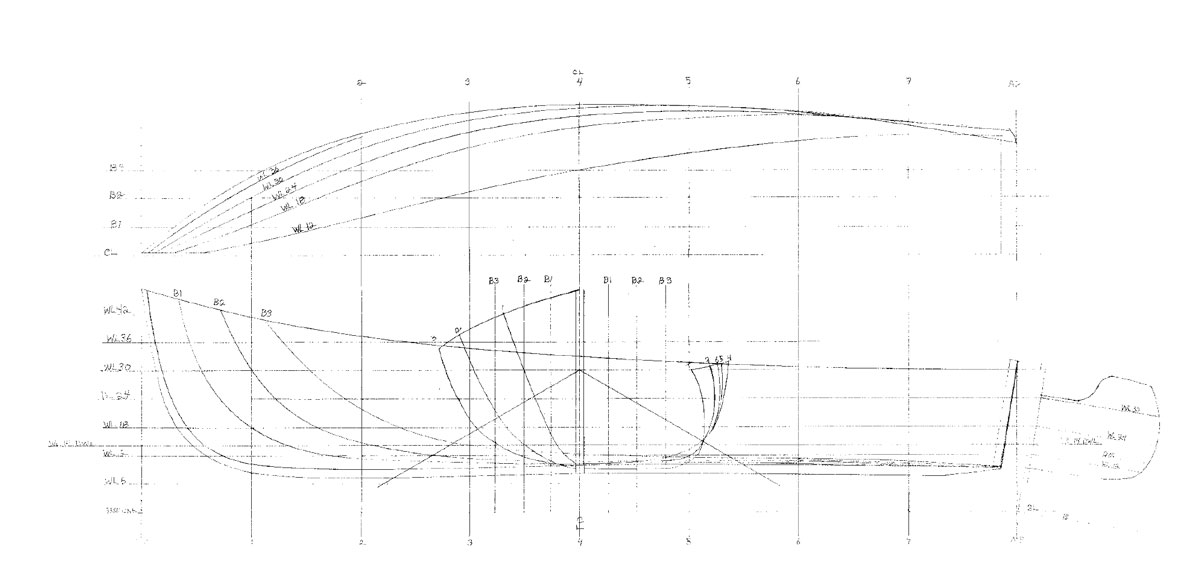
The boat from which these lines were taken was built by Jimmy Steele in Brooklin, Maine, in the 1970s.
In profile view, the bottom is slightly concave. “Hog” is the term describing the condition of older wooden boats whose keels have been deformed into a similar concavity, either by improper storage on land, or simply by the passage of time. At first, I thought this hull had become hogged from being stored upside down on sawhorses for all those years, but Jimmy Steele’s son, Jeff, dispelled this notion. He had owned this boat when new, and he confirmed that Joel drew her this way — and he thought that was one reason the skiff performed so well. Occasionally, designers incorporate such a curve into their powerboats, the idea being that this slightly reversing curve will cause a planing hull to level out faster than will a straight bottom, and hold the bow down afterwards — not unlike the dynamics of a pair of hydraulically actuated trim tabs.
Tiller-steered outboard skiffs tend to be stern heavy because the helmsman, motor, fuel tank, and sometimes a battery, are all located aft. Such boats need all the help they can get to run level, and working skiffs often have clam hods, bait boxes, or traps placed forward to weigh down the bow. Aaron’s reconfigured skiff, because of its near-midship console, jumps up on plane and levels off faster than most. Her high, full, and flared bow makes for a surprisingly dry ride to windward in a chop. Running downwind, her gentle stem curve, moderate deadrise, and round bilges make her forgiving and steady, without sudden jerks or rooting, even at 24 mph in a one-and-a-half-foot chop.
On a calm, sunny day after a storm last summer, Aaron’s almost 40-year-old skiff decided she was tired of being tethered to her mooring. She chewed through her line, drifted off, and nestled up alongside a granite boulder on a falling tide. She was quickly spotted and retrieved, with only scratches to show for her junket. On a different day or in different weather conditions this skiff could have been lost forever with no record of her lines, for Joel’s plans have gone missing. So with the skiff safely back on her mooring, it seemed more important than ever to record her shape and draw plans so others could build this great little boat.
 Tom Hill (after Joel White)
The Jericho Bay Lobster Skiff has a sweet sheerline and generous tumblehome aft, with a 10-degree transom rake that’s perfect for mounting an outboard motor. The stem profile is similar to those of designer Joel White’s larger lobster boats.
With the permission of Joel White’s son Steve, we measured the boat last winter. Aaron was interested in owning an upgraded version because he wanted to trailer the boat over the road occasionally and had concerns about the carvel-planked original boat drying out. And so we decided to replicate the boat with some changes in construction.
Because there is a lot of shape in this hull, particularly at the turn of the bilge aft, carvel-planking would be a challenge for any builder. Planks here must be milled thicker, backed out on the inside, and faired off on the outside. Maybe that’s why Jimmy Steele built only a few of these boats. Because of this, and because we wanted a boat that could spend protracted periods out of the water and not suffer the rigors of trailer travel, we agreed on strip-planked construction, sheathed both inside and out in fiberglass. In the following steps, I’ll walk you through the construction of the resulting Jericho Bay Lobster Skiff.
Making the Strongback
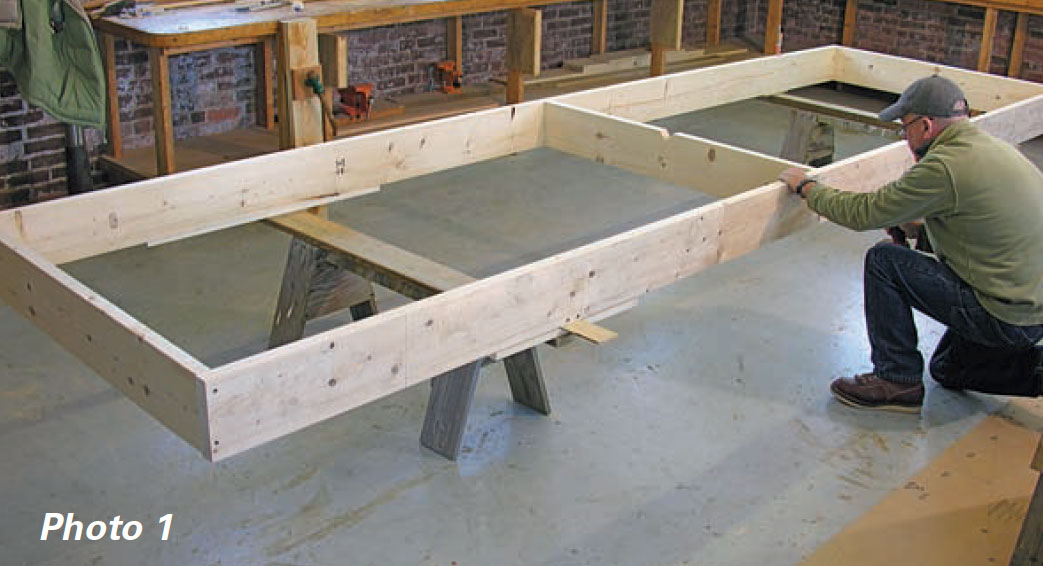
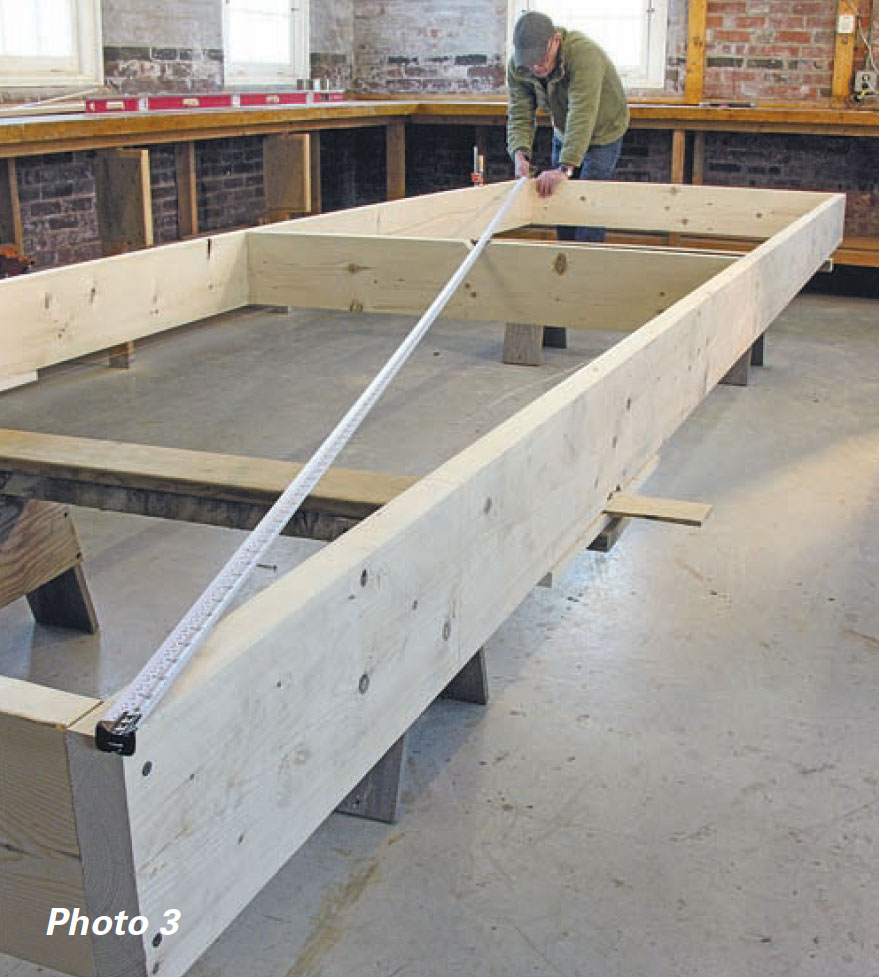
The first order of business is to make the strongback on which to erect the molds. The strongback is a basic ladder frame made of two 15′ straight 2”x8” spruce planks and three 36″ 2”x8” “rungs,” one at each end and one in the center. Cut a notch in the center of the middle rung to allow a taut string representing the boat’s centerline to pass through. Make a saw kerf 1/8″ deep in the centers of the end rungs so the centerline string can clear the molds after they’re in place.
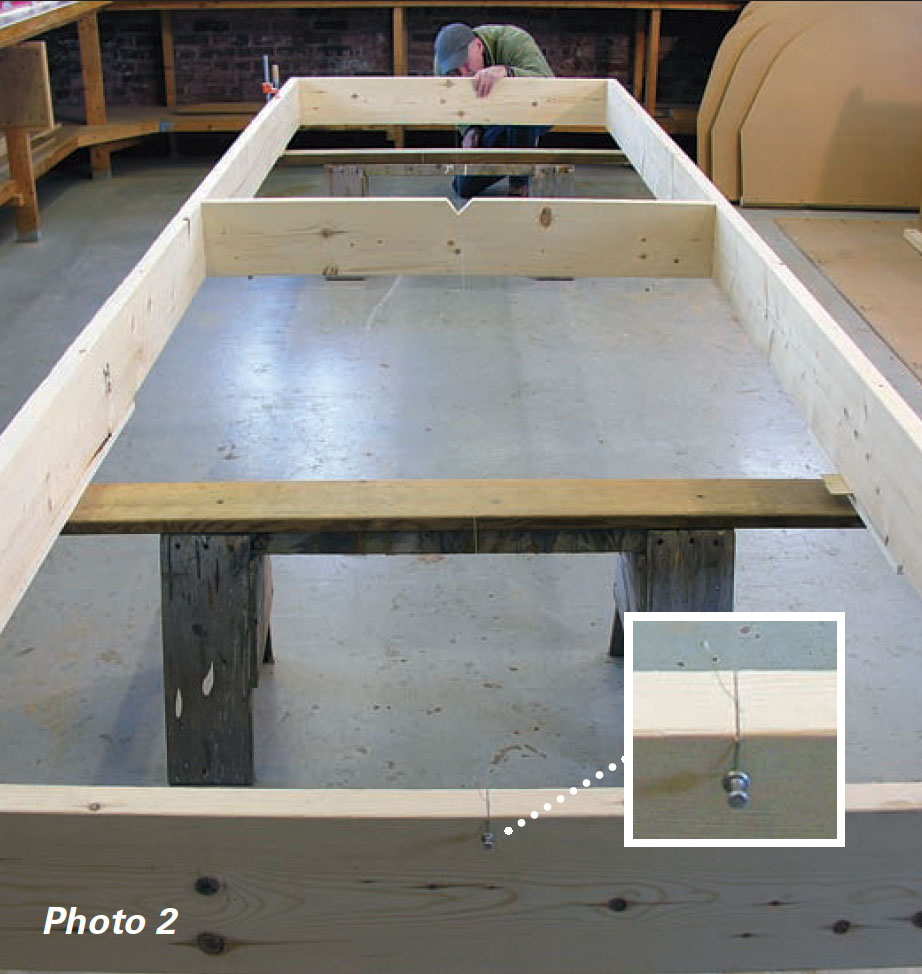
Assemble the strongback by connecting the long pieces to the rungs with 3″ drywall screws or similar fastenings, and temporarily set it on sawhorses or blocking to a good working height. Square it by taking diagonal measurements and shim it level fore-and-aft and side-to-side.
Molds and Building Jig
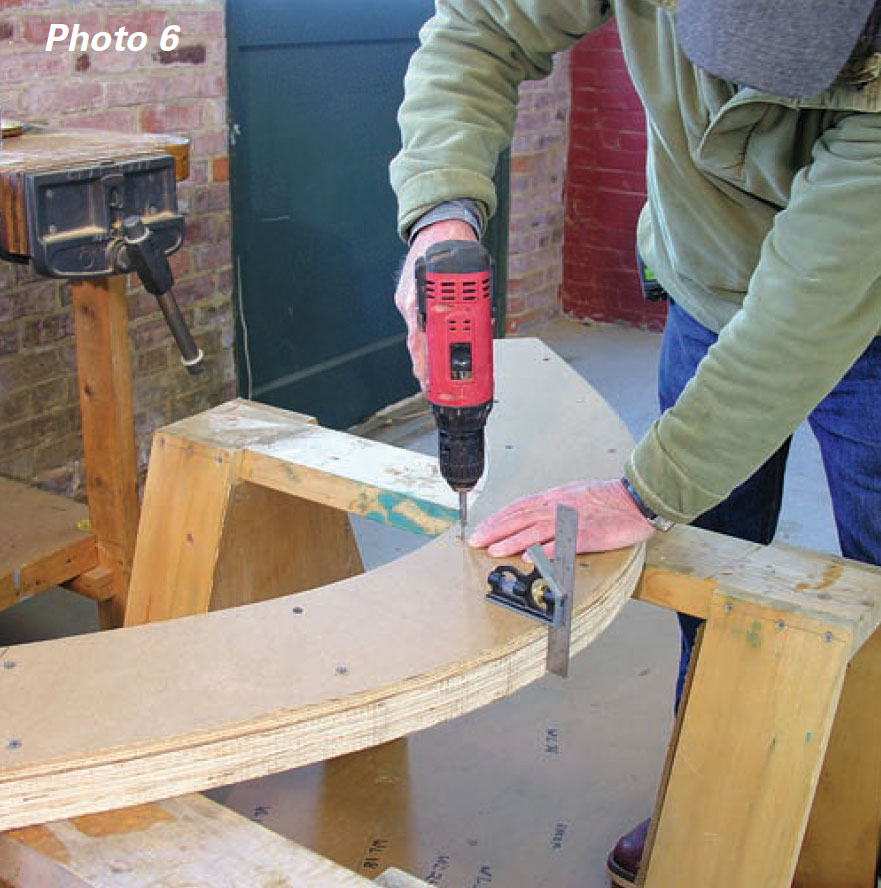
The plans for the Jericho Bay Lobster Skiff include full-sized patterns for the molds and stem, so the most straightforward approach is to carefully transfer these onto your mold stock by making closely spaced awl pricks through the drawing and then connecting the dots with a flexible batten. (However, if you’re familiar with lofting and are so inclined, you could develop the molds from the table of offsets.) The centerline and sheer must be clearly drawn on each mold.
For molds, I used MDO (medium-density overlay) plywood. It has a smooth paper face, allowing for accurate drawing. Next, cut out all the molds and the stem and transom profiles and attach 2×4 mold cleats to the bottoms of the molds. The cleat lengths must be equal to the width of the strongback — in this case, 39 1/2″.
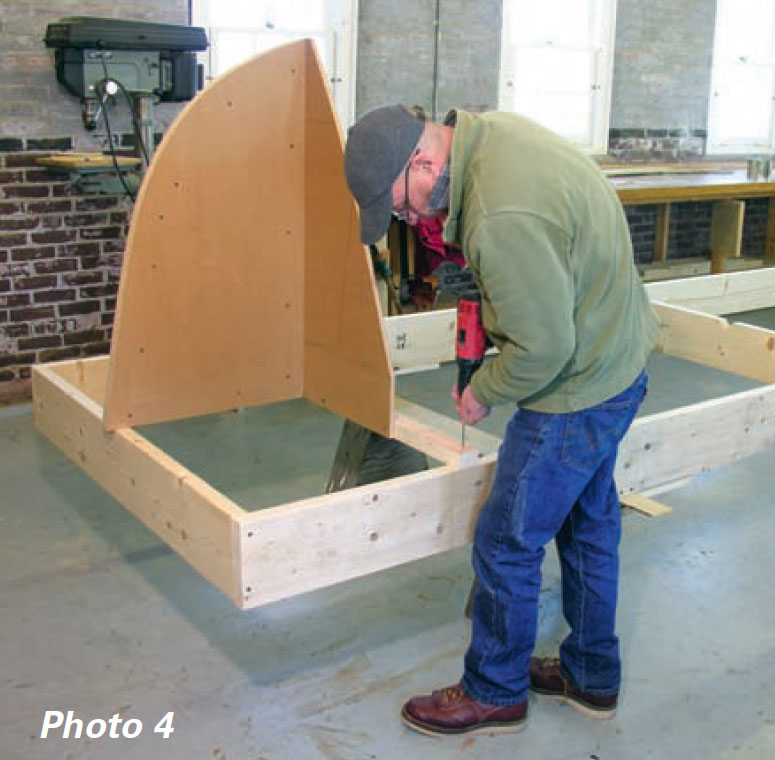
Once the strongback is complete, you can set up the station molds. But first, fasten the stem profile to station mold No. 1 and set it on the strongback, allowing the stem profile to protrude past the end rung by 1″.
Align the centerline drawn on the mold with the taut string. Then, using a framing square, check that the mold is square with the string. Screw the profile to the strongback’s end rung and, using three drywall screws, fasten mold No. 1 to the strongback.
Next set up molds 2 through 6, spaced according to the plan.
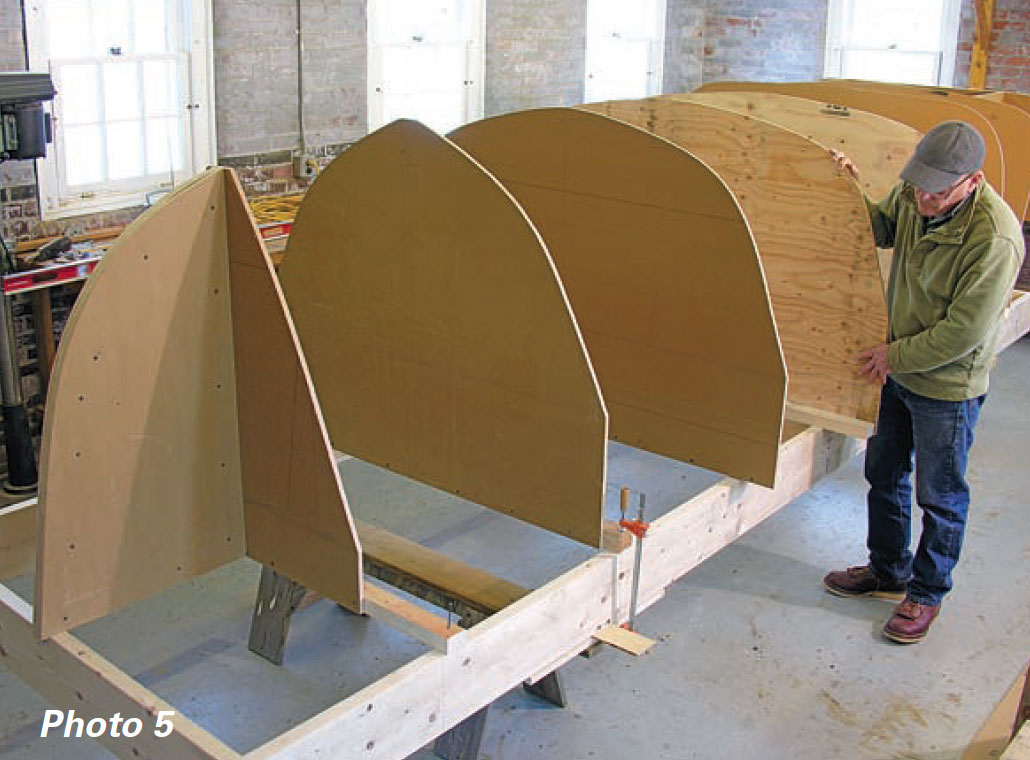
As you did with the stem, attach the two transom profiles to mold No. 7 before you mount it to the strongback. Then toe-screw the transom profiles to the aft strongback rung. The 1/2″ plywood jig transom can now be mounted on the transom profiles. Make a batten long enough to reach from the stem profile aft over the tops of the molds to station No. 7, and temporarily tack it to the stem with a finish nail.
Starting at station No. 2, plumb each mold and temporarily tack it to the batten, until enough of the strip planking has been laid to takeover and hold the molds plumb. Now, the building jig is complete and it’s time to begin building the actual boat.
Building the Stem and Transom
The stem is the first piece to make. It is laminated and it consists of two pieces: an inner stem to which the planking is fastened, and an outer stem applied after the hull has been planked. Laminate the inner stem first. To do this, make a simple jig from 1/2″ plywood scrap left over from the molds. (You can use the pattern for this jig on the plans, or you can develop one from your lofting.)
Both stem pieces are made from 4″x24″ laminates of clear, vertical-grain mahogany. Mill 16 strips. Eight of these are for the inner stem and six for the outer stem, leaving two extra strips. For each of the two separate laminations, cover one of the two extra strips with clear packing tape. Turn it toward the laminate bundle and use it as a continuous clamp pad.
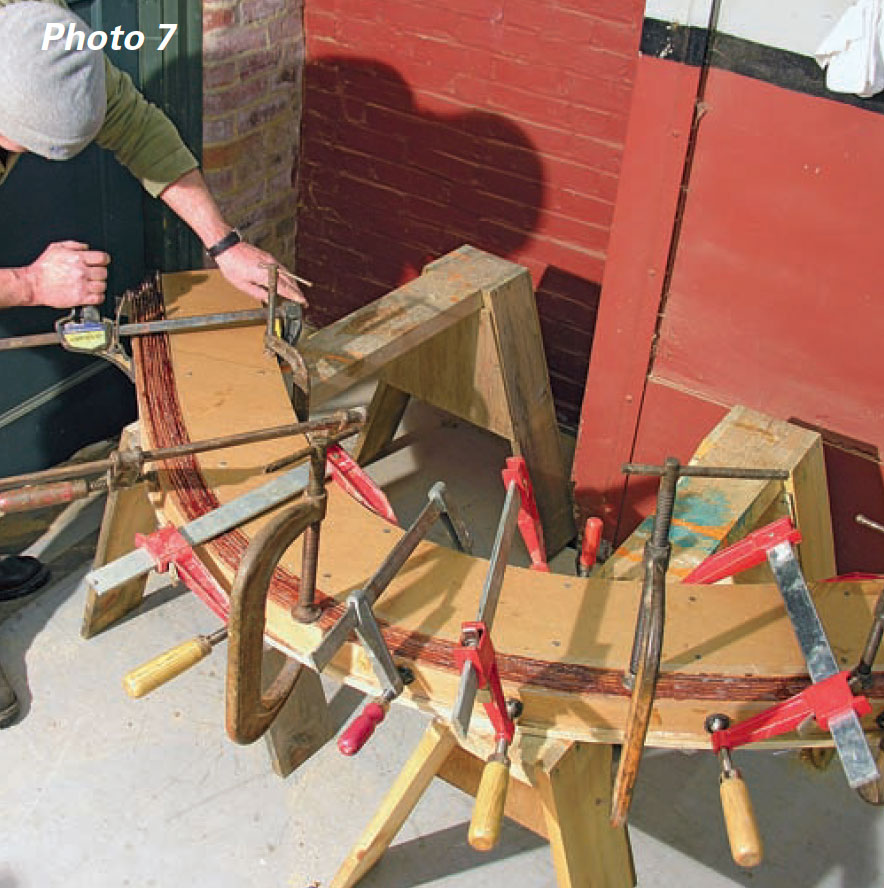
When the glue has fully cured, dress the inner stem to its finished width of 2″. Then temporarily screw it to the stem profile, ready for shaping. The outer stem will be laminated in place after the hull is planked.
The Transom
The transom is glued up from two pieces of clear vertical-grain mahogany. The finished thickness is 1 3/4″. There is a full-sized pattern on the plans; again, you can use it, or develop your own. Sheathe the inside surface with 10 oz. fiberglass set in epoxy before installing the transom on the jig.
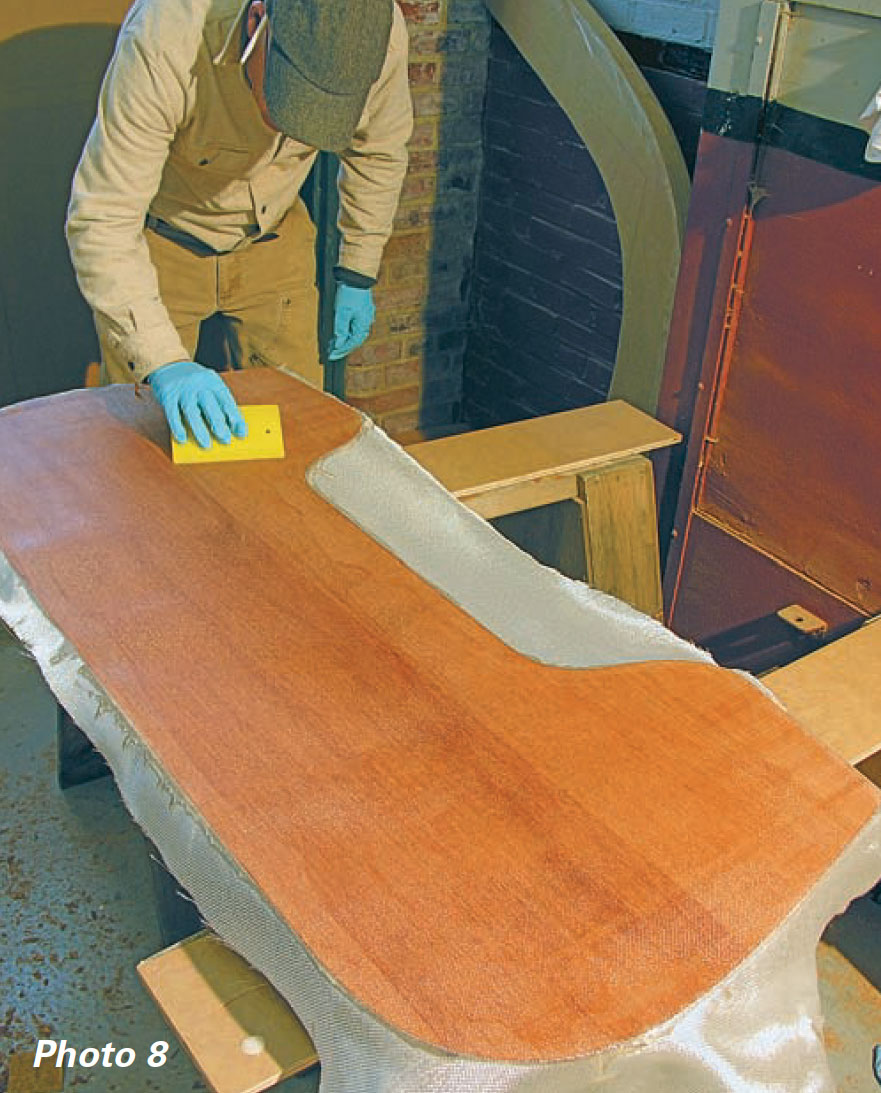
After the initial wetout cures, apply three more coats of epoxy to fill the weave of the cloth. (It’s much easier to ‘glass and sand the transom while it’s lying horizontal on sawhorses than when it’s been installed.) When the epoxy has cured, wash off its waxy amine blush — if there is any — with water and sand the surface with 80-grit paper. The inside face is now ready for paint. Mount the transom onto the jig transom with a couple of temporary screws and clamps.
Shaping the Stem
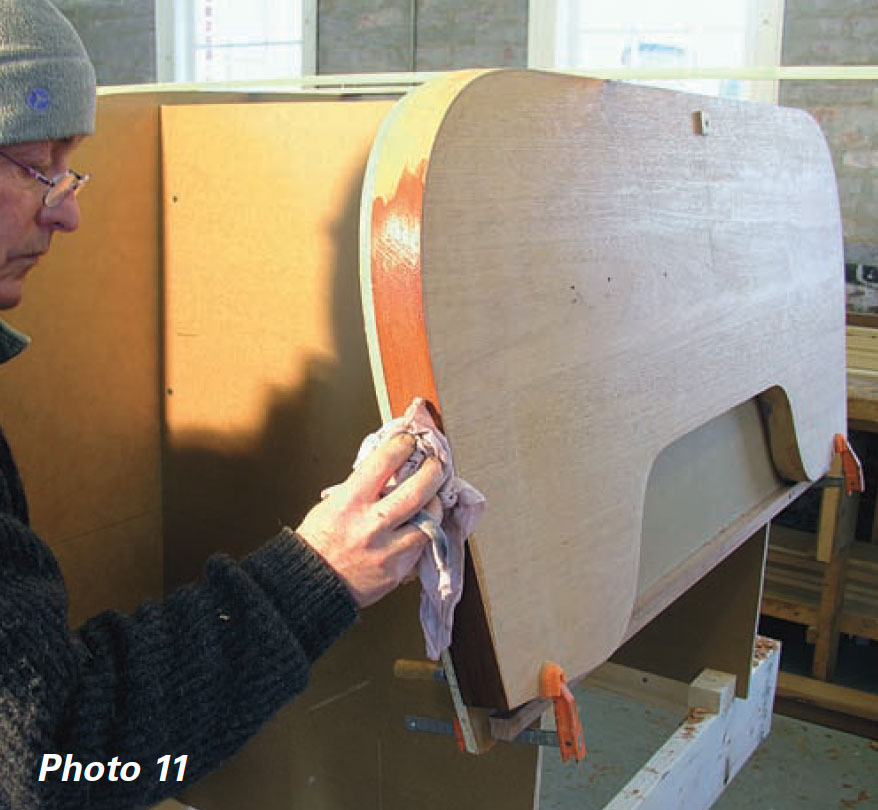
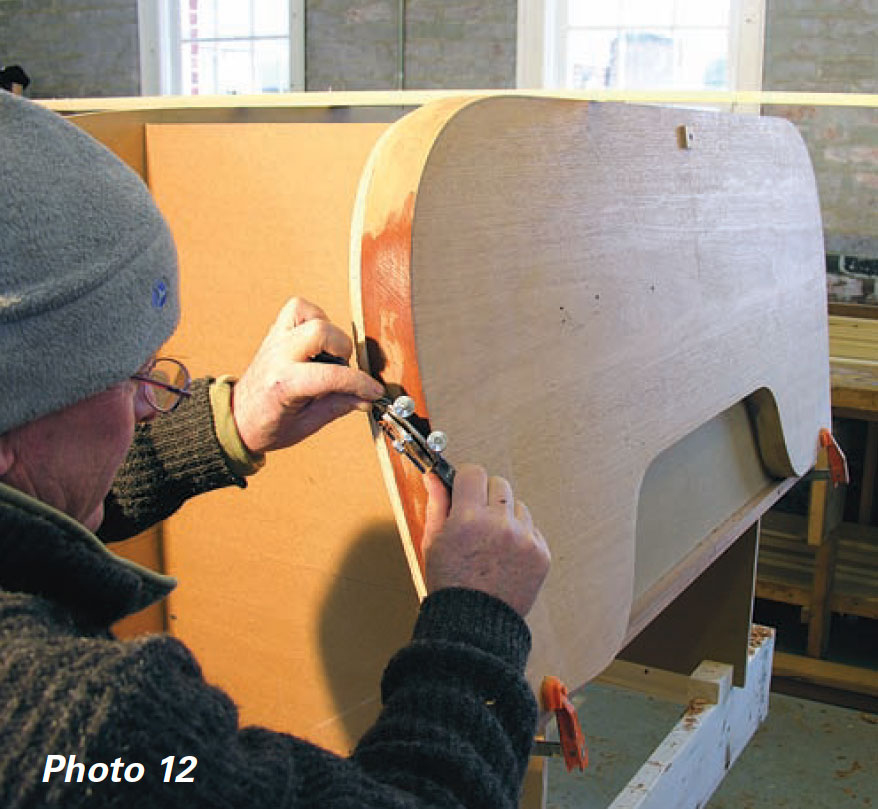
After the stem has been sided to 2″ and temporarily fastened to the jig, use a ballpoint pen to draw a centerline on its face and two lines 1/4″ away on either side. For beveling, I work with a spokeshave from the drawn line…
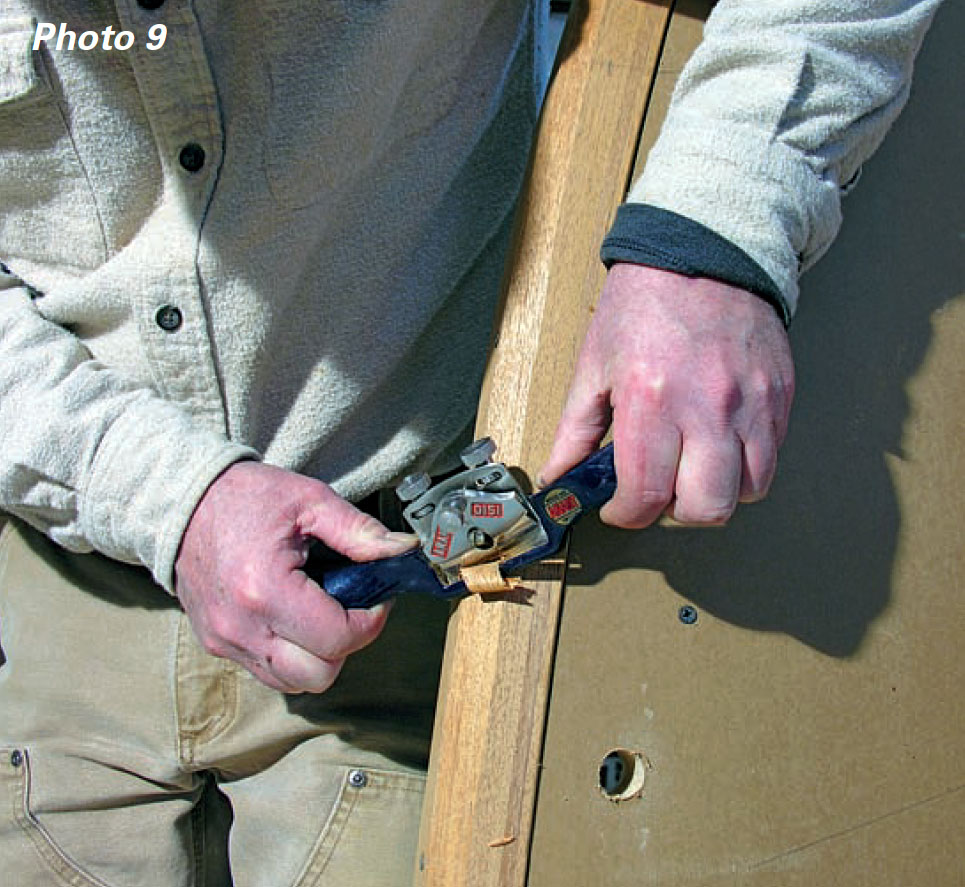
…carefully cutting and frequently checking the developing bevel with a piece of planking stock held along a few molds and reaching to the stem.
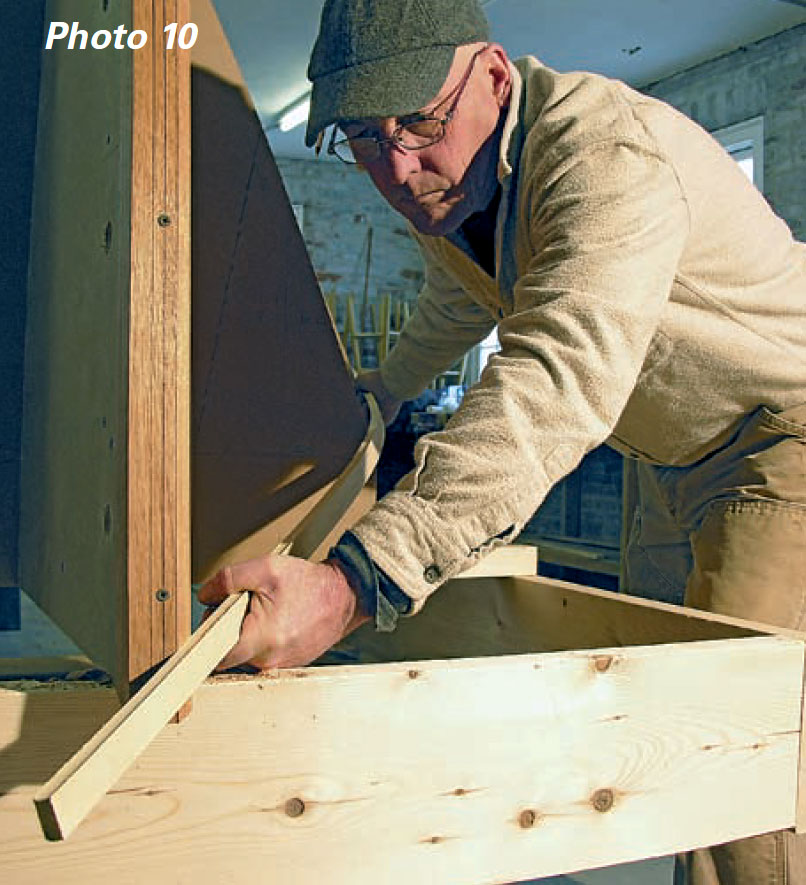
If you go slowly and check often, there is less chance of over-beveling. Take your time and do one complete side, then the other using the first side as a reference but still checking often with planking stock, as before. Pay particular attention at the sheer, making sure that both bevels are exactly the same and correct here. Elsewhere, a bit of over-beveling can be corrected with thickened epoxy and a promise to do better next time, but such surgery will be visible at the top of the stem.
Beveling the Transom
As with the stem, the transom’s edges must be beveled to accept the planking. Draw a line with a ballpoint pen all the way along the inboard corner as close to the edge as possible. There is only a slight bevel on this boat’s transom, about 1/4″ all around. With your combination square set to a depth of 1/4″, draw a line on the transom’s outboard face as a guide, then start to plane outward from boat’s centerline, working toward the sheer, using a low-angle block plane.
I use a wet rag to soak the end-grain, which makes it much easier to work. Cut a small chamfer at the sheer to avoid chipping off the transom’s corner.
As with the stem, have handy a batten that can span several molds for checking the bevel as you go. The bevel becomes more difficult to cut as you round the corner at the turn of the bilge and encounter end-grain; here, a sharp spokeshave will cut better than a block plane.
Planking the Hull
I planked this hull with clear, vertical-grain Alaska yellow cedar, and highly recommend it. Northern white cedar or juniper would be good substitutes. I had the 1/2″x1″ strips milled with a bead-and-cove profile, and because almost all the stock was 17′ long, no scarfing was needed. The hull requires about 90 strips. Strip-planking is a tedious task; working alone, I averaged about 14 strips a day, seven per side. I started at the sheer and planked toward the centerline.
Temporarily screw the planks (cove side up) to each mold through a short strip of 4″ plywood.
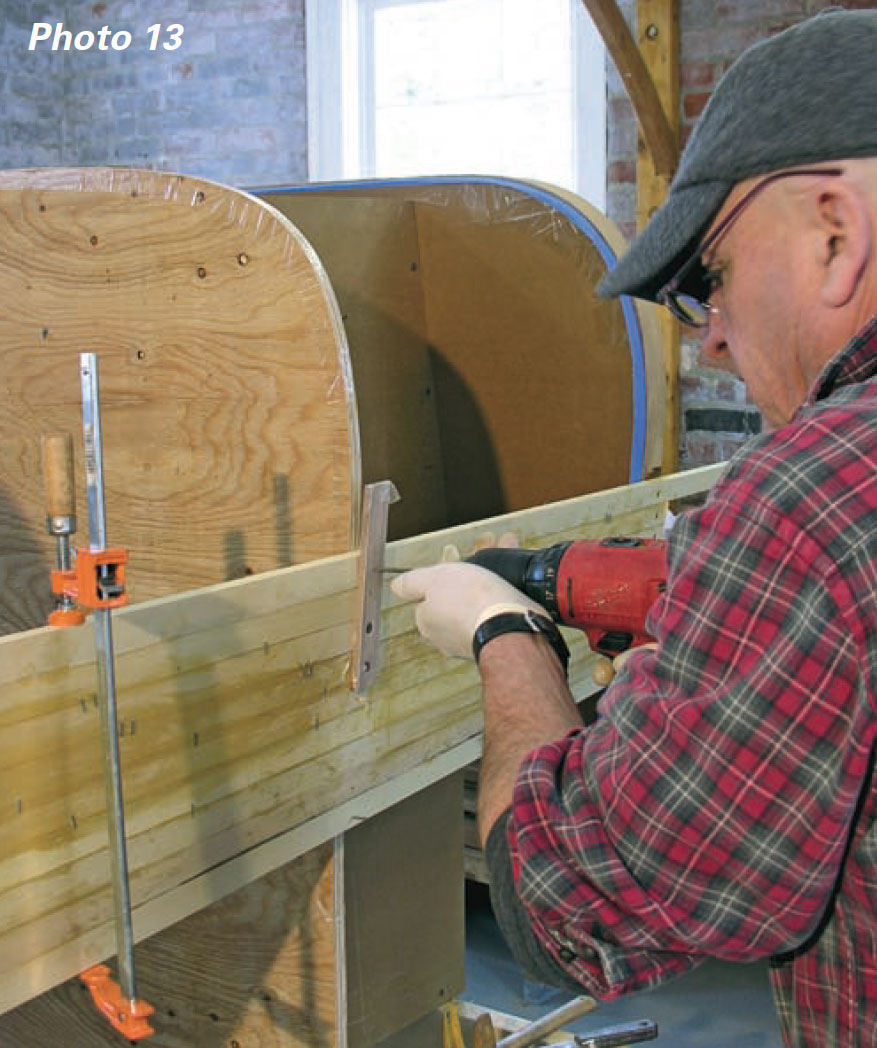
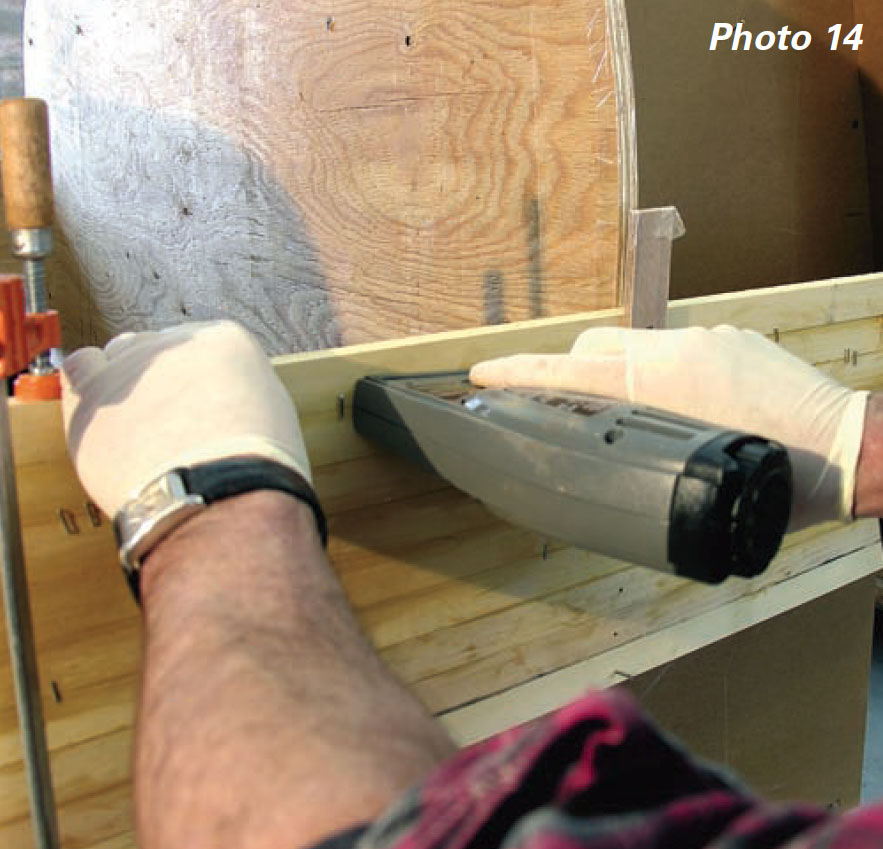
The plywood strips protect the planks from being dented by the screws and help align the planks as well as hold them to the molds. The planks are permanently glued and screwed to the stem and transom with 14″ No. 8 bronze wood screws. Between the molds I used sliding bar clamps to draw the planks together and then shot 3/8″ staples, straddling the plank seam, with an electric staple gun to hold them until the epoxy cured. This system worked reasonably well, and I used about 6,000 staples.
Another great time-saver was thickened epoxy sold in a caulking-gun tube that mixes the resin and hardener as it is dispensed. Designed especially for gluing, with no fillers required, such products are available from epoxy manufacturers like Gougeon Brothers and System Three.
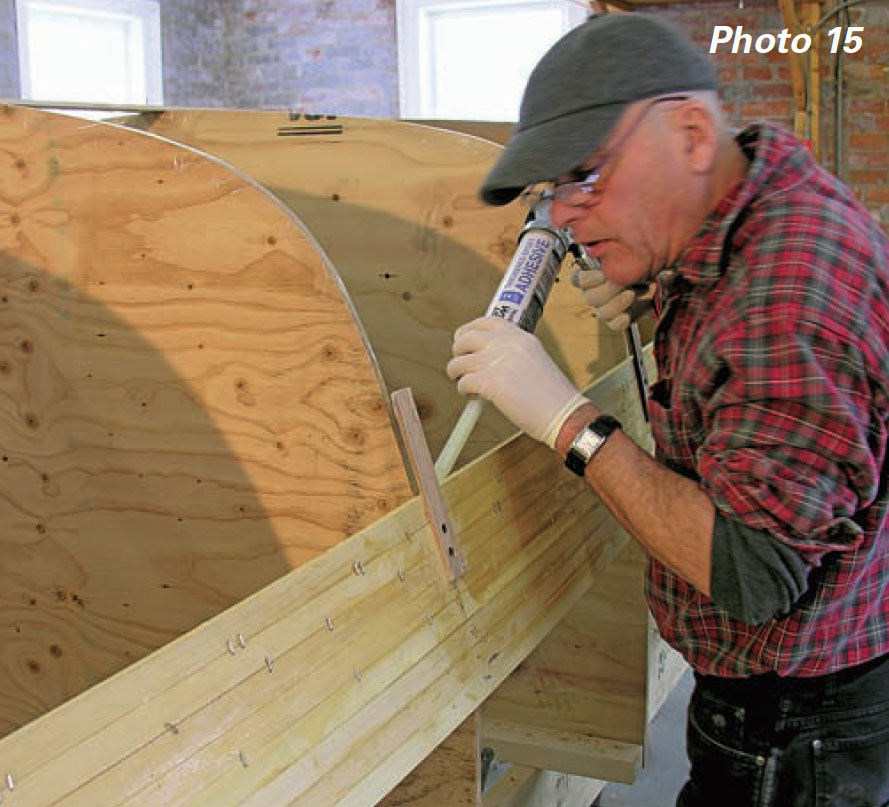
Cut the tip to the size you need and squeeze a bead of epoxy into the cove edge of the already-hung plank. Smooth it out with a small glue brush, and you’re ready to set the next plank in place. Be as neat as possible and clean off all the squeezed-out glue inside of the hull and out using a sharp putty knife and rags slightly dampened with white vinegar. I use vinegar to clean the epoxy off tools, particularly the staple gun.
Filling and Sanding
After the hull is planked you can trim the plank ends flush with the inner stem and transom with a block plane. Use thickened epoxy to fill the screw holes and cracks between planks, which are inevitable at the turn of the bilge.
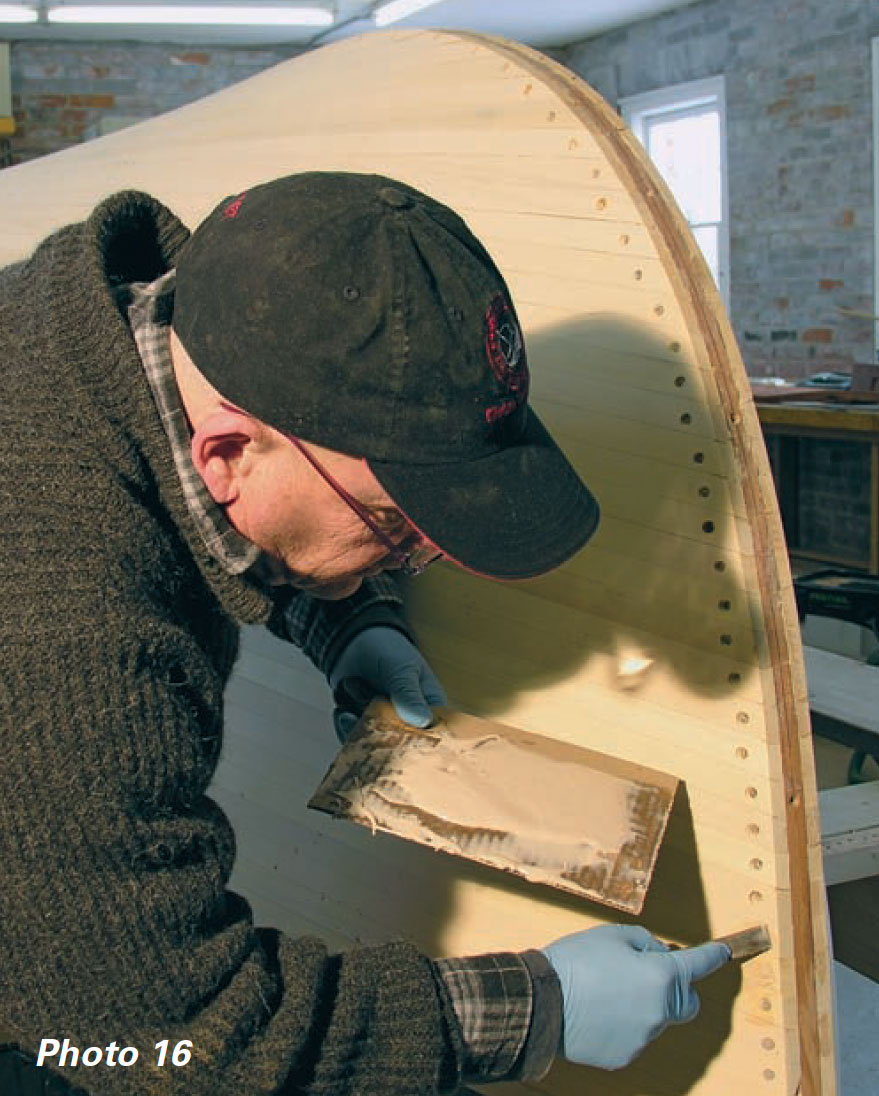
Mix low-density fairing powder into the epoxy until the consistency is like toothpaste, then pack it into any such voids. Scrape off any excess. Neatness here will make sanding easier later on. Since epoxy shrinks a little when it cures, filling is often a two-step process.
I sanded the hull three times, first with 80-grit sandpaper using a random-orbit sander attached to a dust collector, taking care to keep the machine moving at all times to prevent hollow spots from occurring. This tool works well for removing excess glue and knocking down high spots.
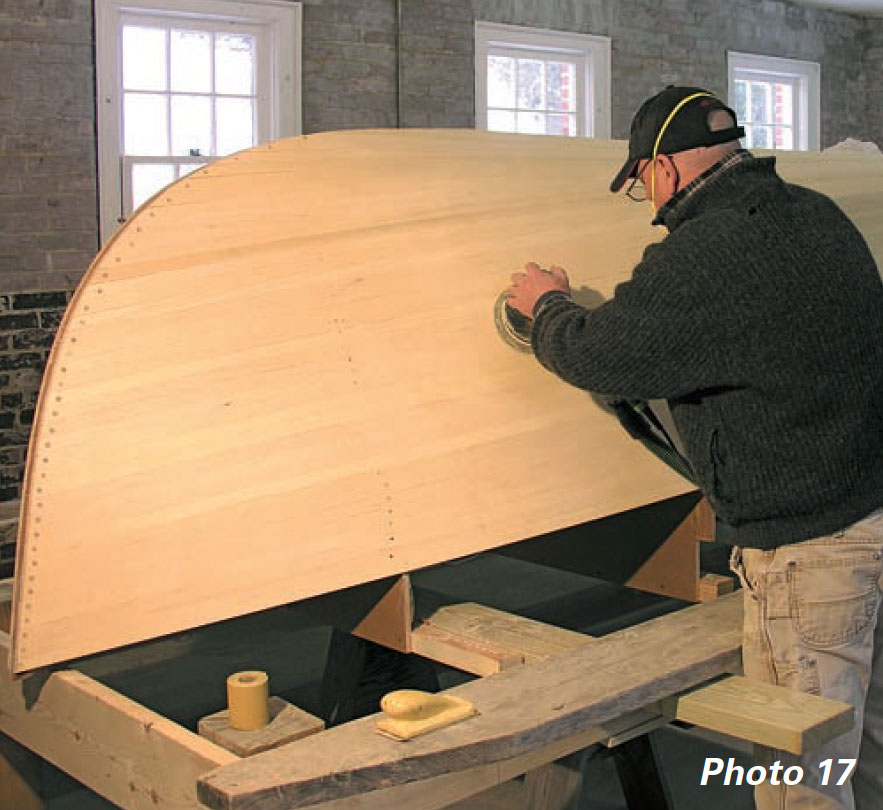
Next comes board-sanding. My shop-made board is of 1/4″ plywood and I used 3″ sticky-back 80-grit sandpaper, board-sanding the entire hull, working diagonally in one direction at about a 45-degree angle to the planking, and then back in the opposite direction.
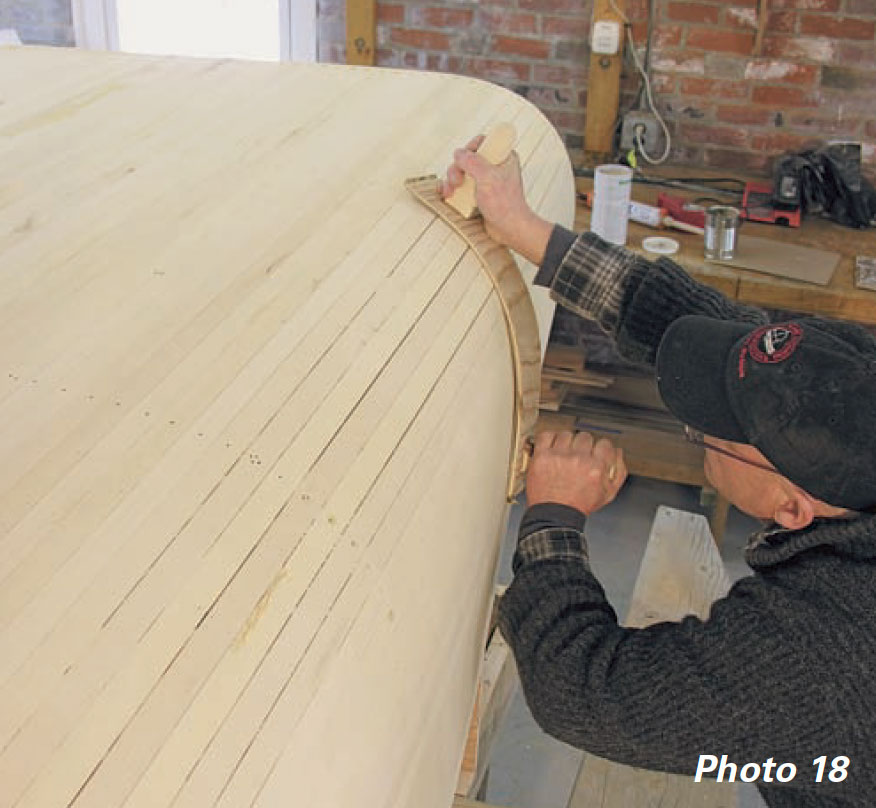
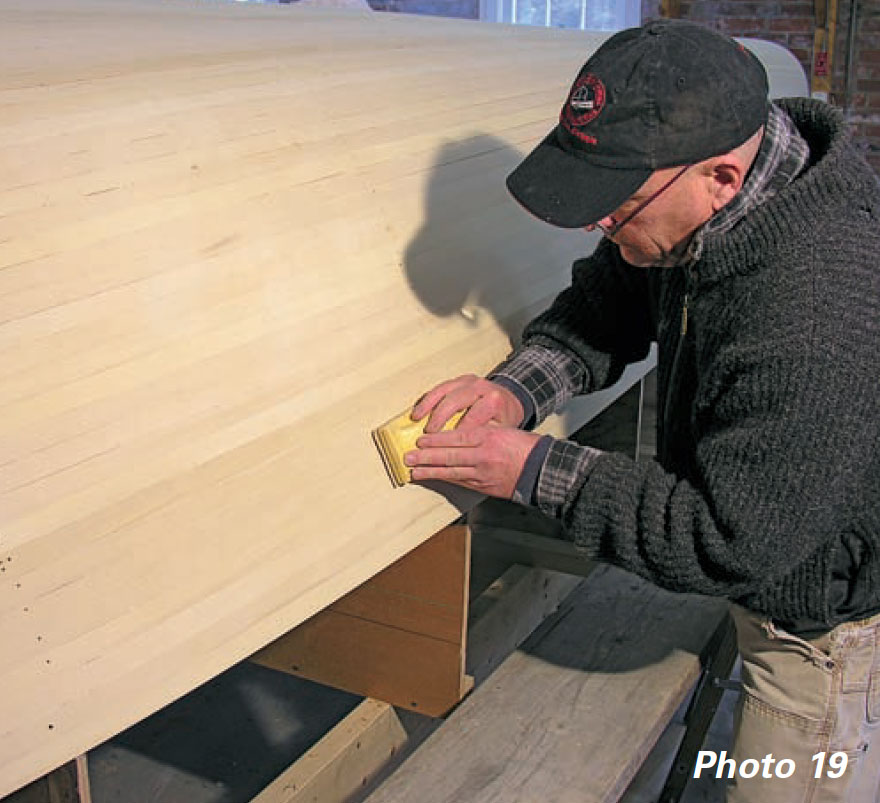
The final step is block-sanding fore-and-aft with the grain. In the photograph, I’m using yellow foam sanding blocks with sticky-back 80-grit paper. I begin with a hard block and finish with a soft one.
In Part 2 of Building the Jericho Bay Lobster Skiff, we’ll fiberglass the hull’s exterior, add the outer stem and keel, and remove the boat from the building jig for final details and painting.
Tom Hill is WoodenBoat’s technical projects manager. Featured image and all construction photographs by Matthew P. Murphy.
The 15-page plans set for the Jericho Bay Lobster Skiff includes the full-sized mold patterns mentioned above, making it well within reach of ambitious amateur builders. Also included is a corrected table of offsets for builders who prefer to start from scratch with a full-sized drawing, or lofting, of their own. Order from The Wooden Boat Store, P.O. Box 78, Brooklin, ME 04616; 800-273-7447; www.woodenboatstore.com.
