
 Alison Langley (both)
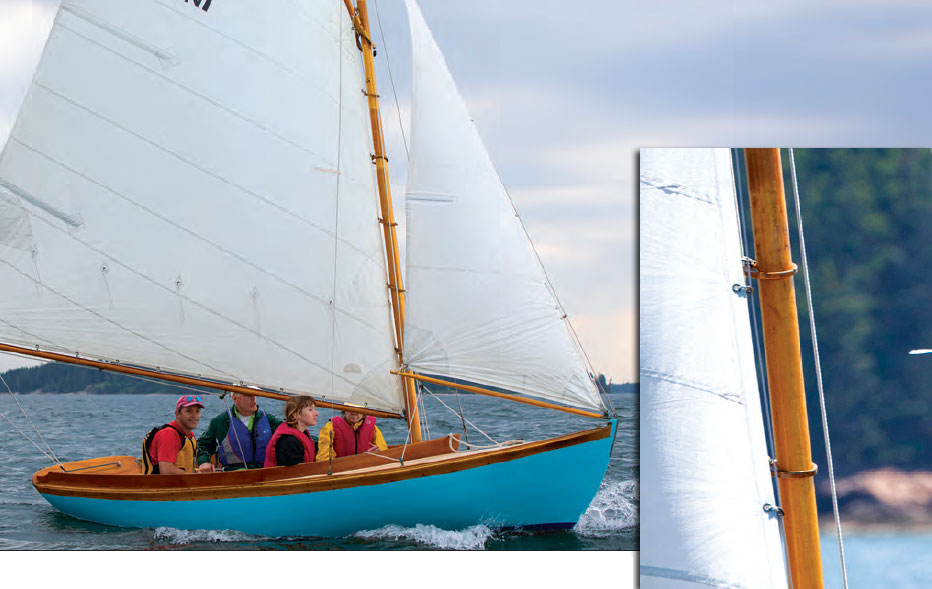
Mast hoops are commonly used on gaff-rigged boats, such as the Haven 12 1/2 seen here. There are a few companies offering replacements, though owners with modest skill and equipment can make their own.
What Are Mast Hoops?
Mast hoops are commonly used on gaff-rigged boats to allow the sail to slide up and down the mast. Hoops are worth extra inspection and care, because replacements are hard to find and expensive to purchase when you do find them. Although they are small, they might seem intimidating to fashion. Bending frames into a small round-bottomed hull is daunting enough, but that tight bend of the circular hoop is enough to make the best builder blanch. How does one make these fittings?
There are, actually, similarities between bending hoops and bending frames. The first consideration for both is stock selection. White oak is a top choice, as are elm, ash, and hickory. Look for straight grain with no imperfections—that is, no sapwood, pin knots, or worm holes. The wood should be air-dried, and moisture content is critical; the greener the stock, the better. It should be as smooth as possible, with the corners relieved so they are not sharp.
Then, there is the device to heat the wood to soften it enough for bending. While this can be accomplished by boiling the pieces in a tank, the most convenient and efficient device used to plasticize wood is a simple steambox. The wood must be steamed for roughly an hour for each inch of thickness.
How do we get that fiendishly tight curve of the hoop? The secret to success is to use a flexible strap on the outside of the curve while bending the stock around a circular jig. The wood on the inside of a curve compresses, while the wood on the outside stretches; steamed wood can be compressed a considerable amount, but it will stretch less than 0.5 percent without failing. The strap keeps the wood on the outside of a bend from failing.
Types of Mast Hoops
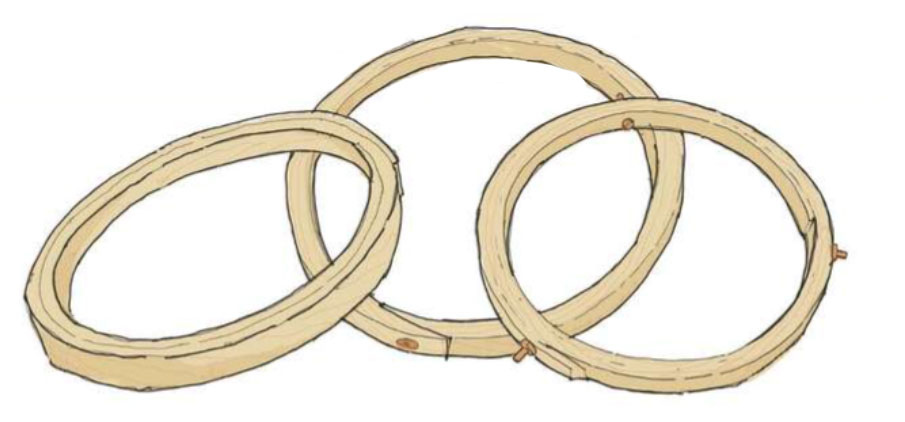
There are three different types of mast hoops: solid wood joined with a scarf fastened with copper rivets and maybe adhesive; laminated, using two or more wraps and fastened with rivets or glue along the perimeter of the hoop; and bolted, which can be handy for large hoops. Bolted hoops have one advantage: they may be unbolted, installed on the mast, and re-bolted without removing any rigging.
How to Make Mast Hoops Step-by-Step
Building the Bending Jig
Begin by determining the inside and outside diameters of the mast hoop. It’s ideal to have an original to use as a pattern, but if one isn’t available you can use this general rule: the inside diameter (ID) of a mast hoop should be 25 percent greater than the mast’s diameter at its thickest point.
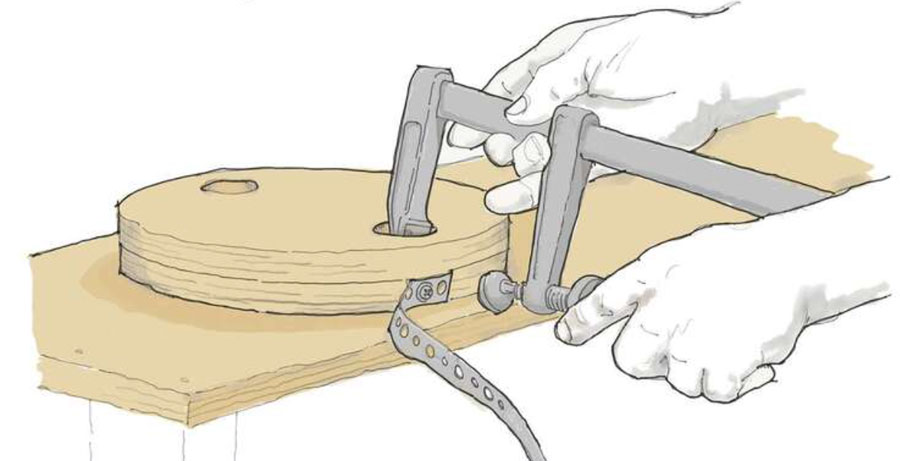
One easy approach is to trace the ID onto a couple of pieces of ¾” plywood, cut them out with a bandsaw, then stack these discs together and fasten them with glue or screws. Mount the stacked discs on a board large enough to allow you to clamp or screw the assembly onto a bench. Bore a series of vertical holes, making them large enough to accept the gripping end of a sliding bar clamp, around the perimeter of this stubby plywood cylinder.
Next comes the bending strap. While straps are available commercially, they are perhaps overkill for our purpose. A good alternative, available at any hardware store, is the ubiquitous perforated steel hanger strap (aka plumber’s tape), measuring ¾” wide (1″ is also available). It’s cheap, already drilled with holes, flexible, and malleable. And it is galvanized. Steamed woods high in tannic acid, such as red oak or white oak, will develop a purplish or black stain when exposed to a black-iron strap. The zinc coating prevents this nuisance. Plumber’s tape is easily cut to length with tin snips. Screw one end to the plywood cylinder, and fasten a dowel pull handle (like on a lawnmower pull cord) to the other end.
Setup a Simple Steaming Unit
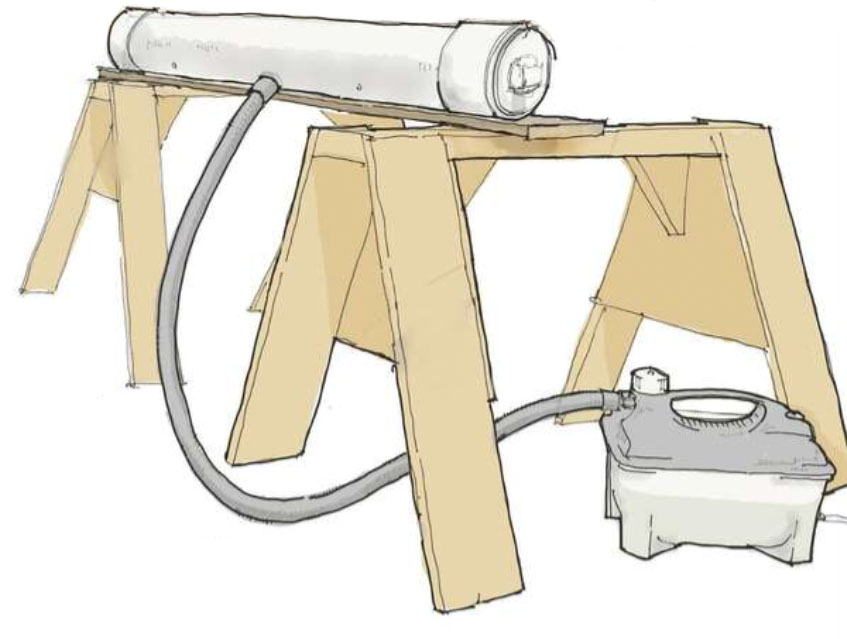
Now it’s time to set up our steaming device. When I work indoors, I use the Earlex electric steam generator (see a review in WoodenBoat No. 228). It’s as safe as using an electric kettle; cranks out plenty of steam; and comes with a long, flexible hose and a fitting that screws into the steambox.
The “box” portion of the setup requires a trip to the plumbing section of the hardware store. A short length of schedule 40 PVC sewer pipe is tops for the job. A length of 4′ will be plenty. Also, get the threaded sewer pipe cleanout adapter (with the screw-in “nut,” which will serve as the door), and a cap for the end. Bore a hole in the pipe and thread it for the steam generator’s hose fitting.
Bore matching horizontal holes to install transverse dowels to support your bending stock. Bore a few more small holes in the upper side to let vapor escape, and a few more on the bottom to let condensation leak out. If the steambox will live on sawhorses, support it with a board to prevent the heated PVC from sagging.

Hoop Keepers
When the clamps are released from steam-bent stock, the stock will spring back somewhat. To maintain the desired shape and allow for production work, cut out a series of circular holes the size of the exterior of the hoop into pieces of wood.
You can safely park your bent stock in these until you finish bending the rest of the hoops; then they can all be fastened at the same time. I like to cut a slit into the sides of the circular holes that allows me to bore a rivet hole through the two mating pieces of the hoop. A rivet can then be inserted through the stock from the inside face of the hoop; the hoop can then be safely removed, and a rove set over the tip of the rivet.
(More) Sewer Pipe Technology – A Bending Jig
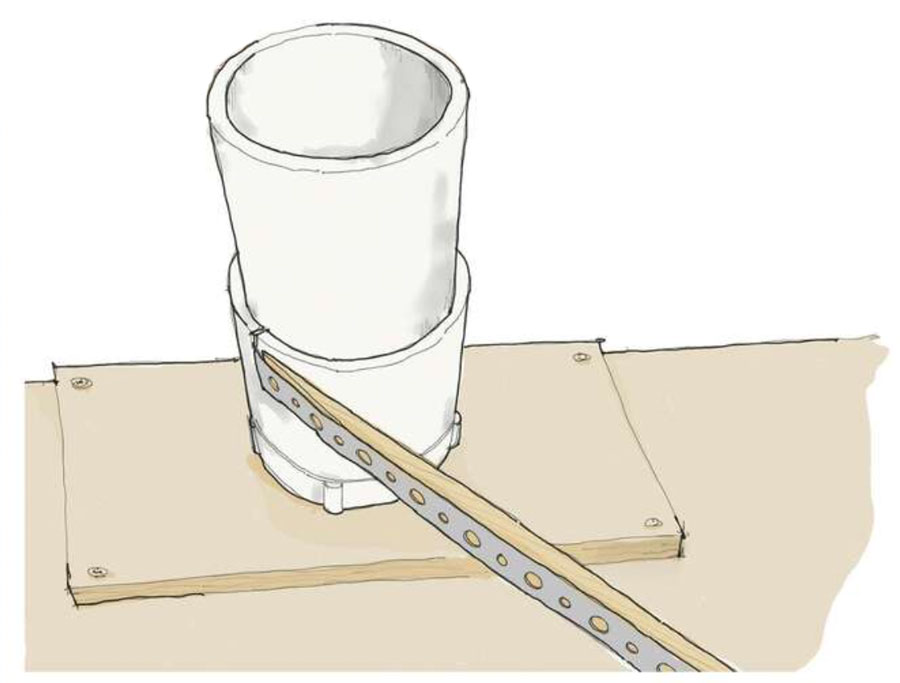
Let’s make a hoop. In this example, I had a prototype to work with; the dimensions for its stock are 5⁄16″ × ½” and the ID was 4 ¼”, which by sheer coincidence is the outside diameter of a 3″ PVC threaded sewer pipe clean-out adapter. The accompanying screw-in cleanout plug, with its square thickening nut on the end, was just the ticket for securely mounting the adapter into a square hole mortised into a board.
The plumber’s-tape bending strap described above is attached to the jig. To prepare for the bend, the jig must be securely clamped to the bench and a couple of deep-throated sliding bar clamps, used to hold the bent wood to the jig, must be rounded up.
Fabricating the Stock, and a Piece of Pi
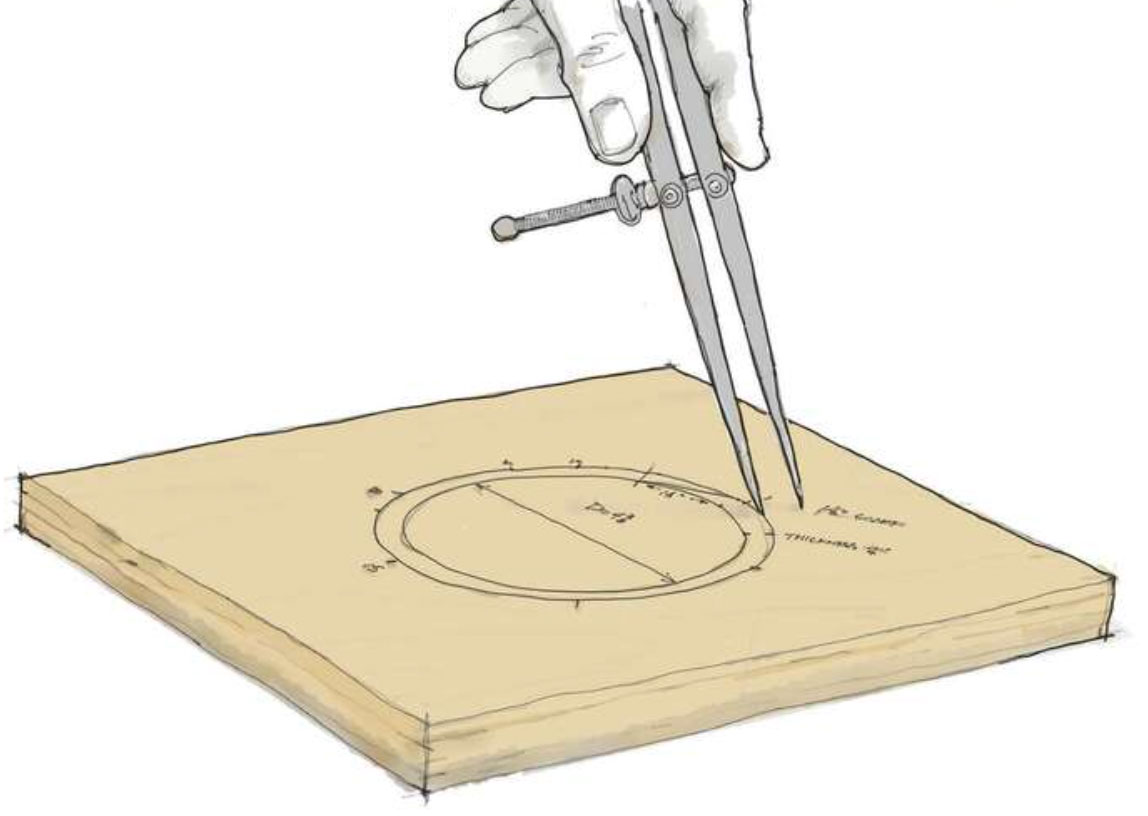
Let’s start with making the scarf-joint version. This is perhaps the more persnickety version, because the length of the stock has to be exact for the 10:1 scarfs to match up. One way is to take the diameter of the outside of our sample—4 7⁄8″—and crank it through the formula for the circumference of a circle, C = πd, where C is the circumference and d is the diameter. The result of that math is 15.236724″. Add 1 ½” for the scarf, and we end up with 16 ¾” of length.
If applied geometry does not appeal, there is the graphic method: loft out the hoop full size using a pencil com-pass. First draw the inner face, then expand the compass by ¼” and draw the outer face. Draw in the scarf joint. Then “walk” around the outer perimeter with dividers to get the distance. Add the 1 ½” for the scarf, and you are in business. Probably. Don’t cut all your stock until you have bent one or two pieces to make sure you have indeed arrived at the correct length.
Your bending stock will tend to dry out quickly after it has been milled. To slow this process, place the stock in a plastic bag or, better yet, keep it submerged in a tank of water.
Bending the Hoop
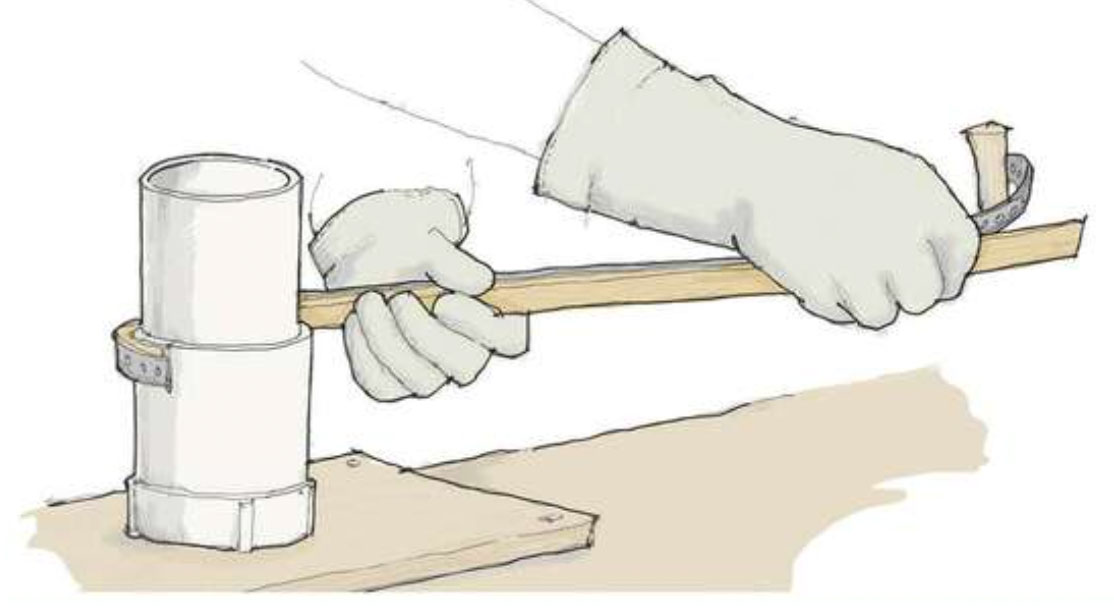
This operation requires speed, so before firing up the steambox, be sure you have all your tools at hand. The jig should be tightly fastened to the bench, clamps should be at the ready, and the drill set to bore holes for the rivets (No. 14 rivets and burrs, in this case). Have a pair of welder’s mitts ready to go for handling hot wood.
Make sure that steam is roiling out of the box, and only insert a couple of pieces of the stock at a time; the steaming time mentioned earlier (one hour per inch) means that 15 minutes will likely be enough for these ¼” pieces; much more than that will overcook the pieces.
A dry run is a good idea. Insert a piece of unheated stock in between the jig and the bending strap with the flat back side of the tapered scarf against the round of the jig. Bring the strap and stock together and grasp both tightly so the wood cannot slip. (The wood must be kept under compression during bending.) Look around and check that you will be able to swing the stock and strap around the jig without running into anything. Also, confirm that your sliding bar clamp has enough depth to grab the bent hoop to hold it in place until it cools. With that done, you’re ready to go.
Remove your hot stock from the box and swiftly wrap it around the jig and clamp it. If you’re lucky, the scarf will overlap exactly. If not, you can modify the next pieces of stock to be either longer or shorter. After cooling, the bent stock can be inserted in one of the hoop keepers with the overlapping scarf aligning with the rivet-boring slot. If the hoop is a little out of round, you can use small clamps to pull it to the side of the round keeper. Bend the rest of your hoops and park them in the keepers.
Fastening
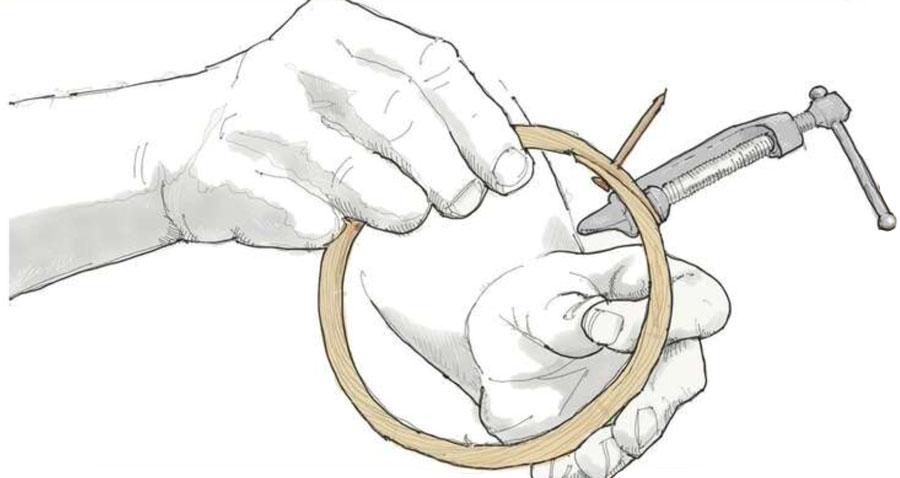
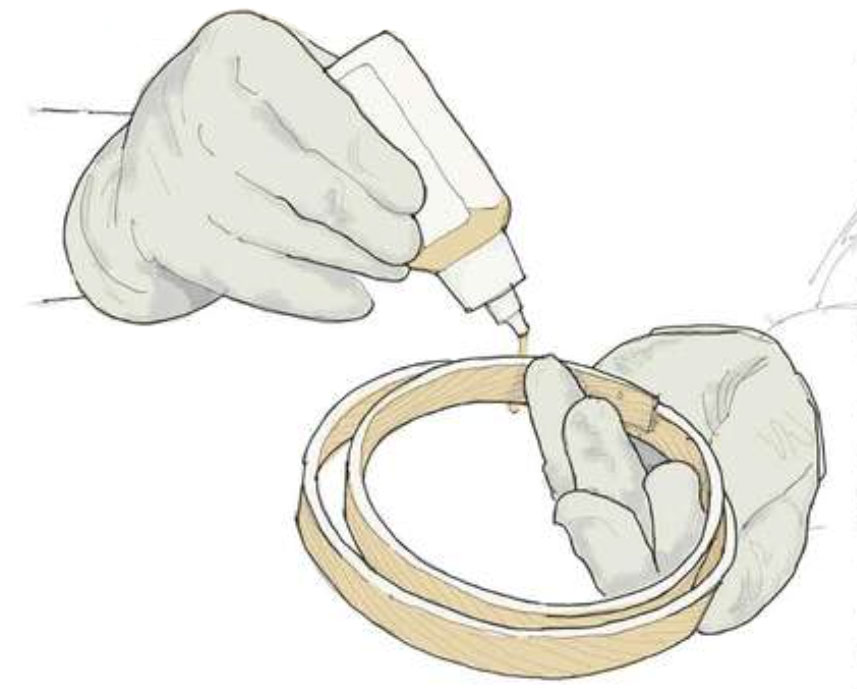
You can now bore for the indexing rivets and insert the copper nails from the inside. Thus fastened, the hoop can be removed and the rove applied—and a second hole can be bored in the scarf and another rivet installed.
For a deluxe, belt-and-suspenders version, you can rivet and glue the scarf with an oak-friendly epoxy, such as G-Flex, or a poly-urethane glue. After boring your index hole, remove the hoop, insert the adhesive in the joint, and reinsert the hoop into the keeper—after you have lined the interior with a protective plastic film that won’t stick to the cured glue. After the glue has cured, install the other rivet.
The Laminated Version
There’s much to be said for a laminated hoop (in this case, two layers, each ¼” thick). The stock is roughly twice the length of the single-thickness version. The tapered ends are less dependent on fitting the mating scarf exactly.
One difference between this version and the riveted one is that instead of mating scarfs on opposite sides of the hoop stock, the tapers are planed to feathers on the same side of the wood. The bending technology is the same. When using the bending strap, you’ll be wrapping around and around, and as with the scarfed version, the bent wood on the jig is clamped until cooled and placed in the hoop keeper. Use small clamps to pull the laminations together and tighten them to the inside face of the keeper.
The rivet index hole is also drilled the same way. On a small hoop such as this, four or five rivets spaced around the circumference should do it. These hoops are also good candidates for gluing. While the hoop is in the keeper, mark in pencil where you do not want the glue to be. Take the hoop out of the keeper and anoint the rest of the surfaces with adhesive, then reinsert it into the plastic-lined keeper and tighten and clamp the laminations to the keeper’s inside face.
Shaping and Finishing
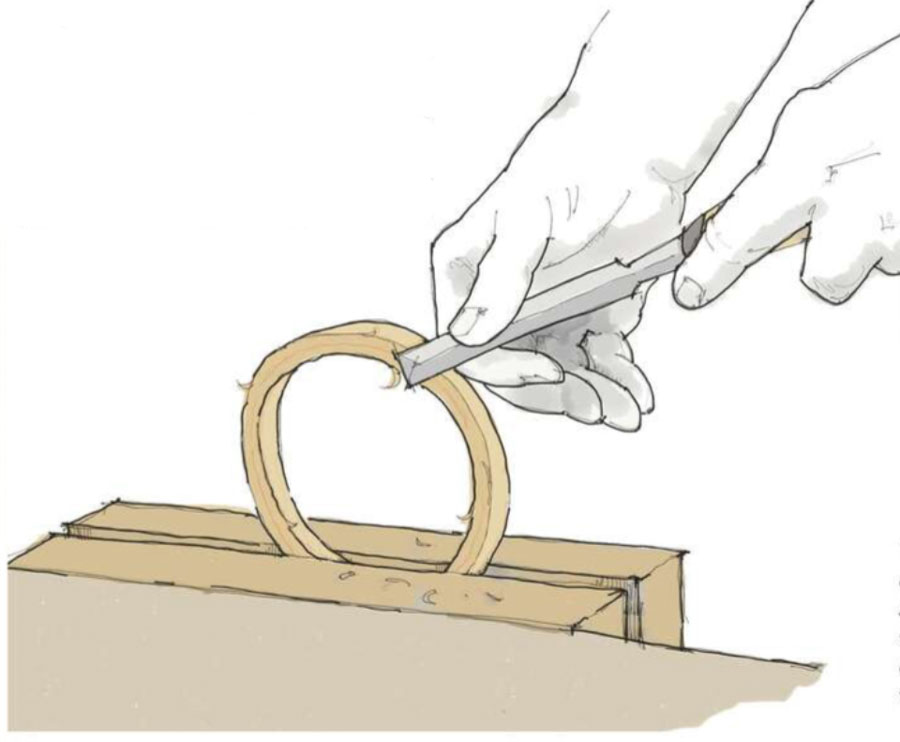
After lightly chamfering the inside and outside corners of the hoops—just enough to “break” the sharp edge—and sanding to whatever standard you prefer, either version can be oiled or varnished. Your set of identical hoops is now ready for attachment to their sails.
Watch the Video to See How It’s Done
More of a visual learner? Watch Greg Rössel and Rich Hilsinger demonstrate the mast hoop-making process in this video.
Greg Rössel is a longtime contributor to WoodenBoat and an instructor at WoodenBoat School.