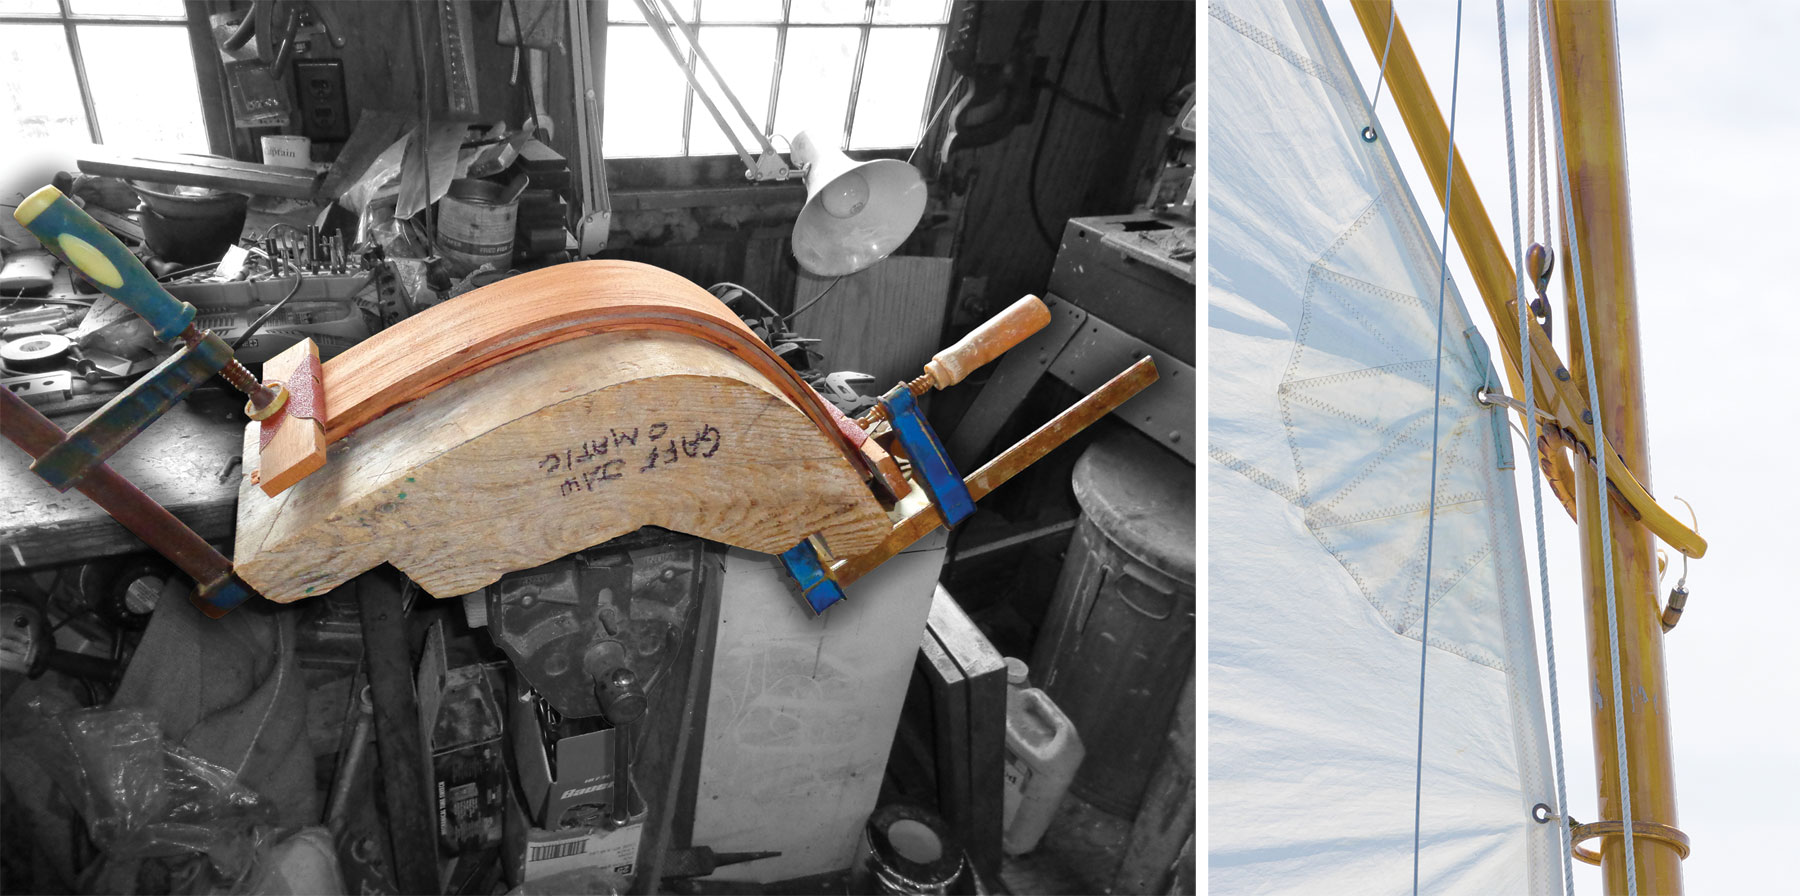
Alison LangleyWith the proper tools and a robust shop-made jig, creating a set of gaff jaws is a straightforward project.
Having your curved gaff jaw fail while underway can be a nettlesome experience, and it is made more so if you don’t have a spare to remedy the situation. These pieces are not mass-produced, so they must be custom made. Luckily, they are easy to fashion if you have the proper stock and purpose-built tools.
A rugged bending jig is crucial to the fabrication of curved gaff jaws. Several years ago, when WoodenBoat School decided to build spare gaff jaws for its fleet of Haven and Herreshoff 12½s, it developed a jig dubbed the “jaw-o-matic”—a jig sufficiently universal to replicate similar but different jaws.
The jaw-o-matic is simply a bending form robust enough to handle the stress of fairly heavy stock being bent over it. Although it is possible to fashion curved jaws by sawing them out of an appropriately shaped and sized timber with the proper run of grain, the most practical approach today is to steam bend either full thickness stock to shape, or to bend thinner laminates and glue them together.
The Tools
Our bending jig was made from a piece of 8″× 8″ × 1′9″ pine. The curve was originally generated by eye and batten. The criterion was that the smooth but variable curve would initially have a slight or moderate inclination as it reached the height of the crown, where it would turn quickly and then ease again as it headed downward. The idea is that somewhere along the run of the variable curve there would
be the perfect fit for a variety of jaws. At the ends of the jig are carved-in flats that allow for clamp purchase.
The clamps used for this job should be substantial. Fast-acting sliding bar versions are preferred over slower cranking C-clamps. To avoid crushing the wood, it’s good to use wooden clamping pads made relatively non-skid with sandpaper glued onto one side.
Lots of Heat
We’ll be asking a lot of our bending stock, so we want to expose it to as much plasticizing heat as reasonable. Because our pieces are relatively short—roughly 22″ long—a good solution is simply to use an off-the-shelf lawn-and-leaf bag as our “steam box.” Place the bag on a flat surface, put the wood on spacers inside to allow good circulation of steam, insert the steam hose, and tie it off. Poke a drain hole in the bottom, and a couple of vent holes in the top and you are in business.
Make a Pattern
Bend a piece of card stock beneath the curved face of the existing jaw, and trace the shape. On a separate piece, capture the curvature of the side view. Cut both out.
Selecting the Stock
This can be the most challenging task of the project. You will be searching for the best of the best—especially when bending solid stock. Viewing the side (thickness) dimension, the grain should be straight with no runout. On the flat, there should be no imperfections—
sapwood, cracks, checks, knots, or worm holes.
Should the wood be air-dried, kiln-dried, or green? For this purpose, green or air-dried would be my choice. Only in a pinch would I consider kiln-dried wood. You can attempt to reintroduce moisture, but using kiln-dried stock is a bit like reheating leftovers. Sometimes it works, other times it only produces heartburn. Many sources indicate that wood for steam-bending should have a moisture content of between 15 percent and 20 percent. If you have a moisture meter, check it out. I never use one. I do, however, submerge my chosen milled stock in a tank of water for a few days before steaming to encourage it to do the right thing.
Our jaw finishes at only 12″ long, but at a bare minimum we’ll double that length. Longer stock can provide more leverage, making the bending job easier. If you decide to go with longer stock, simply use a larger bag or a conventional wooden steambox.
Another consideration is that all woods will rebound, or “spring back,” a little when released from their forms. With easily bent woods such as oak or ash there will be relatively little springback. Mahogany will straighten out a lot—even laminated stock will recoil to some degree. You really can’t tell what curvature your stock has until it has cooled and been removed from the form. If you laminate your jaws from elegant yet brittle (and bend-resistant) mahogany, using twice as many ⅛″ laminations is better than half as many in ¼″-thick stock.
Finally, have more pieces on hand than you think you will need. You will be glad you did.
Doing the Job
With all the ingredients in place, let’s get started.
Begin by firmly anchoring down the bending form. Screw it to the bench, clamp it into a vise, or do what you must to firmly immobilize it so it doesn’t break loose during use.
Then it’s time to prepare the steamer. When I work indoors, I use an electric steamer with a long flexible hose. Check that there are no depressions in the run of the hose that can collect condensation and impede the flow of steam.
We’ll use ⅝″ white-oak stock. Place it into the bag on a bench next to the bending jig. Put spacers underneath and “tent pole” it above to ensure plenty of steam circulation around the wood. Don’t forget the aforementioned steam and drain holes in the bag. Tie off the end of the bag. Turn on the steamer and wait on your timing until you see there is a good flow of the hot vapor going into the bag.
Assemble your pads and adjust your substantial clamps to length. You should use at least three of them; consider doing a dry run of the process to be certain everything is in place. Place your hot mitts at the ready. Then have a cup of coffee and wait about ⅝ of an hour (or about 40 minutes). Be prepared to work expeditiously.
When you are ready, don your gloves, remove the stock, and clamp one end of it to the form using the protective pad. Then, start bending the wood around the form. It will be stiff. Bend it using a “pumping” up-and-down motion. If you are working alone, you can set one bar clamp to hold it while it is partially curved. Use a second clamp to pull more bend into it. Then reset the first clamp to pull even more bend in and so on until you achieve the desired shape. Then leave until it cools and sets its shape, preferably overnight.
Remove the curved stock from the form and set it aside. Repeat the process for the mating jaw for the spar’s other side.
Laminated Stock
Compared to bending the solid stuff, bending thin stock is a walk in the park. The steamer setup is identical to what has already been described. Place spacers or stickers between the laminates in the bag. The steaming time is considerably shorter. For ⅛″-thick stock, it’s just 10 to 12 minutes.
When the steaming is over, the wood can lose heat as fast as it took it up, so be prepared to work quickly. Take the stack of stock from the bag and after removing the spacers, align the pieces with one another (without glue), and clamp them to the form again using the clamp pad. Swiftly, bend the stack around the curve and clamp the other end. Let the wood cool and take a set.
After cooling, the stock can be released and readied for gluing. Now your bending form becomes a lamination jig. Affix some plastic sheeting over the curve to protect the jig from glue. After spreading the laminations with appropriate adhesive (thickened epoxy is typical), it can be reclamped to the form. Extra flats cut into the bottom of the jig allow for doubling the number of clamps and pads, assuring a good squeeze on the buttered laminates. Allow the assembly to cure and repeat the operation for the other half of the jaws.
Fashioning the Jaws
Both the solid and laminated stock will likely have sprung back a bit after being removed from the jig, but when they are cool they will be stable and can be reliably worked. Take the curvature pattern and slide it along the edge of the now-curved blank to select the best location to trace the “flat side” pattern on the inside of the curve.
Move the flat-side pattern over the wood and, for maximum strength, select a spot where the grain is continuous along the length of the jaw. After tracing, the shape can be carefully cut with a bandsaw. The inside curve of the jaw is tight and tough for the blade to negotiate without jamming. So, before cutting it, make some relief cuts into that drawn curve.
Final Shaping
Now for the operation we have been awaiting: the final shaping. Using a block plane, a spokeshave, a round rasp, and sandpaper, work the final shape into the halves of the jaw to match the originals. Plane the edge of the jaw that mates to the gaff straight and smooth, making it slightly hollow so it fits tightly to the spar and there is room for just a dab of bedding compound.
Bore holes for fastenings and parrel. Finish to taste and you are almost ready to set sail. ![]()
Greg Rössel is a longtime contributor to WoodenBoat and an instructor at WoodenBoat School.


