
 Tyler Fields
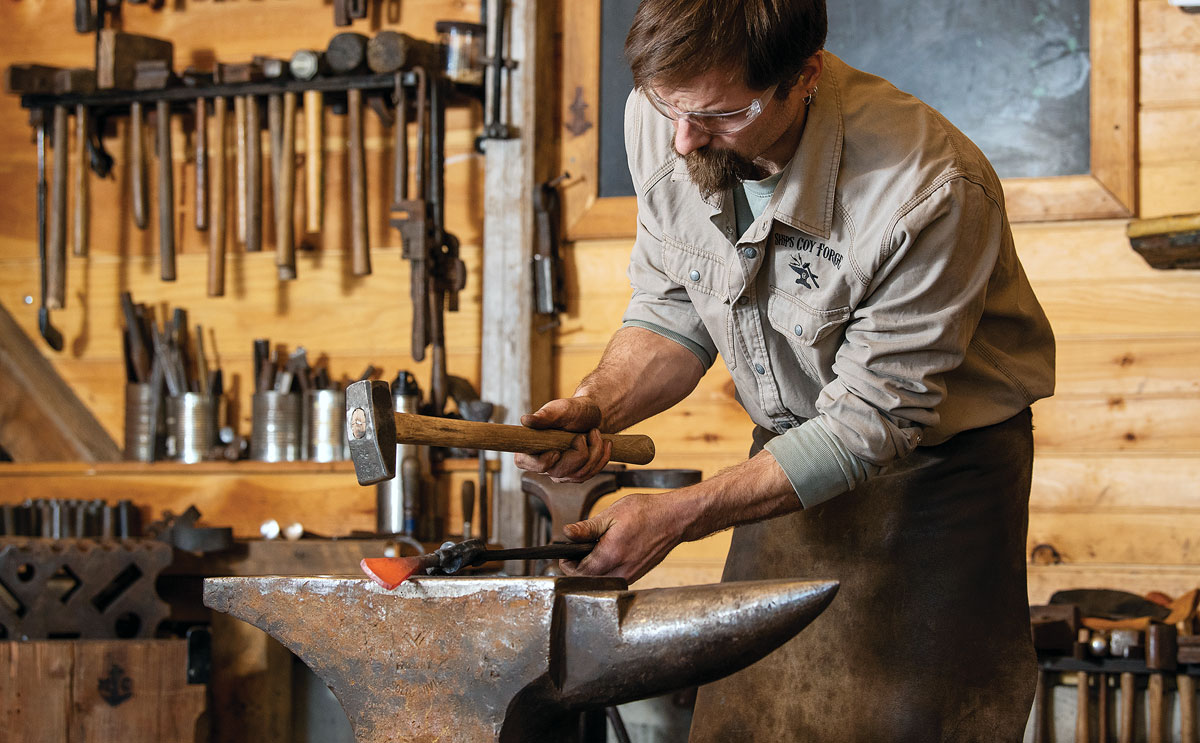
At Ship’s Coy Forge in Lyman, New Hampshire, Med Chandler develops the shape of a caulking iron. These tools are one of the primary products of the forge, which also makes hardware.
Med Chandler makes quality tools by hand. He began learning the blacksmith trade in 2003 at the Fort at No. 4 Open Air Museum in Charlestown, New Hampshire, before stints at Boothbay Harbor Shipyard in Maine and Ball & Ball Reproductions in Pennsylvania. In 2010, Med and his family moved back to New Hampshire and, using reclaimed timbers from a mid-1800s blacksmith shop, built a new forge behind his home. Under the name Ship’s Coy Forge, he has since been producing heirloom-quality tools and replacement hardware.
Caulking irons are a mainstay for Ship’s Coy; the company sends orders for them to locations all around the United States and overseas. Med keeps busy with two lines of iron sizes, “boat” and “ship,” as well as reefing hooks and bottle openers. Last January, he generously allowed me to spend a day in his forge to document his way of making caulking irons from start to finish. The following steps are not intended as a how-to for the backyard blacksmith; rather, they are an overview of the techniques, hard work, skill, and passion required to make these tools.
 The forging process wastes almost no material. In comparison to milling or machining, in which a piece is carved from a larger blank, forging stretches, bends, and molds material into a final shape. Except for some stuff lost to final grinding and polishing, the finished tool ends up using all the metal that the blacksmith starts with. From a steel blank to a rough caulking iron, the process can be broken down into just a few major steps, but it requires years of skill and experience to complete with any repeatable success.
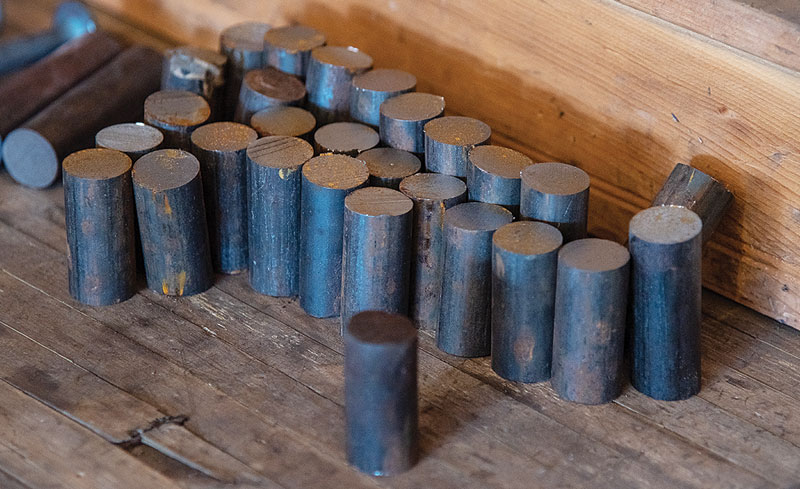 The work begins with rough-cutting the high-carbon spring-steel blanks to length. This type of steel is used because it does not require additional hardening after forging. Each blank begins the same size, and it’s up to the blacksmith to ensure a uniform finished tool in the end.
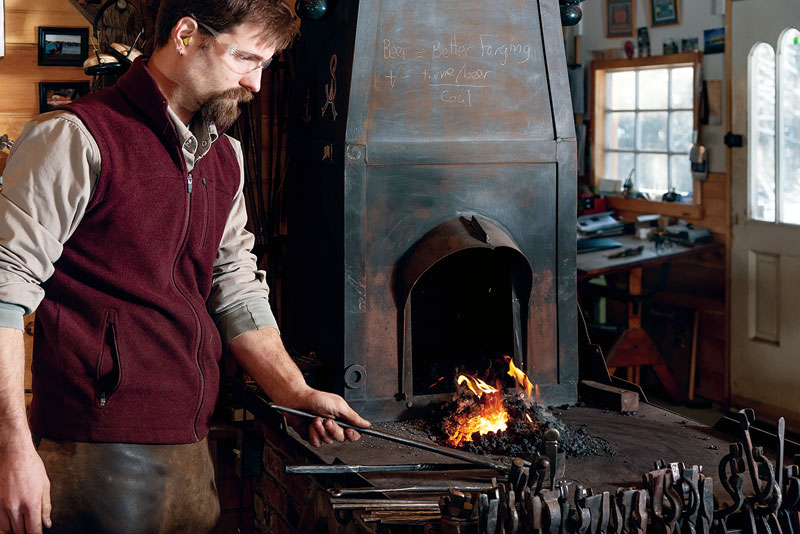 Med uses a coal-burning forge with an electric blower mounted underneath. The blower forces air into the fire pot, controlling the temperature. The more air forced into the pot, the more intense the heat becomes. The center of the forge, where the steel is placed, can reach 3,000 degrees Fahrenheit. As the metal heats, its color changes; color, in fact, is the best indicator of its temperature.
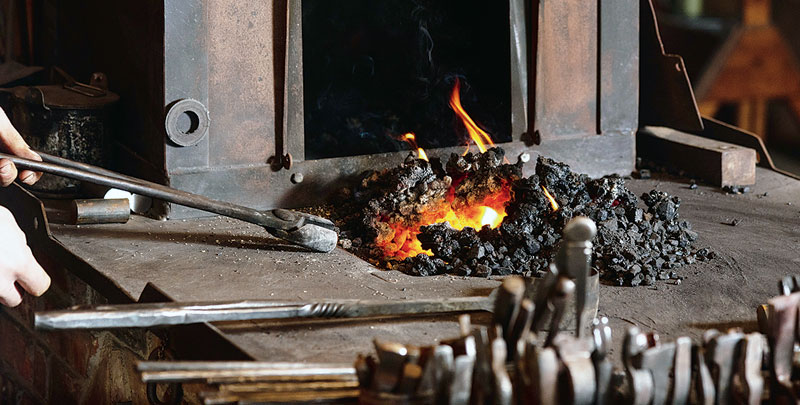 The steel blank is ready to work when it reaches about 2,000 degrees and glows a bright yellow, almost white. Away from the heat, the metal cools quickly, and shifts from the bright yellow to a deep red, and finally the dark gray shade of the relatively cold metal—”relatively,” because even when gray the metal can be 900 degrees or more.Insufficient heating makes the metal difficult to shape. But it’s just as crucial to prevent overheating, which makes the metal brittle or can even make it melt, in which case the piece would have to be scrapped.
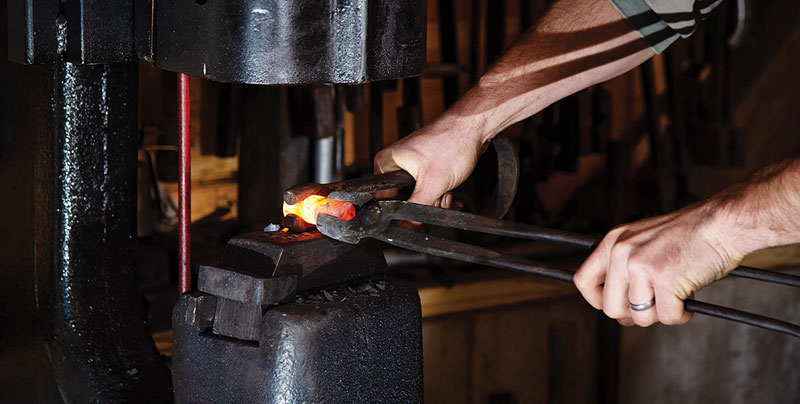 For the initial step of shaping the iron, Med grips the steel with a set of round-jaw tongs while using a spring fuller in combination with the electric power hammer to form an indented ring in the blank. From this ring, the head of the tool will be shaped on the top and the handle drawn out toward the blade end. As Med operates the power hammer by means of a foot pedal, his right hand controls the fuller shaping the metal, and his left hand rotates the tongs holding the blank to ensure even results. Even if you ignore the 2,000-degree piece of steel inches from bare skin, that’s a lot to keep track of. Add numerous questions from a photographer, and trouble could be found quickly. Needless to say, safety is the first priority.
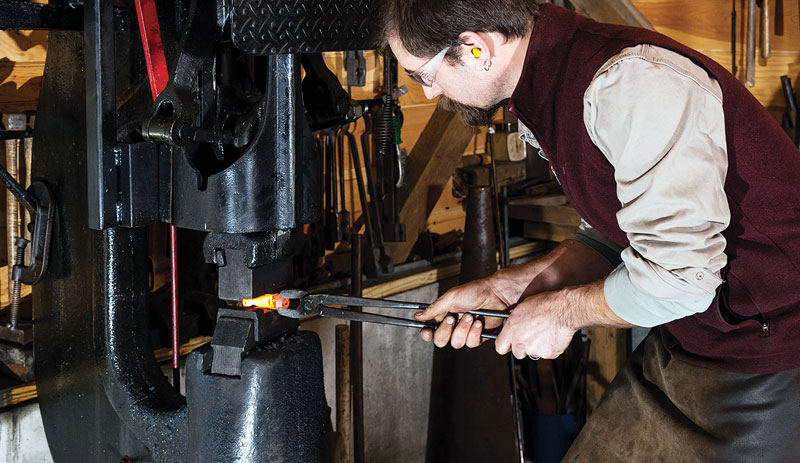 a. With the head of the iron roughly shaped, the metal is slowly lengthened into a handle with a process called drawing.
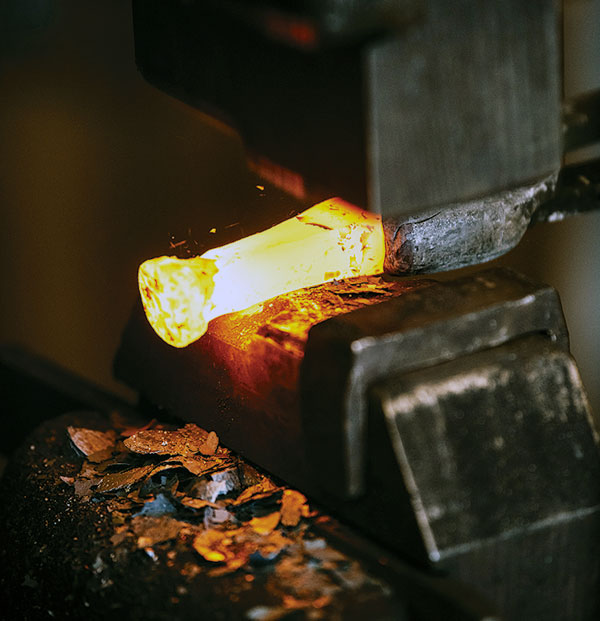 b. As with each step in forging, it’s a zero-sum game: the longer the piece is drawn, the thinner it becomes; with any manipulation, reducing or expanding one dimension will conversely affect another.
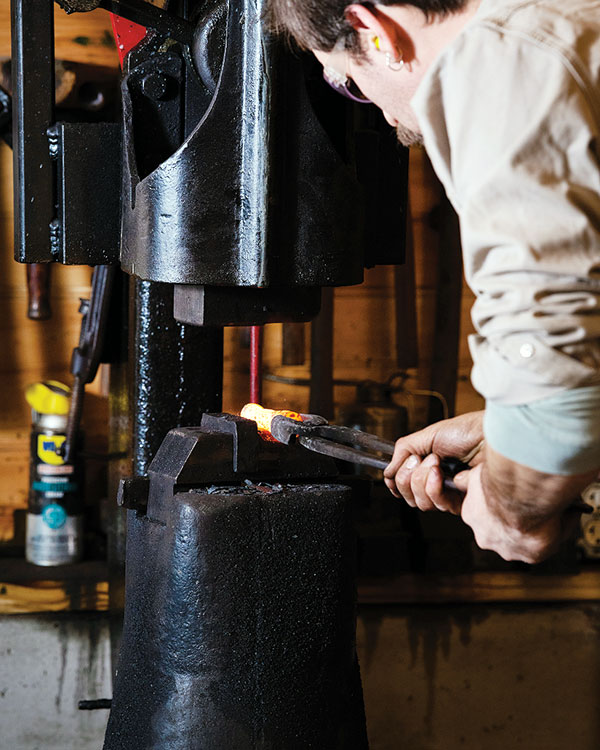 To reduce time later in finishing and to minimize material wasted, Med is careful to make the handle as round as possible during the initial shaping. As in the forming of the iron’s head, he rotates the blank under the power hammer. Skill and experience play an important role in all of these steps: too much hammer pressure at just the wrong time can easily create extra work getting the piece back in shape—or possibly even ruin the developing tool.
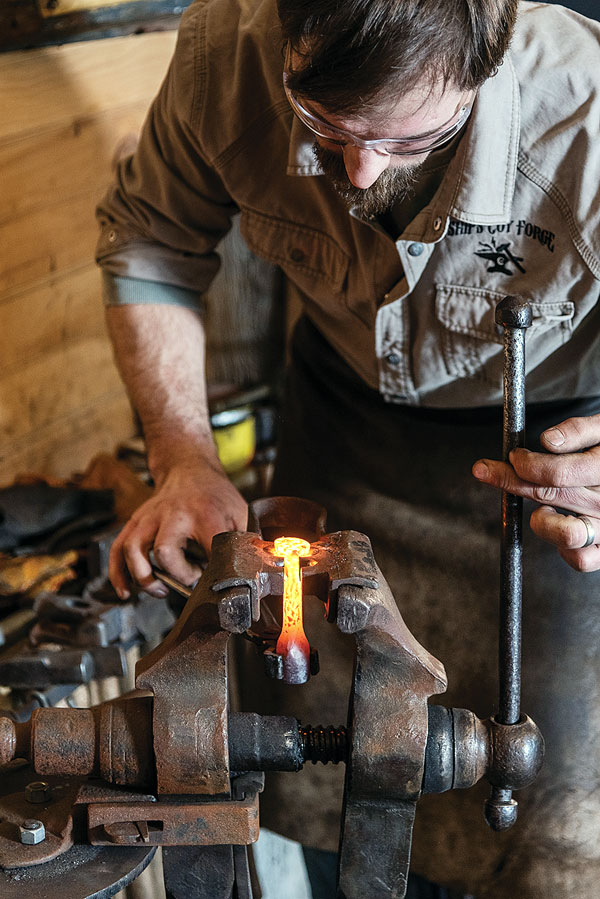 a. After the tool’s handle has been drawn out to the correct length, Med uses a vise-held spring swage to shape the head of the iron.
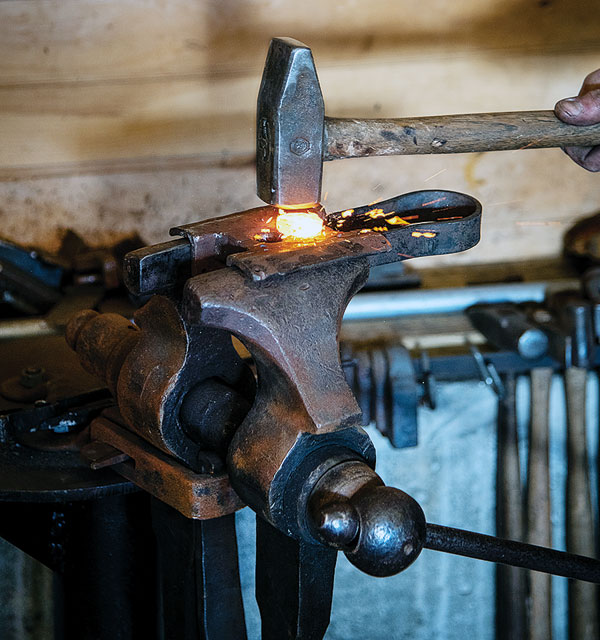 b. With the iron in place and the vise compressing the swage, he uses hammer blows to force the heated iron into the molded surface of the swage, giving the developing tool a softly curving transition from the head to handle.
 A cross-peen hammer is used to expand the metal outwards, forming a flat face; meanwhile, the caulking iron’s head is further shaped in the swage.
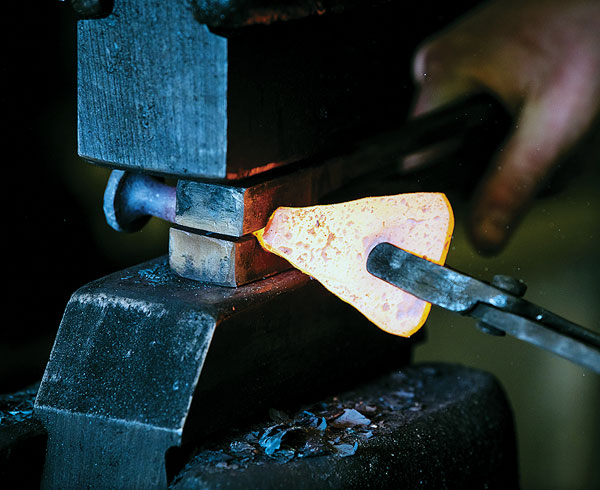
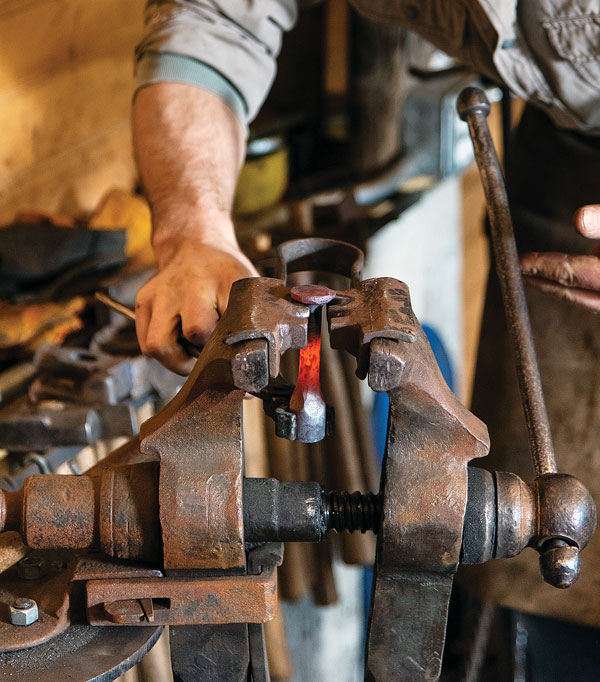 The metal is cooling and showing the resulting dramatic change in color. Here, the piece has cooled from bright yellow to a dark red, which is not the ideal forging heat. So it’s back to the fire pot to reheat the metal. Many such reheatings are required to make a single caulking iron.
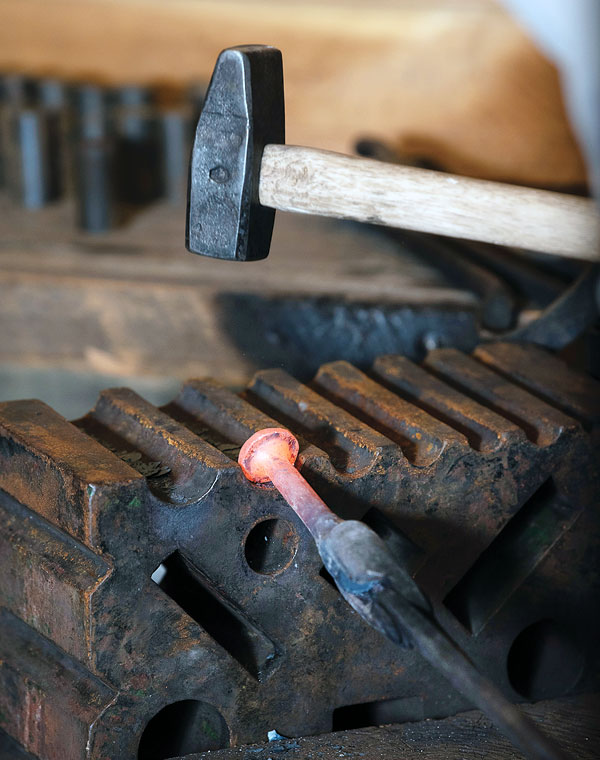 Using a swage block larger than the initial one, Med works the head and handle into a uniformly round shape. Several round-sectioned grooves are cast into this block; Med chooses the appropriate one for this iron.
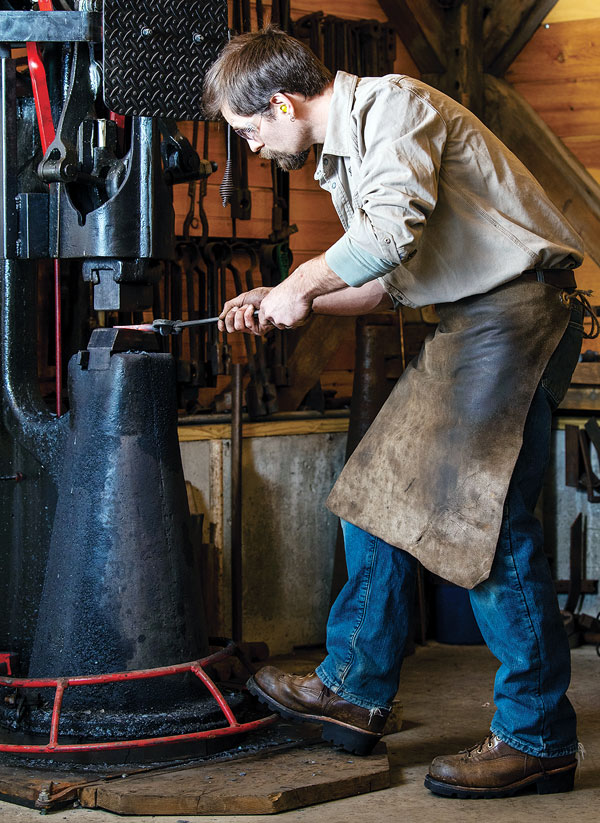 The next stage is forming the blade. This can be done by hammer on the anvil, but a modern—in blacksmithing terms—power hammer saves a little time and wear on the blacksmith.
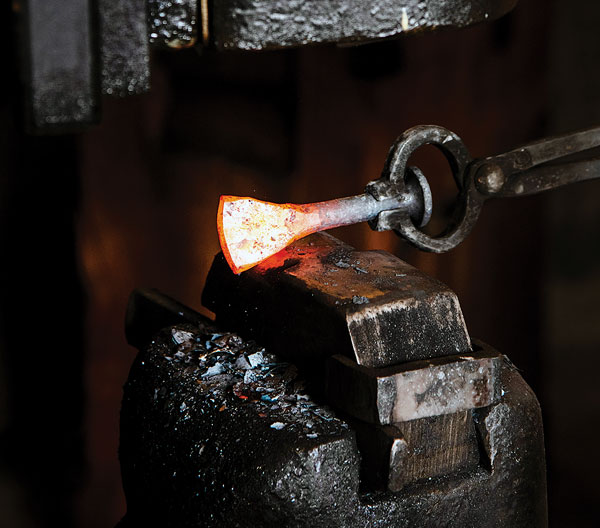 a. The gradual thinning of the steel into a blade takes a mix of techniques. As the material is drawn out, it is also spread and tapered toward the edge of the tool.
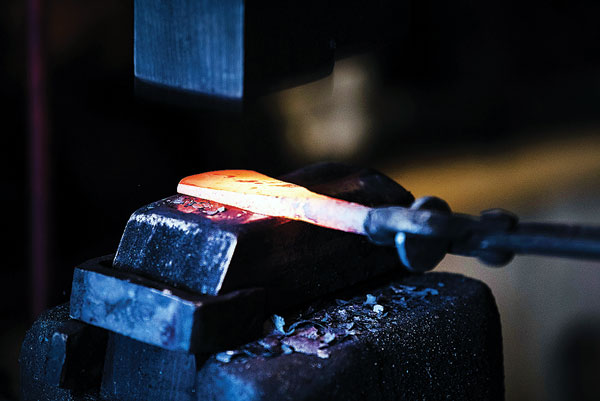 b. Grinding will yield the blade’s final thickness, but, by eye and hammer, Med forges it close to its ultimate shape.
 Experience gives Med the ability to know how much force is required to shape the metal as he works. The process of drawing and spreading the blade requires numerous trips from the forge to the power hammer, with quick stops at the anvil to fine-tune the shape of the tool by hand. Bit by bit, the red-hot steel is forced into the recognizable shape of a caulking iron.
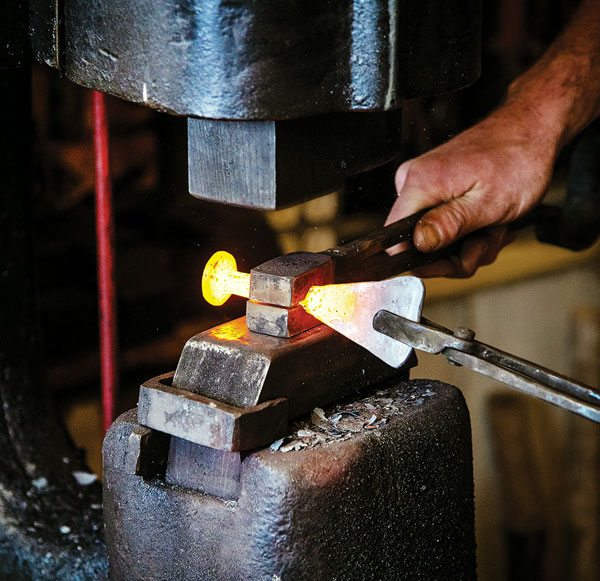 a. The iron’s overall shape continues to change with each step.
 b. Here, Med goes back to working on the handle with the spring swage to ensure it stays as round as possible before moving on.
 The opposite of drawing out material is called “upsetting.” If steel is forced back into itself to make the blade shorter in length, then the tool’s thickness or width—or both—will increase. As he forms the blade, Med watches the thickness of the tapered end and will upset the blade to prevent it from getting too thin before he is ready.
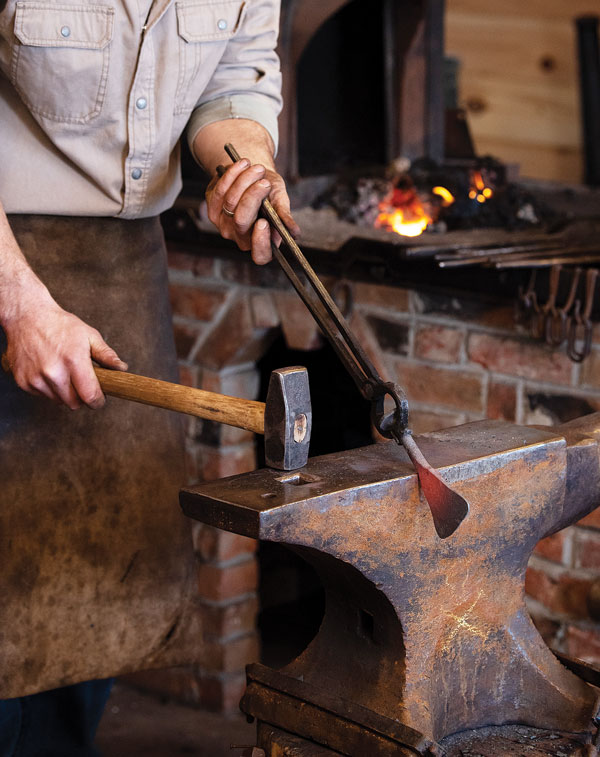 Final rough-shaping is done by hammer and anvil to carefully set the tool profile. Each surface and angle of the anvil serves a specific purpose. Its right-angled top corner can make sharp bends, while the large horn can form gradual curves. Moving from one to the other, Med makes incremental adjustments by eye.
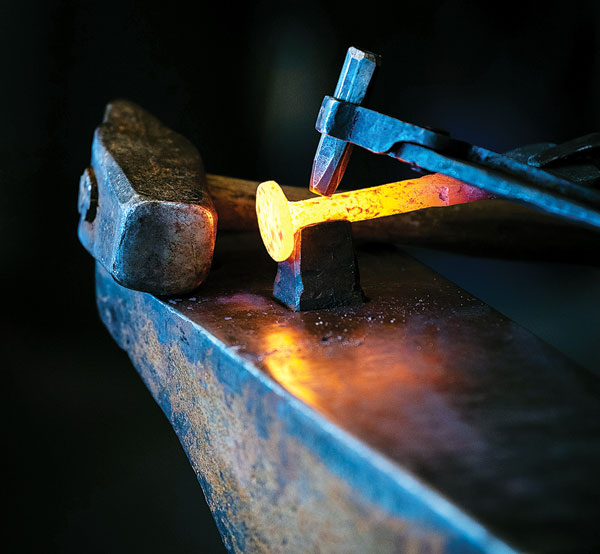 Using a bottom swage set in the hardy hole —the square hole in an anvil—to hold the iron in place, Med hammers down on a punch with the Ship’s Coy Forge logo on the end, thus putting his brand on the tool’s handle. This is the last step that requires the iron to be hot.
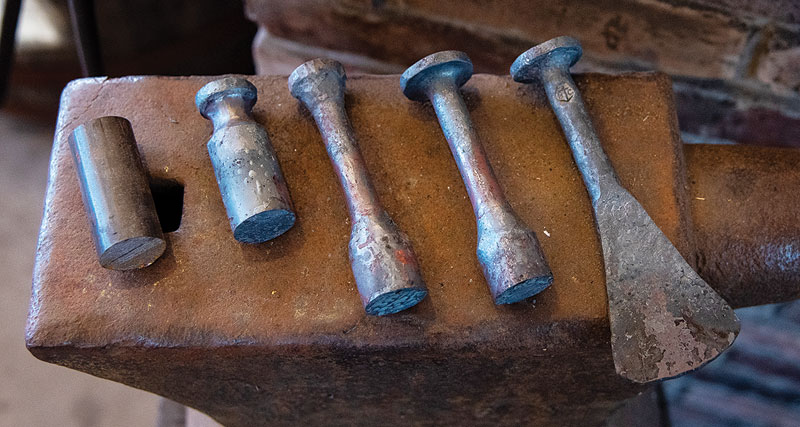
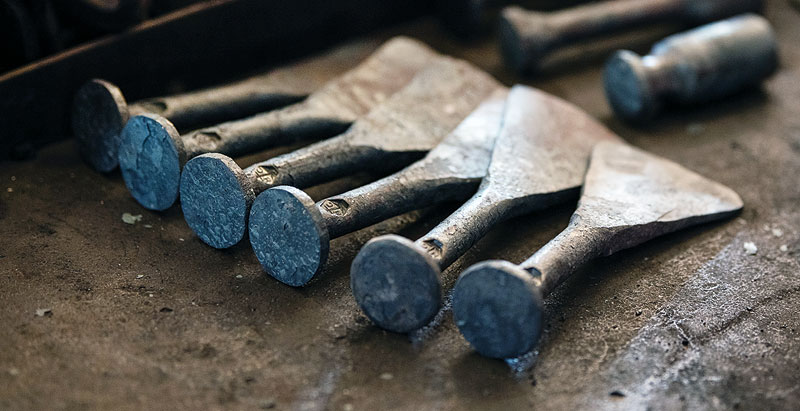 Steel blanks have been heated, pressed, hammered, and pinched into the rough tools seen here.
 Transforming the rough iron into a polished final product begins with a coarse sandpaper and continues on to finer and finer grits. Here, the rough edges of the head, handle, and blade have been cleaned up and faired with 36-grit, which easily cuts the unwanted material away and quickly removes any imperfections in the iron’s shape.
 Med continues from 36-grit to 120, and finally to 220; as he does so, the steel loses its rough, scorched texture and takes on the shine of polished metal.
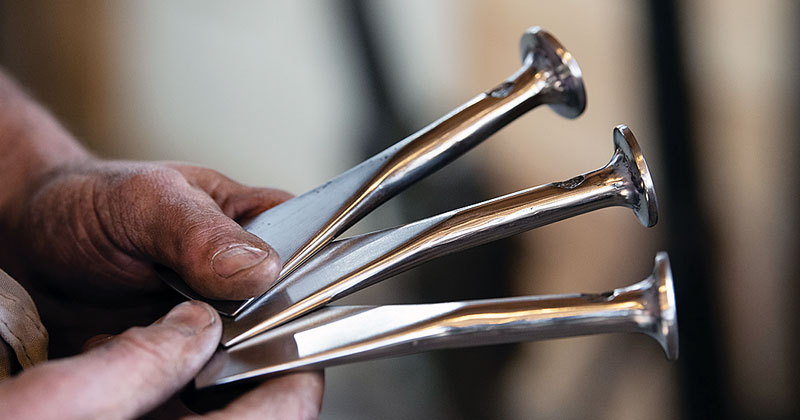 After a final turn through a wire wheel on a bench grinder, the iron is finished and ready for a lifetime of hard use.
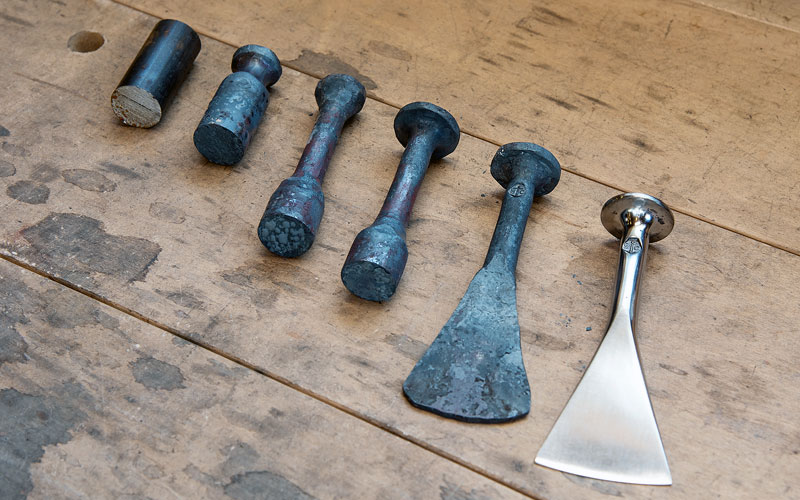 From a steel blank to a finished iron: here is the complete process. A single iron can be made in an hour or so. However, forging a dozen or two at a time streamlines the process greatly.
Tyler Fields grew up in Oregon, where his passion for photography and wooden workboats of the Pacific Northwest developed. Since graduating from Oregon State University and moving to Massachusetts, he has been photographing classic yachts and marine trades.