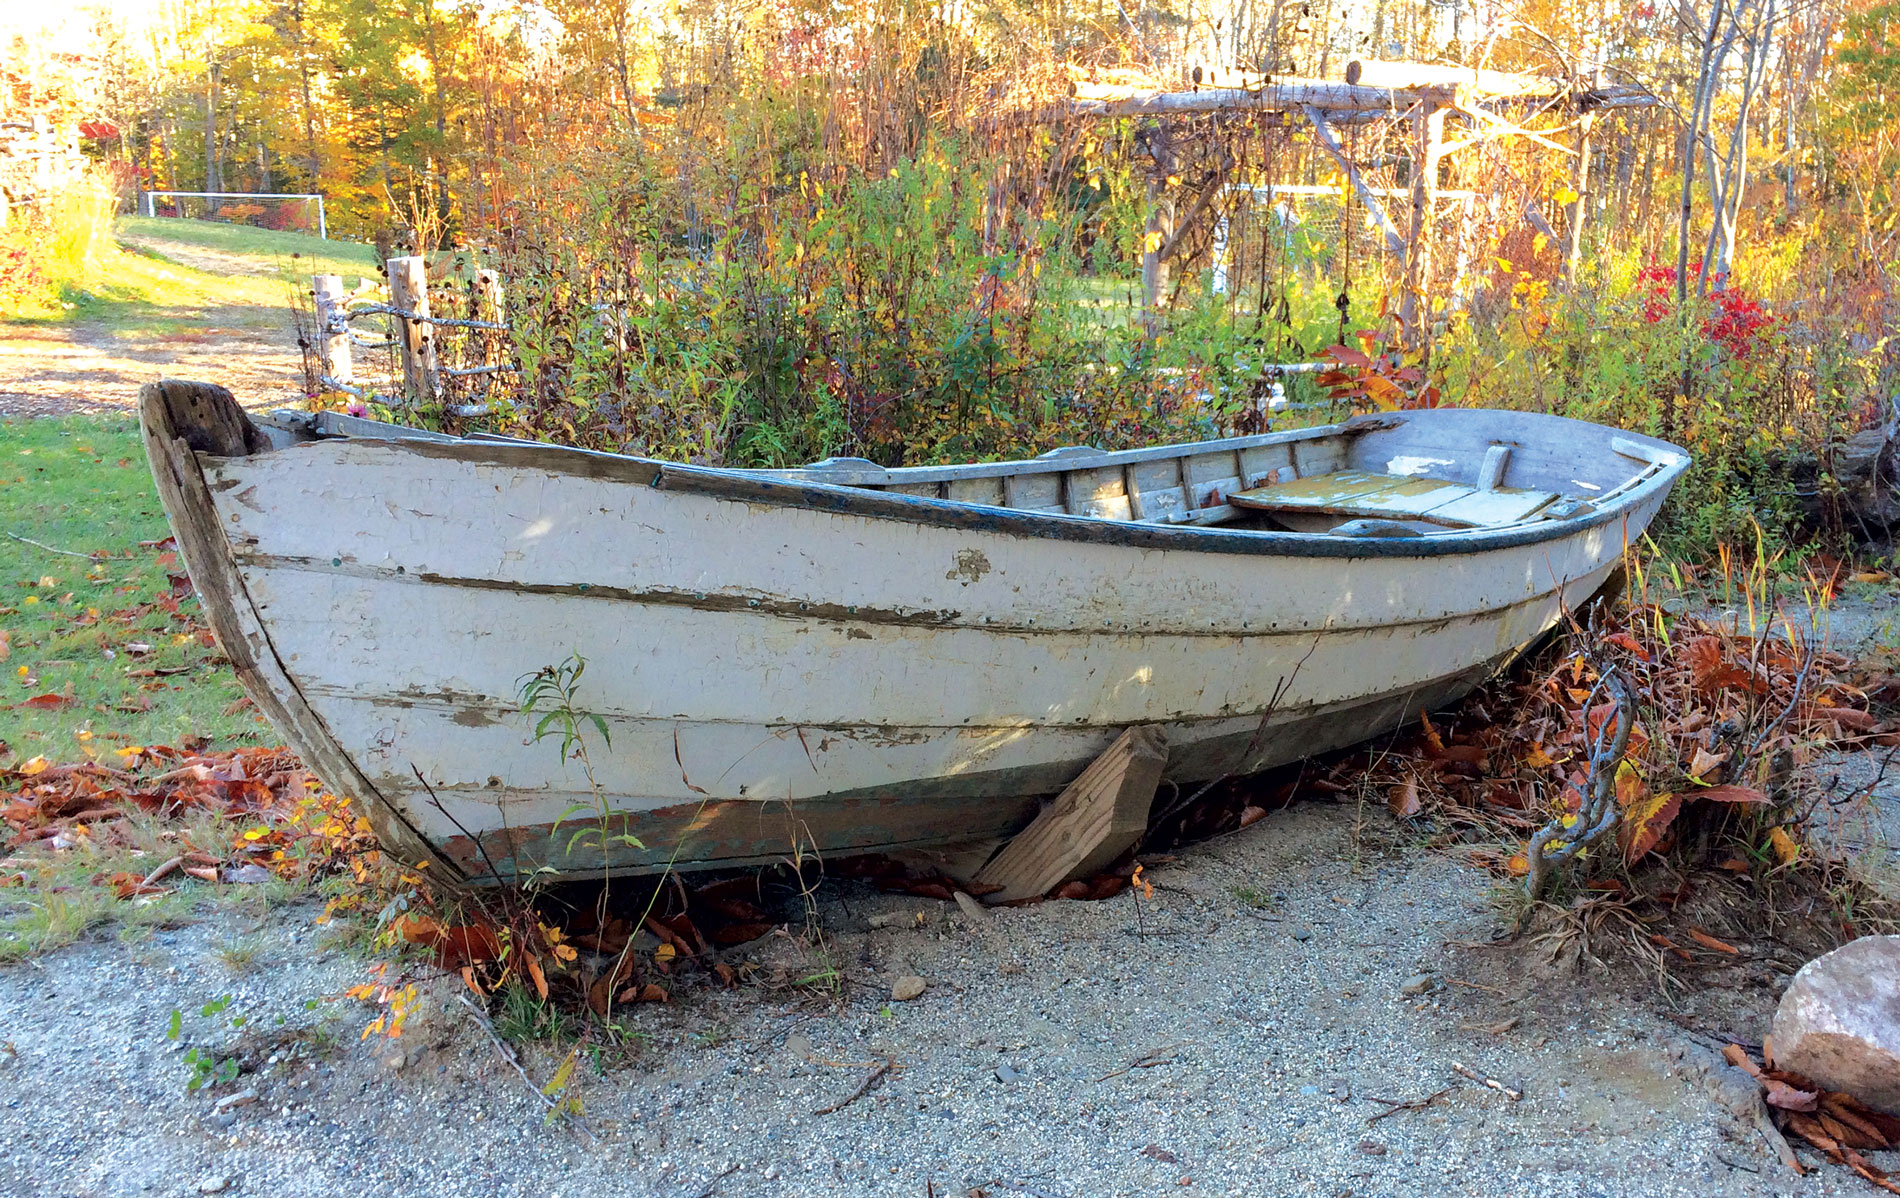
A Viable boat-restoration candidate.Matthew P. Murphy

Viable boat-restoration candidates often exist in seemingly hopeless cases, if one can see beyond the peeling paint to sufficient sound wood and fastenings.

There are few objects as handsome as a traditionally built wooden boat. Owning and sailing one can be a joy, and a wooden boat can have an intangible draw that can cloud the judgment of even the most cautious mariner.

Although most old boats need some sort of repairs, the question is not whether a boat can be fixed. Anything can be fixed. The question is, do you really want to fix it? How much time do you have? How much money? When do you want to get it in the water? This is not to suggest that you shouldn’t tackle a major boat-restoration project, but rather to offer guidance on making that choice, and seeing it through.

Boatbuilding is a bit like assembling a jigsaw puzzle; repair, however, involves plucking random pieces out of the completed puzzle, replicating them, and replacing them. It can be tedious, time-consuming, and expensive. Fortunately, we have tools, techniques, and materials that did not exist when the boat was built.

A classic small launch showing its age rests on a trailer before restoration.Artisan Boatworks

This 1927 launch built by J.O. Brown Boatyard had a deformed sheerline when she arrived at Artisan Boatworks for restoration; the deformation, or “hog,” starts near the after yellow strap. The shop lifted the stern about 4″ and locked in the restored shape with structural repairs.

The Initial Inspection

A professional survey by a knowledgeable professional is always advisable—especially if you are investing considerable funds in your project. But there is much sleuthing you can do on your own to winnow the wheat from the chaff, before you get to the survey stage. Approach the prospect as a skeptical observer. Don your overalls and arm yourself with a notebook, a flashlight, and an ice pick for probing wood softness (carefully used and, if shopping, only with the owner’s permission). Also bring a mallet for checking for the “ring” of solid wood, and an extra-sharp eye to check for twists, sags, lumps, and other general unfairness. Take notes and photos, and bring along a good dose of critical thought—as well as an open mind.

Begin with a visual inspection of the boat out of the water. The human eye is keen and it can quickly pick up discrepancies. If possible, get plans or a photo, or, better yet, visit a pristine example of the boat. This will give you a benchmark and you’ll have a better idea of what to look for.

First examine the sheer. Is it as elegant as you’d expect it to be or does it flatten out in the center or droop at the ends? Look for localized stresses or distortions. Look at the waterline. Has it been re-marked upward at the ends while remaining the same midships? Is the boat drooping at the ends? Sight down the keel for hogging. Some boats, such as Whitehalls and performance pulling boats with long straight keels, are quite prone to this.

Sight the hull from a variety of angles. Is it still straight and plumb or has a twist set in? Is the stem perpendicular and the transom horizontal from side to side? On double enders, are both stems vertical? If the boat is a carvel-planked, round-bottomed model, does the sectional curve still look smooth or are there “hard” places that look similar to chines? Those hard places could indicate a batch of broken frames. Check the planking at the butt blocks; unfairness there could indicate failed fastenings.

This Herreshoff 12½ requires complete rebuilding.Matthew P. Murphy

This Herreshoff 12½, while exhibiting an intact sheerline and relatively straight waterline, requires complete rebuilding; all of her structural elements are decayed beyond service.

There is a pantheon of fastenings used in the planking of traditional wooden boats. Copper rivets are top-notch. Copper clench nails—basically tacks bent over like one-legged staples—are a cheaper, faster, but lower-quality option. Iron screws and bolts are usually bad news and were often used by economy-minded builders. Chances are, unless you have a lot of time or money, restoration of an iron-sick boat will be problematic. Brass screws were often promoted as an upgrade; they didn’t rust, but over time they did fall prey to corrosion, especially when paired with iron fastenings in the keel; this mix of unlike metal in seawater causes galvanic action, whereby the less noble metal—brass, in this case—is wasted by the more noble one (iron). Also, brass screws are weak, even when new. Bronze screws are now considered the gold standard; they are rugged and, although they do corrode over time, can usually be extracted if removed before their deterioration progresses too far. Bronze ring nails are durable but miserable to extract when doing repairs. Stainless steel is occasionally used in freshwater vessels but is subject to corrosion in saltwater.

Looking at the planking, are the bungs (or putty) pristine or are there rust streaks indicating that the iron fastenings within are breaking down? Iron swells as it corrodes and it will push bungs out of their holes and can blow steam-bent frames apart, destroy keels, and attack wooden planking. If the bungs are tight, remove a few (with the permission of the owner). Does the metal look sound or, in the case of bronze and brass, is there a pinkish crumbly appearance to the fastening indicating galvanic corrosion? Galvanic action is bad news; if found here, look for it elsewhere in the hull.

Look for signs of refastening or over-fastening. Are there four bungs where’d you expect two, or six instead of three? If so, chances are the planks have been sister-refastened in a quick and dirty fashion, possibly weakening not only the plank but also the frames. Watch for cracked or broken planks, as well. Look for dark stains on plywood that is either varnished or epoxy-coated; this might indicate water intrusion. A slump in the surface of a painted plank might foretell concealed rot.

On to the backbone: Look for unusual hollows or raised uneven areas on the stem and transom. Hollows could indicate decay. Uneven areas could indicate Bondo, the auto body filler, which is inappropriate for a wooden boat because it soaks up water and thus can rot the wood around it. Investigate by gently tapping the surface with a mallet. Does it have the good “ring” of sound wood, or does it give you a dull “thunk?” Carefully probe the suspected region with the ice pick. Is the wood solid or does it have the consistency of an old jack-o’-lantern? Are there any mysterious locally swollen areas on the keel that might indicate corrosion-expanded iron keelbolts?

Proceeding to the interior of a cruising boat: Does the bilge smell fresh or ominously musty? Work from stem to stern. Look for signs (and sounds) of rot in the stem, keel, frames, floors, and transom. The lower ends of frames and transoms and the after ends of keels are prime suspects. If there is a centerboard or daggerboard trunk, are there signs of leaking? Are there any mysterious interior “water lines” that indicate that the boat has flooded? Watch for “furry” frames; decomposed oak can have this look. Check that any lockers have been well ventilated and that they have not been acting as unintended Petrie dishes. How do the keelbolts look? Are they intact and not corroding?

Finally, check out the exterior, breasthook, knees, rails, thwarts, hardware, and spars—especially if the spars are painted.

You will likely find at least a few shortcomings and character flaws that will take a little more than paint and putty to fix, but at least you’ll be aware of them. Does it still show promise? If so, the next step is to figure roughly what it will take to get the project up to snuff.

Telltale streaks of rust indicate a row of steel or iron fastenings.Greg Rössel

Telltale streaks of rust indicate a row of steel or iron fastenings in this lapstrake plank seam.

Starting Off: Plank and Fastening Removal

A common pitfall is to attempt to answer the Siren’s call to do a total restoration right now and bring the boat up to like-new standards. This is admirable, but unless you have unlimited time and money it is a recipe for acquiring an incomplete white elephant in the back yard with a batch of spare parts strewn about. If possible, a more incremental approach is the way to go. Order your priorities by breaking the project into three lists: 1) Must Do Now; 2) Work on Next Winter, and 3) Get to it Down the Road. You have already determined that you have a strong structure to work with. It’s better to build on that with sound and solid repairs that will get you safely out on the water in the summer and back into the shop for continued restoration in the winter.

A special saw is used to cut hull fastenings.Greg Rössel

The oscillating multitool is a boon to wooden-boat restorers. It handily cuts through, wood, metal, and other hard materials, and is ideal for quick removal of compromised frames, as seen here.

There has always been a requirement that a builder be creative in the use of tools—how to get a saw into tight situations to sever a fastening, cut off a moldering frame in a seemingly impossible location, or fashion a necessary scarf without destroying the edge of a cherished heirloom firmer chisel. That’s where the oscillating multitool comes in. It features a replaceable small blade that’s fixed at one end while the other end moves, or oscillates, rapidly back and forth in an arcing motion—sort of a combination of vibrating and sawing. The blade moves at a very high speed. The tools have a variety of easily changed blades, with perhaps the handiest being the titanium nitrate coated one that cuts wood with fastenings embedded. This tool is a game changer. Removing fastenings can be difficult. But first you must get to them. Unless you are dealing with light lapstrake planks, whose fastening heads are exposed on the outside of the plank, the head of the screw or rivet will be set into counterbored holes filled either with a bung or some sort of compound. The compound-filled holes can be (relatively) easily cleaned out using an awl and a mallet to tap and pick away at the filler. The resulting hole won’t be perfect, but it will be adequate to give you access to the fastening. For bunged holes in bright-finished surfaces, however, this technique will likely leave an unsightly chewed-up result on the plank that will stand out like a sore thumb. The Rotabroach Sheet-Metal Hole Cutter made by the Blair Equipment Company (see Review, WB No. 264) is the answer in such cases. Rotabroach hole cutters are designed to be used with handheld power drills for boring precision holes in sheet metal, frame materials, and plate, but are also ideal for removing bungs or compound that fills counterbores. They produce clean, sharp-edged, bung-sized holes that allow easy access to the fastenings below without injuring the surface or the fastening—be it a rivet, slot-, Frearson-, or square-drive screw. It’s a tool worth considering.

The RotabroachMatthew P. Murphy

The Rotabroach, while designed for sheet-metal work, has proven to be an ideal tool for quick and clean bung removal, even in bright-finished surfaces. These photos show one in a series of eyebrow-trim fastenings that required inspection and rebedding.

The holes were re-bunged, the finish was rebuilt locally.Matthew P. Murphy

After the holes were re-bunged, the finish was rebuilt locally; following a few years of service, the new bungs mellowed to the hue of the surrounding wood, making the repair invisible.

Copper rivets are the easiest plank fastenings to extract. Start by taking an awl or a prick punch and, using a small hammer, make a small dent in the head of rivet. Then, take your variable-speed drill and a sharp bit that is the same caliber of shank of the rivet, and slowly bore through the copper head. Very soon the head pops off the shank of the nail and onto the bit. Take a thin punch and drive the rivet out through the plank.

Screws are like pirates: there be good and there be bad. Bronze screws can usually be extracted with little problem. They can also be a bit set in their ways when bound to the surrounding wood. To fix this, select a screwdriver that closely matches the slot of the screw. Insert the tool into the slot and give the end of the handle a smart blow with a hammer. Then use a brace and bit to slowly back out the screw. If a screw still won’t budge, and its head is compromised, it can often be removed with a screw extractor. These devices, available in most hardware stores, resemble tapered drill bits, but have steep flutes along their lengths that spiral in the opposite direction from a screw’s threads. Carefully drilling a longish hole into the screw’s shank and then chucking the extractor into the drill and spinning it into this hole in reverse, is a good last resort for screw removal.

Brass screws are trickier than those of other metals. They might be removed as previously described. Then again, the head may just crumble. In that case, you may have luck—or not—using a screw extractor. You may also be able to sneak the blade of an oscillating tool between the frame and the plank and cut it.

Ring nails are miserable and, if they were properly installed, will be intractable. Again, the oscillating tool could possibly be used to free the plank from the frame. It may also be worth sacrificing the plank by using a small-diameter hole saw to cut around each nail. Then pull off the plank over the nails and slice them off at the frame.

Before attempting to remove the plank, remove all the seam compound and caulking cotton.

Usually, replacing boat frames is best.Matthew P. Murphy

With joinery removed and easy access to the inner hull, full frame replacement is preferable to scarfed-in repairs.

Frame Replacement or Repair: Several Approaches

Although total frame replacement—rather than repair—is usually desirable, the required disassembly of so many other components just to reach a frame or two might make it impractical. There are cases, however, in which the access to the broken frames is relatively unimpeded, and the removal of a plank or two allows for easy clamping of a scarfed-in new section.

On the other hand, imagine a classic lapstrake runabout in which the lower ends of the frames are rotted but the rest of the frame is sound. The boat has a lot of interior furniture, cables, and wiring and there is a deck to contend with. The run of the frame along the bottom is nearly flat until it takes a sharp turn at the bilge; the upper end of that flat portion is a perfect place for an epoxy-glued scarfed-in new frame section.

Now consider a boat with a few frames broken at the turn of the bilge. In his 1955 book Boat Carpentry, Hervey Garrett Smith offers a repair called “the slit sister frame. The basic idea is to cut a section of straight grained, green or air-dried frame stock of the dimensions of the original frame and long enough to overlap at least two planks on either side of the break. The sister is slit on the flat, with the slit stopping not less than 4″ from the end. Smith writes that “the main reason for slitting the frame is to eliminate the severe deformation of the wood fibers that caused the old frame to break. Thus, when the slit frame is bent, the inner half can slide by the outer half with no distortion.” The sister is installed next to the broken frame with the slit side down, for drainage. Clean the caulking from the region of outer plank curve distortion. Line up some braces to help you with the bending on the interior (practice on the broken frame alongside). A brace for fairing the plank on the outside is helpful, as well. The new frame section will be fastened with bronze machine screws, which will also pull the planks back into fairness.

A boat bottom is exposed for structural repair.Greg Rössel

Because the entire frame runs were readily accessible, full frame replacement was the best course in this flat-bottomed runabout. If the upper frames were intact, however, and access there was obscured, the straight lower portions would be good candidates for scarfed-on new frame heels.


Sometimes a broken frame can be fixed by running another one alongside.Isaac Robbins, afer Hervey Garrett Smith

In some cases, a broken frame must be sistered rather than replaced. The repair illustrated here was described by Hervey Garrett-Smith in his book Boat Carpentry. It shows a frame section of the same sectional dimensions as the original, kerfed for easy bending, and spanning at least two planks on either side of the break.

Here’s one final frame-repair scenario: Several years ago, Wooden­Boat School’s catboat developed a chronic planking leak far forward under the deck. The planking would not hold caulking. Upon investigation, it turned out that a few frames had been removed and never replaced. The solution was to install new ones. But the tight space precluded the “Smith” solution described in the previous paragraph. So, we scribed patterns onto a piece of plywood and carved a suitable pair of replacement frames. This solution presented three choices of stock: A laminated version or one fashioned from either black locust or hackmatack with suitable curved grain. Having access to a suitable offcut from a large hackmatack knee, I went with that. The shape was traced from the pattern, but the stock was cut oversized to accommodate the twist that needed to be scribed and carved into the pieces. A forward end of the already-problematic plank was removed and a butt block added for eventual joining of the new plank end to the old. With the plank removed, the frames could be clamped into place and fastened with machine screws. The new plank end was fashioned and, again, fastened with machine screws to the frames and butt block and caulked.

And so it is with repairs: four different approaches were needed in four special circumstances to achieve basically the same result.

Small wooden pieces can be glued in place as repairs.Greg Rössel

Carefully glued-in dutchmen can be used to repair damaged portions of planks that are otherwise sound.

Dutchmen (Graving Pieces) Small and Large

Graving pieces, also called “dutchmen,” have long been used to repair or salvage otherwise-sound stock—even in new construction. Early methods depended mostly on mechanical fastenings, but epoxy adhesives have been a game-changer in adding strength to such a repair.

Common structural areas to be repaired with dutchmen are exposed top edges such as transom tops and coaming edges. Begin by selecting wood that closely matches what is being repaired. Then, fashion the repair piece slightly larger and taller than the area to be repaired. Clamp the graving piece against the injured area and trace the graving piece’s shape onto it. Carefully cut away the compromised area to the shape of the graving piece, until the graving piece fits tightly. Dry-fit the graving piece and bore through its upper surface and into the fixture for a couple of bronze fastenings. Disassemble, spread the joint with thickened epoxy, and glue and screw the piece in place. After curing, bung the fastening holes, shape the exposed edge, and sand and finish to taste.

A plank edge can be repaired with a new edge piece glued on.Greg Rössel

In some cases, as seen here, an entire plank edge can be repaired with a glued-on replacement.

Planks that have developed shallow decay pockets (say, ¼″ or so deep) can be salvaged with a graving piece. The most popular version is a diamond shape with irregular sides. As with the previous repair, it is easier to make the receiving mortise to match the graving piece than the other way around. Cut the diamond then plane a slight taper into its edges, like a tapered plug. Place the diamond over the decay and trace around it with a pencil. Then, using a small-caliber mortising bit in a router, clean out the rot while staying clear of the drawn lines. Check to be sure all the rot has been extricated down to good clean wood. Then, with a sharp chisel, finish the job to the drawn pencil lines. Check the fit of the graving piece. If it looks good, file a small glue relief hole into the side of the graving piece that will relieve the hydraulic pressure that otherwise would build up when the patch is pressed into place. Softwood sucks up the glue, so be sure to soak the mortise with thin epoxy and then apply some that has been thickened. Plane the graving piece flush after the glue has cured.

Small defects can be repaired in a similar fashion by using shallow mortises cut with a round Forstner bit and plugged with a matching cut round plug. (Do a test run on test stock to make sure they indeed match.)

Occasionally on a small boat you will find otherwise-sound planks that have rotted edges. The top-notch solution would be to replace the entire plank, but there can be a considerable cost in material and time in this method. Another option is to simply replace the edge by cutting out the dubious wood and gluing in a strip that is the same thickness as the original. Though it seems a bit odd, it is no more so than any other strip planking: sound wood to sound wood joined with a strong glue line. Begin by removing the compound and caulk from the edge adjacent to the repair. Remove the fastenings along that edge as well. Mill out your plank strip slightly thicker than the original plank and cut a batten that is slightly narrower than the new strip. The batten will guide your Japanese rip handsaw, which you’ll use to remove the sacrificial wood. With the old strip of planking removed, clean up the remaining edge with a sharp hand plane.

The stem of the Friendship sloop.Greg Rössel

The stem of this Friendship sloop had localized damage outside of the rabbet line; the portions of the timber in contact with planking, however, were intact. To avoid a major stem replacement, a large dutchmanstyle repair was accomplished.

Check along the run of the new to see if any hollow must be worked into the interior face. Then, warp the strip into its location to determine the edge bevel. When the fit looks good, prepare for gluing. Insert pieces of plastic sheeting between the plank and each frame. Work out your sideways clamping-and-wedging strategy. Have your drill, countersink, and screws at the ready. Prime the mating edges with thin epoxy, then, using slow hardener, mix up a thickened batch. Apply thickened epoxy to the edges and, working from bow to stern, begin drilling and fastening and clamping; you can also wedge the strip against the plank. After the epoxy is cured, fair the repair and fill the screw holes.

One task that can be a deal-breaker is a backbone repair, especially on a large boat. Replacing a stem or keel is daunting and expensive. Consider, however, a partial stem repair I accomplished on a Friendship sloop—a repair that did not require complete replacement. The lower end of the timber had blown apart because it had developed iron sickness at the bobstay anchor points; the rest of it was sound.

Upon inspection, it was determined that the damage did not extend into the rabbet and that we could simply cut back to the apex and install a jumbo dutchman without any loss of strength. This repair was akin to installing a false stem on a dory—only more complicated.

We began by unfastening the forward ends of the adjoining planking. This revealed that, indeed, the stem was unaffected from the rabbet inward. A pattern was made of the curvature of the stem face. The stem was then cut back to the middle line of the rabbet—the place where the inner corners of the planks land—for a section of the stem. We’ll call it the apex here. Like the smaller graving piece described previously, the ends of our repair had low straight angles with nibs cut in.

Next, a single laminate was steam bent in over the apex; upon cooling, it was bedded in epoxy and screw-fastened to provide a fair surface for our soon-to-be-laminated graving piece to land upon.

The curvature of the fairing laminate and the nibbed ends were traced onto plywood and, using this curved shape, a gluing jig was fabricated. The laminates were milled thin—about ¼″—to eliminate springback. The laminates were steamed and bent to shape ahead of time and left to cool and take their set. Then after sheathing the jig in plastic, the laminates were heavily coated with epoxy, firmly clamped to the jig, and left to fully cure overnight. Meanwhile, the plywood tracing was cut along the drawn lines to create an accurate pattern for the graving piece.

After curing, the excess glue squeezeout was planed off, the pattern was traced onto it, and the faying surfaces of the graving piece were trimmed to shape. The graving piece retained its shape so the fitting was a relatively straightforward task. Thickened epoxy was applied to the inside of the graving piece, and it was clamped to the stem and left to cure. All that was left to do was to fair in the curvature of the stem face and the tapered sides. The rabbet was cut in and the stem was back in business, ready for replanking.

Is that a lot of steps? You bet. But it’s way cheaper and faster than gutting the hull and replacing the entire stem, and there’s no compromise in quality.

An expedient cabin-side replacement.Greg Rössel

For an expedient cabin-side replacement on a Friendship sloop, the author laminated new sides on top of the old ones. Here, he’s protecting the old sides from the inevitable glue squeezeout.

Deck Furniture as Bending Form

Here’s one more example of saving time and money using new technology and tools: replacing trunk cabin sides and coamings.

Classic boatyards have numerous advantages over the backyard restorer. Two worth noting are 1) access to high-quality lumber in long lengths and widths and 2) access to experienced employees. Fabricating new trunk cabins and coamings of solid stock is a big deal involving persnickety pattern making and joinery, handling large, heavy stock, a prodigious steambox, and many fast-acting clamps and hands. Replicating such a facility in the back yard would be difficult. If your cabin sides need replacing, you may actually use the existing cabin or coaming as a form to laminate new sides using high-quality marine plywood and epoxy built up to the desired thickness; the outer layer could even be a layer of veneer so the finished piece resembles solid hardwood.

The gluing-up of new cabin sides.Greg Rössel

The gluing-up of new cabin sides, using the in-place originals as bending forms, requires a well-conceived clamping strategy.

For either operation, it is worth taking the time to make a pattern using relatively inexpensive ¼″ underlayment plywood. Your finished plywood stock can be scarfed to length if necessary. Working one side at a time, begin by removing the hardware—port lights and such—from the cabin side. Remove some of the cabin top to allow clamp access. Then assemble your full-length pattern for the side, making it over-length and over-width to allow enough excess to trim to the finished dimensions and bevel to fit the deck. Wrap the plywood around the existing cabin side and clamp it into place. Using a pencil riding atop a block, scribe the curvature of the deck onto the pattern. Remove the pattern and cut out the curvature of the deck. Return the pattern to the deck and re-clamp. At this time, record all the necessary information—port light locations, the height of the top edge at regular stations, the forward and after ends of the side, and so on.

Prefabricate your laminates, scarfing them to length as necessary and staggering the scarfs. Fasten plastic sheeting along the side of the cabin and deck to catch excess glue, and to keep from adhering your new cabinsides to the old ones. Work out your clamping schedule and pads to assure proper clamping pressure. Round up some friends. This job involves lot of slippery epoxy, so to keep the glue-up under control; the job is best done in stages, one layer at a time.

A classic small boat on a trailer in a rural field.Matthew P. Murphy

What it’s all about: A carefully maintained Herreshoff 121⁄2 awaits spring launching at WoodenBoat School.

Using slow-curing epoxy, wet out the laminates with first a thin then a thickened mixture. Bring the laminates to the cabin side and begin clamping. Sheetrock screws can be used where necessary to increase clamping pressure on the interior faces of the glue-up, though they’ll mar the outer layer if it’s to be bright-finished; these screws will be removed after the glue cures and their holes filled with thickened epoxy during the application of the next layer. Let the epoxy cure fully.

Repeat the process for the other side. After both sides have been fabricated, you can remove the original sides to fit your replacements.

This process is non-traditional, but the result is as strong as the original, and it gets the job done efficiently and within the scope of a home workshop.

And that, ultimately, is what it’s all about: new approaches, alternative technology, and thinking outside of the box that will get that classic back on the water.


Epoxy

Epoxy adhesives are a boon to restoration. They are formulated in a number of strengths, viscosities, curing times, and abilities to bond dissimilar materials. There are thin epoxies for penetrating rot and standard ones that can be amended for different but simple bonds. There are fillers and surfacing compounds for filling in minor imperfections. Some epoxies can glue damp woods or be used on wet surfaces—and even underwater. Others are made to ruggedly adhere to difficult-to-bond hardwoods. One does need to know the attributes, limitations, and qualities of the product being used, and it shouldn’t be a replacement for good workmanship, but epoxy adhesives, used properly, have made a world of difference when making repairs. 

—GR

The Case for Plywood Rudders

The case for plywood rudders.

Builders once used iron drift pins when they were looking for strength in building up items such as centerboards and rudders. These were efficient and economical until the iron swelled as it corroded—so much so that it would blow out the side of the wood containing it. A better but much more expensive alternative would be to use bronze drift pins in a replica replacement. But why bother when we now have access to high-quality marine plywood that can be laminated with epoxy to the same dimensions as the original? Sheath this assembly with Dynel cloth and it’ll be tougher than a boiled owl, and there will be no warping, twisting, or swelling.

—GR

  Article ends.

Greg Rössel is a contributing editor for WoodenBoat.