
Designed by Joel White and built by Jimmy D. Steele, the Jericho Bay Lobster Skiff is a scaled-down version of the classic Maine lobster boat hull. Author-boatbuilder Tom Hill adapted the design, originally meant for plank on-frame construction, for strip-planking in the winter of 2008-09. In Part One of building the Jericho Bay Lobster Skiff, Tom described the process of measuring this “little gem of a skiff,” and proceeded to make molds, set up a building jig, and plank the boat. Here, he describes the completion of the project — the fiberglassing and fitting out.
Installing the Keel
I installed the keel before I fiberglassed the hull, butting the glass up to the keel and adding a fillet of thickened epoxy along the joint between the fiberglass and keel. Alternatively, the hull could be glassed before installing the keel, and the keel would then cover the joint where the fiberglass butts along the centerline. Either way will work fine.
The finished dimensions of the keel are 2″x2″. Mill the keel stock out of straight mahogany to 2 inches thick by 24 inches wide; this extra width provides sufficient depth to allow scribing in the deep concavity of the boat’s bottom while maintaining a consistent 2″ depth of keel.
The after end of the keel has a 12” long bevel, leaving a keel depth of 1/4″ at the transom. The forward end of the keel has a step scarf to accept the outer stem. With the keel stock left long forward and scribed to fit the bottom curve, measure back about 14” from where the stem starts curving away from the keel, and make a saw cut 1” deep.
From the bottom of that cut, draw a scarf line forward 14″ to a feather edge and cut the scarf.

To position the keel perfectly straight, snap a chalkline down the centerline and make tick marks 1″ away from it on both sides, then connect these marks using a straightedge and a pencil. Brush epoxy onto the hull between the lines and on the corresponding mating surface of the keel. An extra pair of hands is helpful in fastening the keel: one to hold the keel straight, and one to crawl under the boat and drill and drive screws.
Fiberglassing the Hull
Skiffs such as these are perfect for island-hopping and picnicking. There are few sandy beaches on the coast of Maine, where this boat is to be used; here most have barnacle-covered granite rocks. We therefore wanted some bulletproof sheathing, so we used 24 oz. biaxial cloth on the outside of this hull. This cloth is thick and strong, and it requires a lot of resin to wet out. I’ve never been fond of fiberglass work. It’s always sticky and often itchy. I always wear gloves, even when handling the dry cloth.
I built this skiff in the winter in the old milk house at WoodenBoat School — a brick barn with no insulation. The air-exchange rate was a little too good. It was January in Maine, and I was barely able to keep the shop at 60 degrees. Any colder would have made fiberglass and epoxy work impossible. I think 75 to 85 degrees is the best temperature for ’glass work. The work goes faster with two people; in the photos, Aaron Porter, this skiff’s owner, is helping me in the following steps, which outline the basic process of fiberglassing this hull.
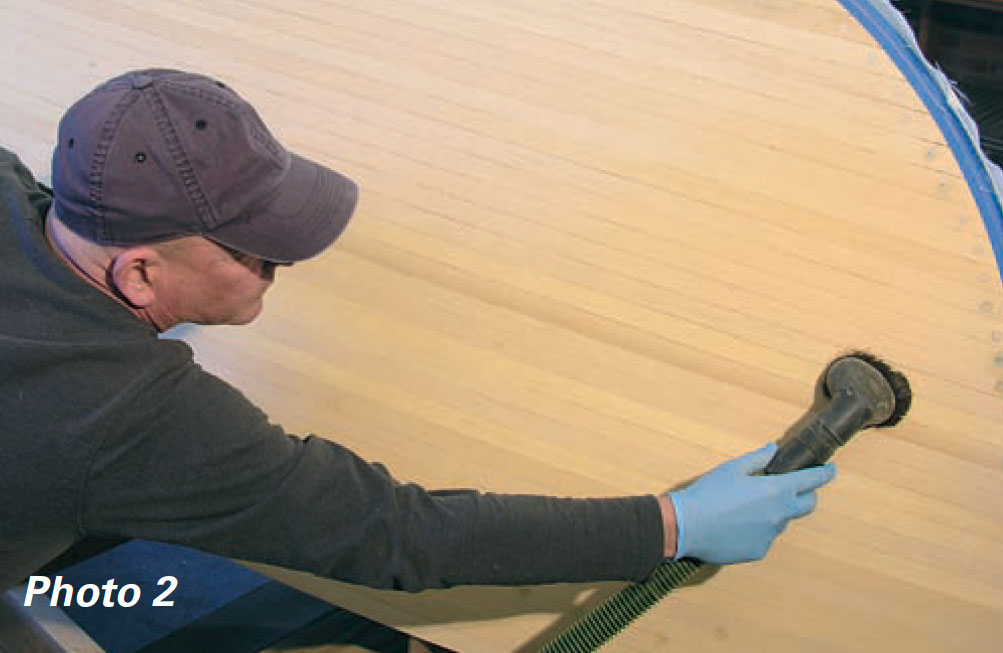
First, vacuum the hull thoroughly using a brush attachment. You want a smooth, clean surface for the fabric.
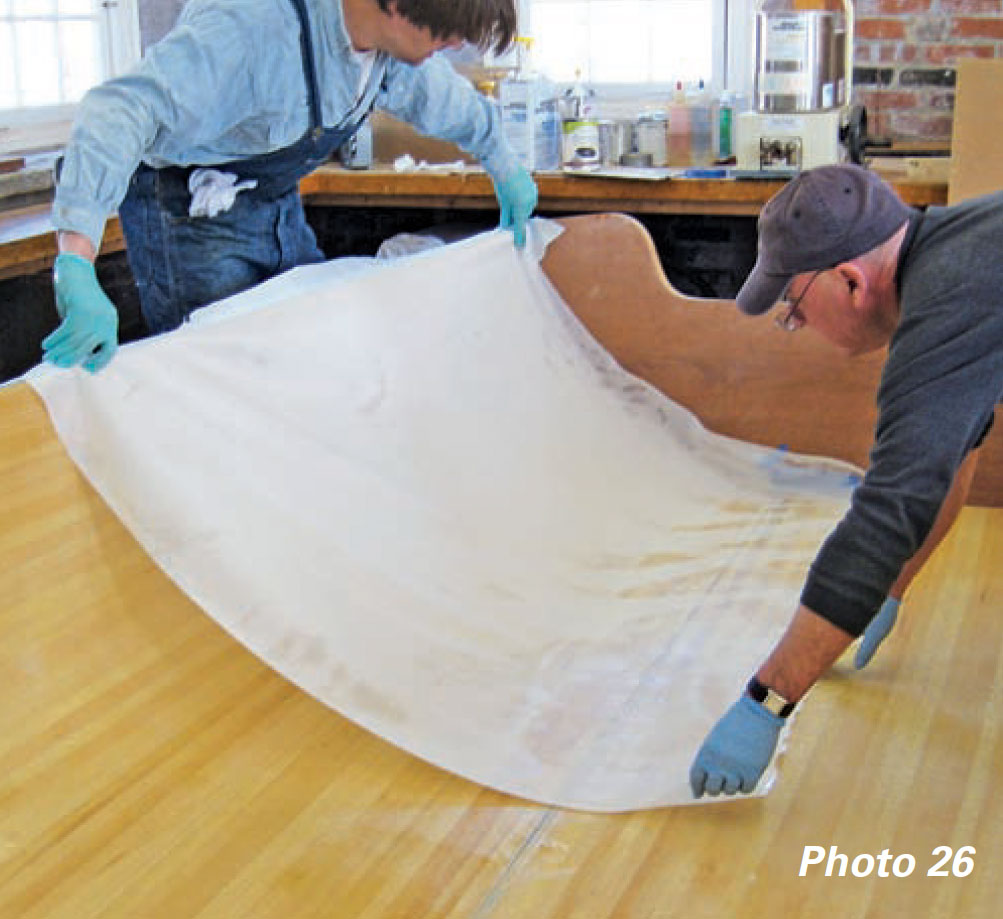
Biaxial fiberglass cloth has woven-roving fabric on one side and ’glass mat stitched to it on the other side. Put the mat side against the wood with the woven side facing out. Roll out the ’glass on the hull and trim it, leaving a little extra at the edges.
It’s a good idea to make a witness mark on the cloth and hull to help align the cloth when it goes back on. With the cloth trimmed, roll it back up and set it aside.
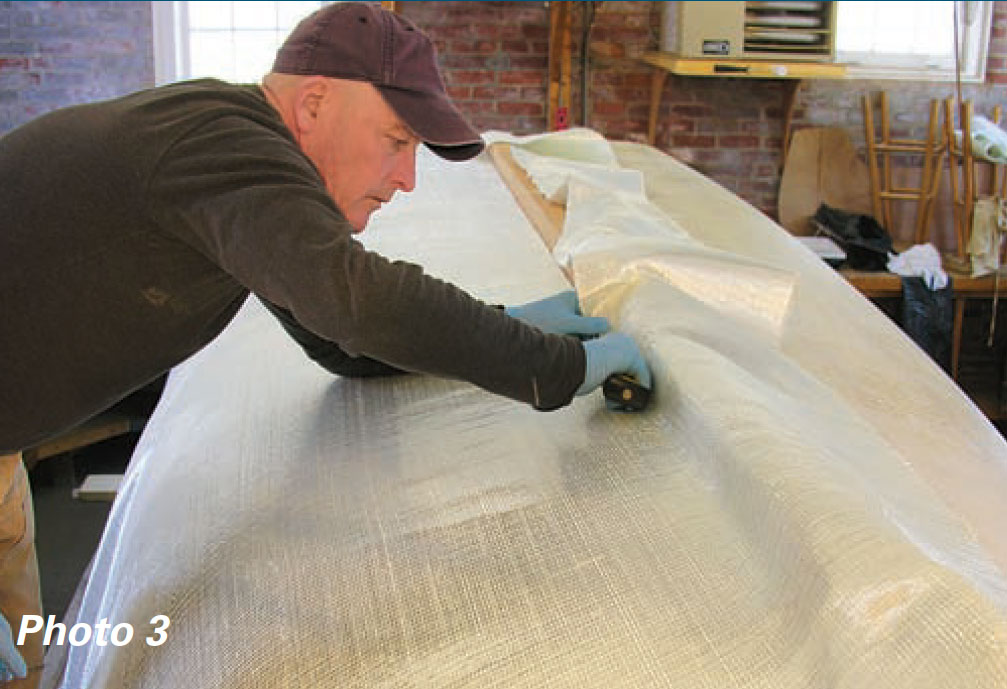
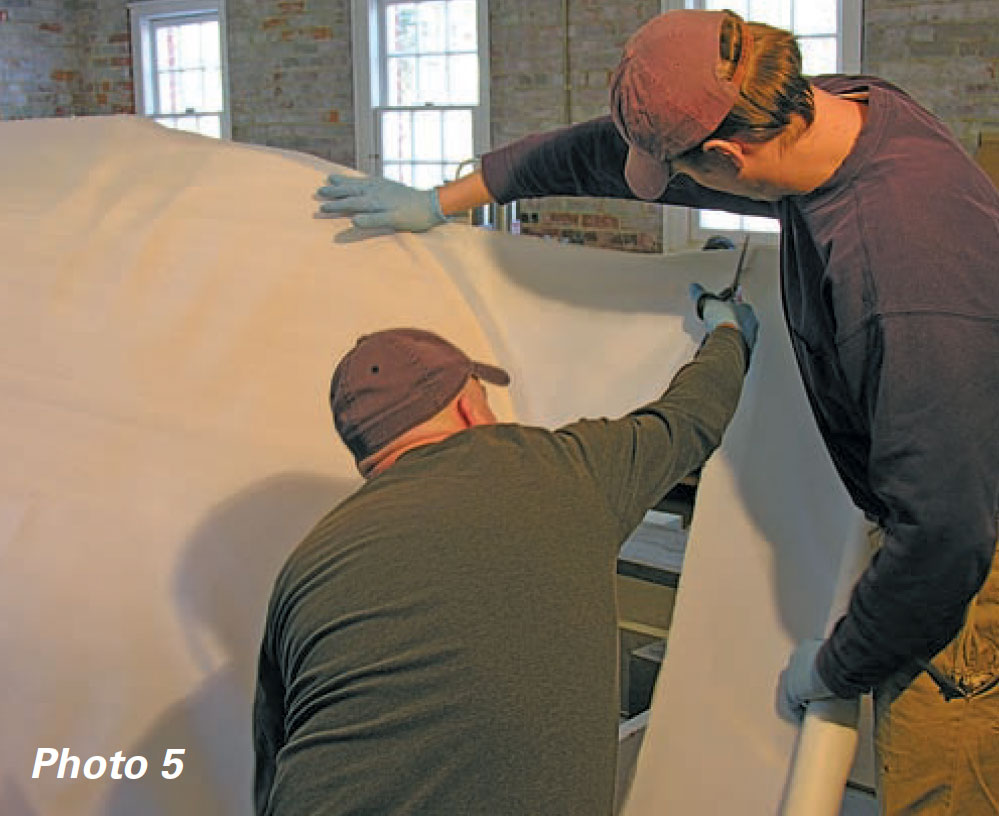
We used release fabric, or peel ply as it is sometimes called. This disposable layer of treated nylon is applied to the wet ’glass and epoxy, and peeled away when the epoxy has cured. When the release fabric is pressed down with a squeegee, it compresses the ’glass tight to the wood and draws resin to the surface, filling the weave of the fabric and thus creating a smooth surface requiring minimal sanding.
If you choose to use peel ply, now is a good time to roll out a length of it, trim off what you need, and set it aside.
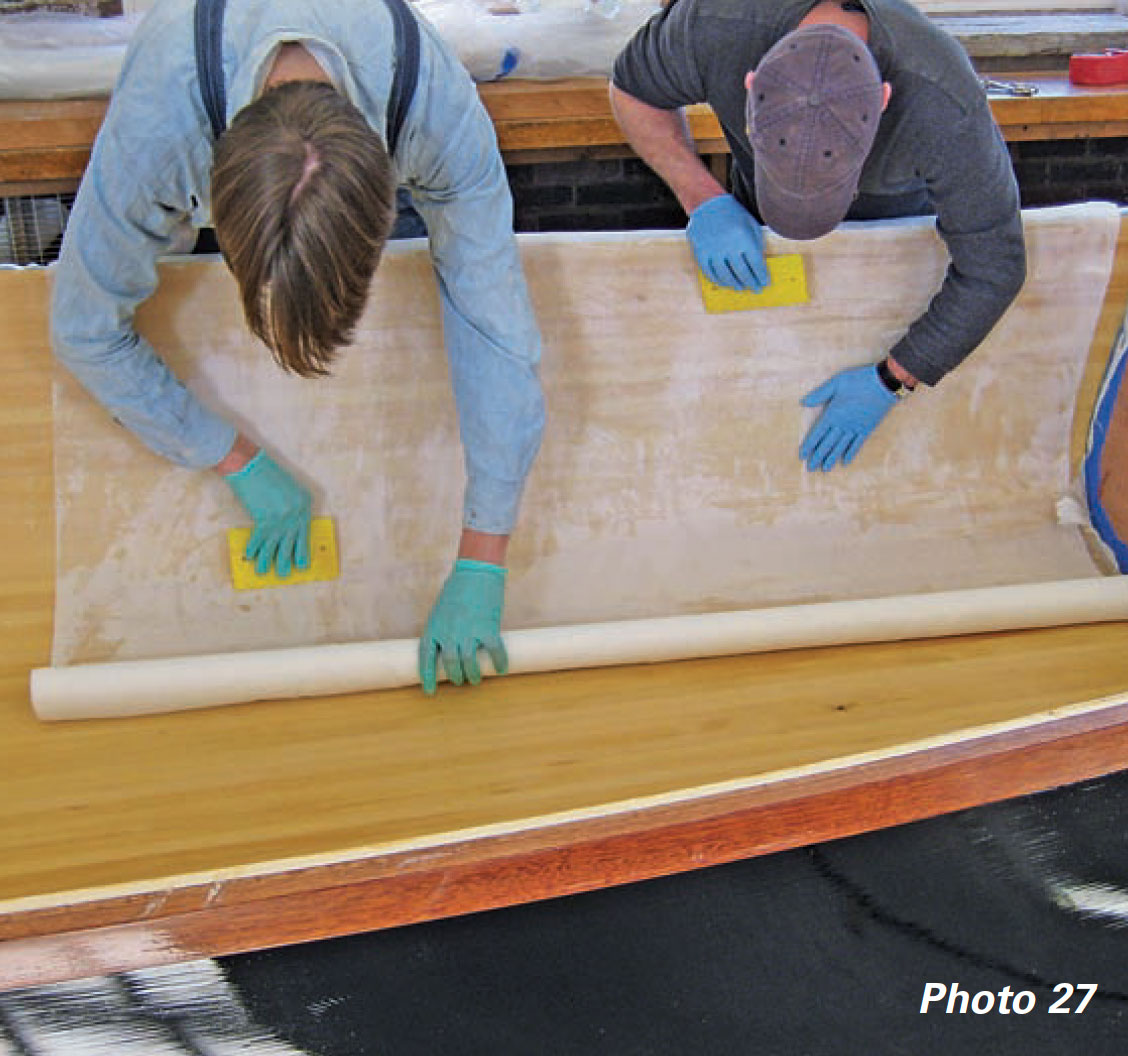
It’s always a good idea to wet out the wood with a so-called “tack coat” of epoxy before applying the fabric. Foam rollers work well for this; when used in combination with squeegees, they work well for saturating the cloth, too. Roll the cloth out on the wet hull and thoroughly saturate it with epoxy.
Roll over every square inch of the wet fabric a couple of times with a bubble buster — a corrugated metal roller used to remove any trapped air. The white peel ply is then carefully laid out on the wet fiberglass, with no wrinkles, and smoothed out with a plastic squeegee until it becomes transparent. This step was a bit tricky on this hull; in retrospect, I would suggest piecing the peel ply together with smaller overlapping sections run athwartships.
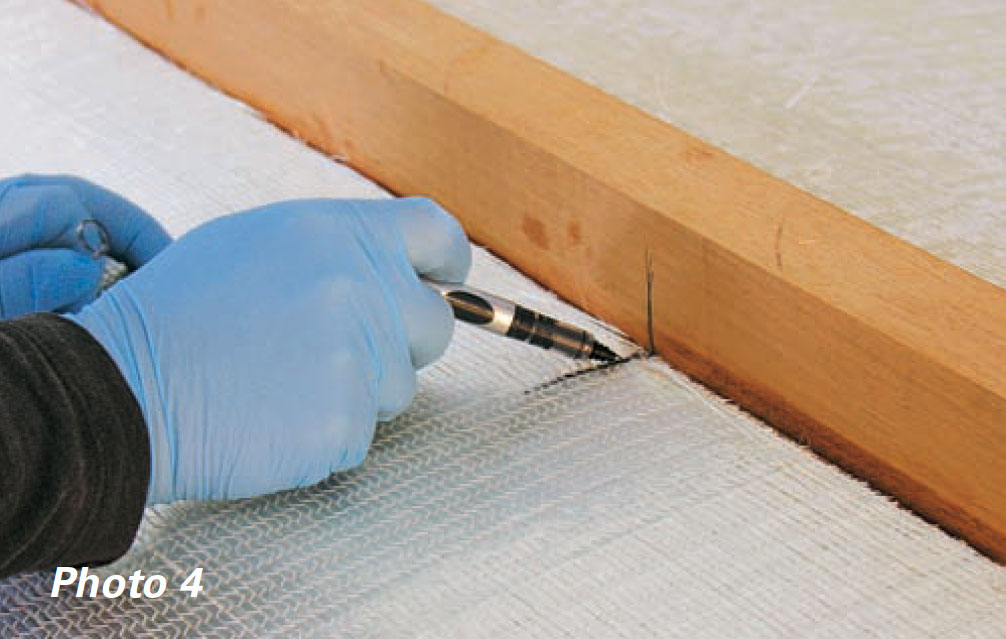
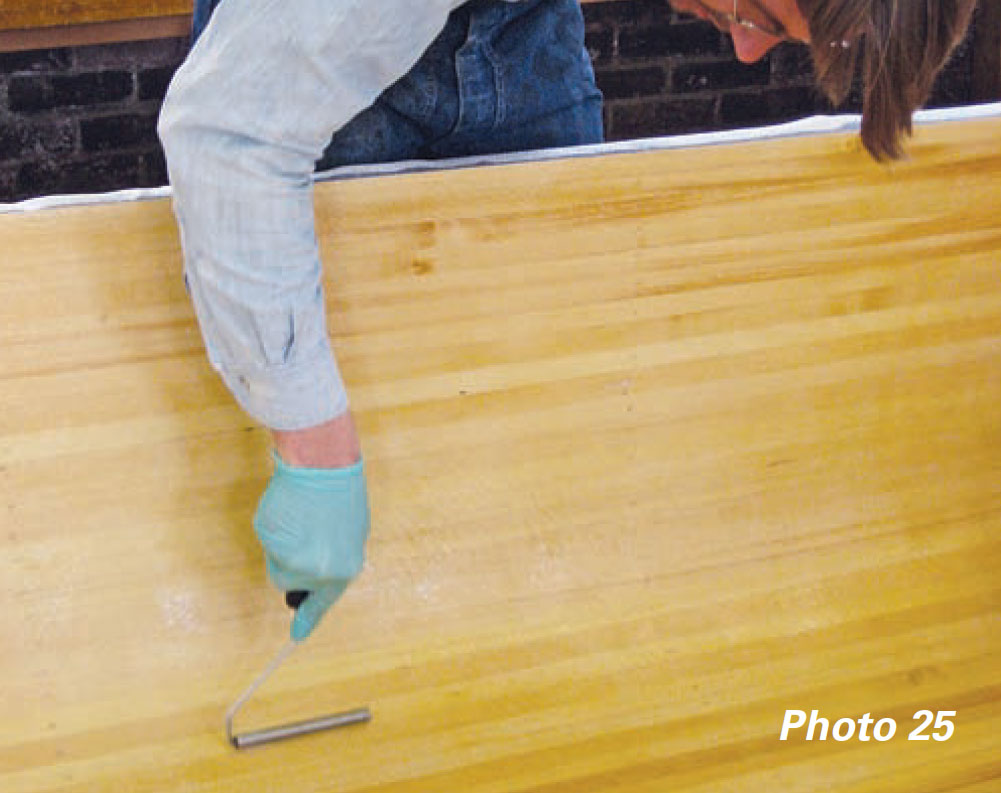
After about three or four hours (depending on the temperature), when the epoxy is no longer sticky but still flexible, use a sharp knife to trim off the excess fiberglass and release fabric at the transom, stem, and sheer. If you forget to do this, you will be grinding it off later, making a huge toxic mess in the process.
After the epoxy hardens, pull off the release fabric, which will also take away the epoxy’s waxy amine blush with it; thus, the usual washing away of this epoxy-curing byproduct is not required. If you have any air bubbles or spots that are not adhered to the wood, don’t worry: you can carve them out and patch them with epoxy and glass. Small voids can be filled with epoxy putty.
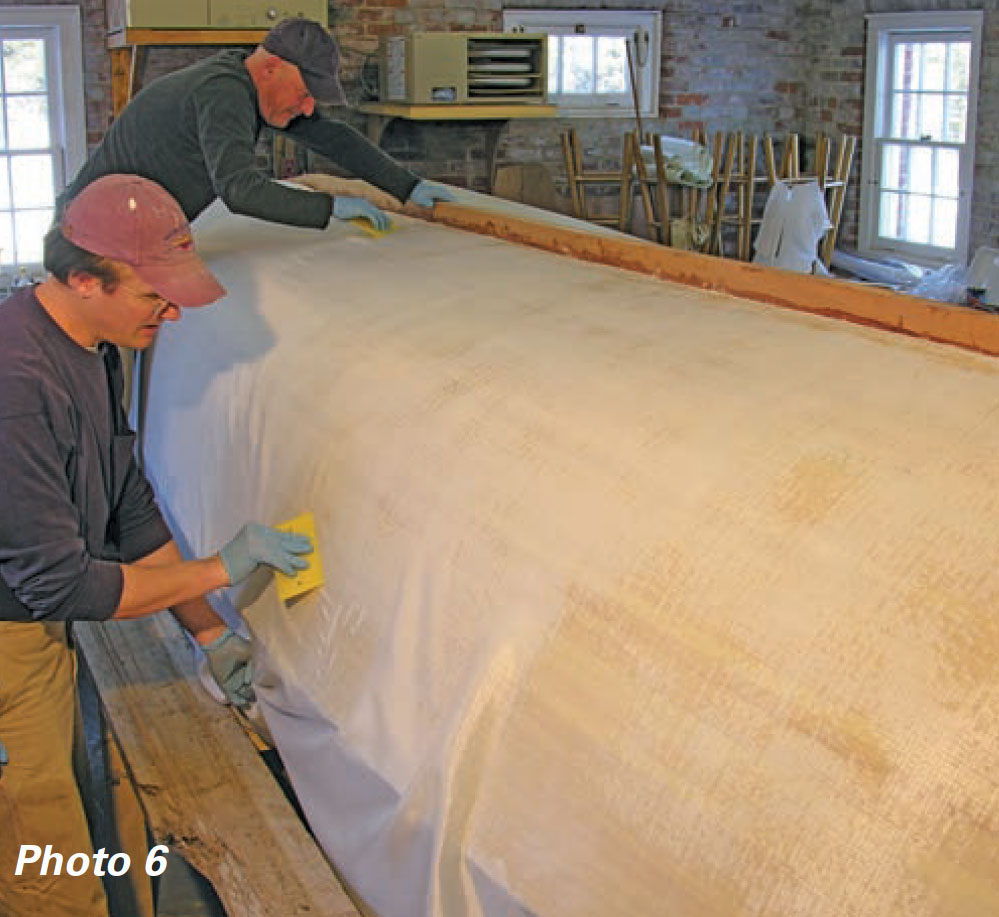
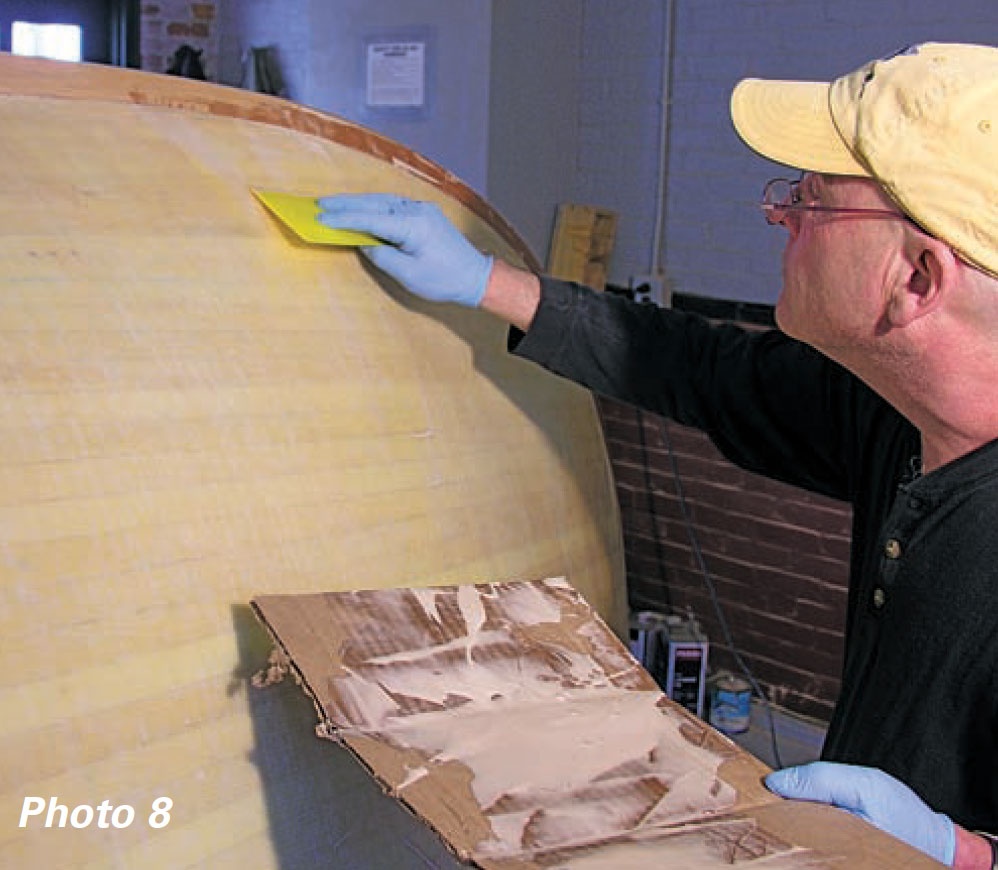
With the peel ply removed and the voids filled, roll or squeegee two or three more coats of epoxy onto the hull to get enough resin built up so you can sand the surface smooth without breaking through to the fabric.
Sanding the Fiberglassed Hull
Let the buildup coats of epoxy cure for a couple of days before washing off their amine blush and sanding. If you attempt to sand the epoxy when it’s still “green,” it will gum up the paper with little sticky balls of glue. In addition to being an annoyance when sanding, this semi-cured epoxy poses a health risk. If you sand it when it’s harder, it will simply make white dust and the sandpaper will last longer. Wear a good-quality dust mask to keep the dust out of your lungs. (The epoxy’s instructional literature should specify the time required for a full cure.)
It’s best to use a random-orbit sander attached to a dust collector with 80-grit paper for the first sanding.
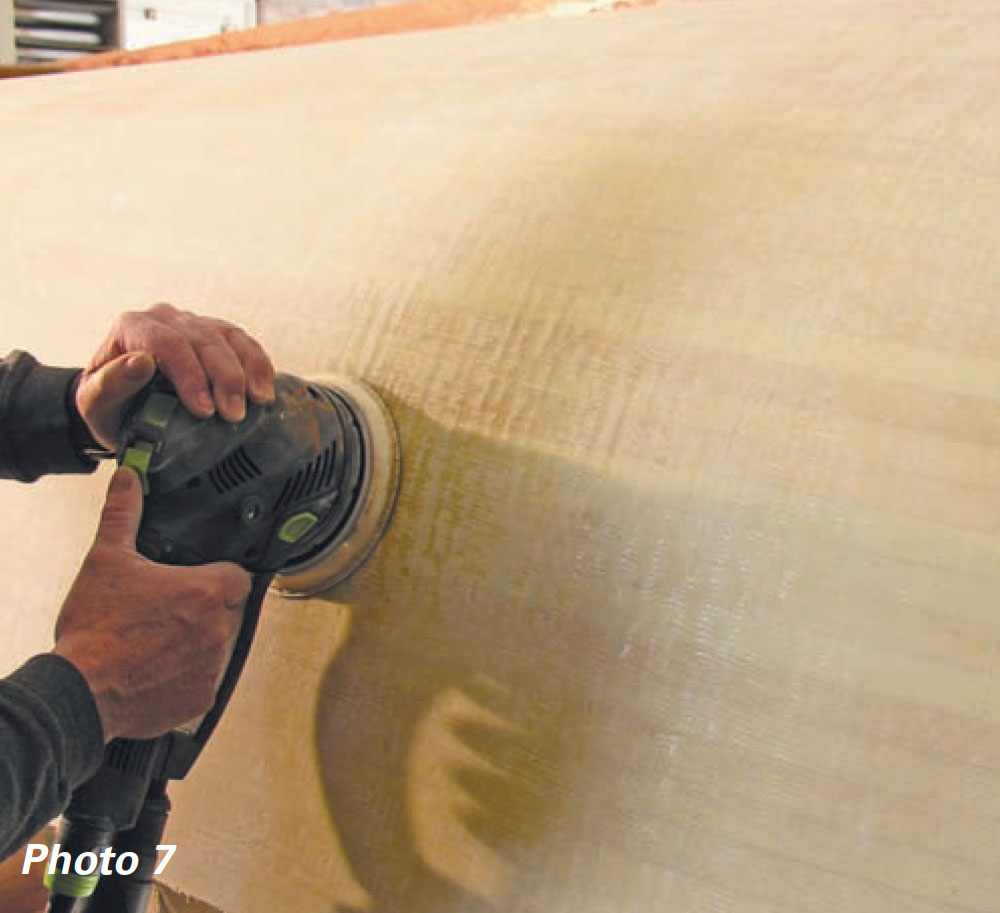
Remember to keep the sander moving at all times to prevent hollows. After the initial sanding and vacuuming, apply the final filling of epoxy thickened with low-density filler with a squeegee. The final sanding is with 120-grit sandpaper.
After I had completed the sanding, I ran into my friend and fellow boatbuilder Joe Gott. He said, “You look beat.”
“Sanding all day,” I said.
He replied, “Isn’t that 90 percent of boatbuilding?”
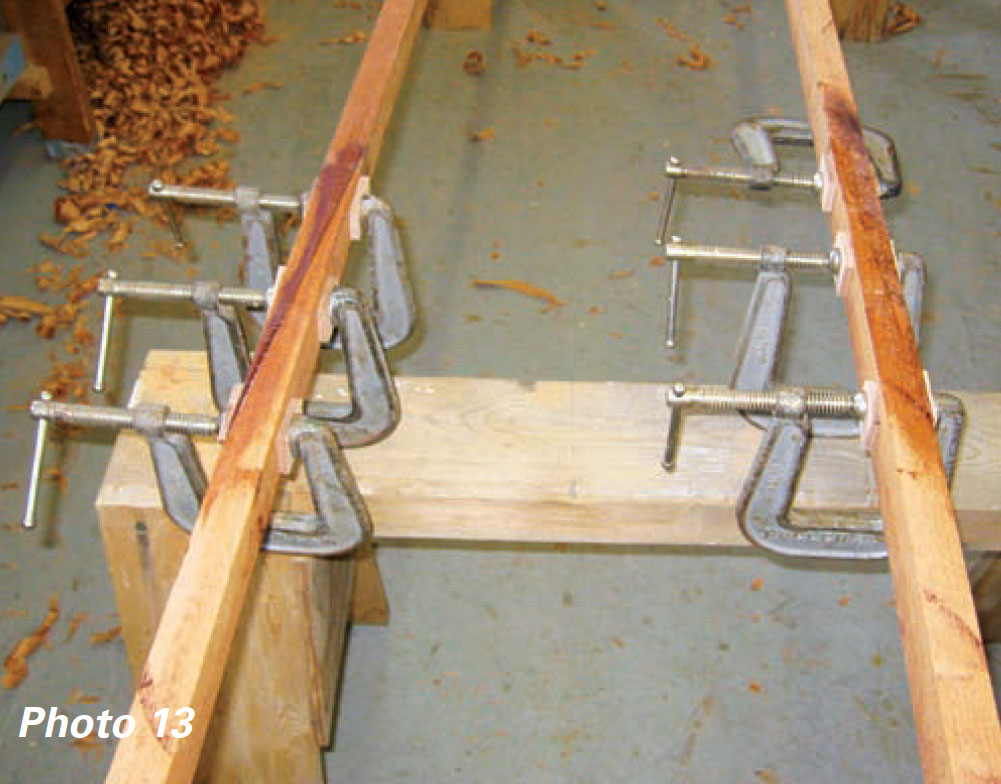
Outer Stem Installation
The outer stem can be laminated on the boat rather than at the bench. Before applying any glue, make sure you have a good fit with the dry bundle at the step scarf on the keel, and drill a hole there for a 2″ No. 14 screw; that will be the first fastening to hold the wet bundle.
Apply glue to the six pieces of 1/4” stock and to the plank ends and inner stem. Working from the scarf to the sheer, about every 4″ drive screws or ring nails through 1″ x 2 1/2″ x 1/4″ temporary plywood blocks on the centerline.
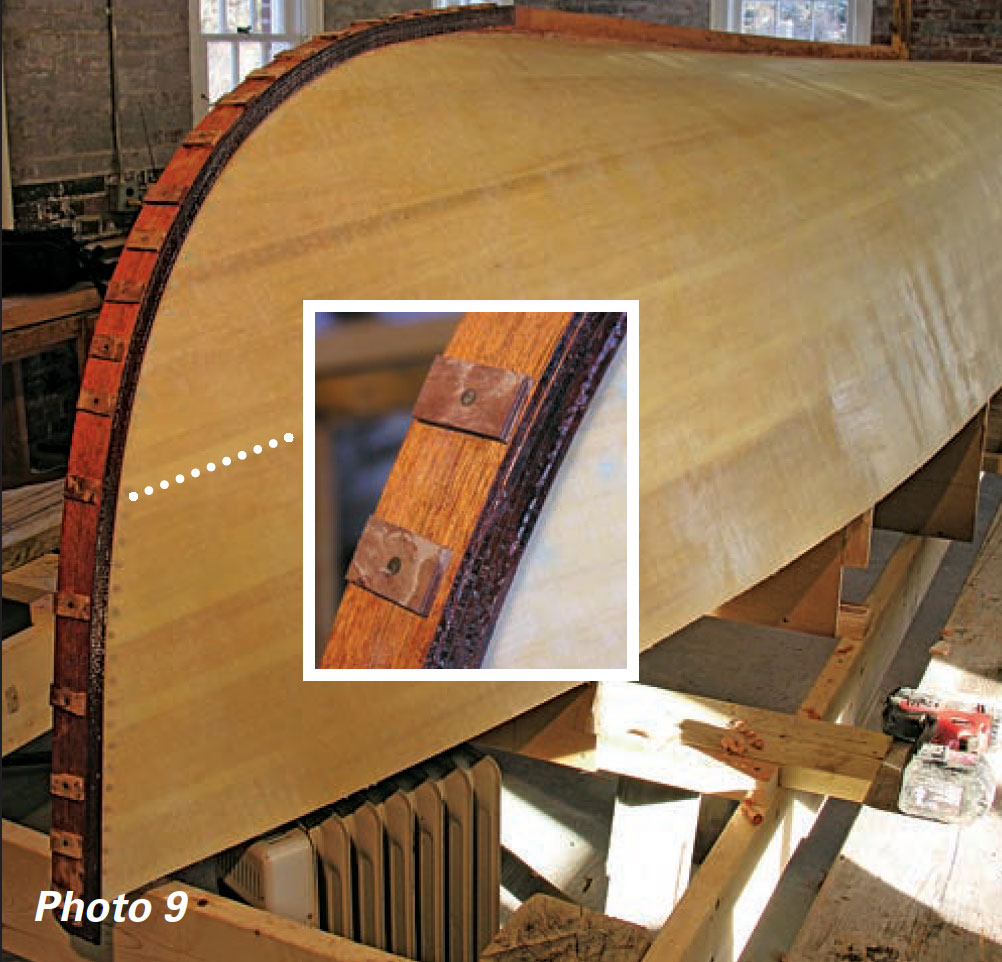
Make sure the bundle is tight without any voids, and clean off all the excess glue that squeezes out as you go. Don’t glue the blocks to the stem; wrap them in packing tape if this is a concern. After the glue has cured, remove the plywood blocks, square up the bundle, and trim it flush to the planking with a rabbet plane.
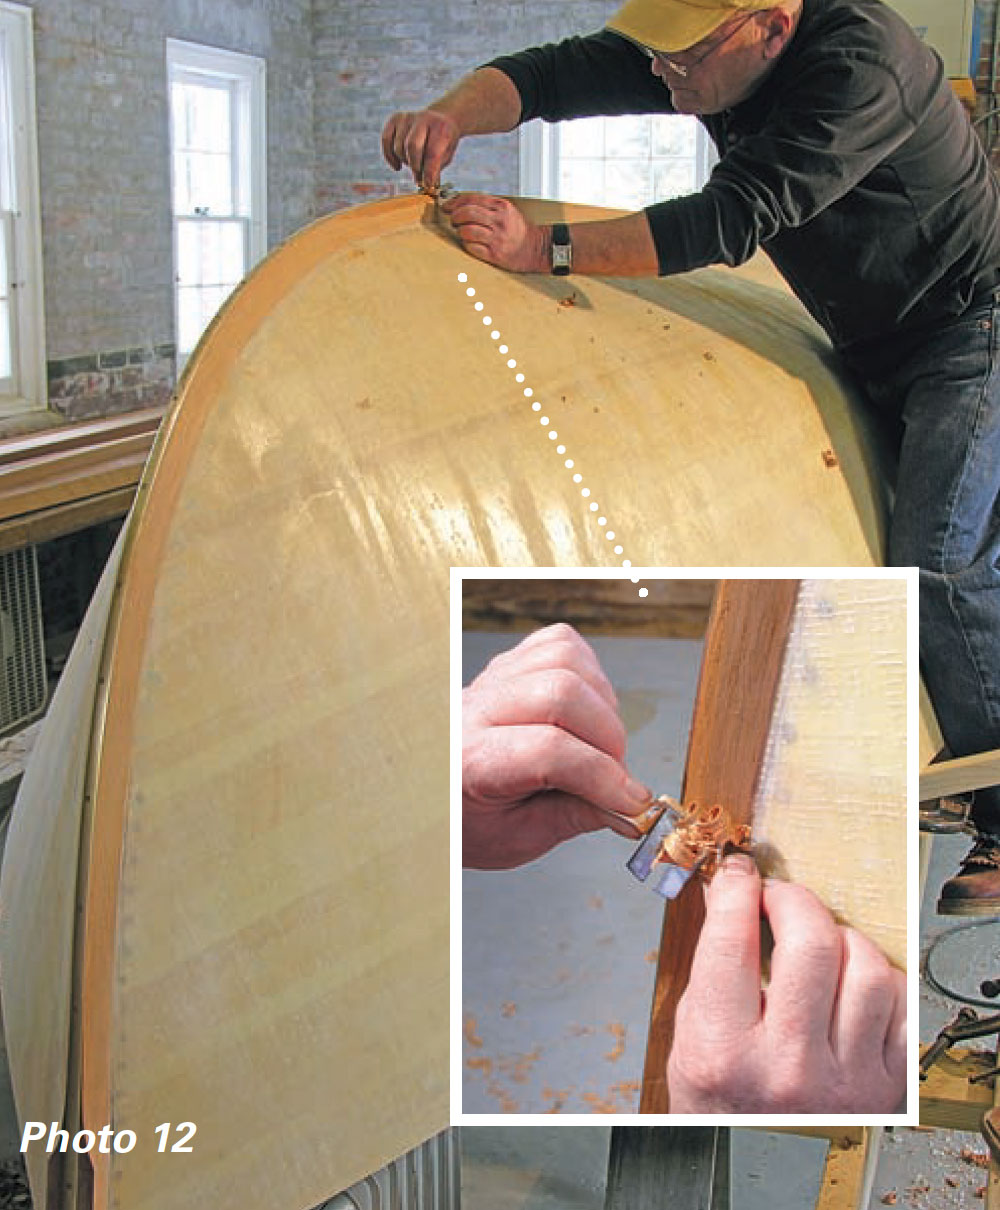
Clue and nail the brass 1/2″ half-oval next. Drill 3/32″ holes every 5” on the centerline of the half-oval. I used No. 14 3/4” bronze ring nails and epoxy to fasten this piece, and trimmed the heads of the ring nails with a pair of side cutters so they looked more like finish nails; this method allows a smaller countersink size to be used to make the heads flush. If the countersink hole is too large, the half-oval will sometimes break when it’s bent around the stem curve.
Spread a bead of thickened epoxy on the centerline. Center the half-oval on the outer stem with a combination square, and nail the half-oval to the stem. Use a nail set to drive the heads into the countersunk hole.
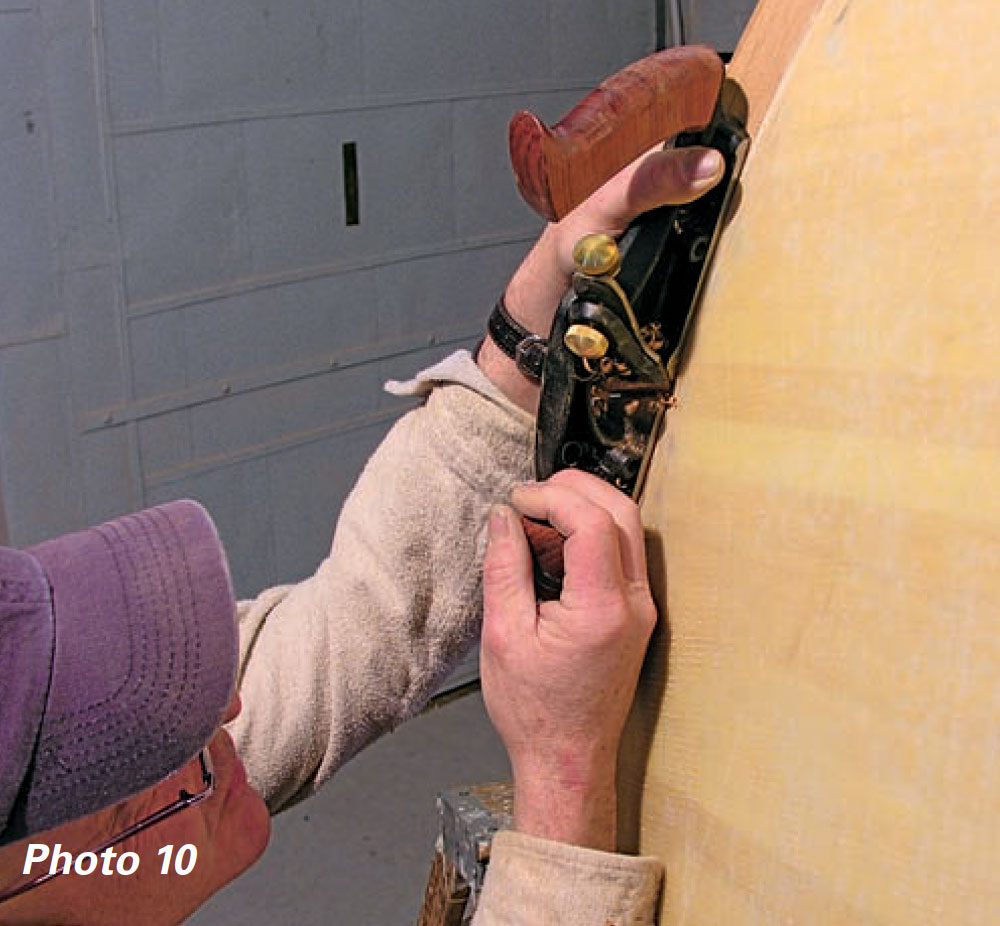
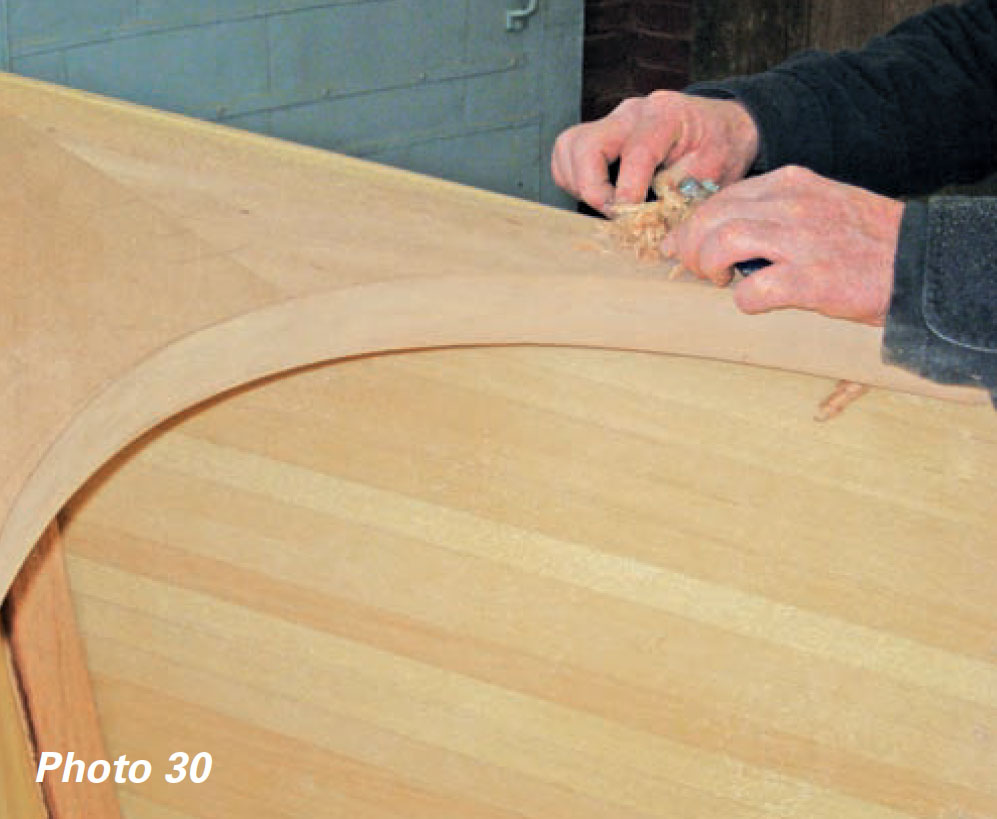
Next, fair the outer stem into the planking with a spokeshave, leaving the top 6” rectangular in section. This will give the ends of the rail a surface to land against and give a traditional appearance to the stemhead.
The top end of the outer stem will be crowned with the breasthook later. The final step is to sand the outer stem and keel smooth, tape off the brass, and epoxy-coat the bare wood.
Installing the Guardrails
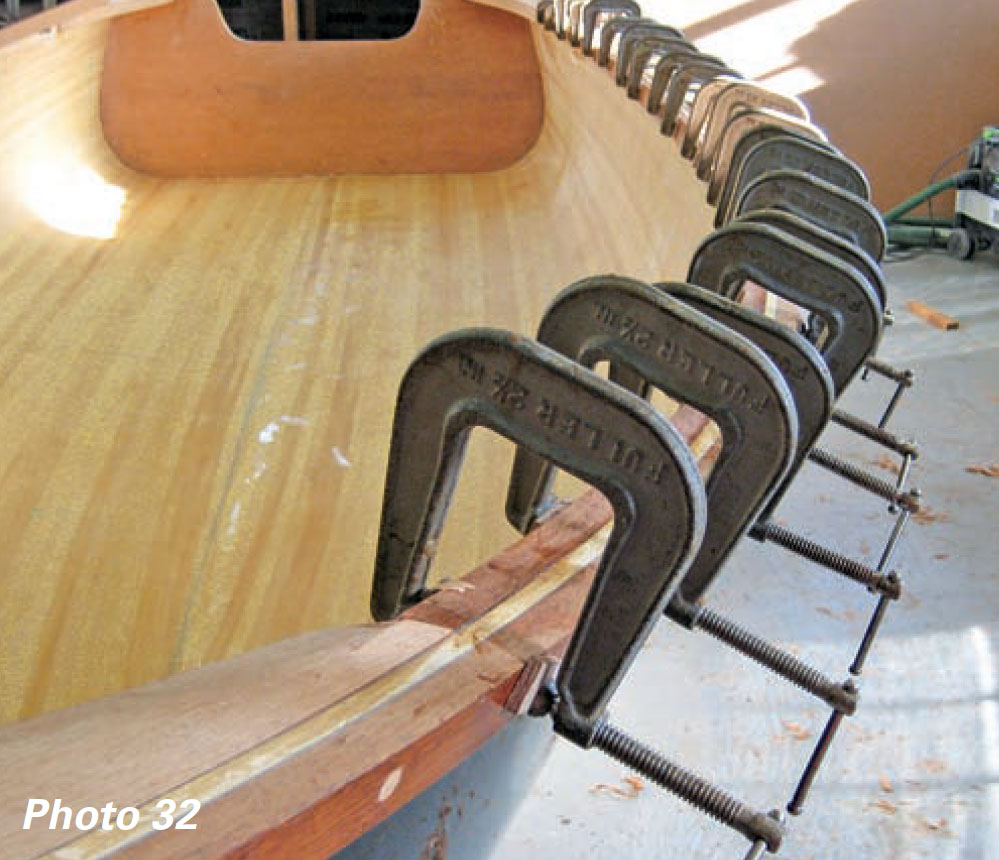
The installation of the rails is the last step before painting the exterior of the hull. The finished dimensions of the rails are 3/4” x 1 1/2”. I rough-sawed them 1/8” over-size and scarfed them to length from two shorter pieces.
If you must scarf yours to length, too, start by band sawing a 12″-long scarf, clean your saw cut up with a block plane, and then glue and clamp the pieces together. When the glue has cured, plane the oversized rails to their finished dimension.
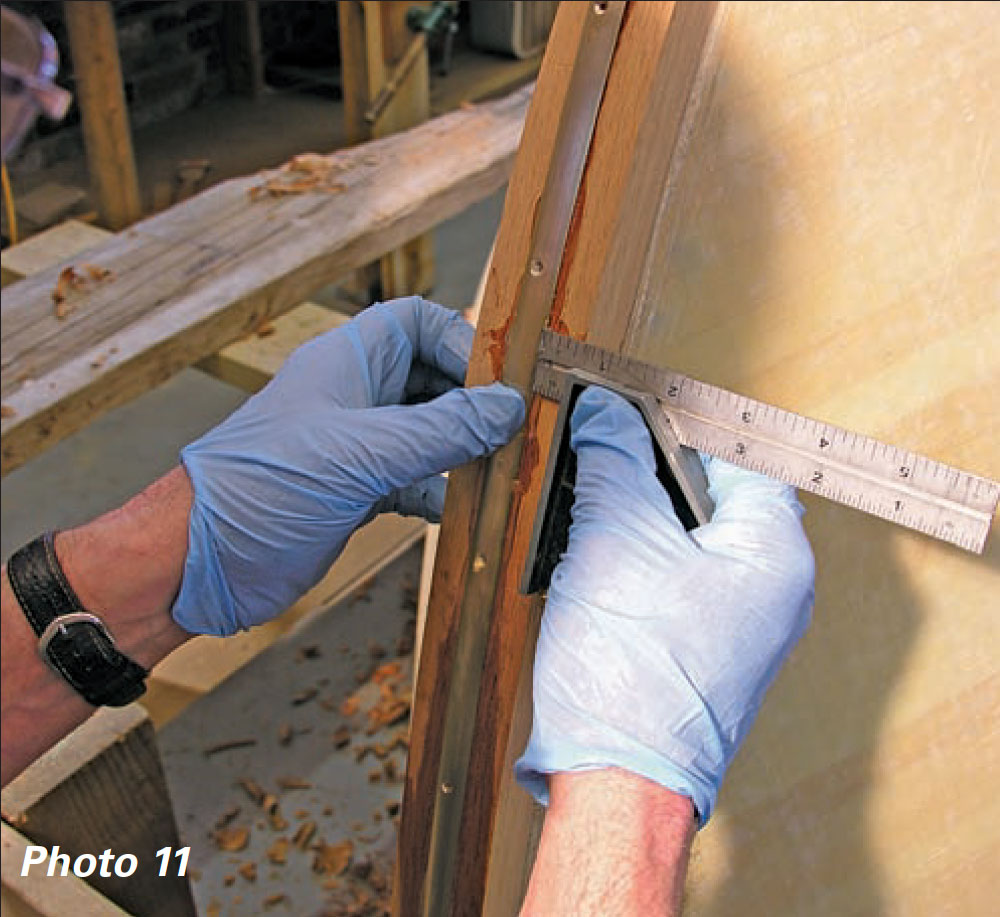
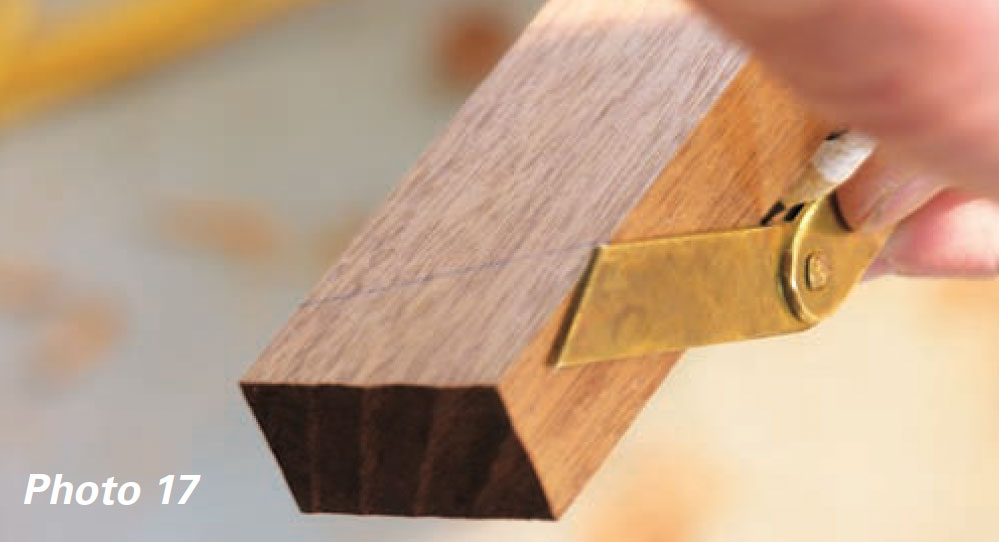
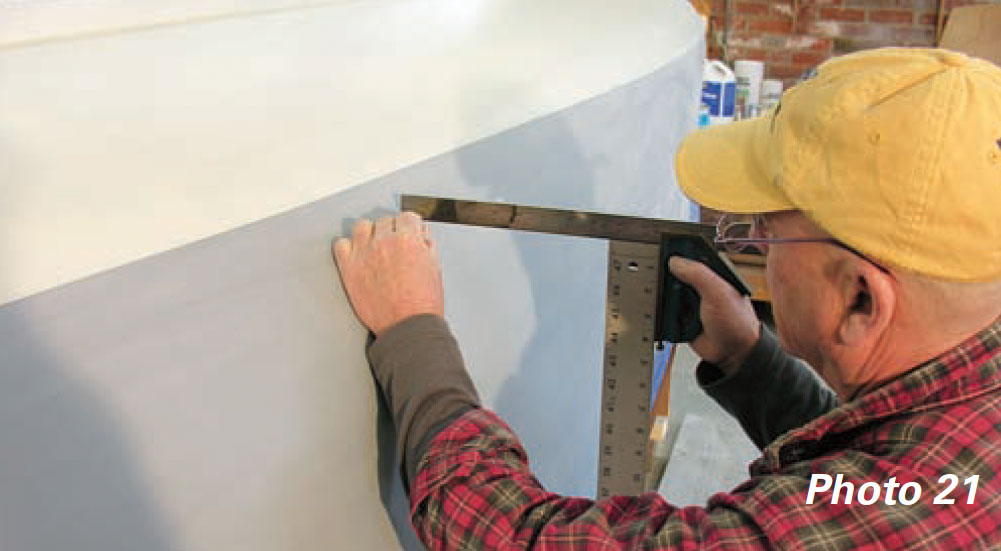
Copy the bevel at the intersection of the sheer plank and the outer stem (in profile view) with a small bevel gauge…
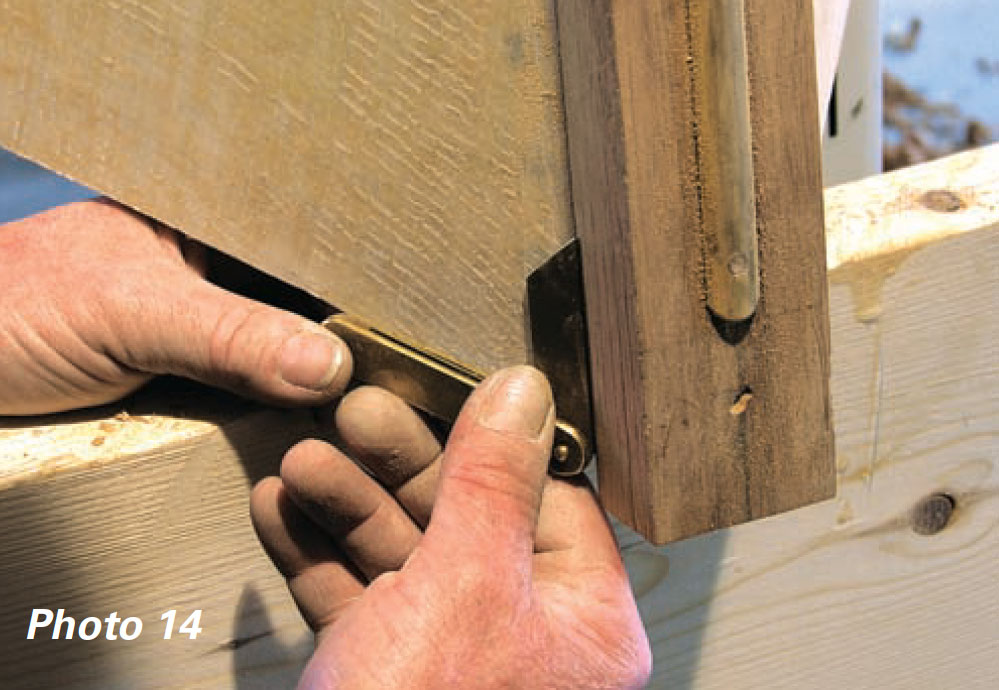
…and transfer that bevel onto the rail
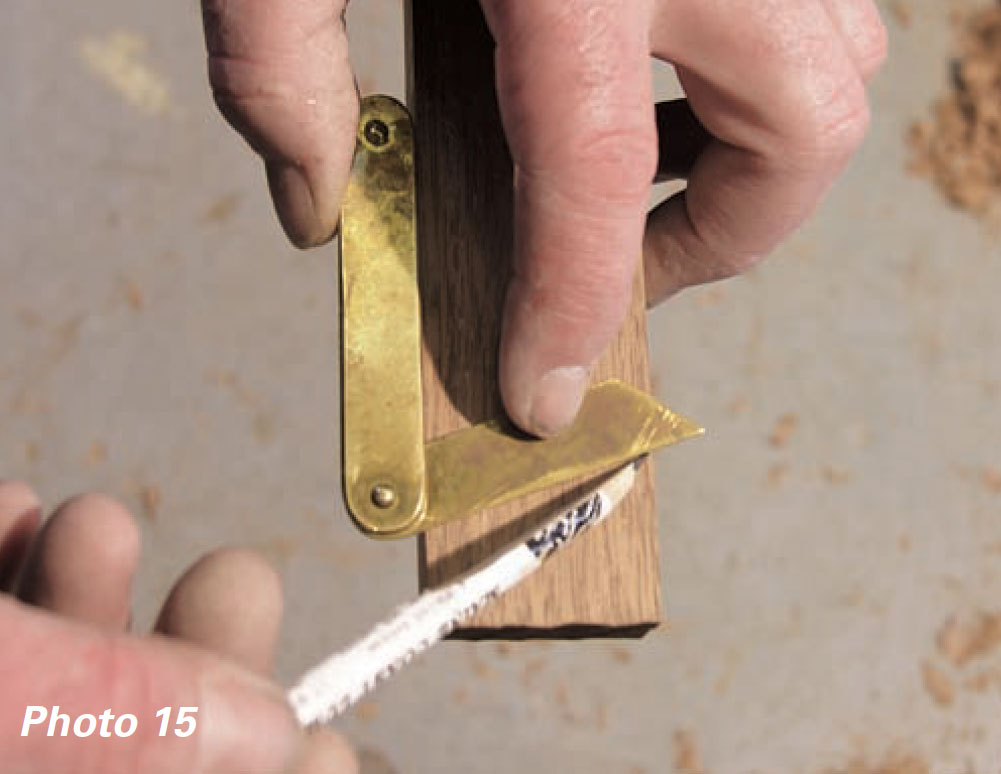
Next, copy the bevel at the same intersection in the plan view — i.e., from above.
Transfer that bevel onto the rail, connecting the two lines.
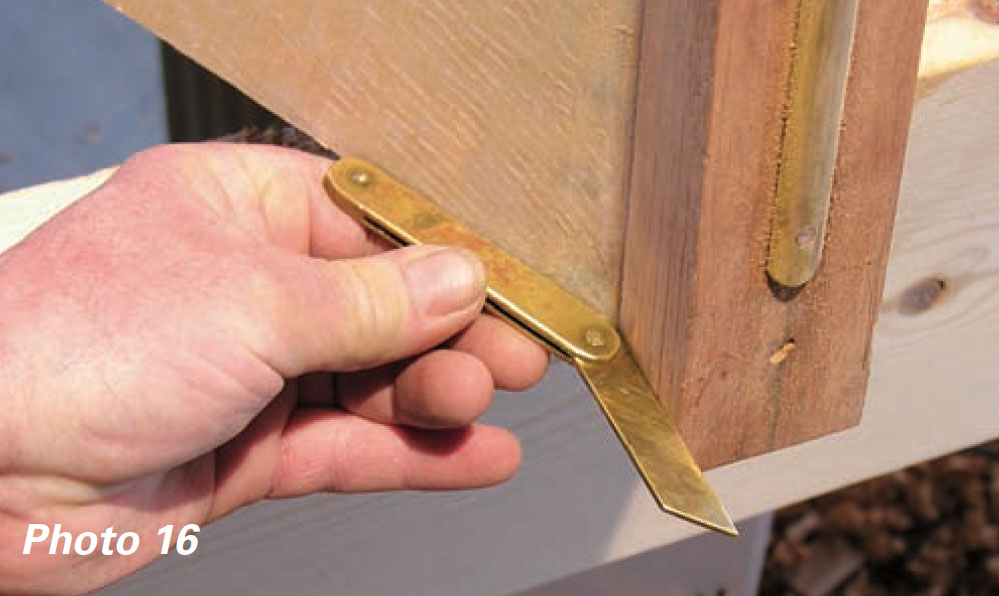
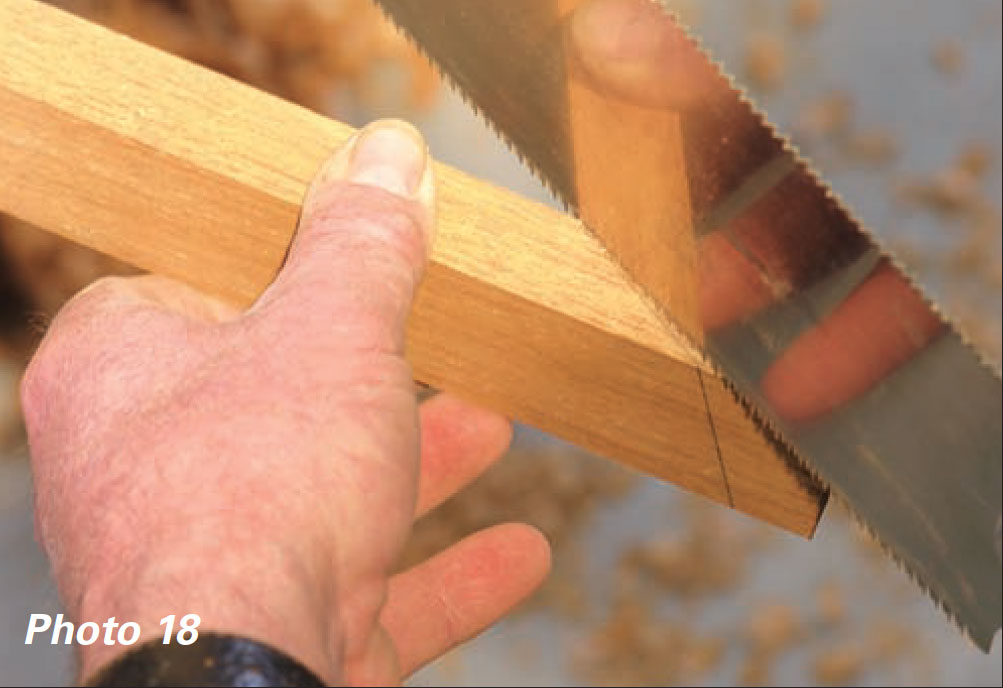
Cut the compound bevel you’ve just marked with a Japanese pull saw, as close to the lines as possible. If it isn’t perfect the first time, try again; a bit of overhang at the transom will allow for this.
The rails are fastened with epoxy and two No. 14, 1 1/2″ bronze wood screws, one at the joint between the inner and outer stem, and one at the transom.
Start at the stem and clamp toward the transom, spacing the clamps about 10” apart, leaving the rail 1/8″ below the top of the sheer plank. Drive the screw at the transom and trim off the extra length of rail stock flush with the transom. The sheer plank gets trimmed later using a laminate trimmer with a flush-trimming bit, or a block plane.
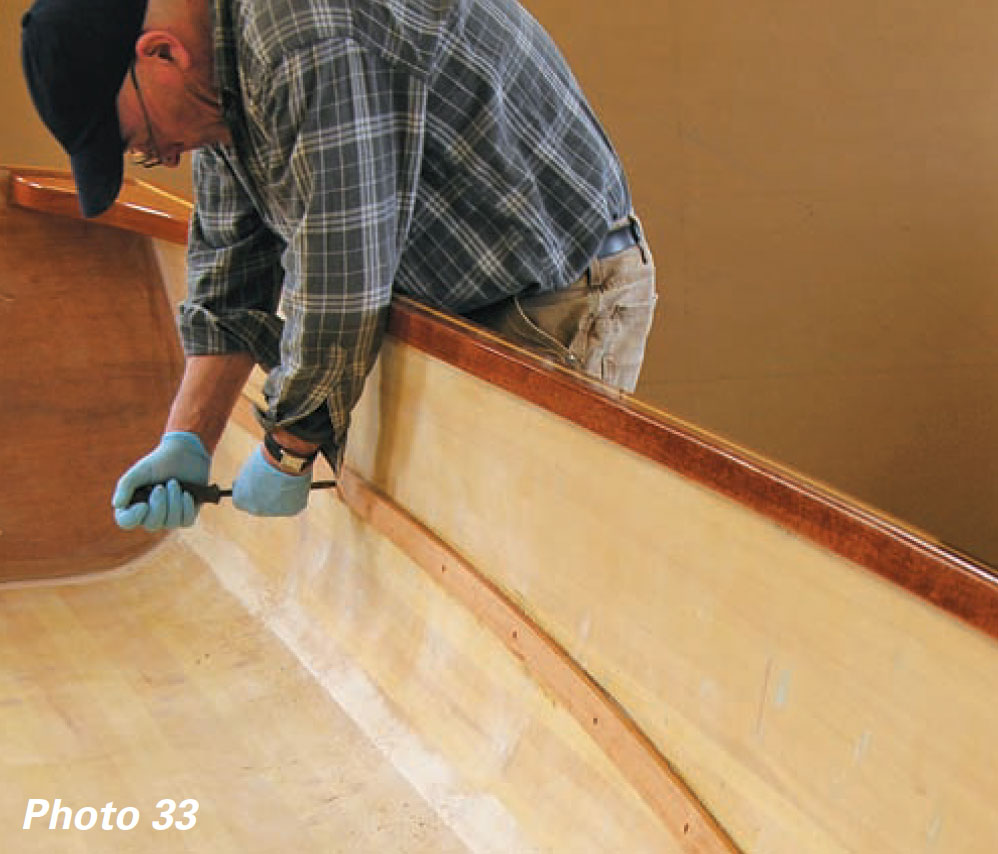
Now is a good time to sand the bottom and outside face of the rail and put a 1/8” roundover on the bottom corner. If you are clear-coating all raw wood with special clear epoxy (as was specified by the owner of the boat we’re building here), a coat or two can be applied to the rails now, as well.
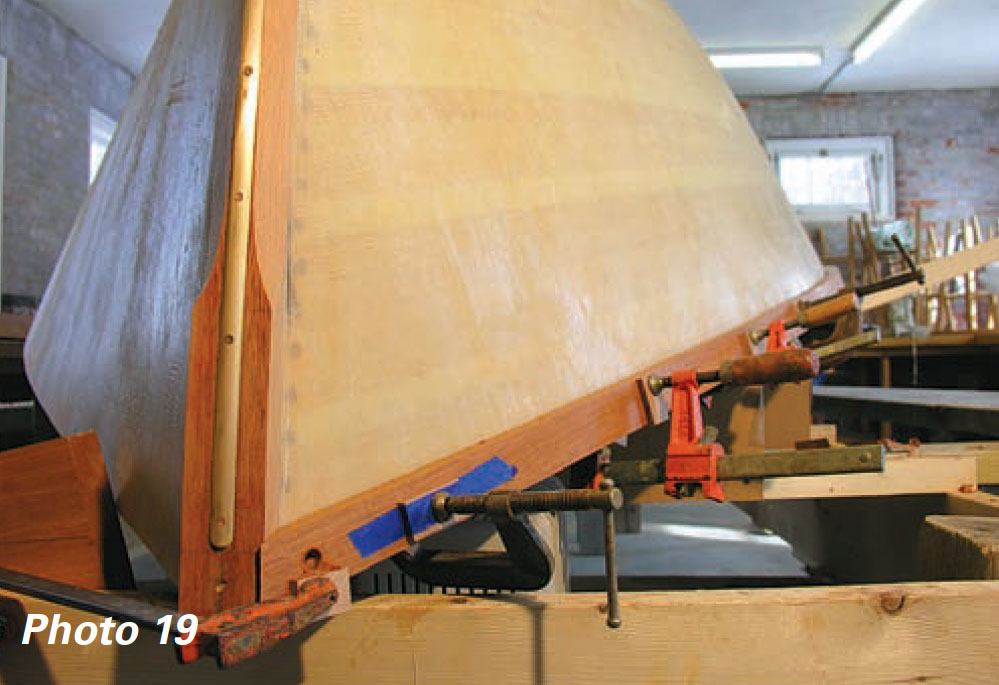
Priming and Painting
With the hull’s exterior complete, it makes sense to paint it when the boat is still upside down; turning it over safely requires six people, and I wanted to turn it only once. I typically use single part oil-based marine enamels for small boats.
Aaron wanted a two-part epoxy-based barrier coat primer and paint for the exterior on his skiff, and he wanted all the mahogany trim coated with epoxy and then varnished. Options abound for finishing this boat. Check WoodenBoat No. 166 and WoodenBoat No. 207 for details on this process.
Marking the Waterline
After the hull is primed and sanded, the waterline can be marked and taped off for the first coat of bottom paint. The final coat of bottom paint goes on after the topsides have their final coat.
Using the top of the strongback as a level reference, make a simple jig using straightedges clamped together at right angles.
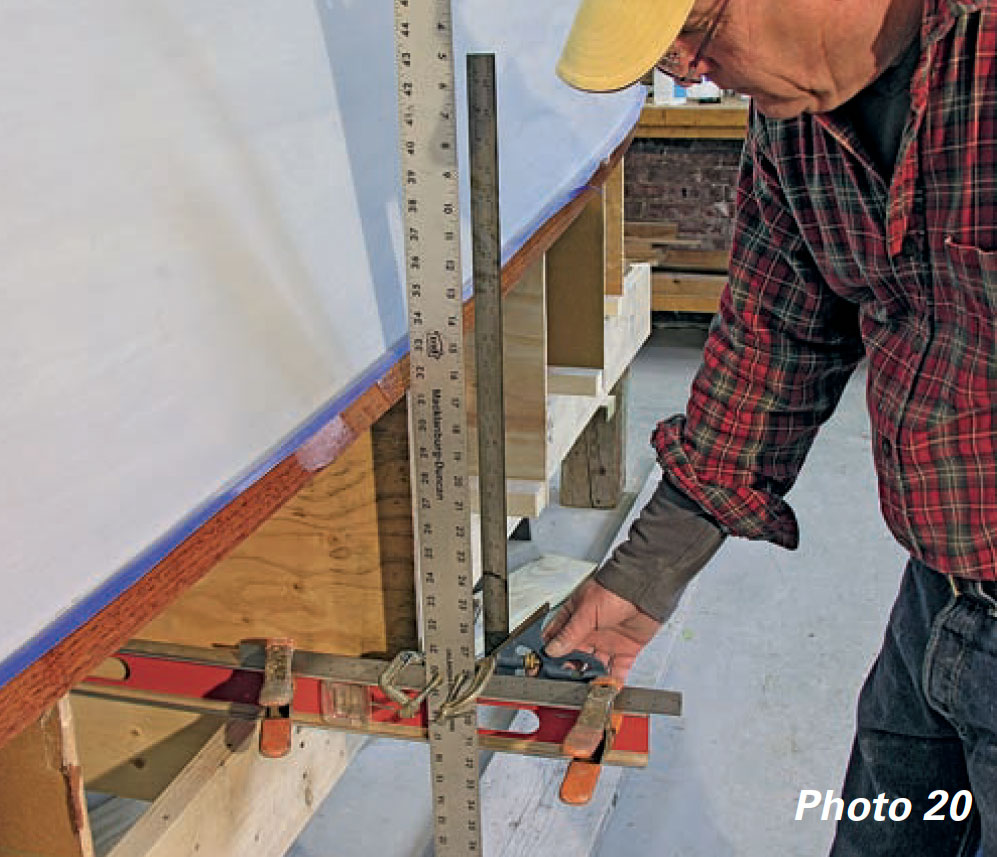
The designed waterline (DWL) of this boat is waterline No. 14. Measure the appropriate distance up from the top of the strongback to waterline No. 14 and square off the vertical leg of the jig to the hull with a combination square.
Make tick marks with a pencil at 6-inch intervals from the stem to the transom and connect the marks with masking tape. This can take several tries to get the tape fair. Start at the transom and pull out a long length of tape, winding it onto your marks as you walk forward. You sometimes have to deviate from your marks a bit up forward where the deadrise increases or the hollow occurs, in order to get a straight-looking line.
As you can see from the photos, my first attempt was a mistake: I marked waterline No. 12 instead of No. 14, but didn’t realize it until I had taped it off and rolled on a coat of bottom paint!
Marking the Seat Riser
The final step before lifting the hull off the jig is to mark the seat-riser locations on the inside of the hull. The best time to draw these lines is when the hull is still on the building jig, sitting level. Use the top of the strongback as a level reference, just as we did for the waterline. I made a simple jig to mark this line between the station molds using a 6′ level and a piece of scrap plywood.
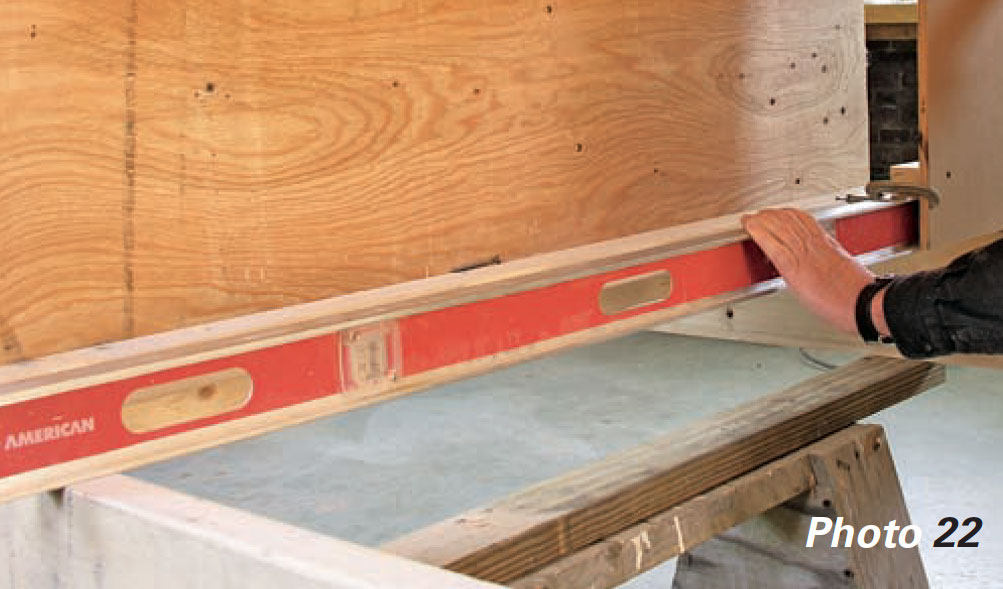
Screw a 2″x2″ cleat to the back of the plywood so it will sit upright and square to the level when clamped in place. Glue a pencil to the plywood at the height above the strongback corresponding to the location of the top of the seat riser.
After the hull is turned over, make tick marks with a ballpoint pen every 6″ along the pencil line; the marks should be deep, so they won’t sand off and can be seen through the fiberglass sheathing.
Sanding the Inside of the Hull
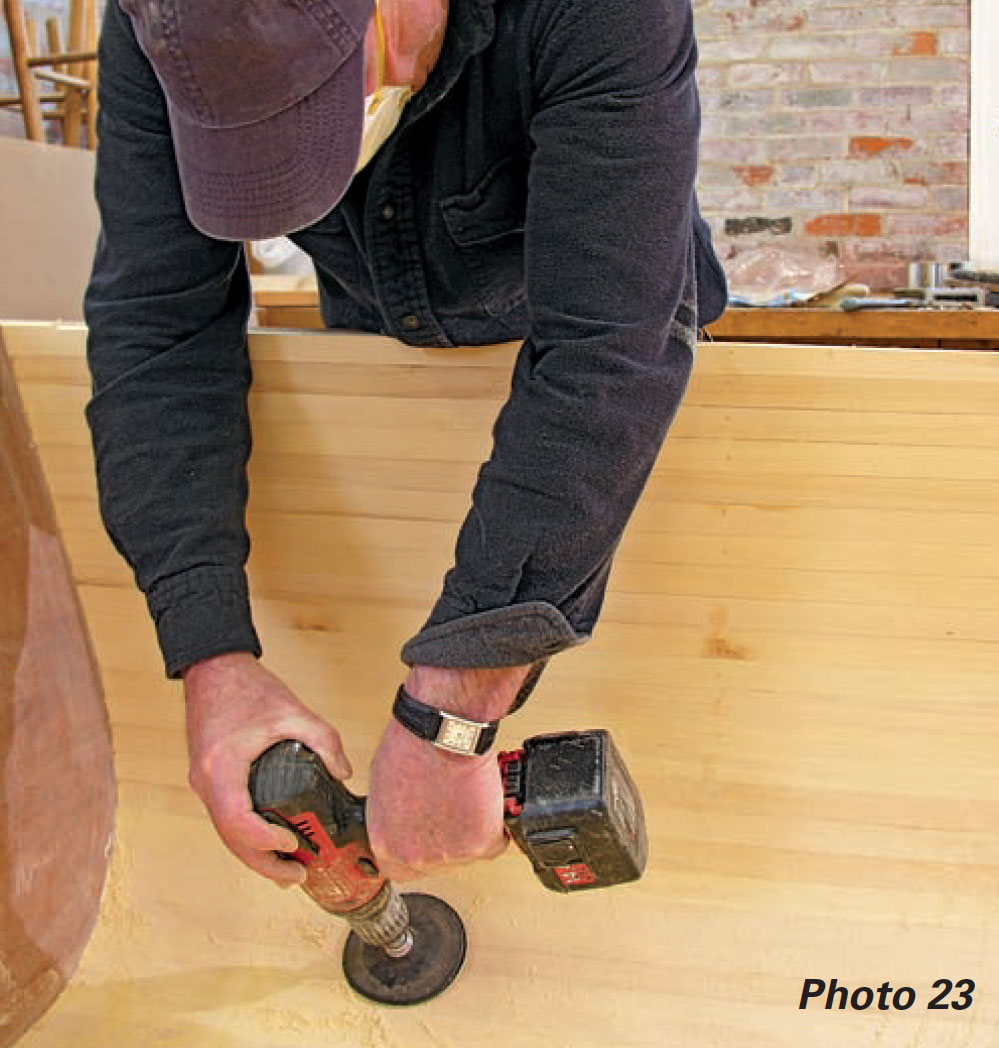
The flat surfaces on the inside of the hull can be smoothed with a random-orbit sander and 80-grit sandpaper. At the turn of the bilge aft, a 3″ flexible disc with sticky-back paper works best in the tight-radius concavity. Finish by hand-sanding with a soft block and 80-grit paper
Glassing the Inside
The inside of the hull will receive two layers of 10 oz. cloth set in epoxy. Vacuum the hull and draw a centerline along the bottom.
With a foam roller, wet out half the hull with epoxy. Roll out the first layer of fiberglass along the centerline and secure it with short pieces of masking tape at about 1′ intervals. Leave extra cloth at the transom, stem, and rails. Using a plastic squeegee, wet the cloth with epoxy and trim the wet excess fabric with sharp scissors.
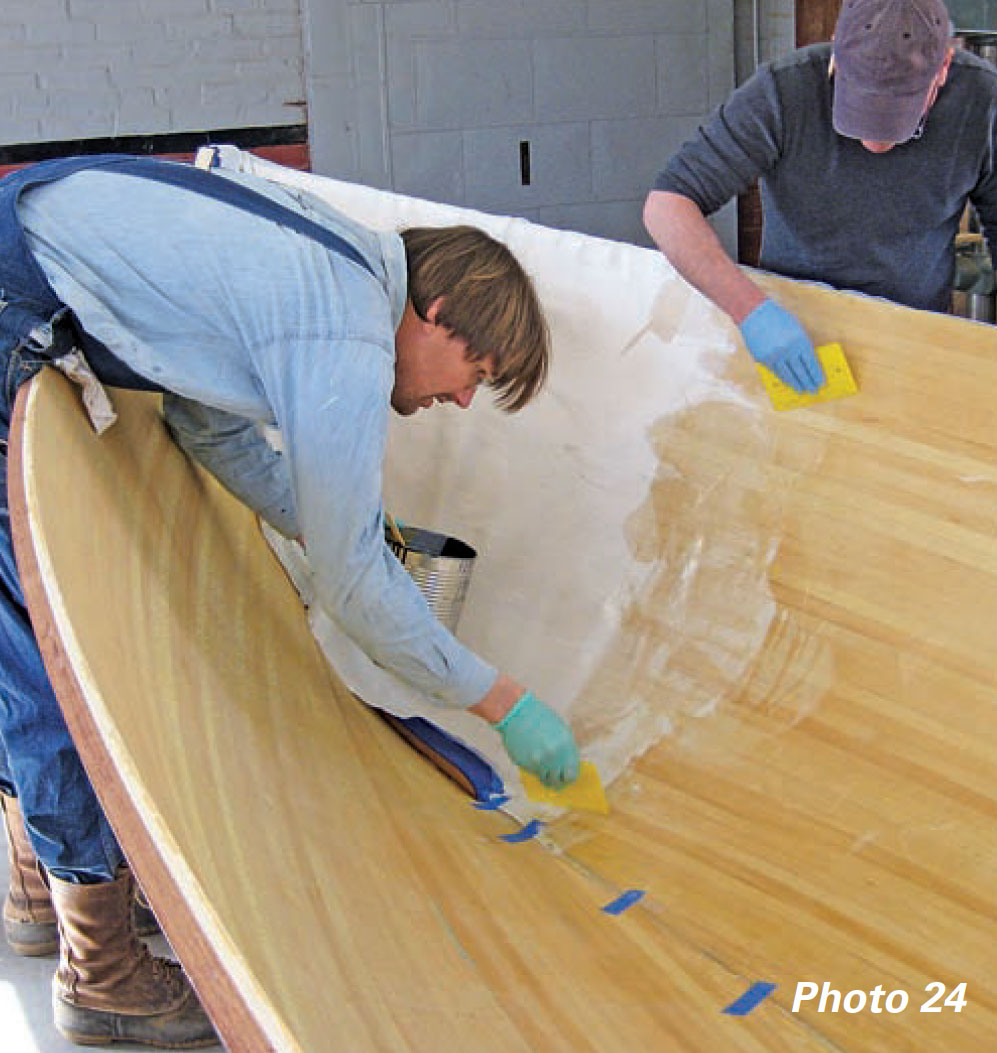
Next, go over it with a bubble buster to remove any trapped air.
Then, apply release fabric as we did on the hull’s exterior, pieced in and overlapped.
This proved to be a bit of a struggle to get squeegeed smooth. And, while it does make the ’glass work smoother, I still had to apply two more coats of clear epoxy to the second layer of 10-oz cloth to fill the pin holes before the final sanding.
The other side of the hull is done using the same steps. After the first layer cures, sand it with 80-grit paper and apply the next layer of 10-oz cloth using the same method.
Pull the release fabric off and roll on two more coats of epoxy. Let these coats cure for a couple of days before washing the amine blush off and sanding the surface with 80-grit paper. Now it’s time to paint. As noted for the outer hull (page 74), there are numerous sources for guidance on achieving a finish appropriate for your purposes.
Make the Breasthook
Use a router or laminate trimmer with a flush-trimming bit to cut the sheerstrake flush with the rail. You must always work from left to right, against the rotation of the bit.

You will need to finish the trimming at the stem and transom by hand with a small spokeshave or plane and a chisel. From the plans, use the full-sized pattern to draw the two halves of the breasthook. Note the grain direction when cutting the two halves from the 14″ stock: It should run parallel to the rails.
The rails are 1 1/2”, and the breasthook is installed flush with the bottom of the rails, leaving 1/4” above the top of the rail to create a crown.
Epoxy the two halves together on a piece of scrap plywood using cleats and wedges with clamps to hold the halves in place until the glue sets. A couple of strips of clear packing tape underneath the glue joint will keep the pieces from sticking to the plywood.
With a bevel gauge, copy the angle at the stem by laying a flat block across the rails and sliding the bevel underneath the block up against the stem. Transfer that angle onto the forward edge of the breasthook. Tilt the table on the bandsaw and crosscut the bevel.
Next, set the breasthook on top of the rails and mark the curve along the rails underneath and plane the winding bevel. This is a plane-and-fit task. If you take too much off the sides, trim the front a little. If you take too much off the front, trim the sides a little. If you relax and take your time, you can make a perfect fit.
When you are satisfied with it, epoxy and screw the breasthook through the rails with 2 1/2” No. 14 screws. Once the glue has cured, the crown can be shaped. Leave it flat only where the mooring bitt is to be installed.
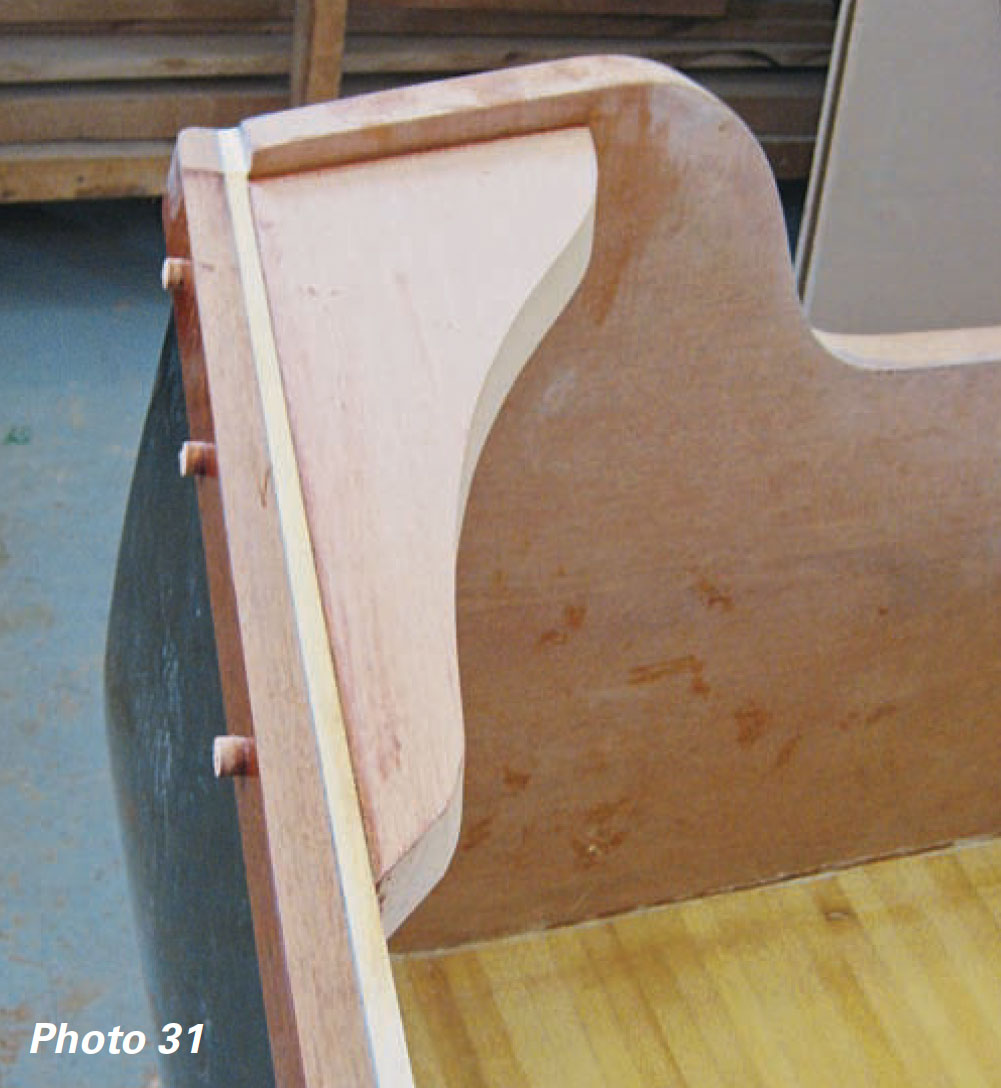
Make the Quarter Knees
The quarter knees can also be made from the pattern in the plans. They are cut from 1 1/2” stock with the grain running parallel to the rails.
The angles at the transom are copied with a bevel gauge, and the edge along the transom runs parallel with the crown of the transom. This is another cut-and-fit task; again, be patient and take your time to get a good fit.
Fasten the quarter knees with epoxy and fastenings as you did the breasthook. You will need 3” No. 14 screws through the transom and 2 1/2” No. 14s through the rails.
Assemble the Rails
The rails simply butt against the quarter knees and breasthook, which must be prepared with a sharp chisel to accept the rail ends. With this done, record the angle at the breasthook with a small bevel gauge held between the sheer and the breasthook in plan and profile views in the same manner as you did fitting the outer rail to the outer stem.
Transfer the angles to the end of your rail and saw to the lines. If you are happy with the fit, clamp the rail in place at the breasthook and then every foot or so, working toward the quarter knee.
It’s nearly impossible to make an accurate measurement along the entire length of the rail. Instead, we measure only the last three feet. At the inside corner where the quarter knee meets the sheer, place a folding rule or a small stick of wood — say, 1/2”x1/2”x3” long.
Make a mark 3′ forward at the end of the stick on the sheer plank. Clamp the rail up to that mark and transfer the mark onto the rail. Align the end of your stick with the mark on your rail. And at the other afterend of the stick, make a mark on the top inside edge of your rail. That mark will correspond with the inside corner defined by the breasthook and sheer.
Now, copy the angles just as you did for the breasthook and draw them on the rail. Make the saw cut for the compound angle, and the rail should fit snugly between the breasthook and quarter knee. The rail can now be glued and clamped in place. No fastenings are needed.
Add the Seat Riser
The seat riser is 1 1/2”x5/8”x11’. It is fastened with epoxy and 4” No. 8 screws from the inside along the marks made when the hull was still on the jig. Be careful not to bore through the hull or drive the screws too far.
The top edge is then beveled to accept the seats. A rabbet plane works well in concert with a pair of slip-sticks for checking the bevel. Slip-sticks are simply a gauge made of two pieces of straight scrap that can be clamped together to fit an inside dimension — in this case, the distance between the risers. As you slide the sticks along the risers, their distance apart changes; account for this by loosening the clamp and adjusting the length of the slip-sticks accordingly.
Install the Seats and Steering
The three seats are made of 5/4” mahogany. Their locations and widths are drawn on the plans.
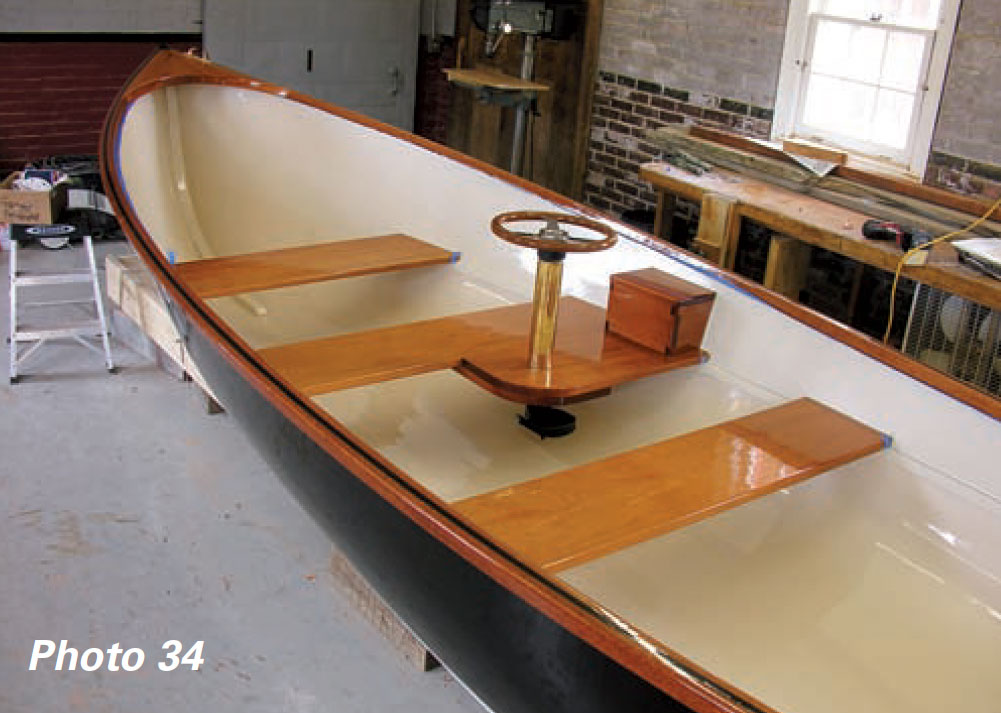
The center seat is double-thick with a wide piece glued and screwed under the starboard side to support the steering column. The grain runs fore and aft for extra strength. There is room for another bench seat aft, but we decided to leave that space open for a cooler and more room to move around when fishing.
As we mentioned in Part One, the original design was tiller-steered and Aaron had added a small console with a wheel just to starboard off the centerline. This worked well, getting his weight forward to achieve better trim.
But consoles take up valuable space and add weight in small boats. We discussed console designs at length, and it became apparent that Aaron really didn’t want a console in this boat. He will use the boat as an island tender, occasionally he must carry a load of 2x4s. The solution to the problem was a 3′-diameter thick-walled brass pipe lying in my garage in Vermont. It was left over from a big boat project, and I’ve wanted to use it for years.
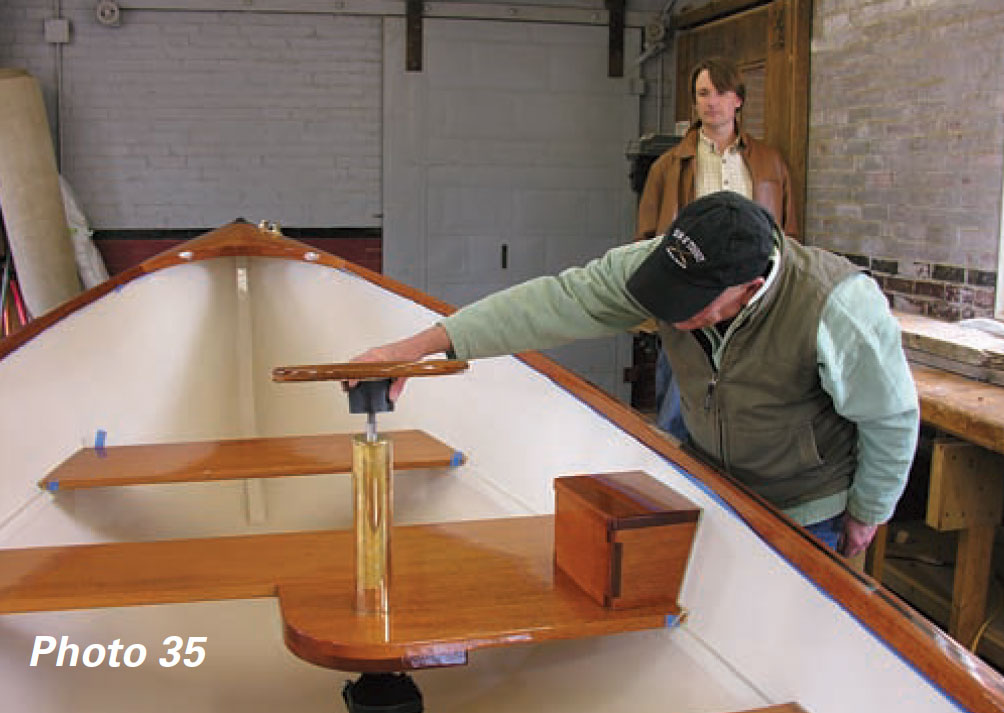
The helm station has a period effect. I had a plate welded onto the pipe’s bottom so it could be bolted to the reinforced seat. A cap was fabricated and welded on the top with a hole bored for the shaft. I used a standard Teleflex Safe-T QC helm and bolted it to the plate.
My local machine shop made a shaft extension that fit over the short Teleflex shaft and pinned to it. There is a standard 3/4” taper machined on the other end to accept a steering wheel.
The brass pipe sticks up plumb out of the varnished mahogany seat and on it is mounted a horizontal teak steering wheel. A small dovetailed box with a hinged top was mounted on the seat against the hull. The throttle/shifter bolts to the side of it.

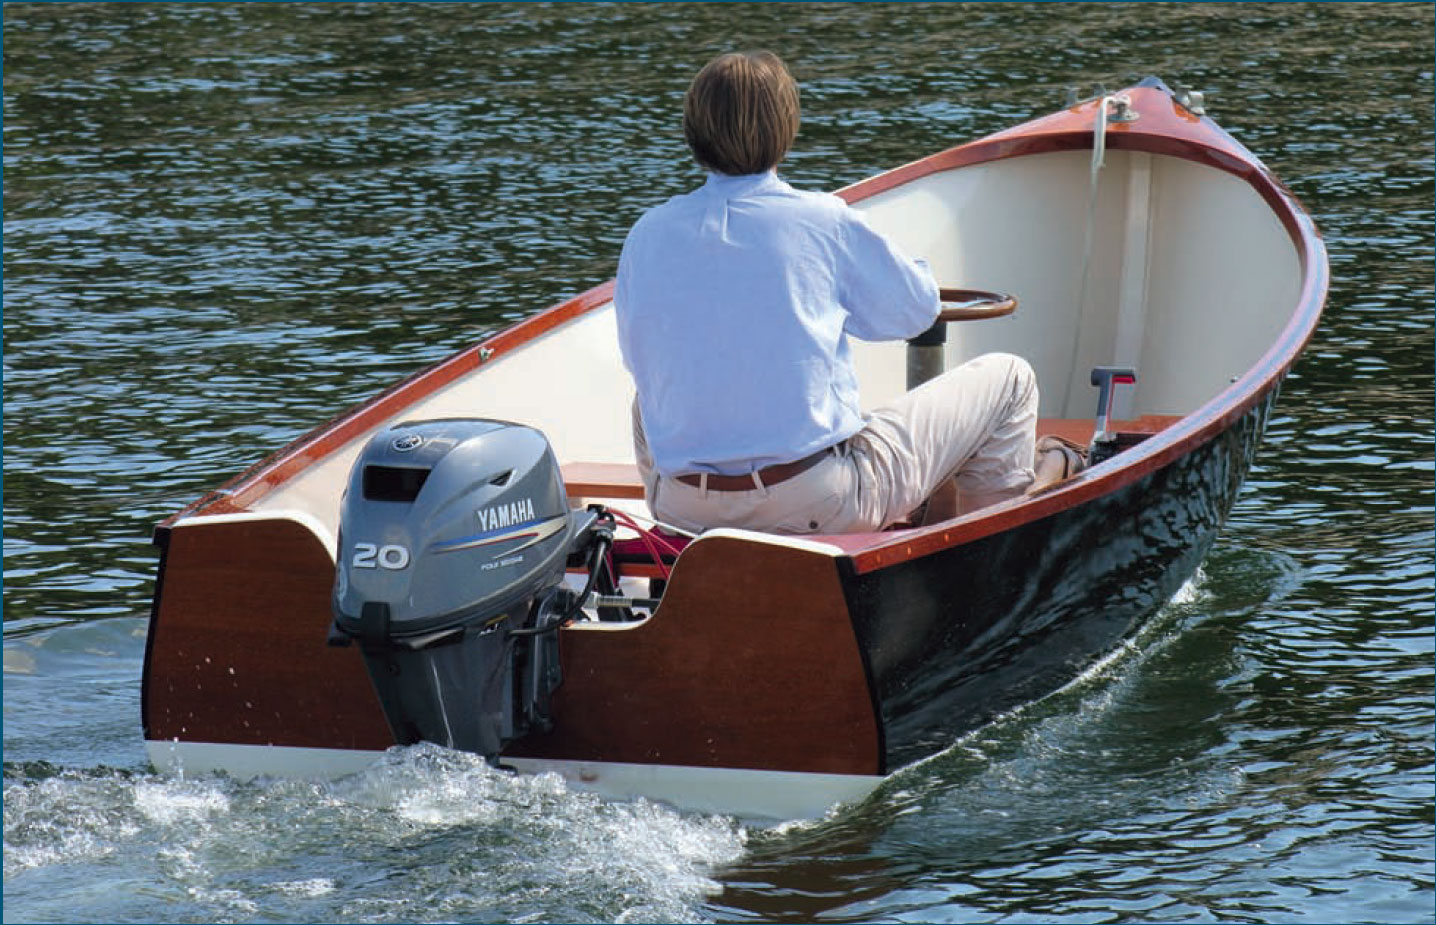
The new Jericho Bay Lobster Skiff exceeded both my and owner Aaron Porter’s expectations. Because the fiberglass sheathed, strip-planked hull is lighter and more fair than its carvel-planked predecessor, and because the exit at the transom is a sharp, crisp corner, the boat outperformed its older sister. It makes 20 mph easily, and we’ve seen 26 mph on the GPS (the old boat would do 21 mph on a good day).
Also, the frameless strip-planked hull is easier to maintain than a plank on-frame boat — easier to clean, easier to sand, easier to paint. The monocoque hull can sit on a trailer for long periods of time in the hot sun without opening seams.
With full-sized patterns and basic joinery, the boat is well within the reach of intermediate boatbuilders. By putting it in the hands of ambitious amateurs, I hope we’ve breathed new life into this timeless Joel White design.
Tom Hill is author of Ultralight Boatbuilding (International Marine, 1987), a guide to glued plywood lapstrake construction.
The 15-page plans set for the Jericho Bay Lobster Skiff includes the full-sized mold patterns mentioned above. Also included in a corrected table of offsets for builders who prefer to start from scratch with a full-sized drawing, or lofting, of their own. Order from The WoodenBoat Store, PO Box 78, Brooklin, ME 04616, 800-273-7447; www.woodenboatstore.com. Click here for video footage of the boat under construction and underway at Woodenboat.com.